Hutch-1 Ionizing Radiation Interlock System Testing Protocol
The objective of this testing procedure is to verify the functionality of the Hutch-1 ionizing radiation interlock system. The following fall under the scope of this testing procedure:
Hutch-1 search and securing system.
Trouble tungsten shutter control.
Ionizing radiation monitoring interlocks.
Starting Conditions
The default state for testing of the Hutch-1 ionizing radiation interlock system is in a completely disarmed state.
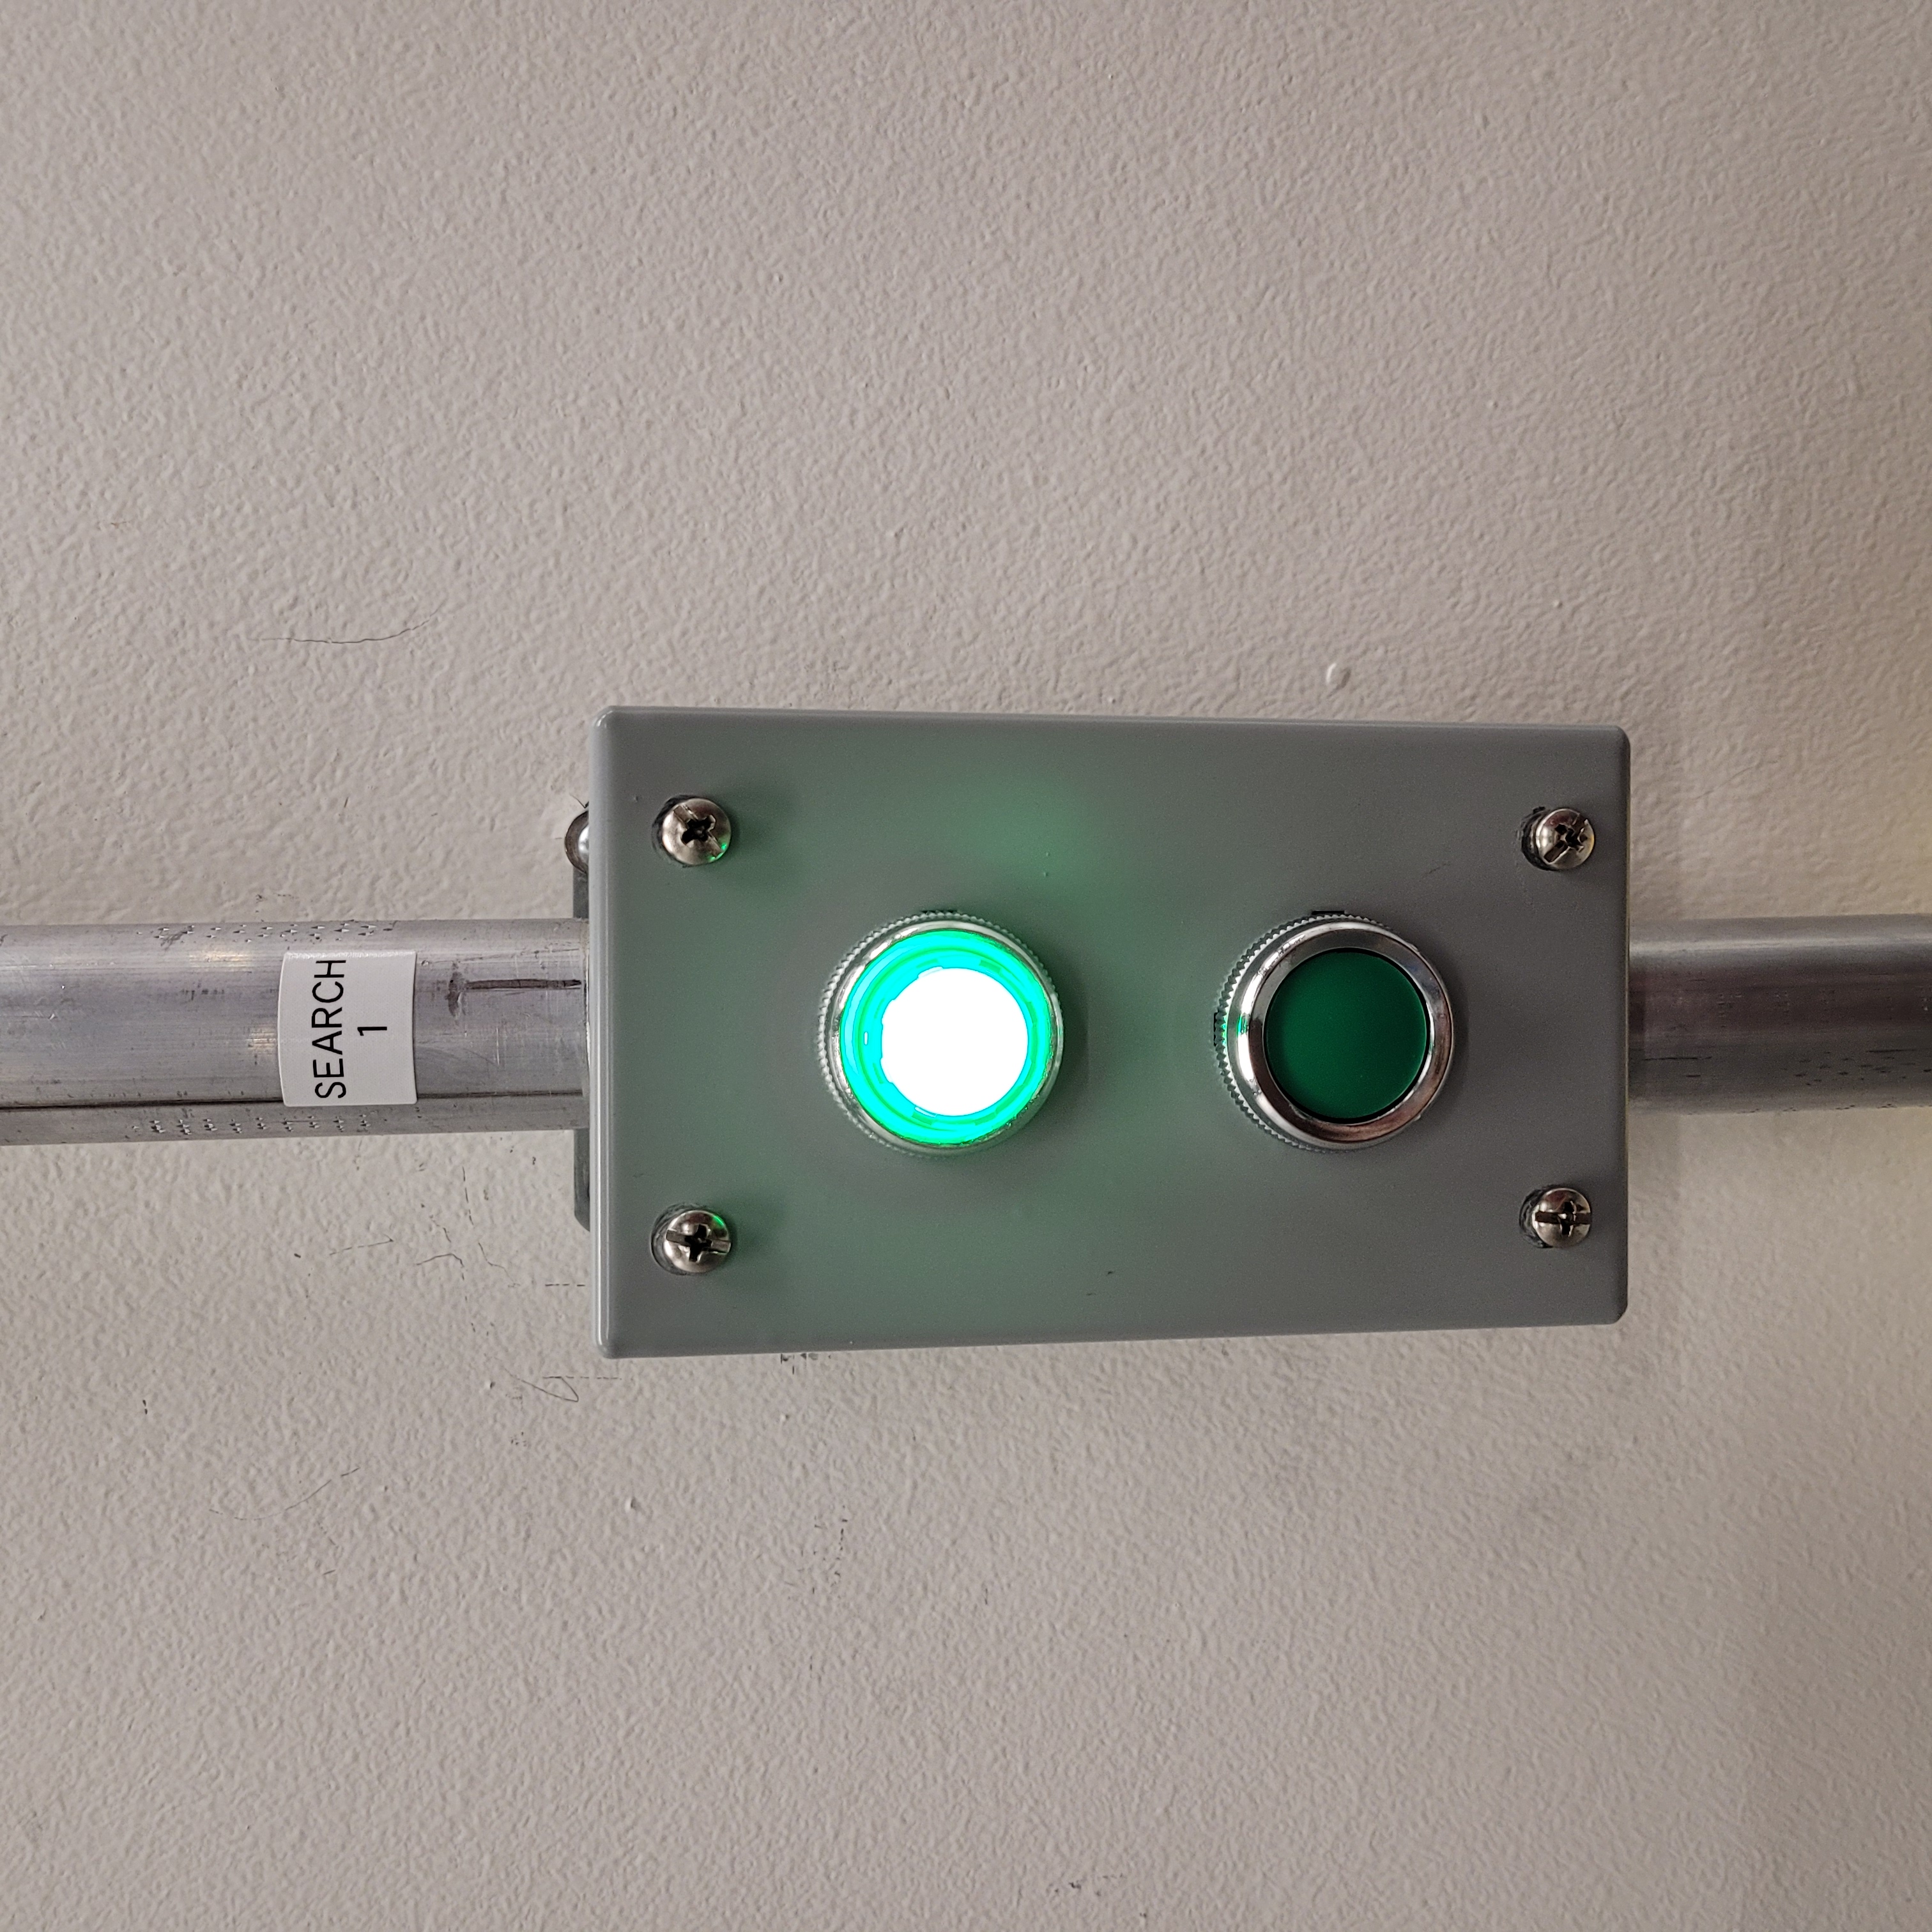
Search button LEDs are off in Hutch-1.
Button 1
Button 2
Button 3
The following Hutch-1 Control Ionizing Radiation Interlock protocase lamps are red.
SECURE PERIMETER
BEAM SELECT
BEAM STOP
The following Hutch-1 Control Ionizing Radiation Interlock protocase lamps are green.
AREA MONITOR
BEAM status
Hutch-1 Control Ionizing Radiation Interlock protocase BEAM SELECT key is set to DIVERGENT.
Hutch-1 Control VIEWMARQ displays LASER SAFE.
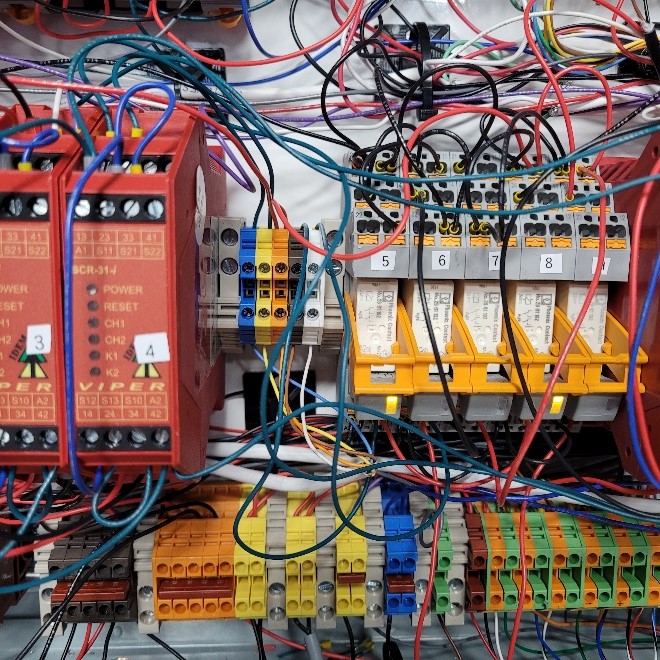
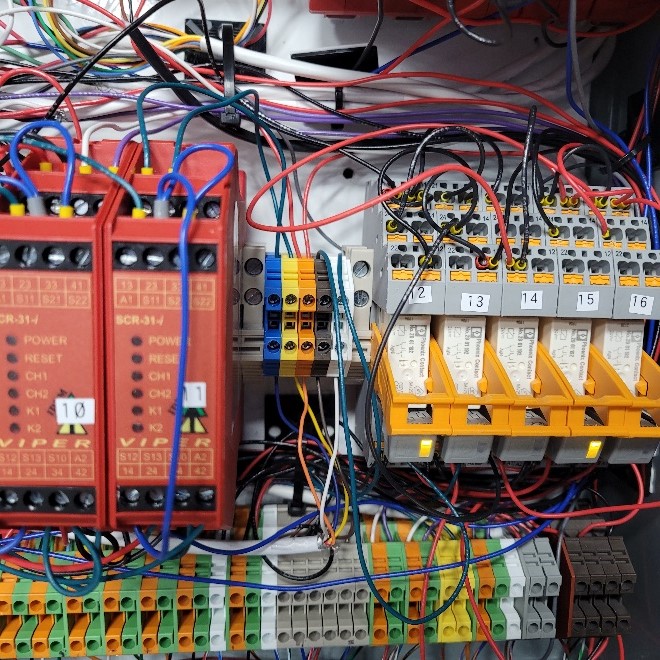
There is no 24VDC across the blue and yellow contact blocks in Hutch-1 panel for the double tungsten shutters.
Set 1
Set 2
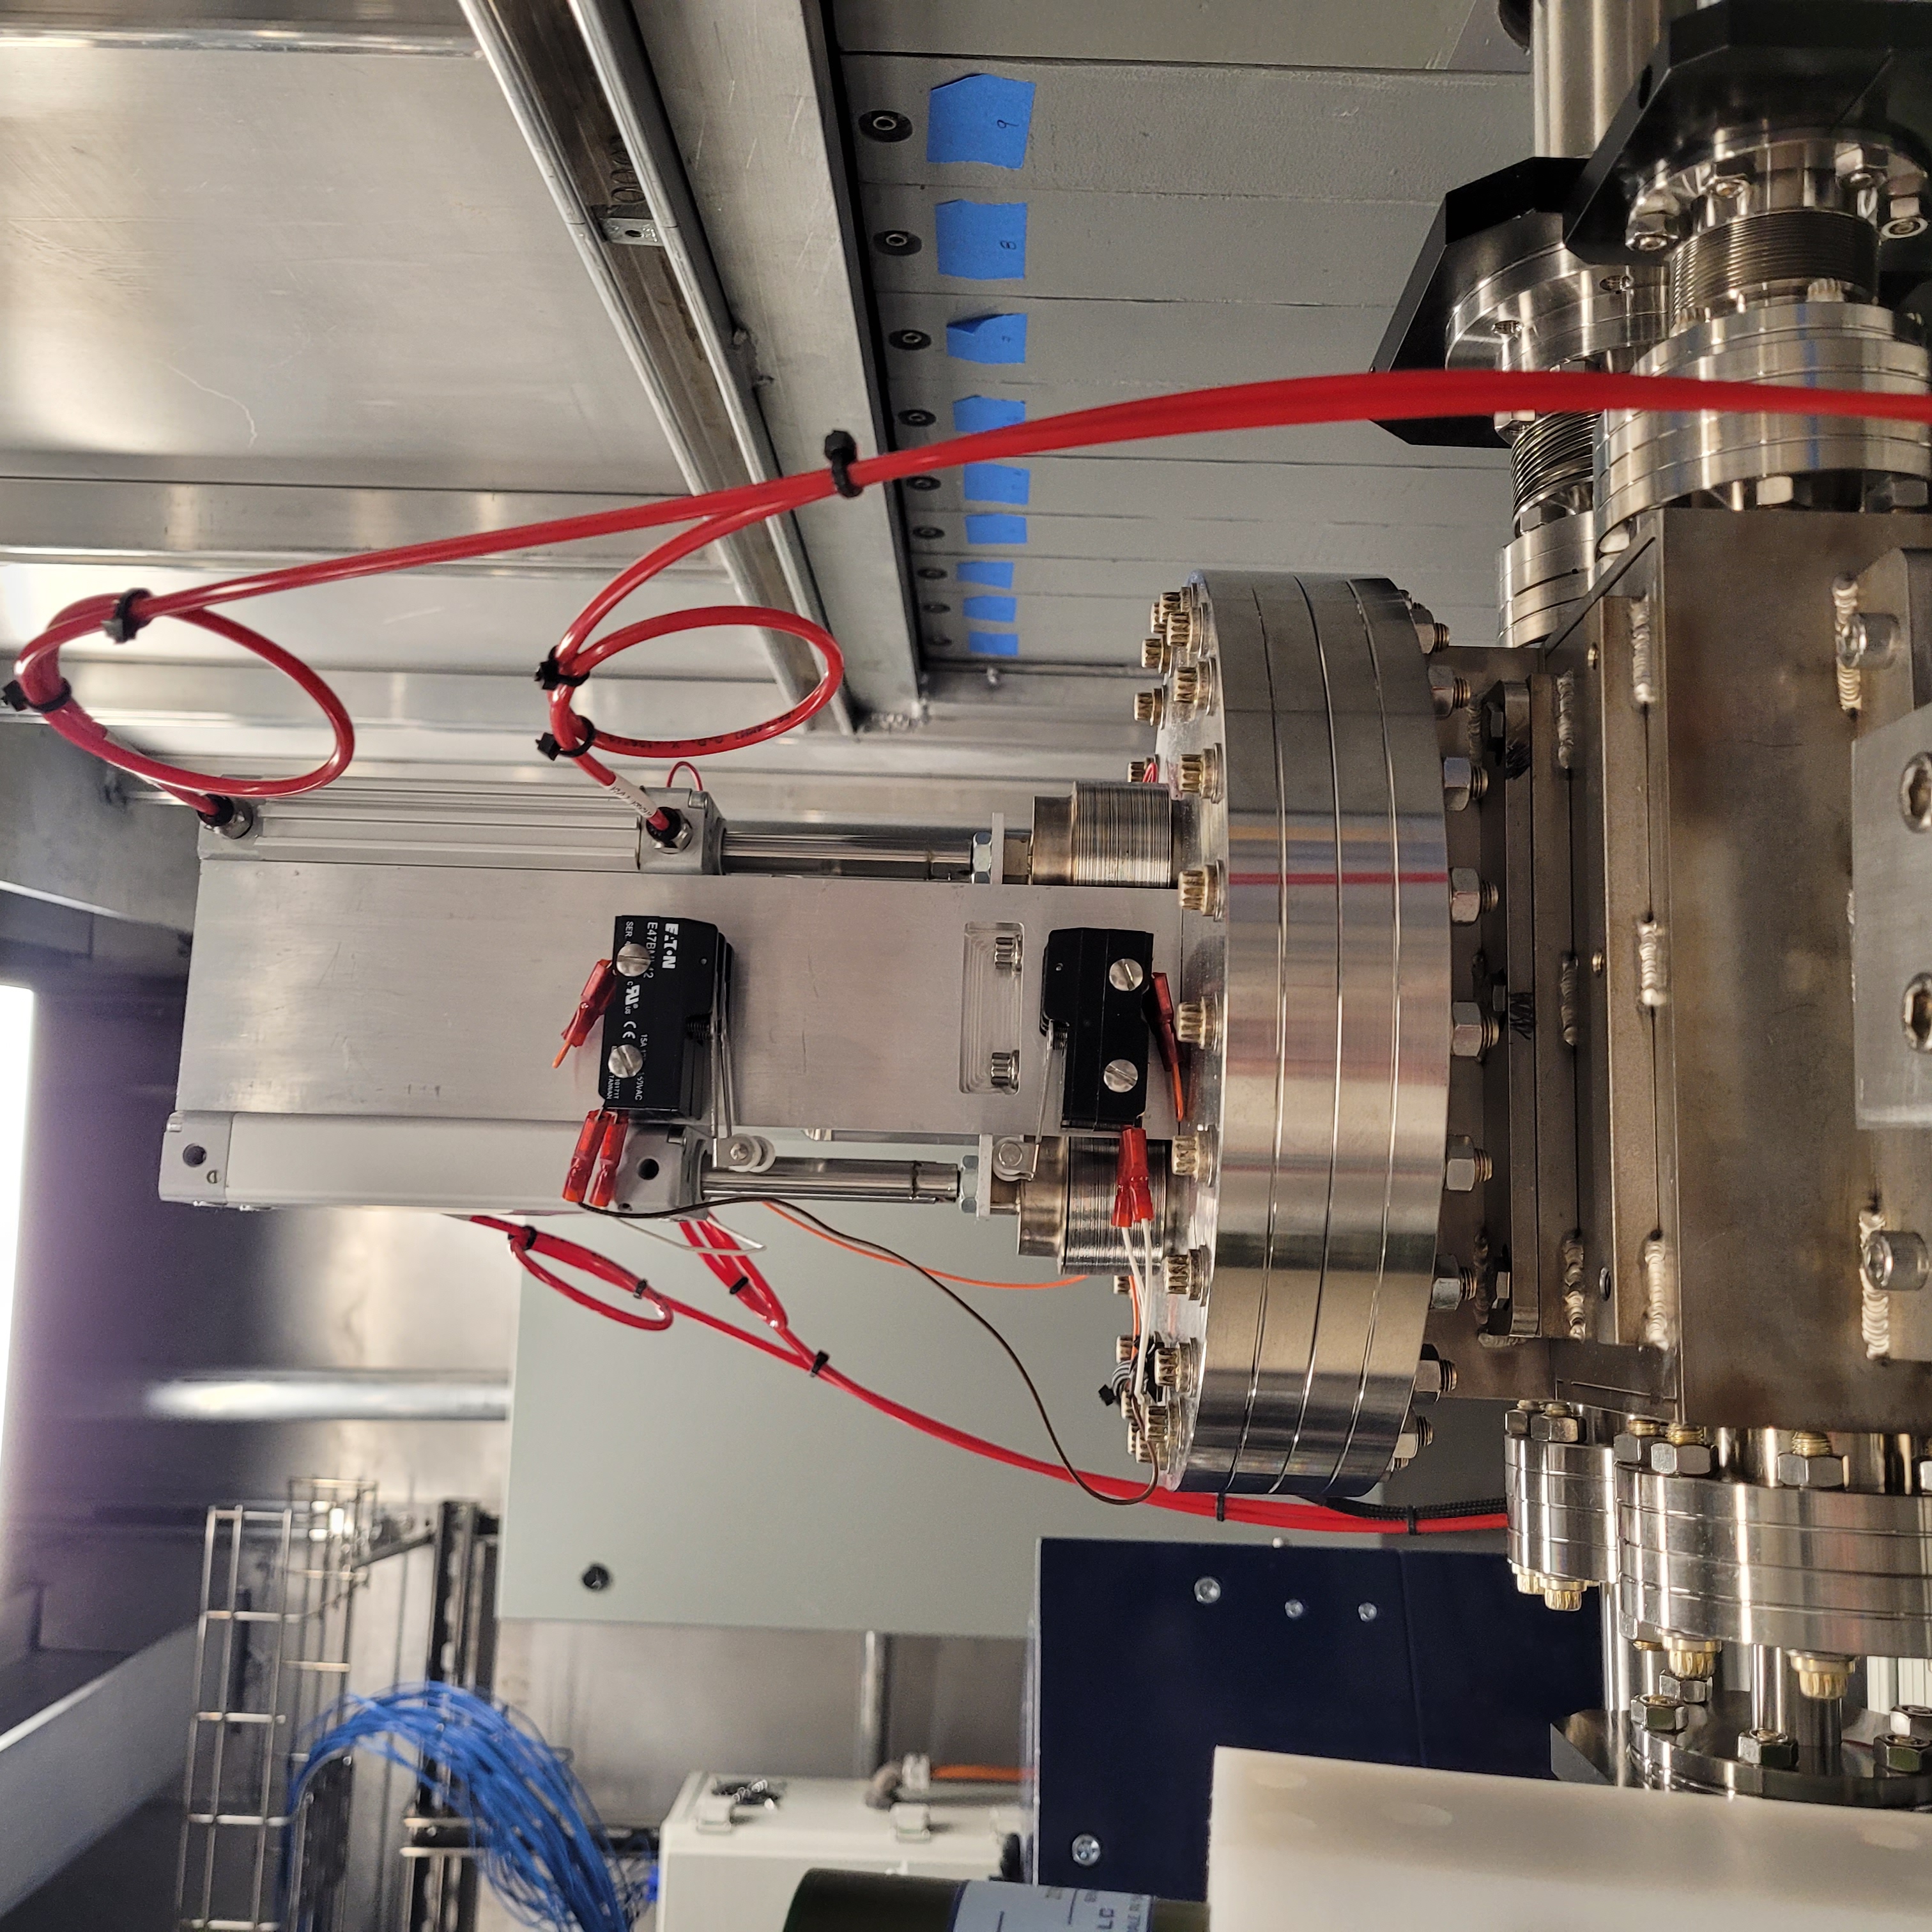
The double tungsten shutters are in the closed position.
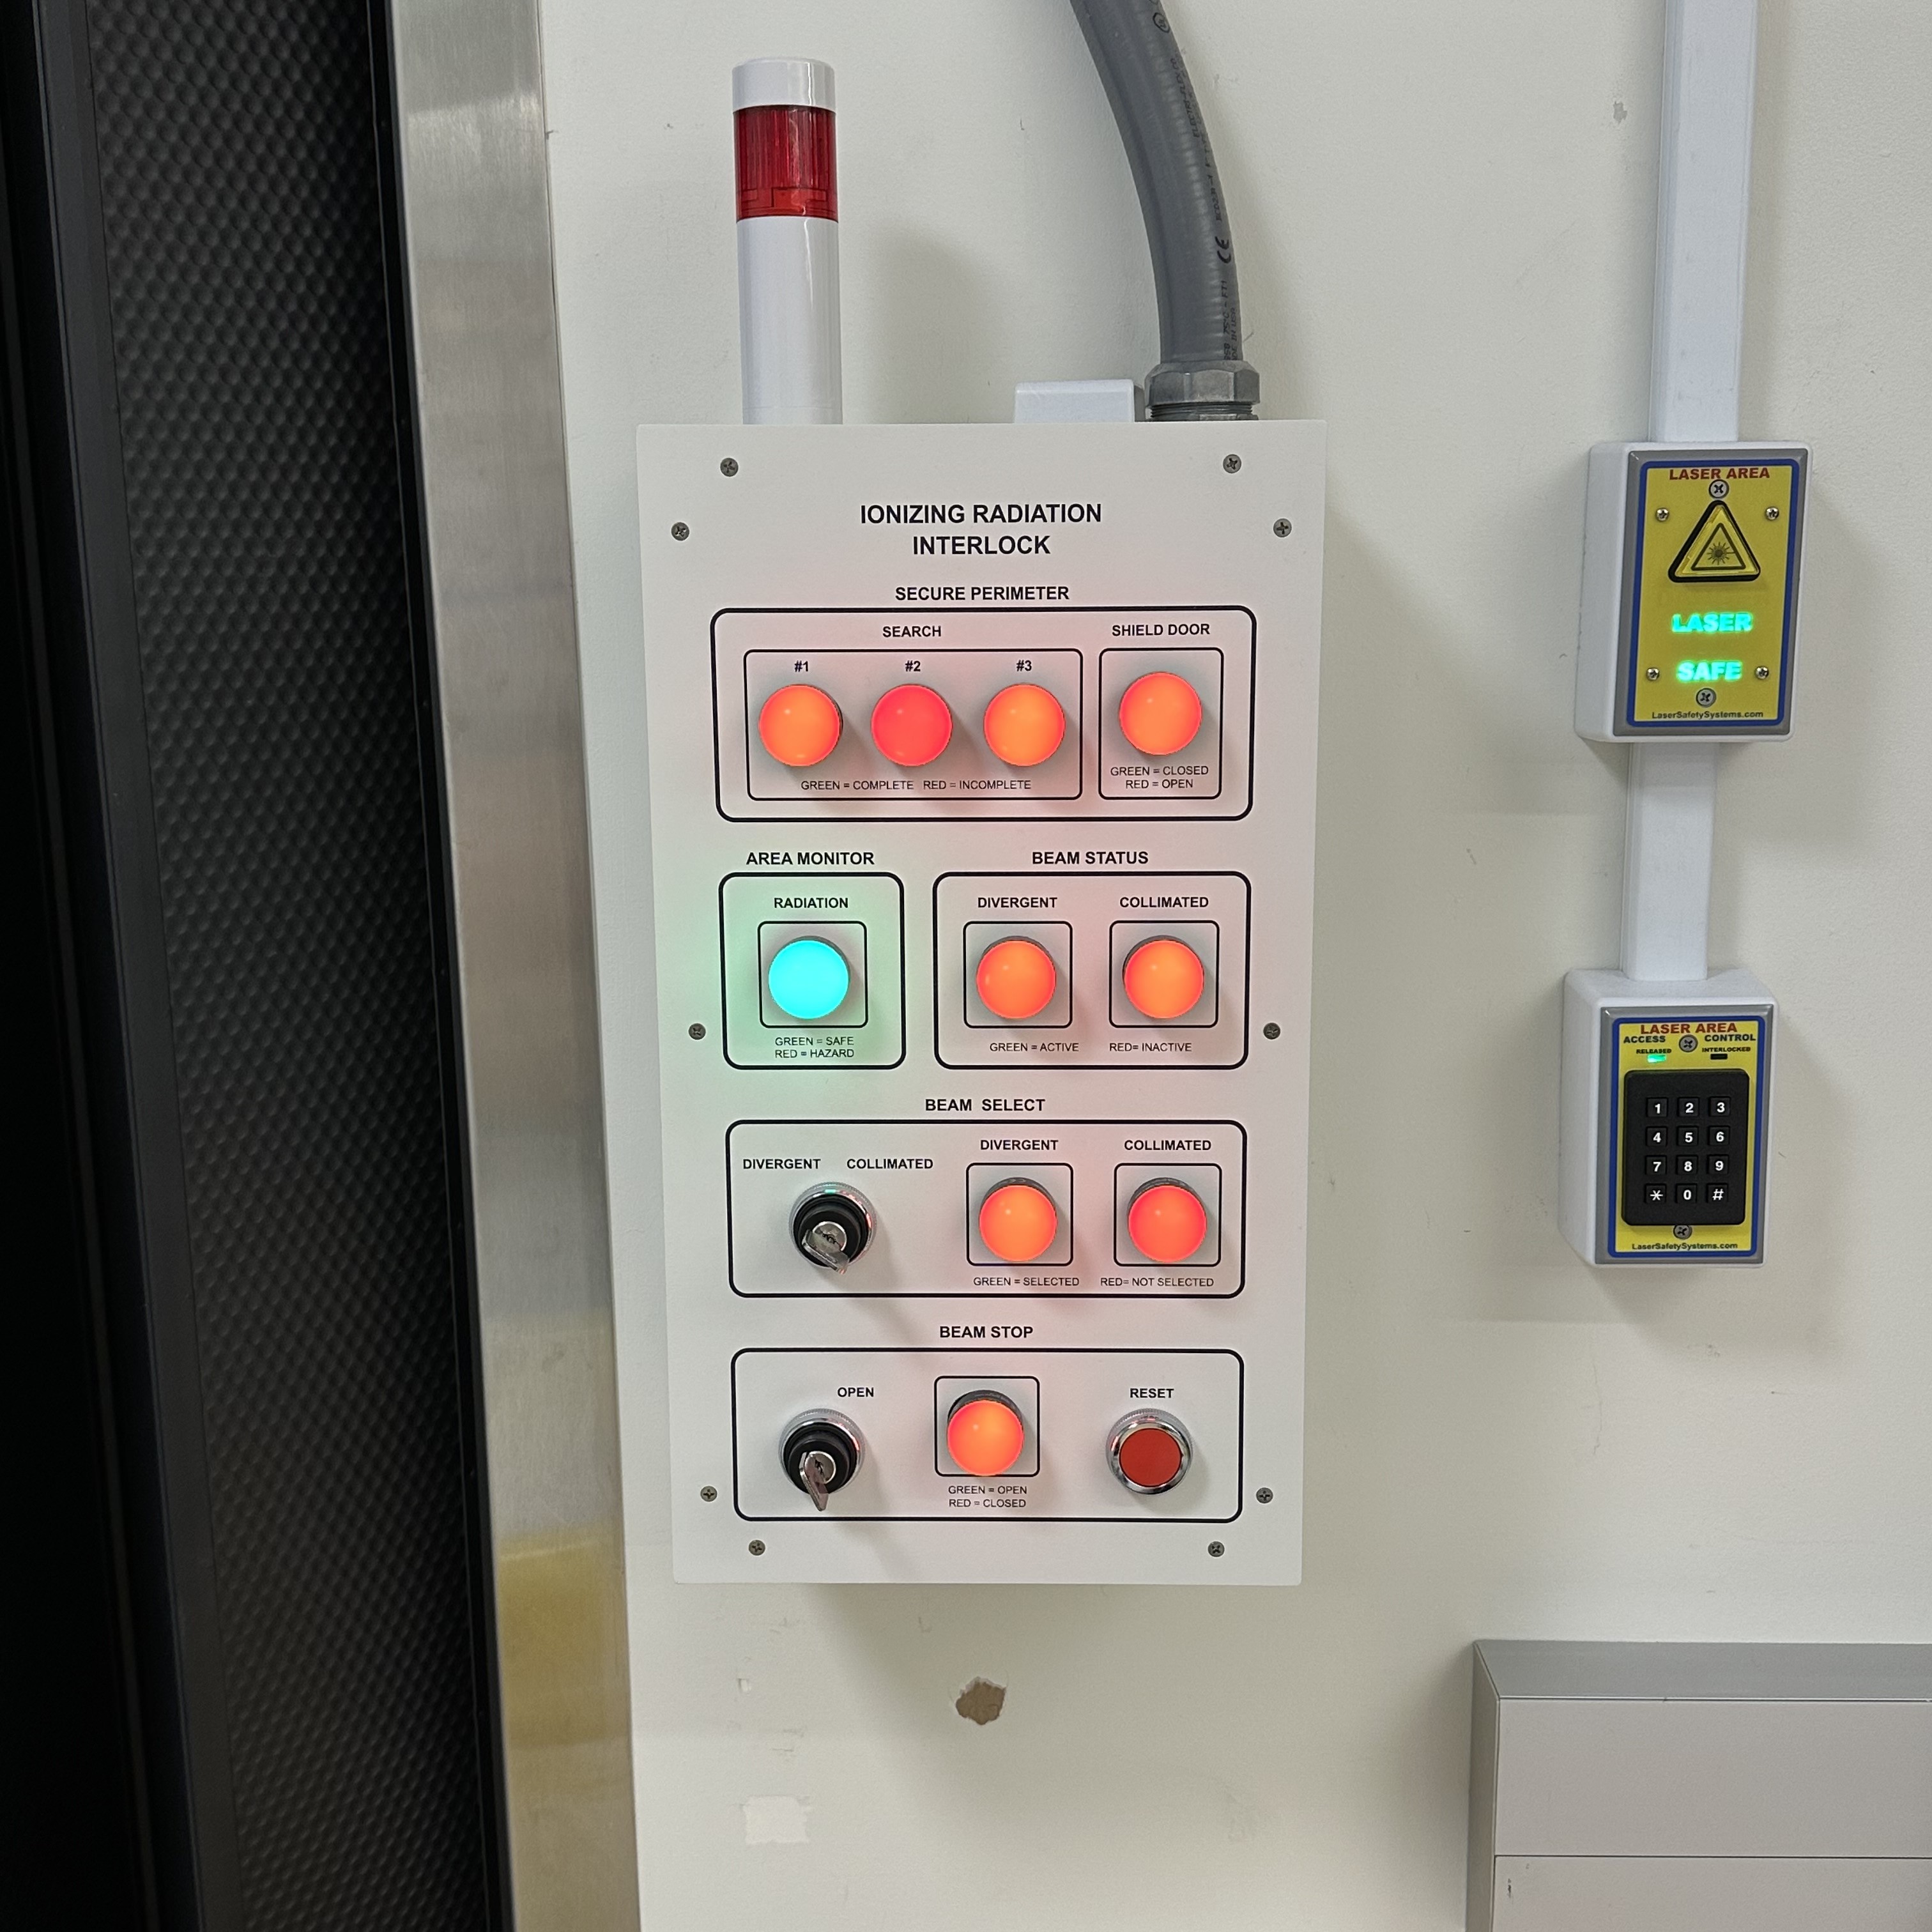
Figure 1: Hutch-1 Control Ionizing Radiation Interlock protocase.
|
|
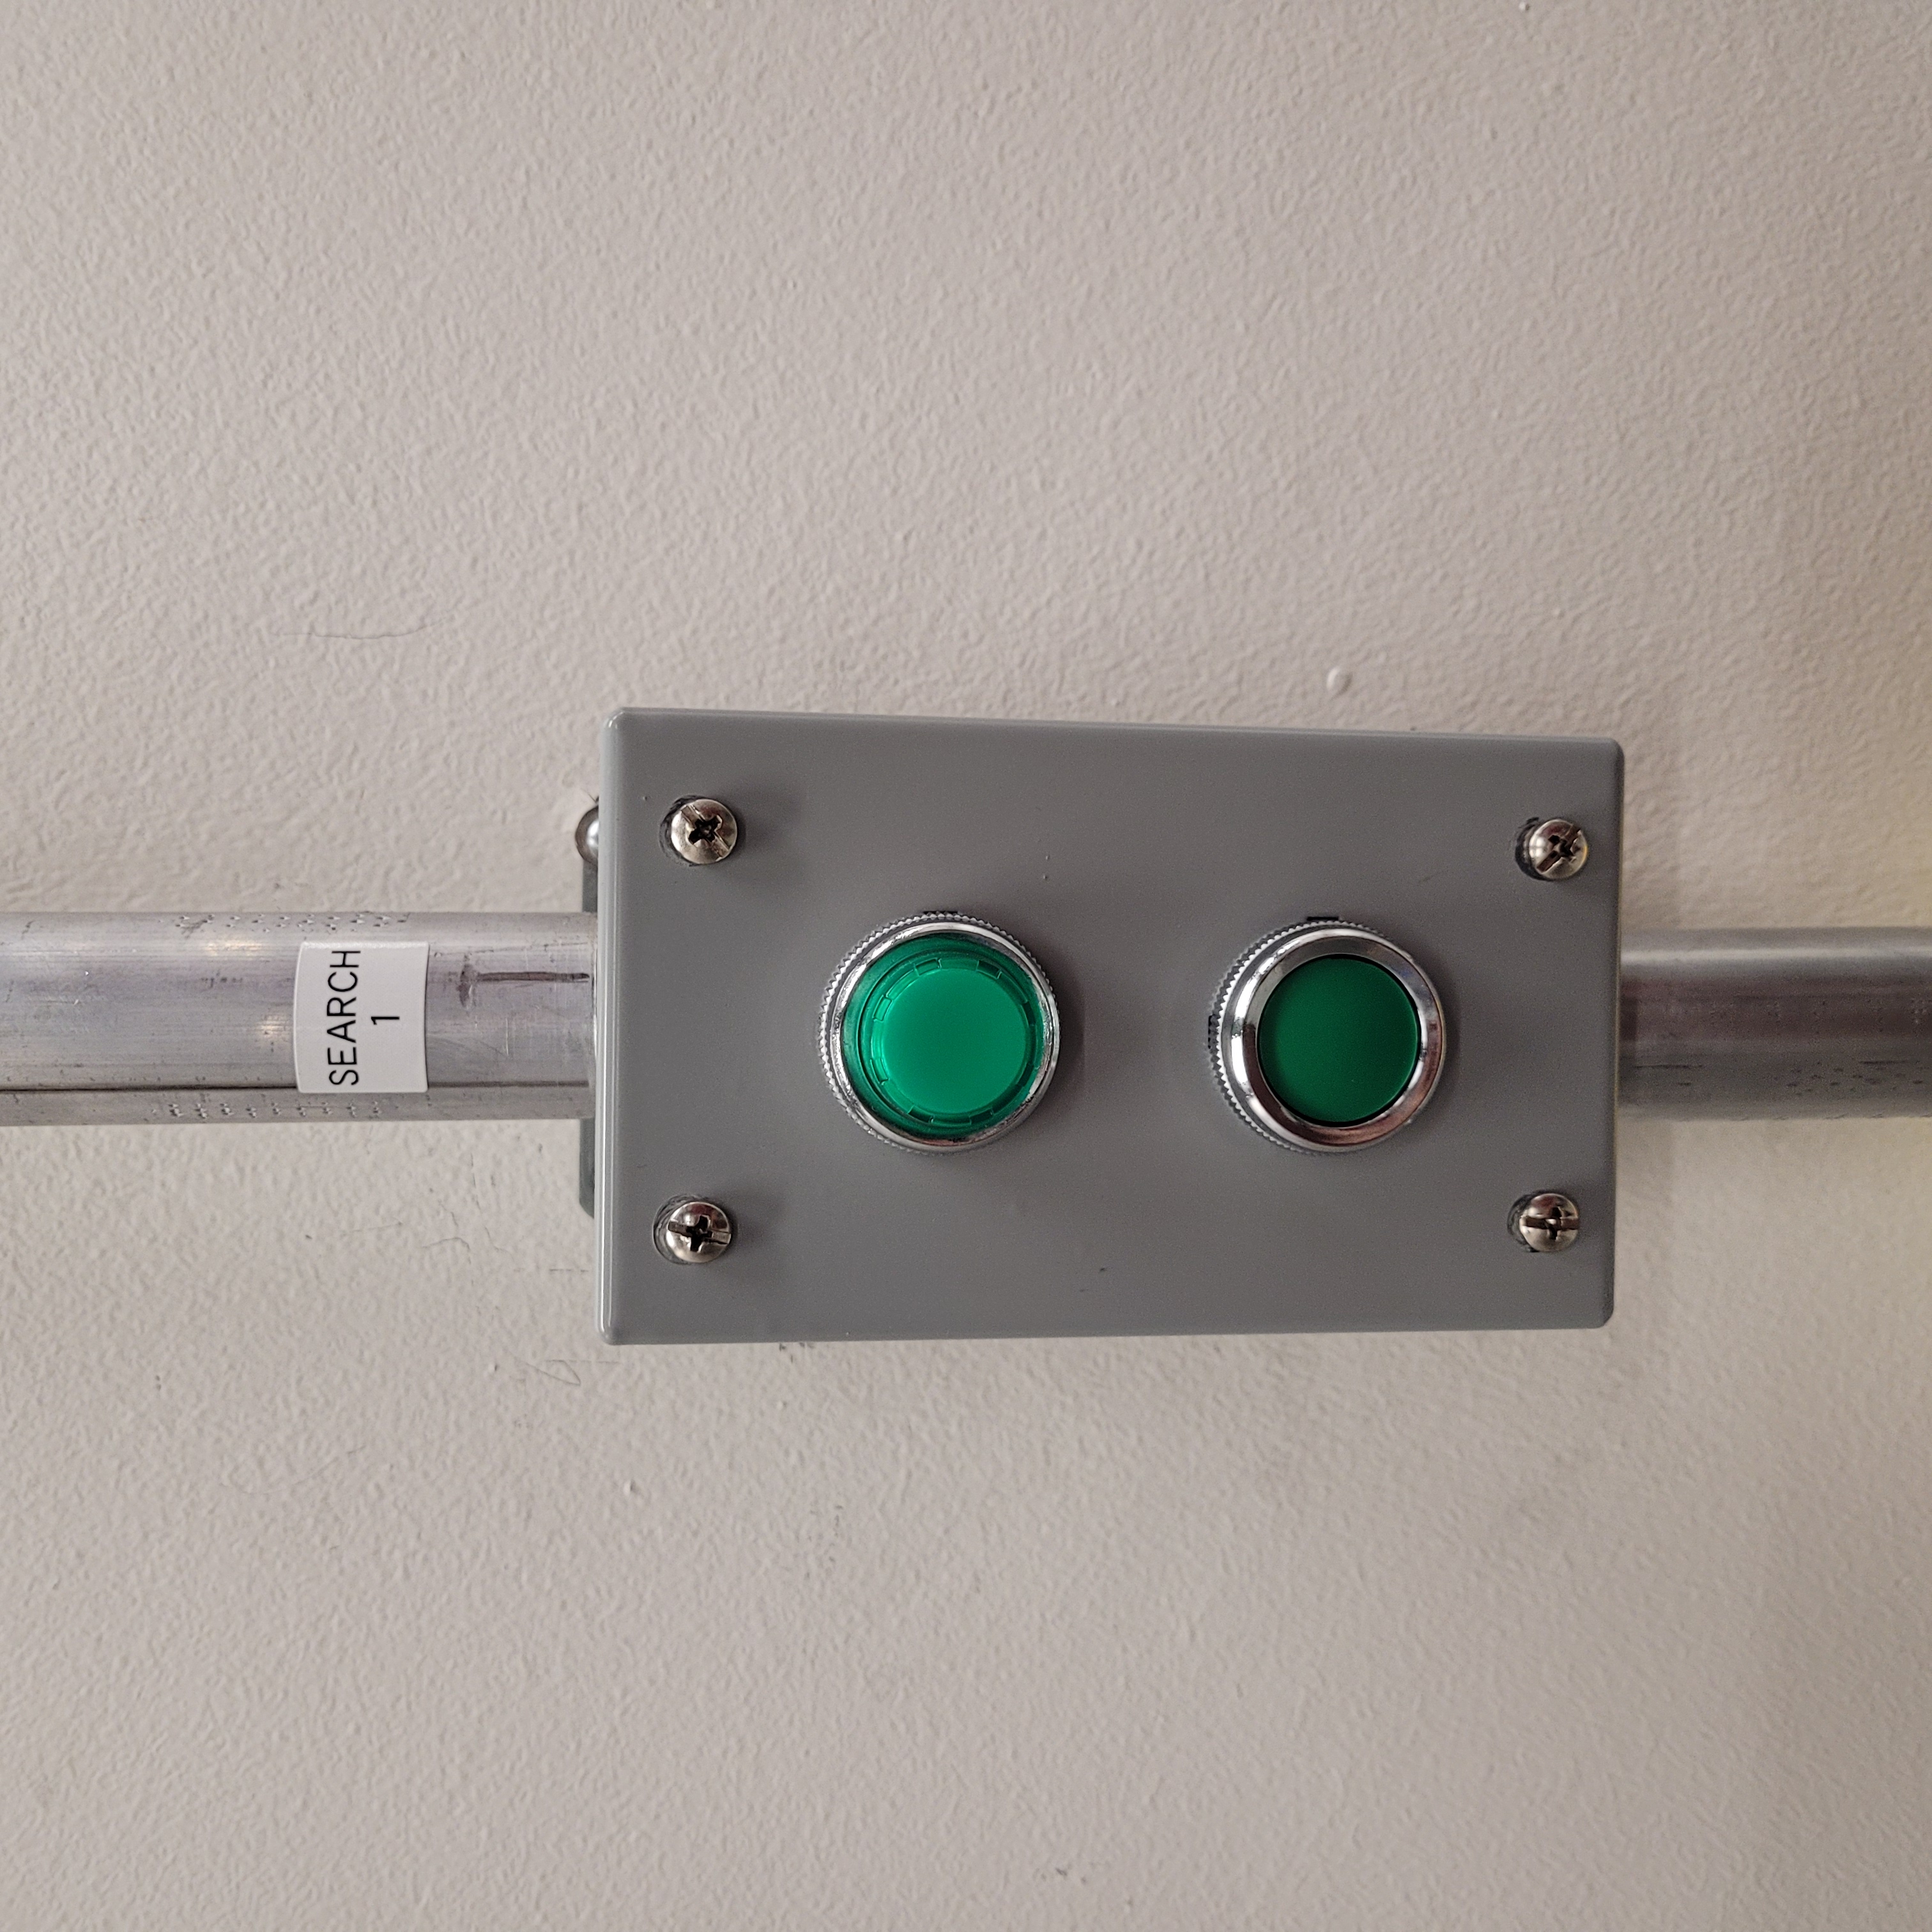
Hutch-1 search button off. ============================================================ |
Hutch-1 search button on. ============================================================= |
Figure 2: This is an example of the Hutch-1 search buttons in both states.
|
|
Hutch-1 double tungsten shutter contact set 1. ============================================ |
Hutch-1 double tungsten shutter contact set 2. ============================================ |
Figure 3: These are the contract blocks for the double tungsten shutters in the Hutch-1 aggregator panel. The specific sets being referenced here are the blue and yellow contact blocks next to the red IDEM relays. If there is 24VDC across these contact blocks, the shutters are open.
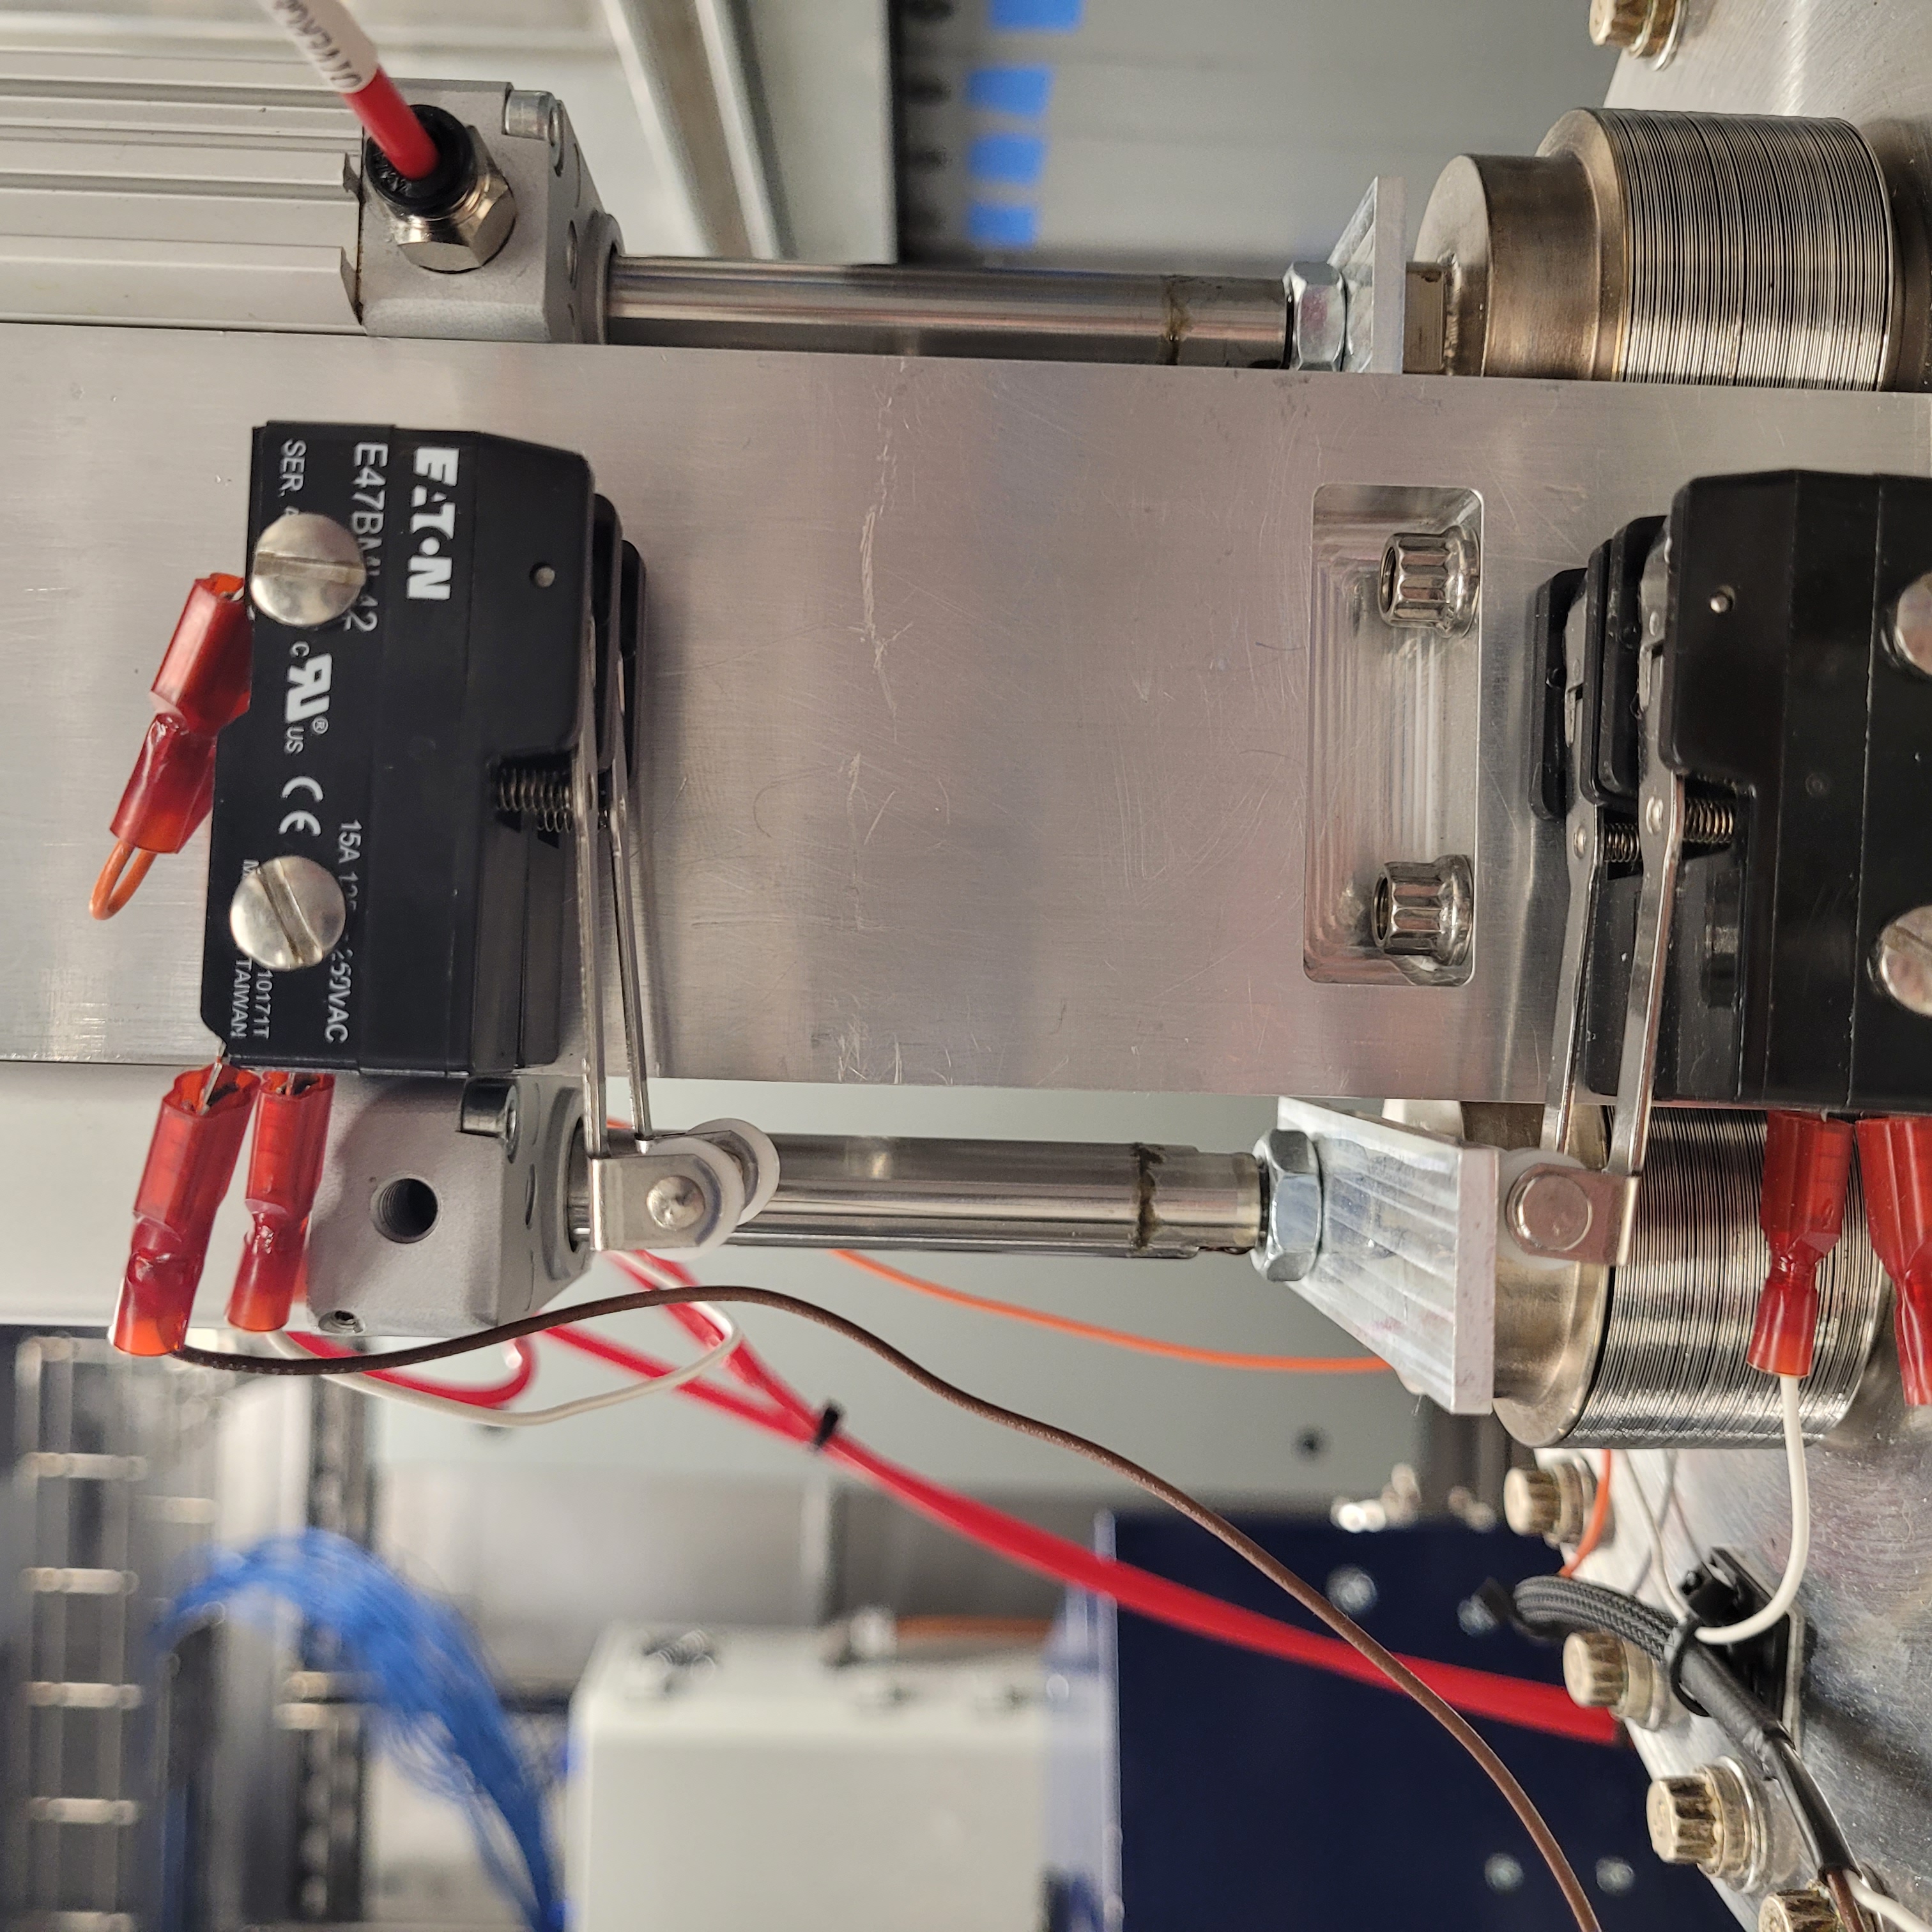
Figure 4: This is the upright double tungsten shutter in the closed position. This shutter corresponds to the convergent beam. If the plate in image 2 where to be on the top sensors, the shutters would be open. Additionally, the other double tungsten shutter is rotated 180 degrees around the beam pipe from this one. Because it is rotated, the contact being on the upper sensors is the closed position for the other shutter.
Search Procedure
Push search buttons three and two in Hutch-1 and verify they will not activate without going in the correct sequence.
Button 3
Button 2
Go through Hutch-1 and in the correct sequence, click the three search buttons. The LED on the search button should turn on and the corresponding lamp on the Hutch-1 Ionizing Radiation interlock protocase should turn green.
Button 1
Button 2
Button 3
When the third search button is hit, there will be an audible chime and a flashing light from the chime. The chime is located on the west wall of Hutch-1.
Once all three search buttons have been hit in order, close the shield door. The Hutch-1 Control IONIZING RADIATION INTERLOCK protocase shield door lamp turns green.
The Hutch-1 Control IONIZING RADIATION INTERLOCK protocase Beam Select Divergent lamp turns green.
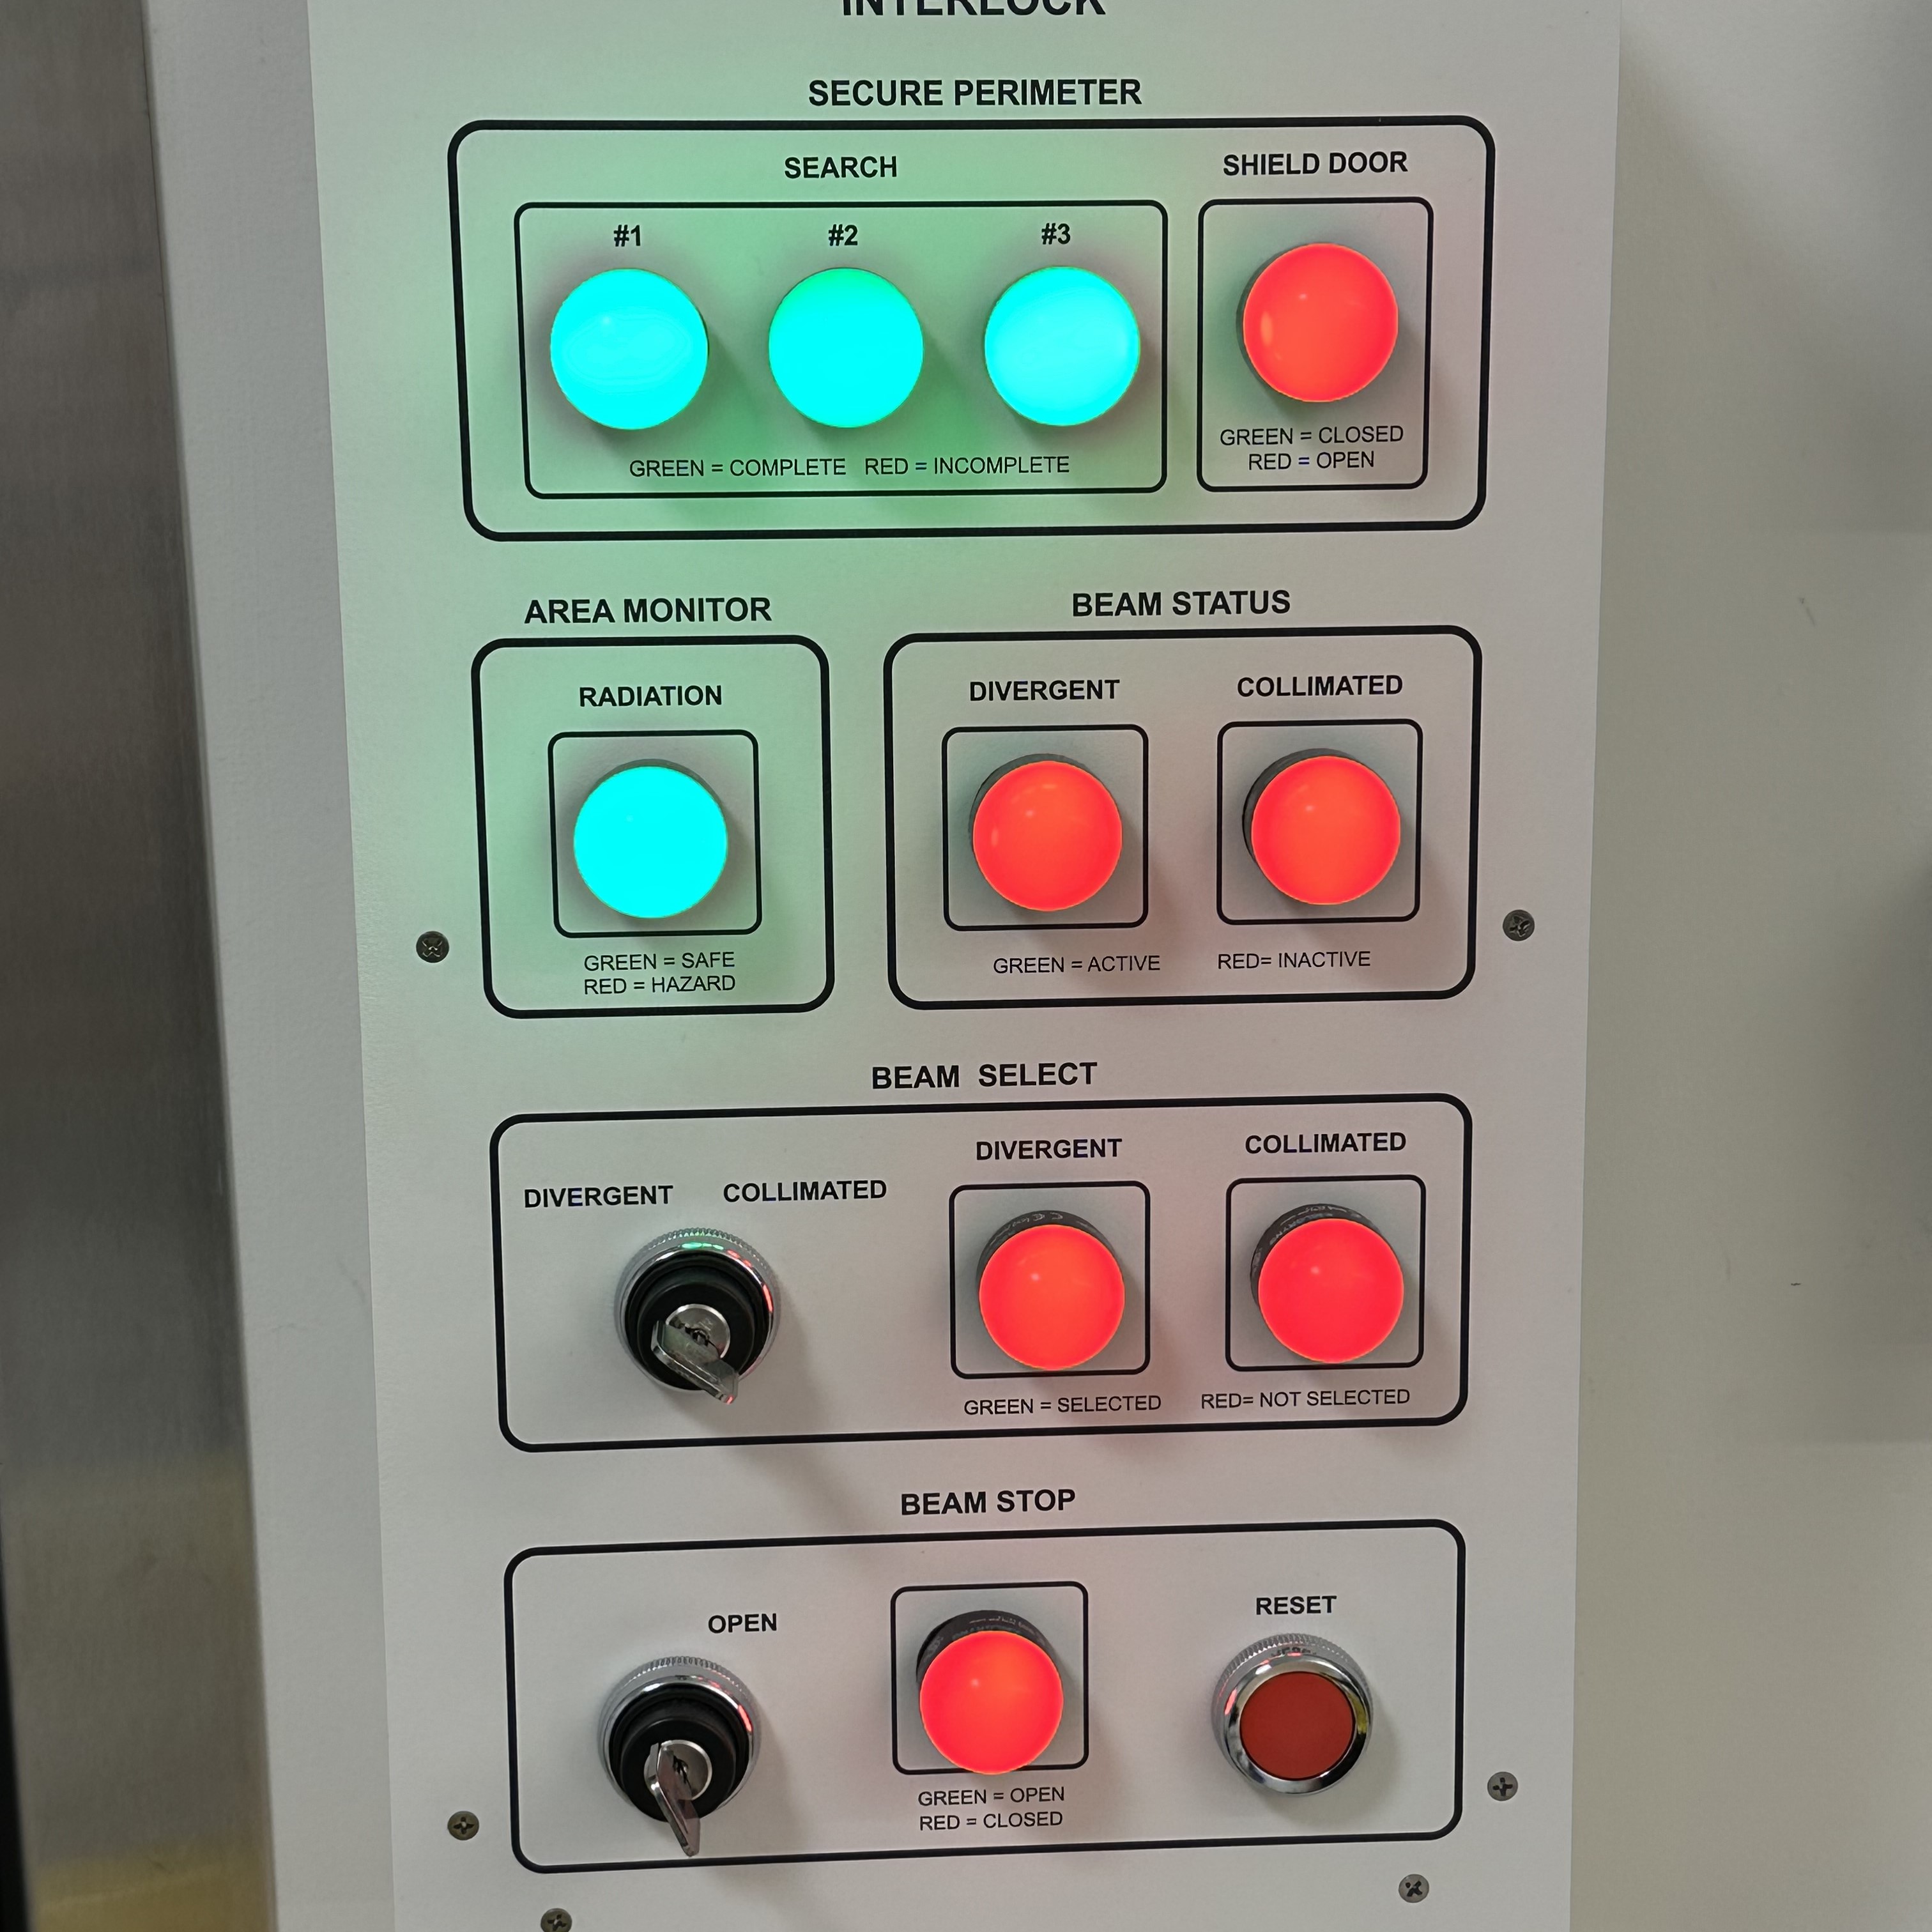
Figure 5: This is the Hutch-1 Control IONIZING RADIATION INTERLOCK protocase when Hutch-1 is searched.
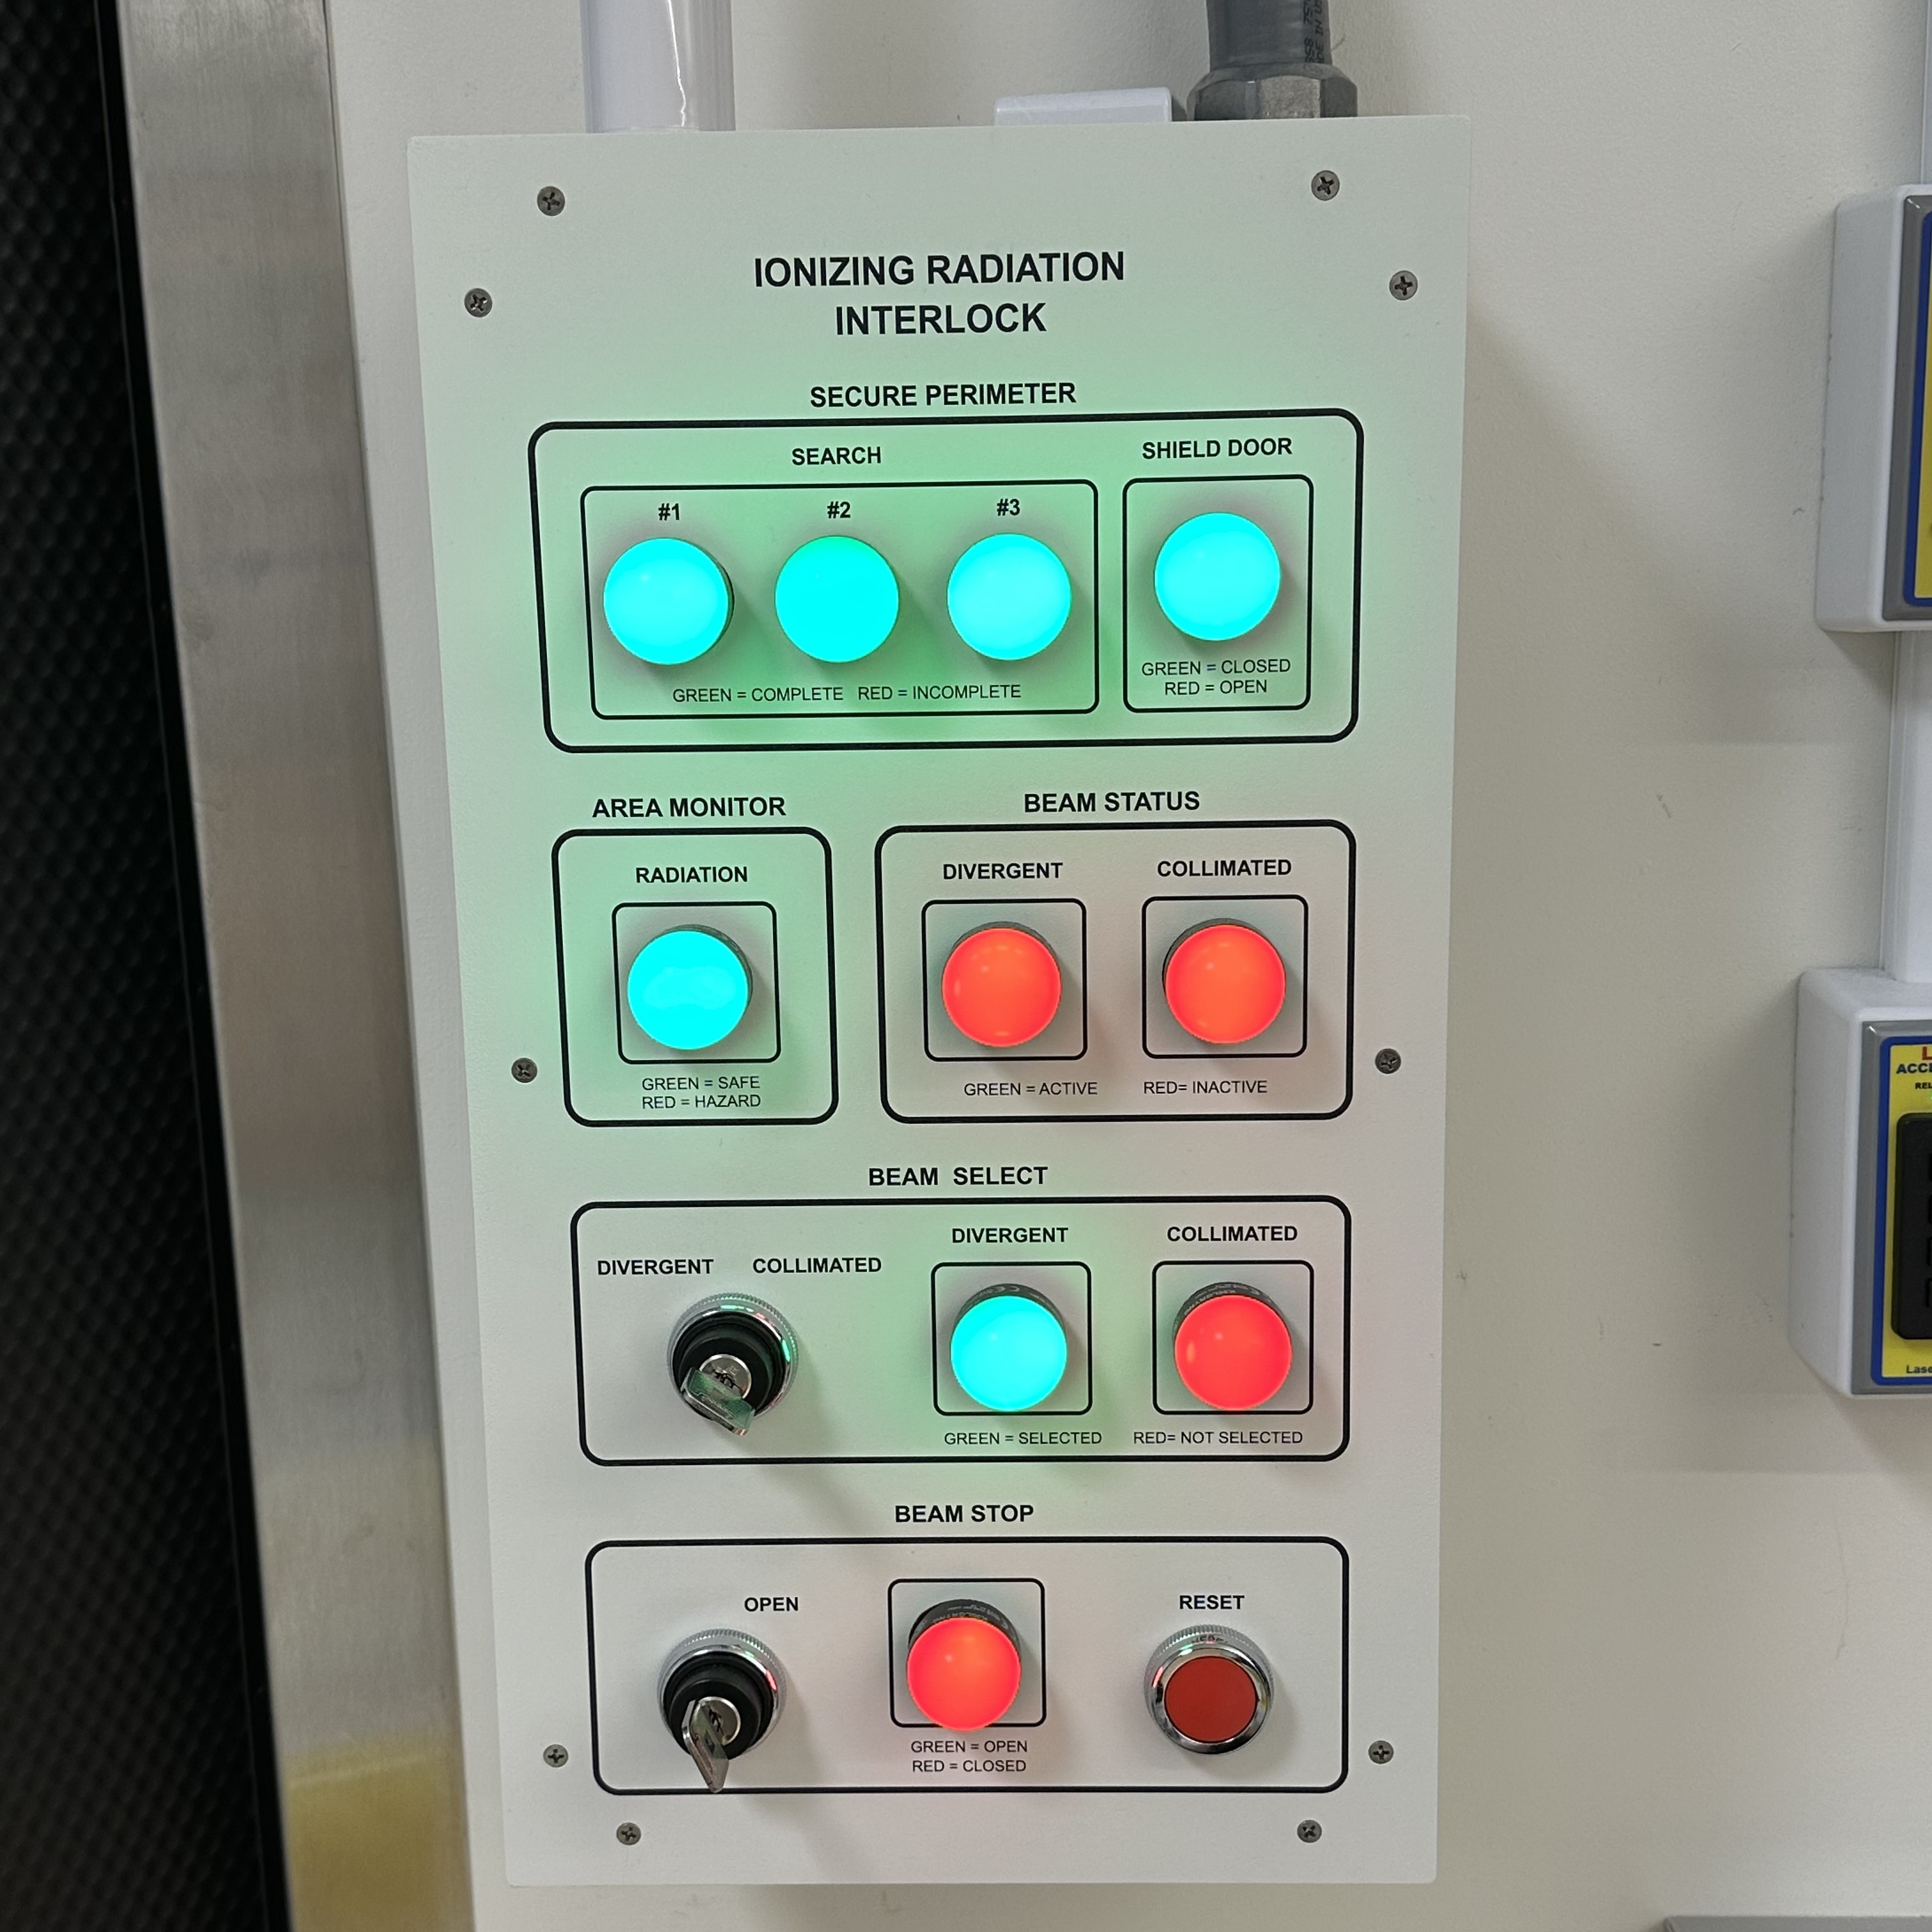
Figure 6: This is the Hutch-1 Control IONIZING RADIATION INTERLOCK protocase when Hutch-1 is secured.
Changing Beam Status
Turn the Hutch-1 Control IONIZING RADIATION INTERLOCK protocase BEAM STOP key to Open. The Beam Stop lamp turn green.
The Hutch-1 Control IONIZING RADIATION INTERLOCK protocase BEAM STATUS DIVERGENT lamp turn green.
Change the Hutch-1 Ionizing Radiation Interlock protocase Beam Select key to Collimated.
The BEAM SELECT DIVERGENT lamp turn red.
The BEAM SELECT COLLIMATED lamp turn green.
The BEAM STATUS DIVERGENT lamp turns red.
The BEAM STATUS COLLIMATED lamp turn orange while the shutter is moving, and then turns green when the shutter is open.
Verify that the divergent shutter is physically closed and the collimated shutter is physically open on the double tungsten shutters in Vault-1.
Change the Beam Select key back to Divergent. The inverse of step three should occur.
The BEAM SELECT COLLIMATED lamp turns red.
The BEAM SELECT DIVERGENT lamp turns green.
The BEAM STATUS COLLIMATED lamp turns red.
The BEAM STATUS DIVERGENT lamp turns orange while the shutter is moving, and then turns green when the shutter is open.
Verify that the divergent shutter is physically open and the collimated shutter is physically closed on the double tungsten shutters in Vault-1.
Press the Reset button. All Hutch-1 Control IONIZING RADIATION INTERLOCK protocase BEAM STATUS lamps are green.
Verify that both shutters are closed.

|
|
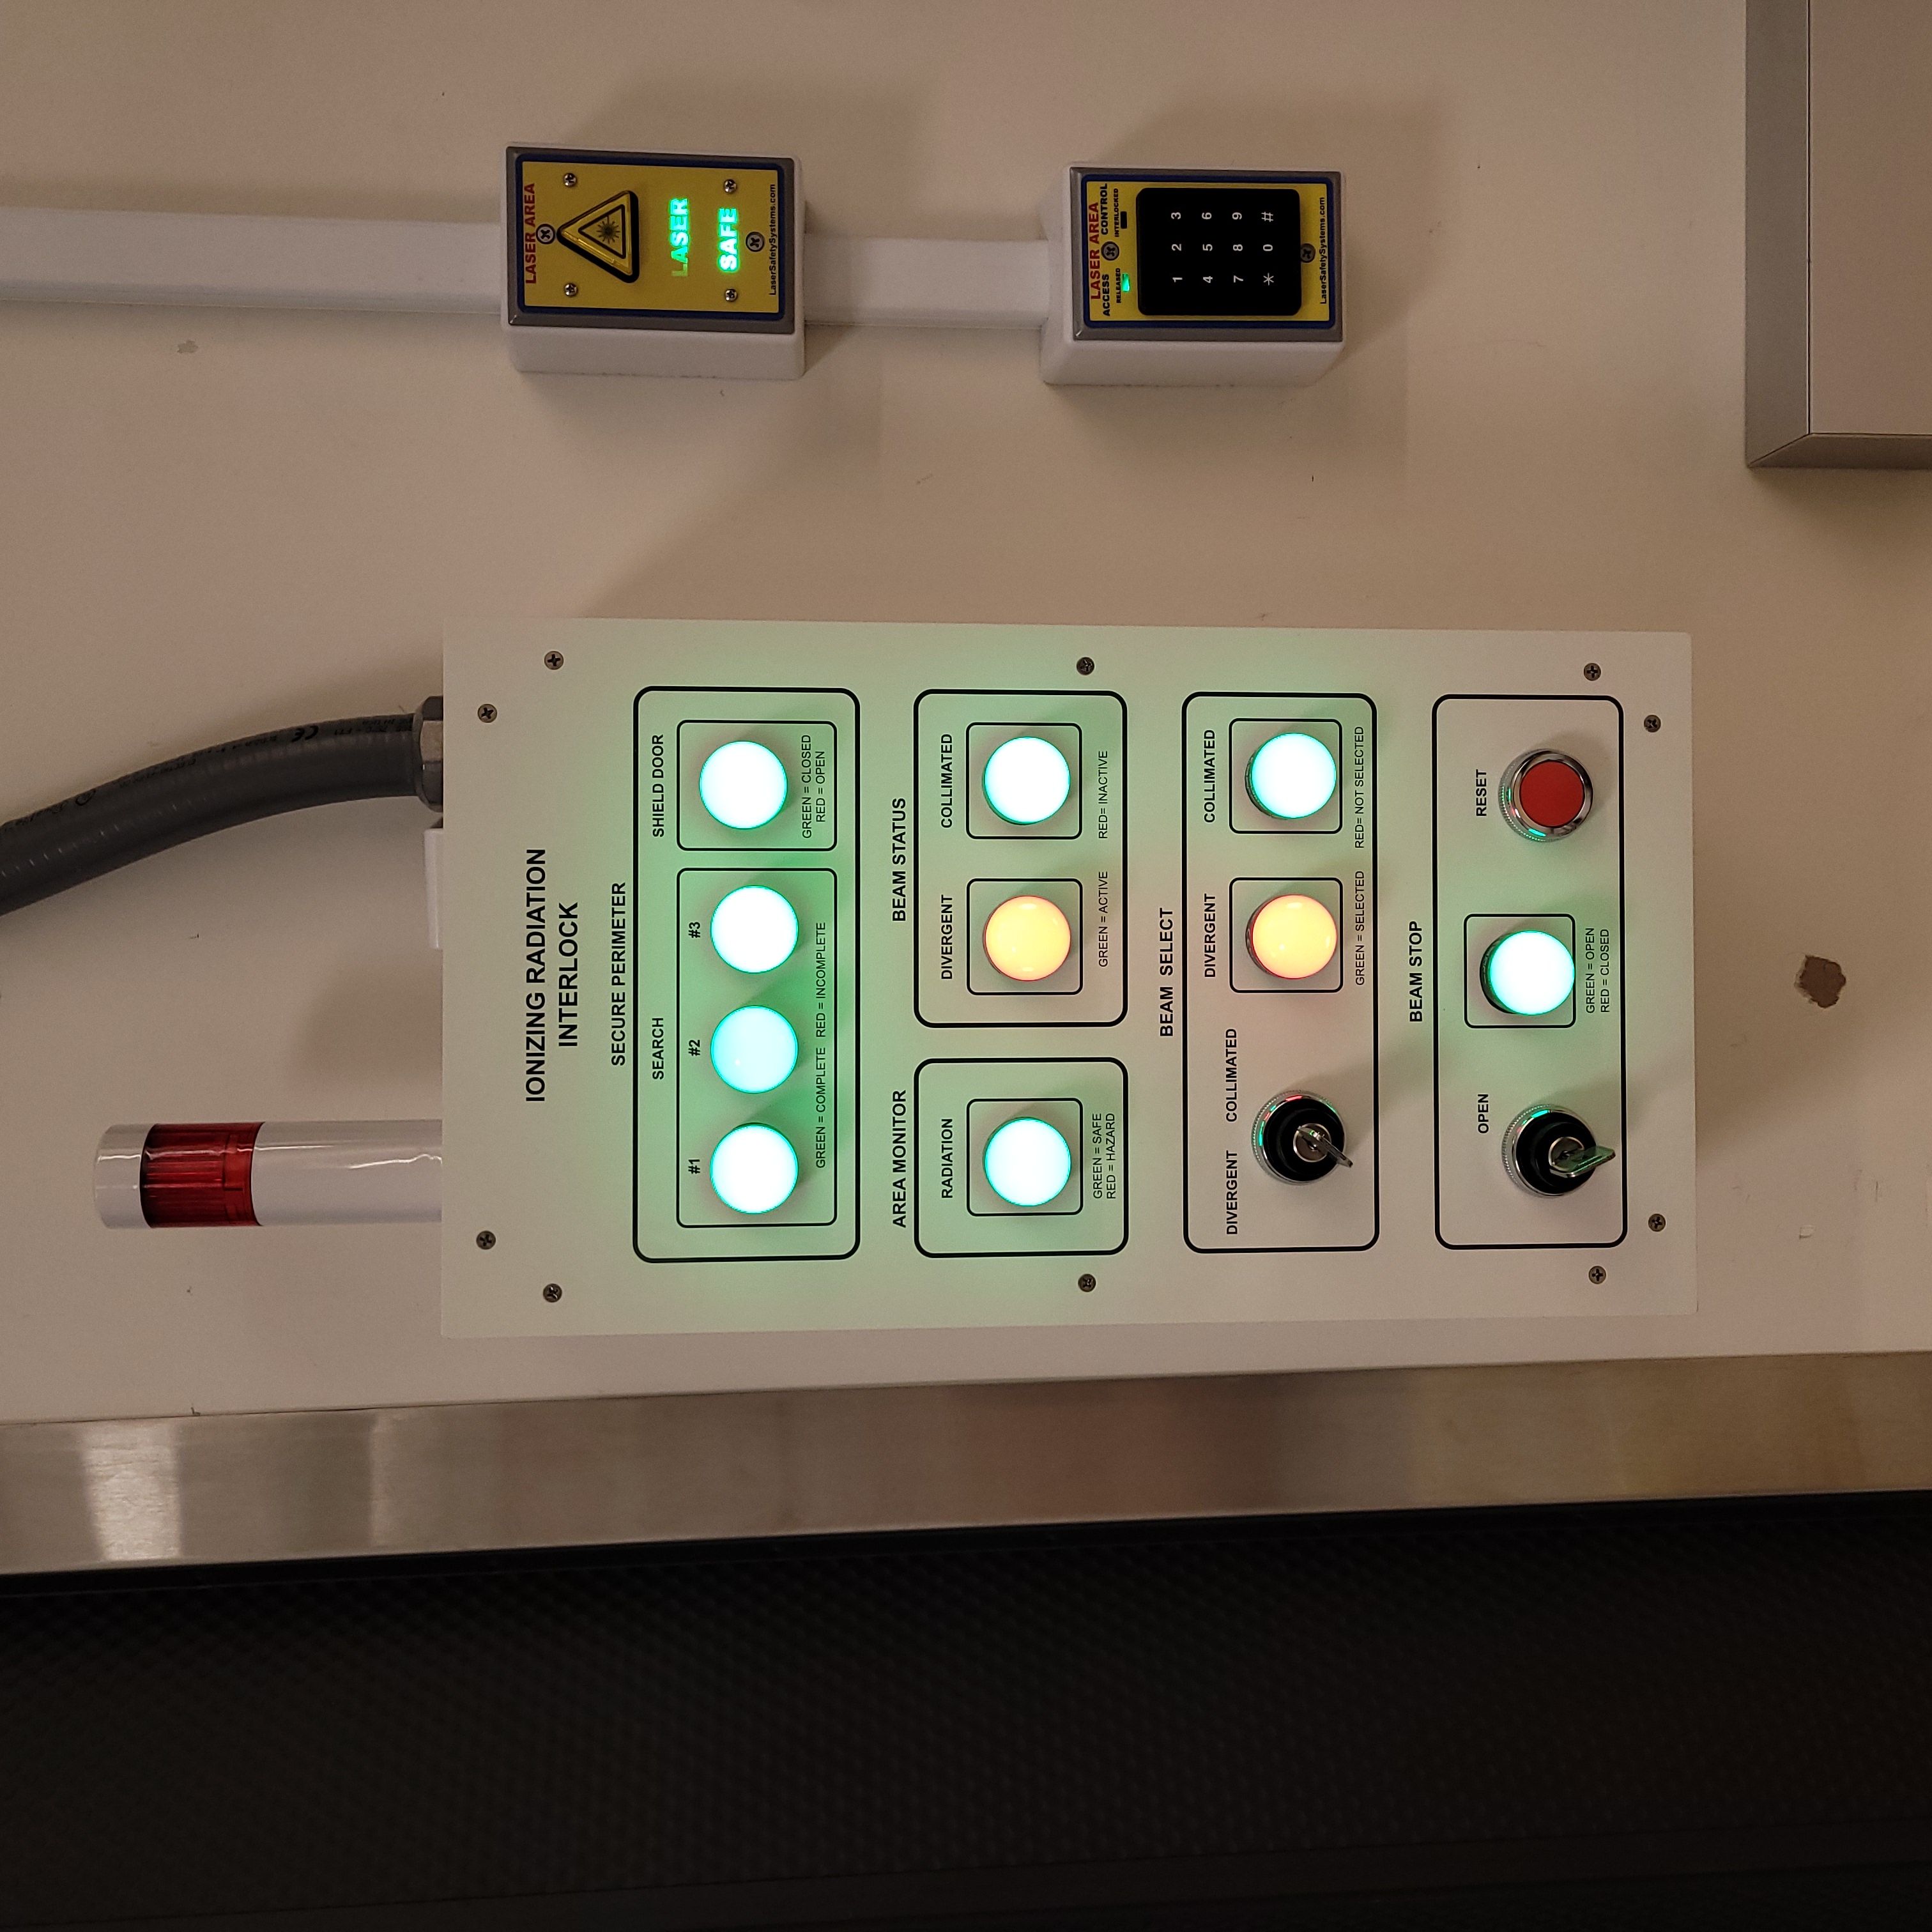
Divergent beam open. =============================================================== |
Collimated beam open. ============================================================== |
Figure 7: This is the Hutch-1 Control IONIZING RADIATION INTERLOCK protocase when either shutter is open. When the beam stop is open a shutter will automatically open to whatever beam select is set to before hand.
Returning to Starting Conditions
Return the Hutch-1 ionizing radiation interlock system back to starting conditions.
