Vault-1 Ionizing Radiation Interlock Testing Protocol
The objective of this testing procedure is to verify the functionality of the Vault-1 ionizing radiation interlock system. The following falls under the scope of this testing procedure:
Vault-1 search and securing system.
RF and accelerator arming.
Transmitter override.
Ionizing radiation monitoring interlocks.
Starting Conditions
The default state for testing the Vault-1 ionizing radiation interlock system is in a completely disarmed state.
The IONIZING RADIATION INTERLOCK protocase in Vault-1 Control shows:
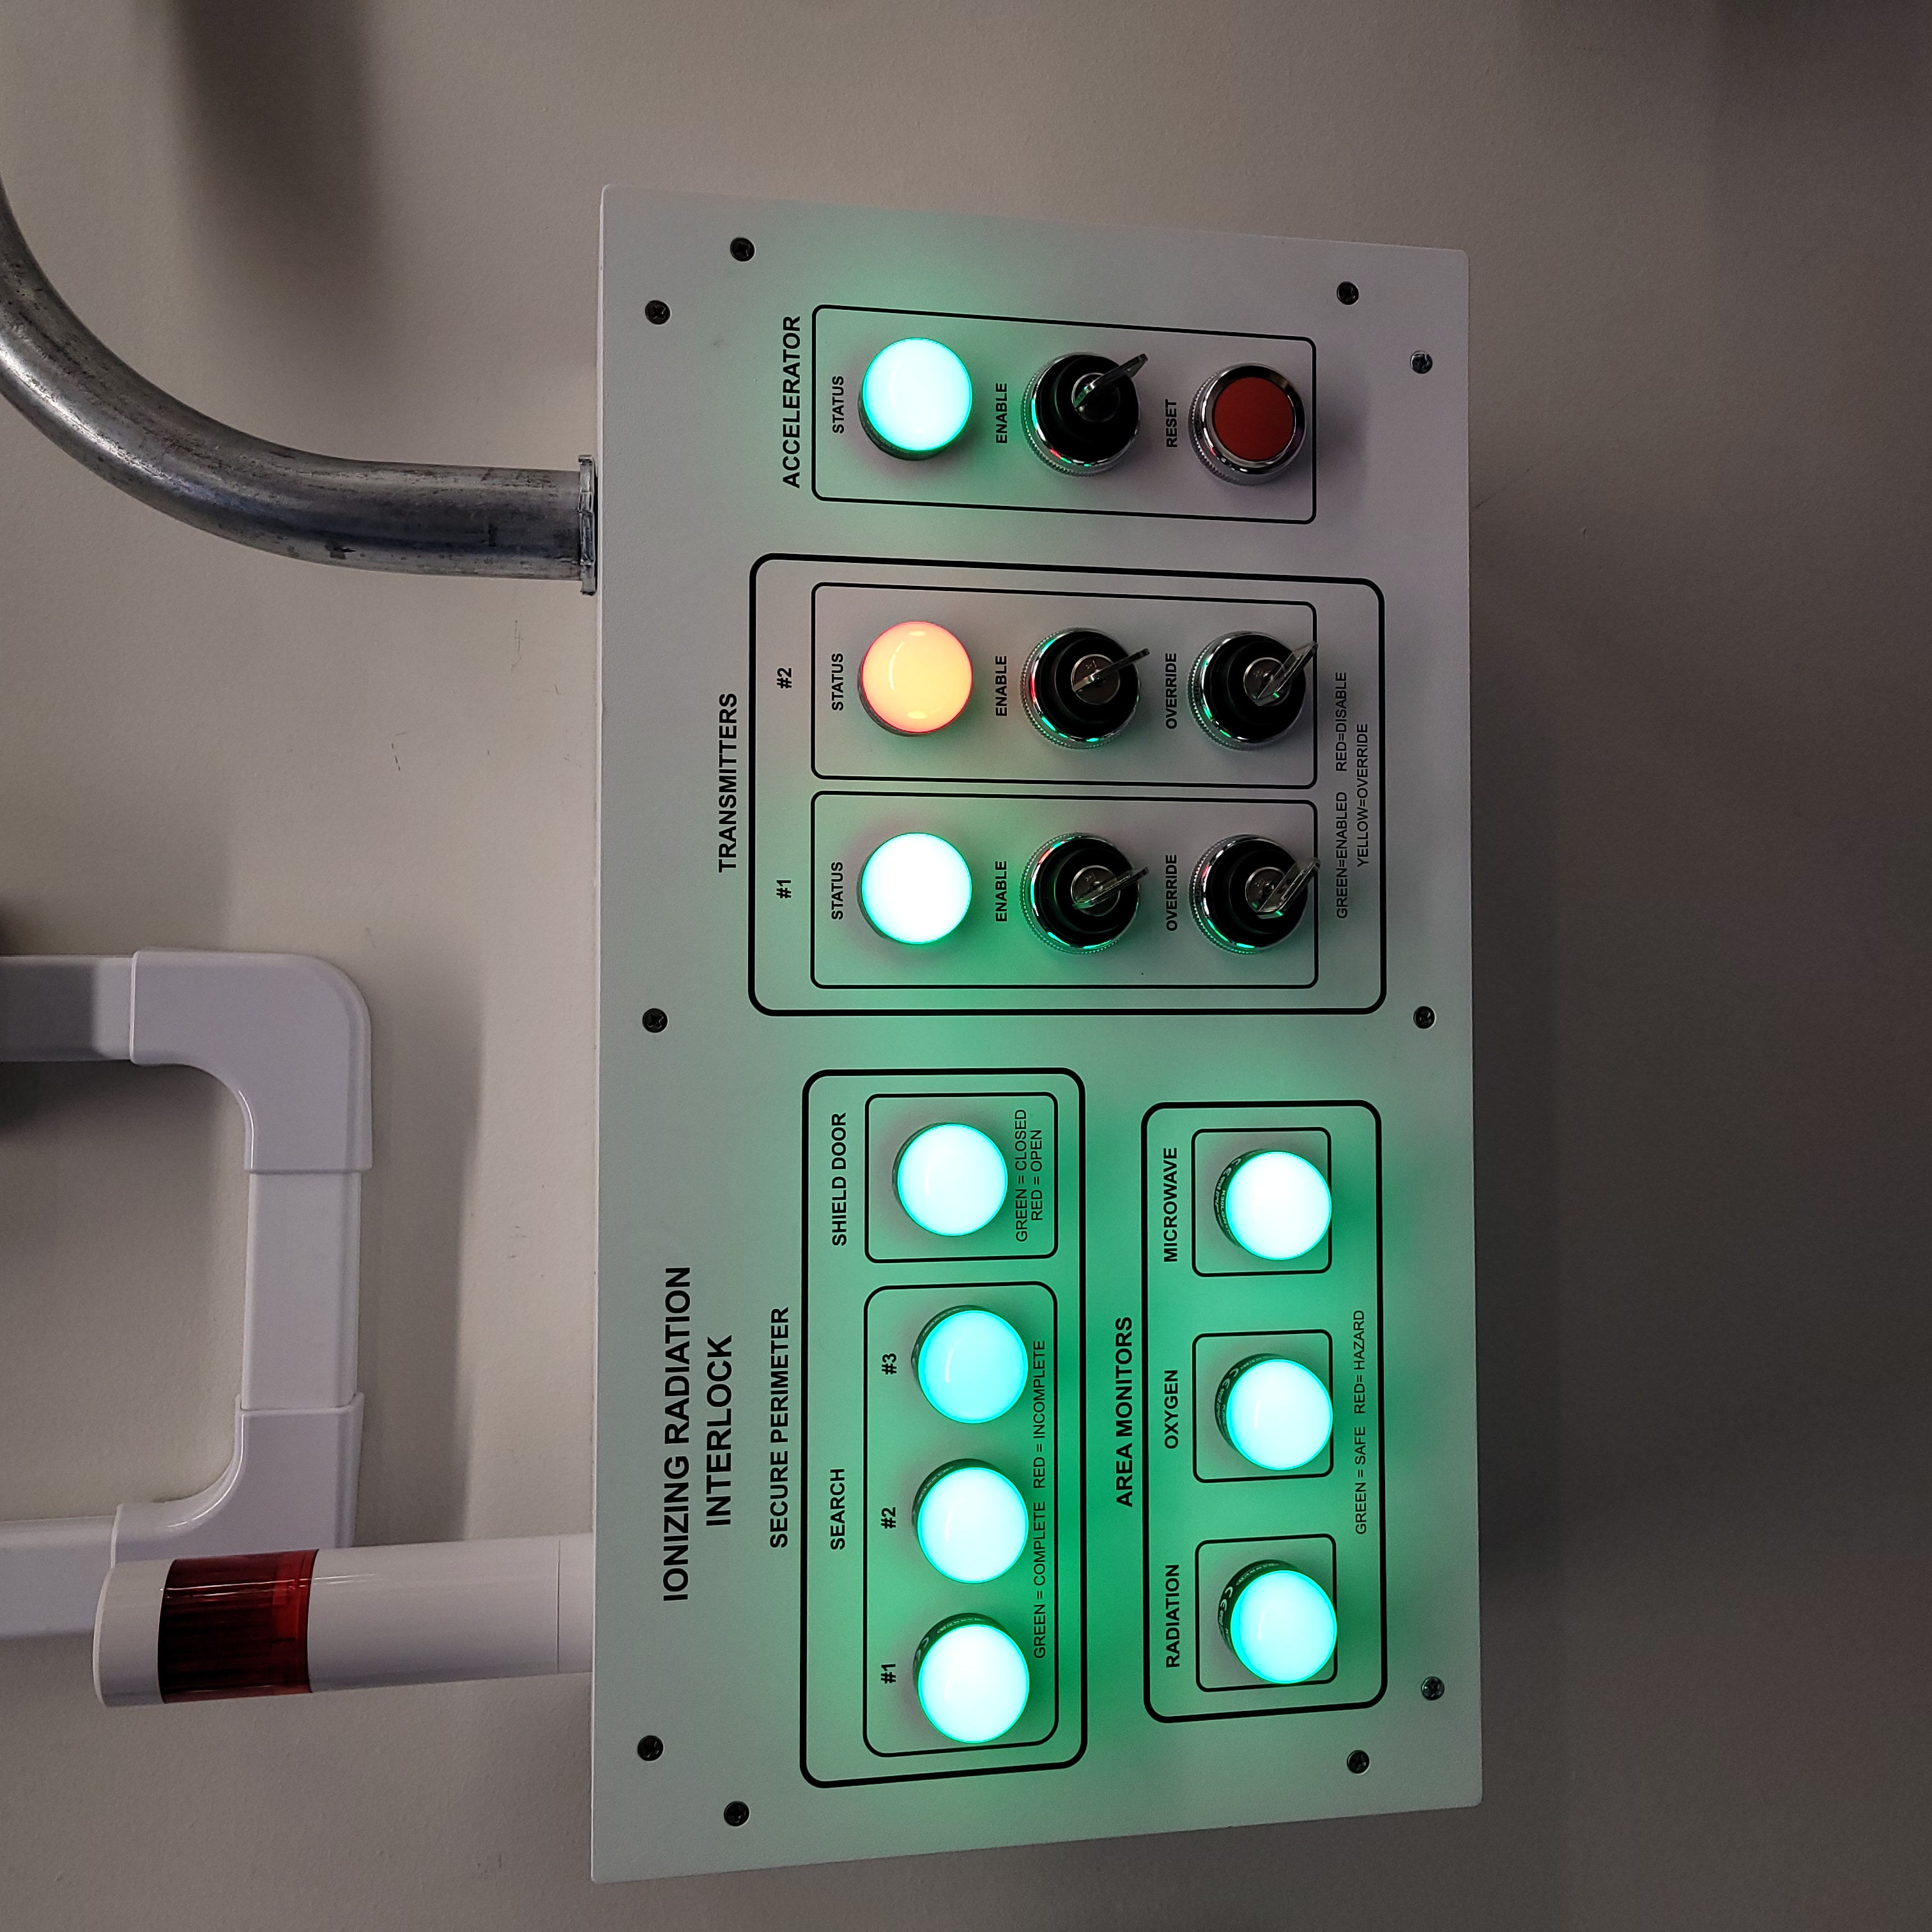
All SECURE PERIMETER lamps are red.
All AREA MONITOR lamps are green.
TRANSMITTERS and ACCELERATOR lamps are red.
VIEWMARQ in Vault-1 Control displays LASER SAFE.
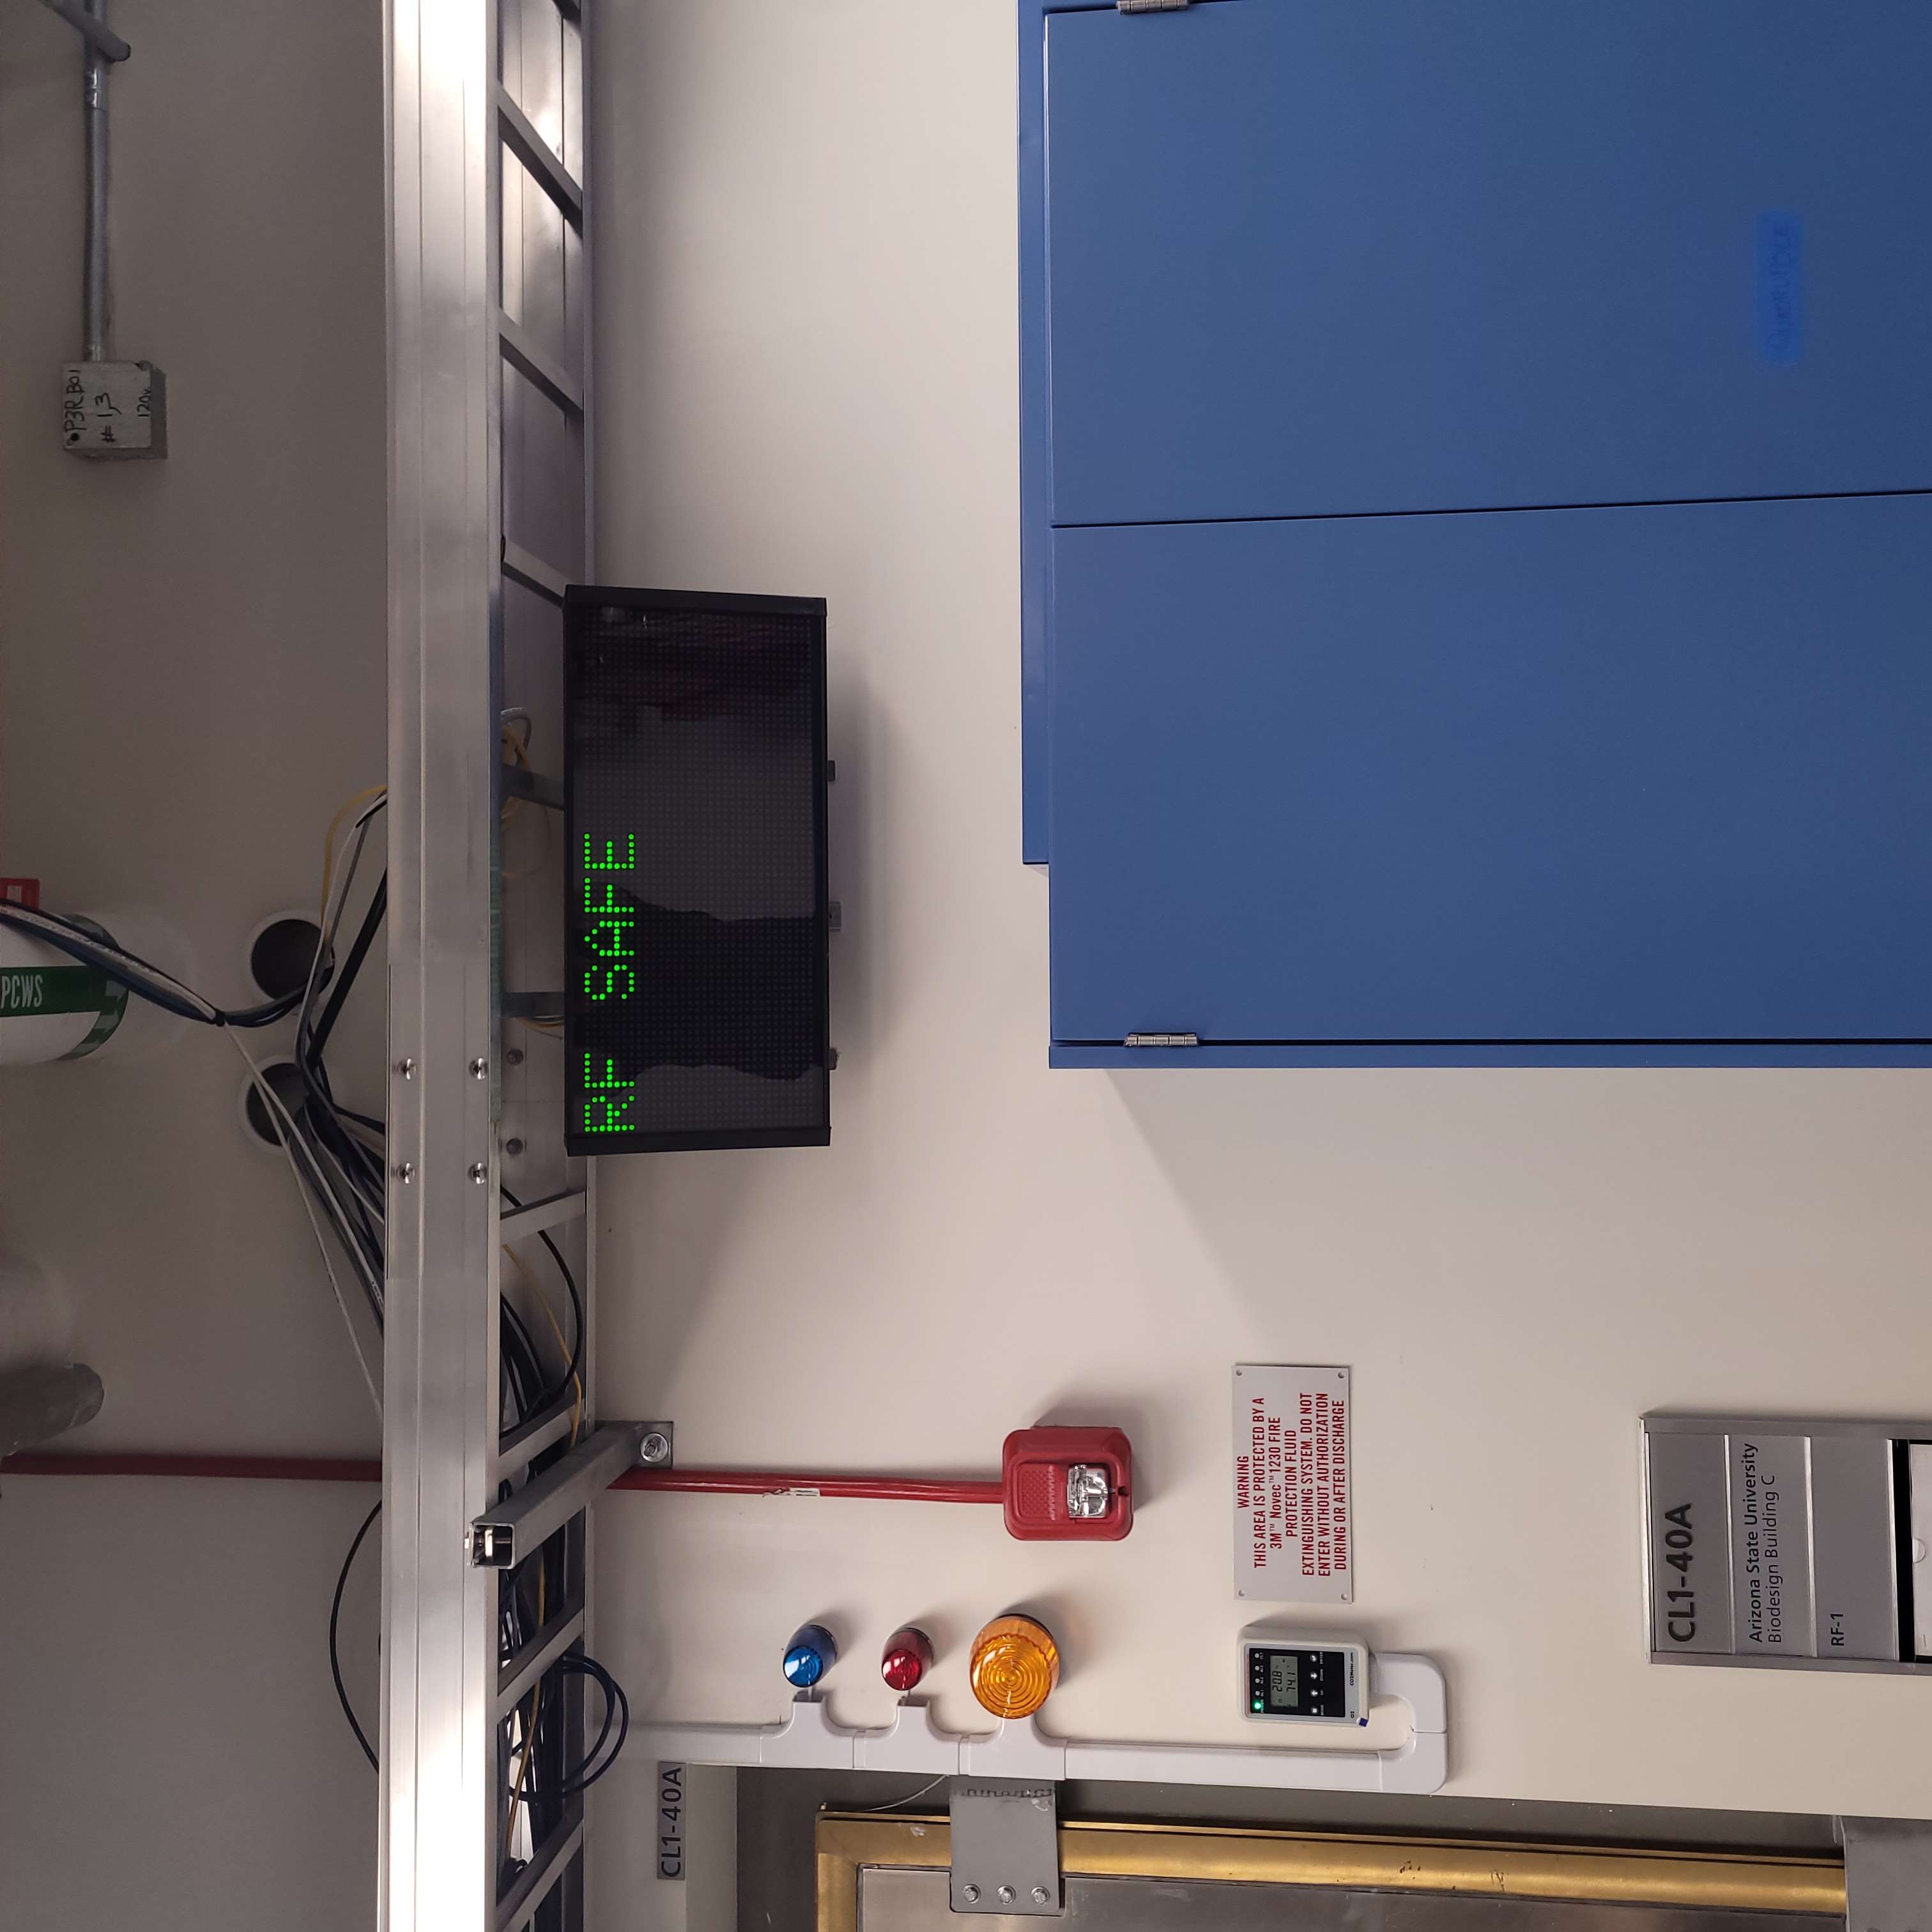
VIEWMARQ in Accelerator Lab displays RF SAFE.
All individual red, blue, and orange beacons are off.
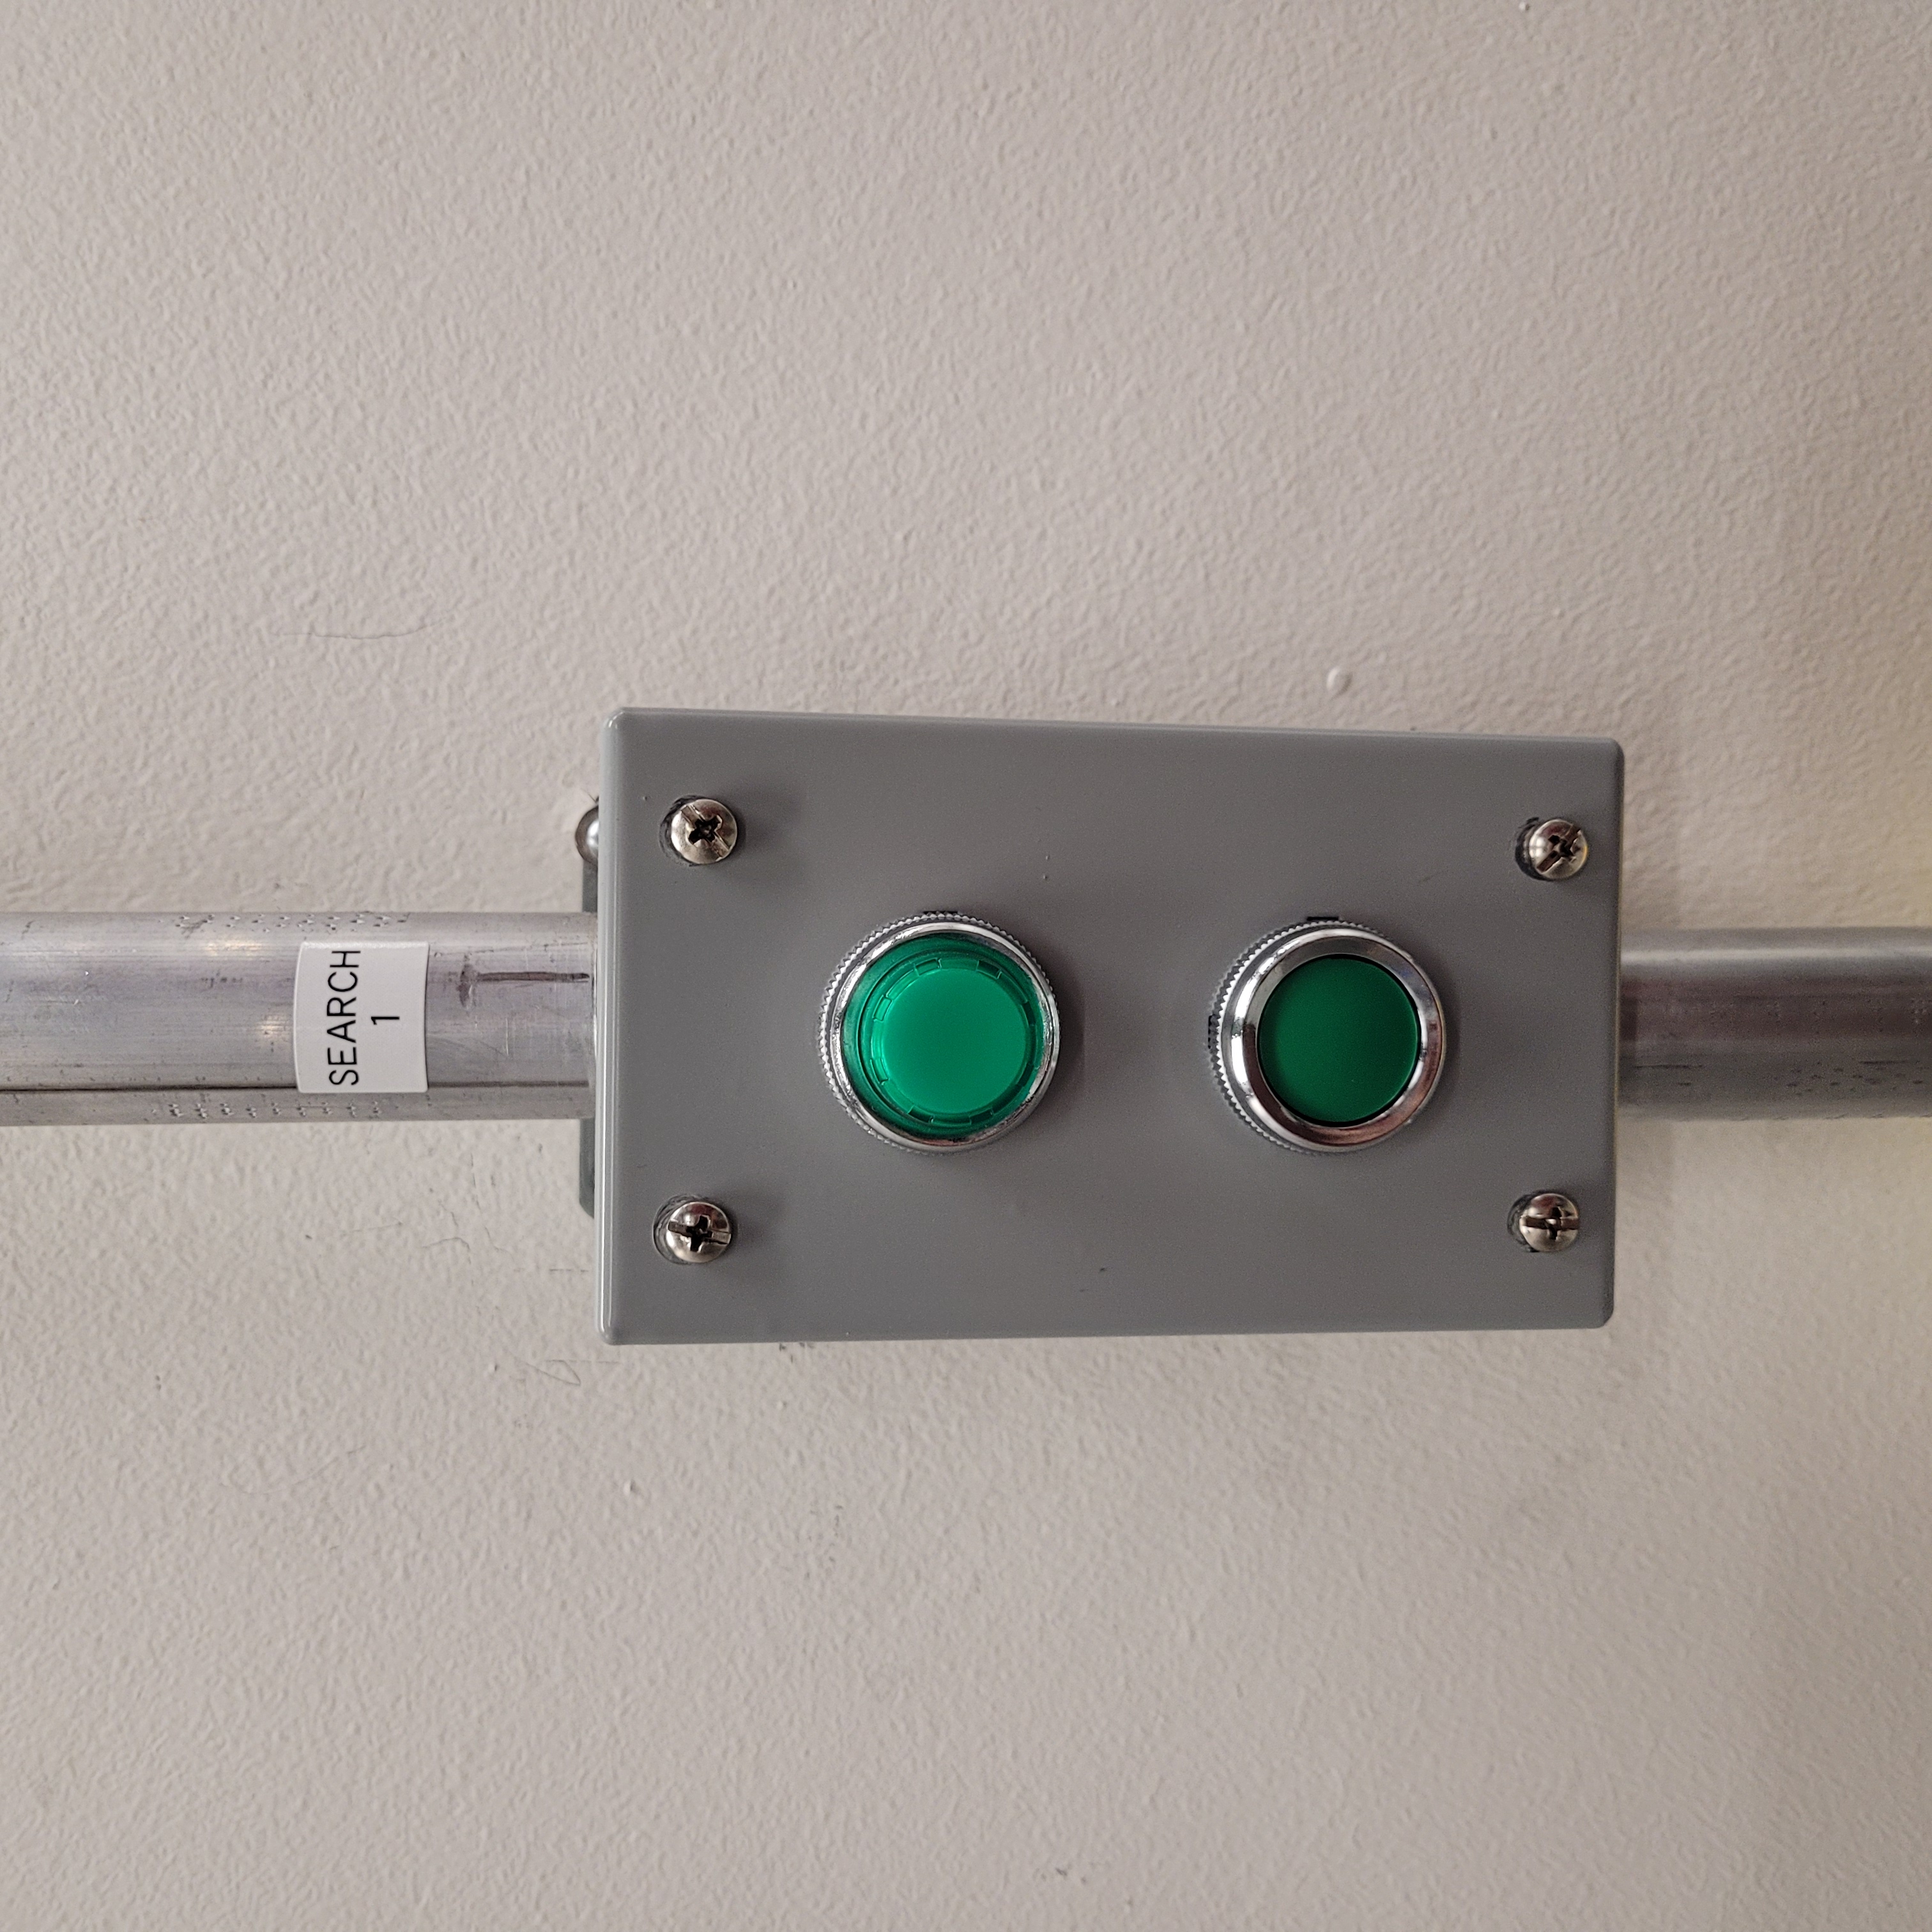
Search buttons LEDs are off in Vault-1.
Button 1
Button 2
Button 3
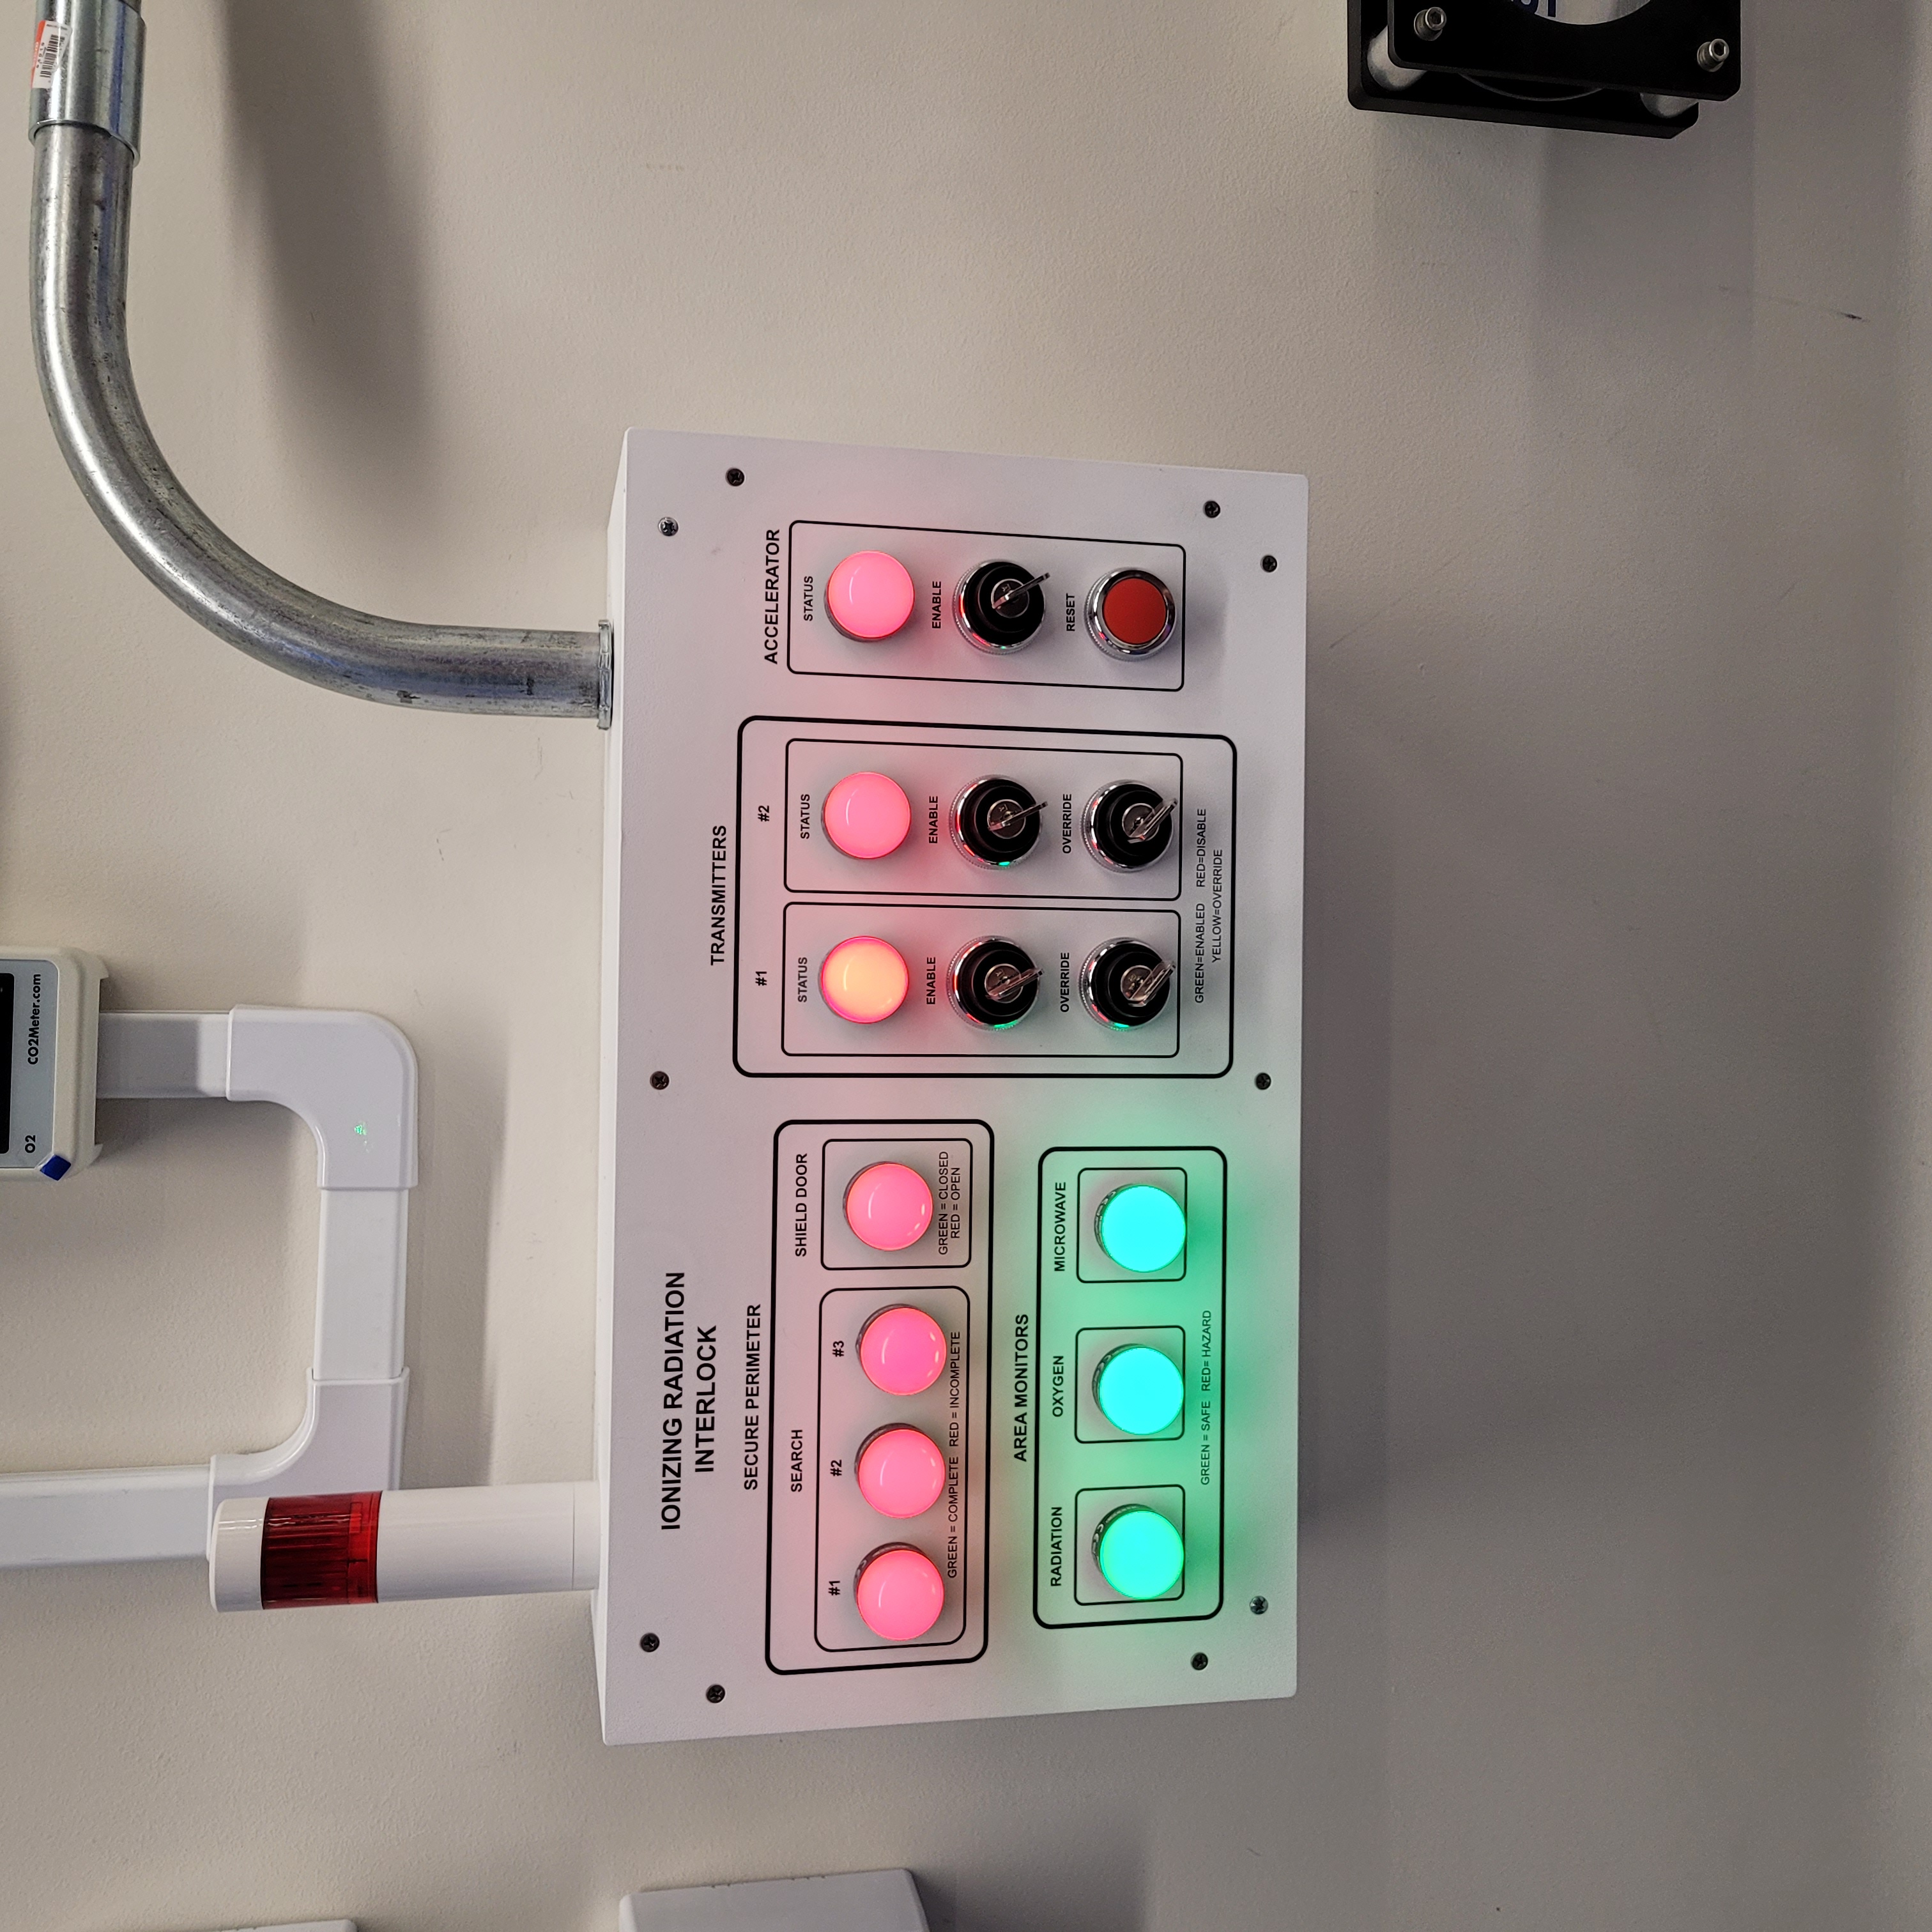
Figure 1: This is the Vault-1 Control IONIZING RADIATION INTERLOCK protocase in a disarmed, unsecured, safe state.

|
|
Vault-1 Control VIEWMARQ display when the system is safe. ================================= |
Accelerator Lab VIEWMARQ display when the system is safe. ================================= |
Figure 2: These are the VIEWMARQ displays in Vault-1 Control and Accelerator Lab when the system is safe.
|
|
Vault-1 search button off. ============================================================ |
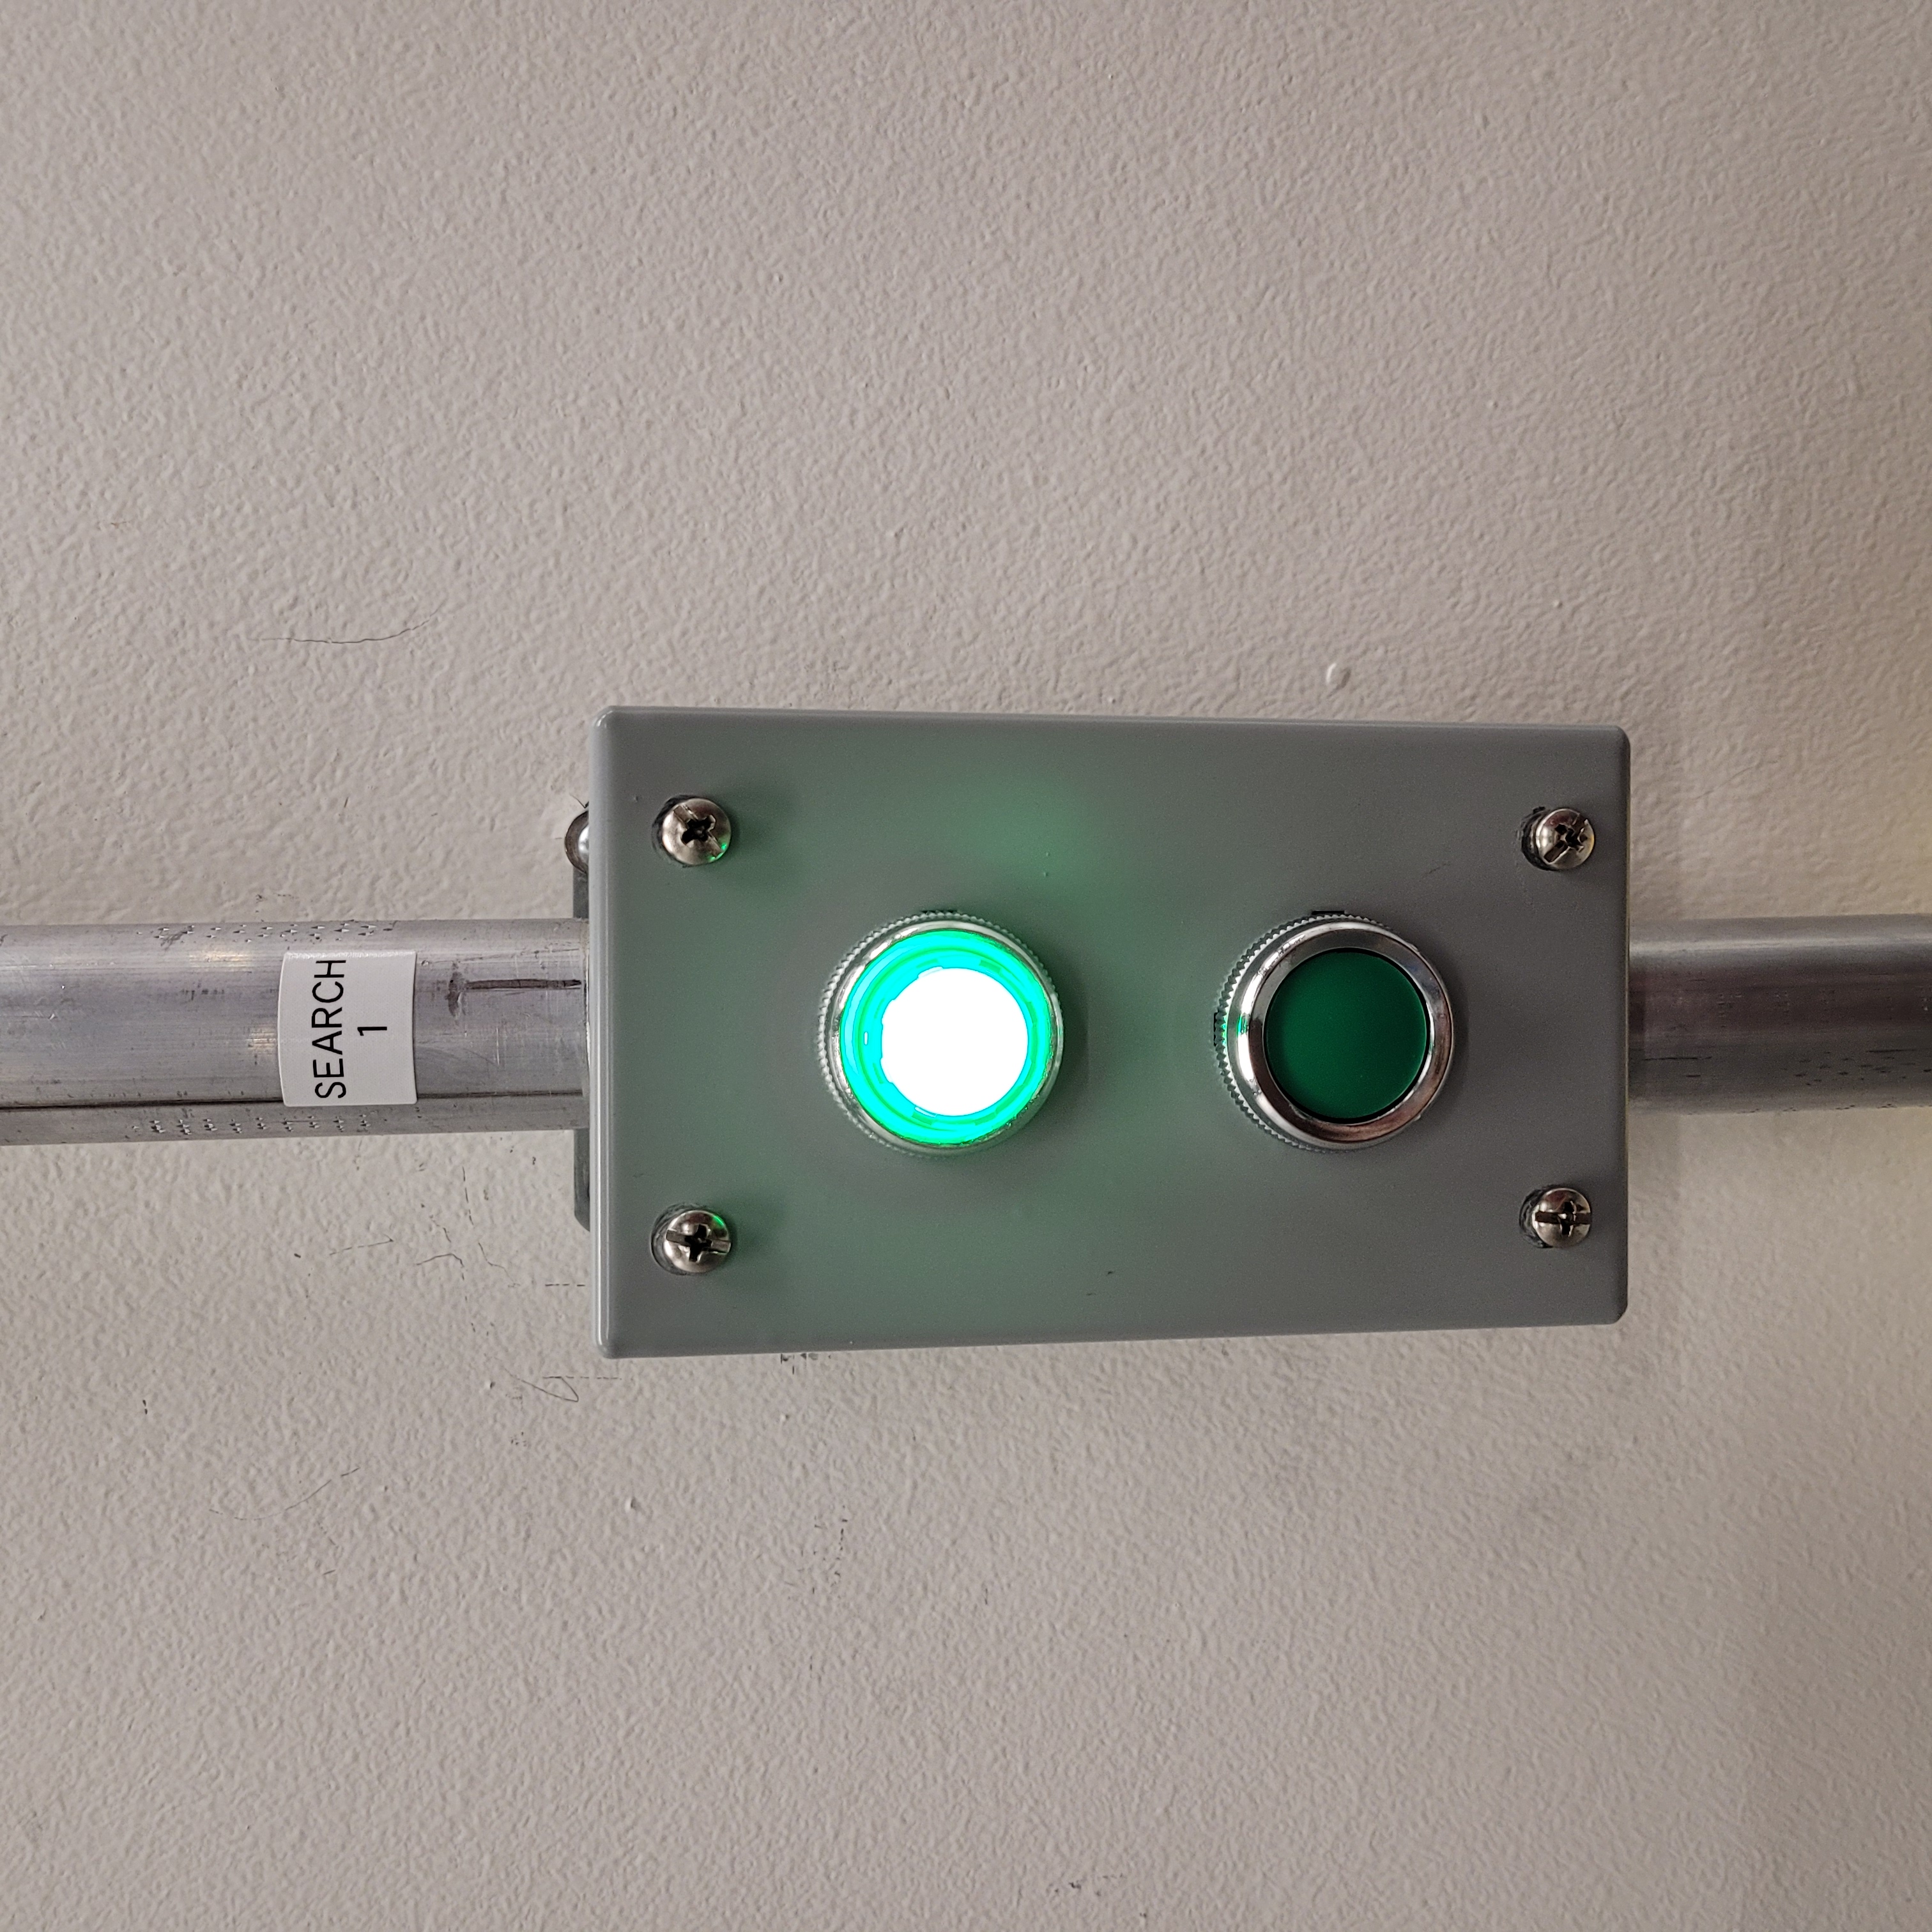
Vault-1 search button on. ============================================================= |
Figure 3: This is an example of the Vault-1 search buttons in both states.
Testing Unsecure Vault-1 Conditions
When Vault-1 is in a non-secure state, neither the accelerator nor the transmitters should be able to be armed.
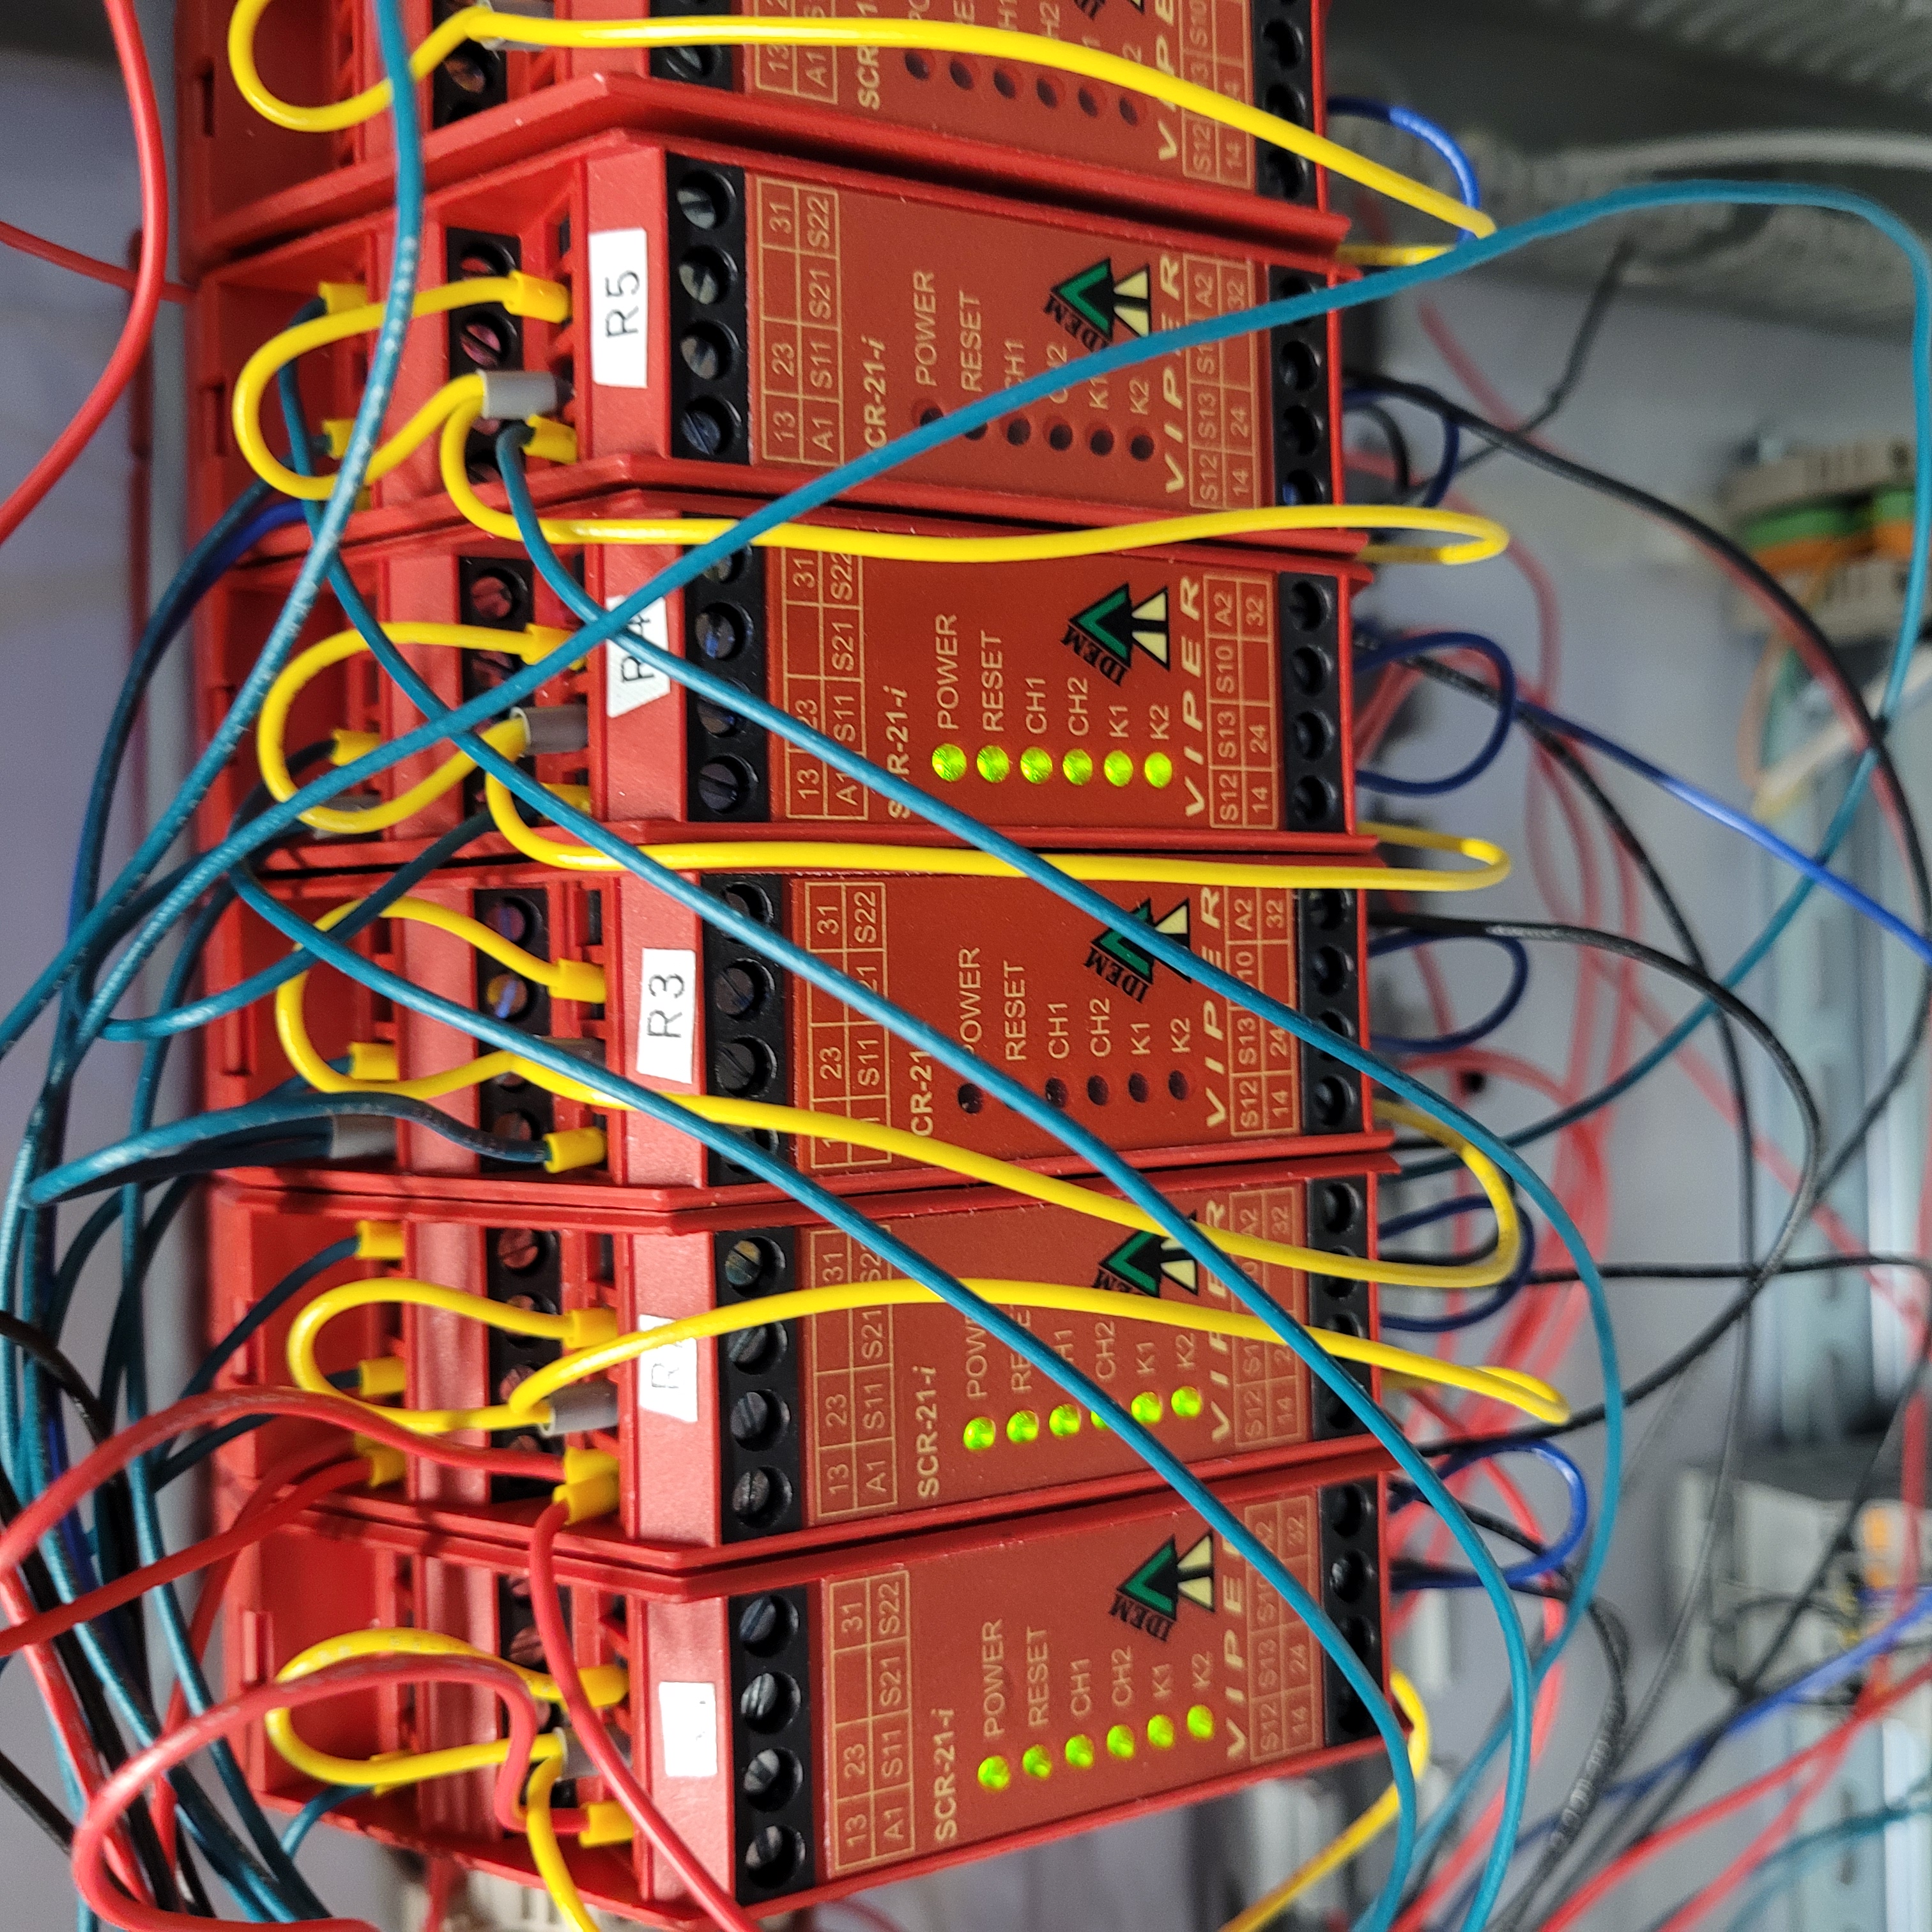
Relay R1 in Vault-1 Control west panel is off.
Switch the ENABLE key for the accelerator. The accelerator lamp remains red.
Relay R2 in Vault-1 Control west panel remains off
Switch the ENABLE keys for transmitters 1 and 2. Both transmitter lamps remain red.
Relays R3, R5 for transmitter 1 and R4, R6 for transmitter 2 in Vault-1 Control west panel remain off.
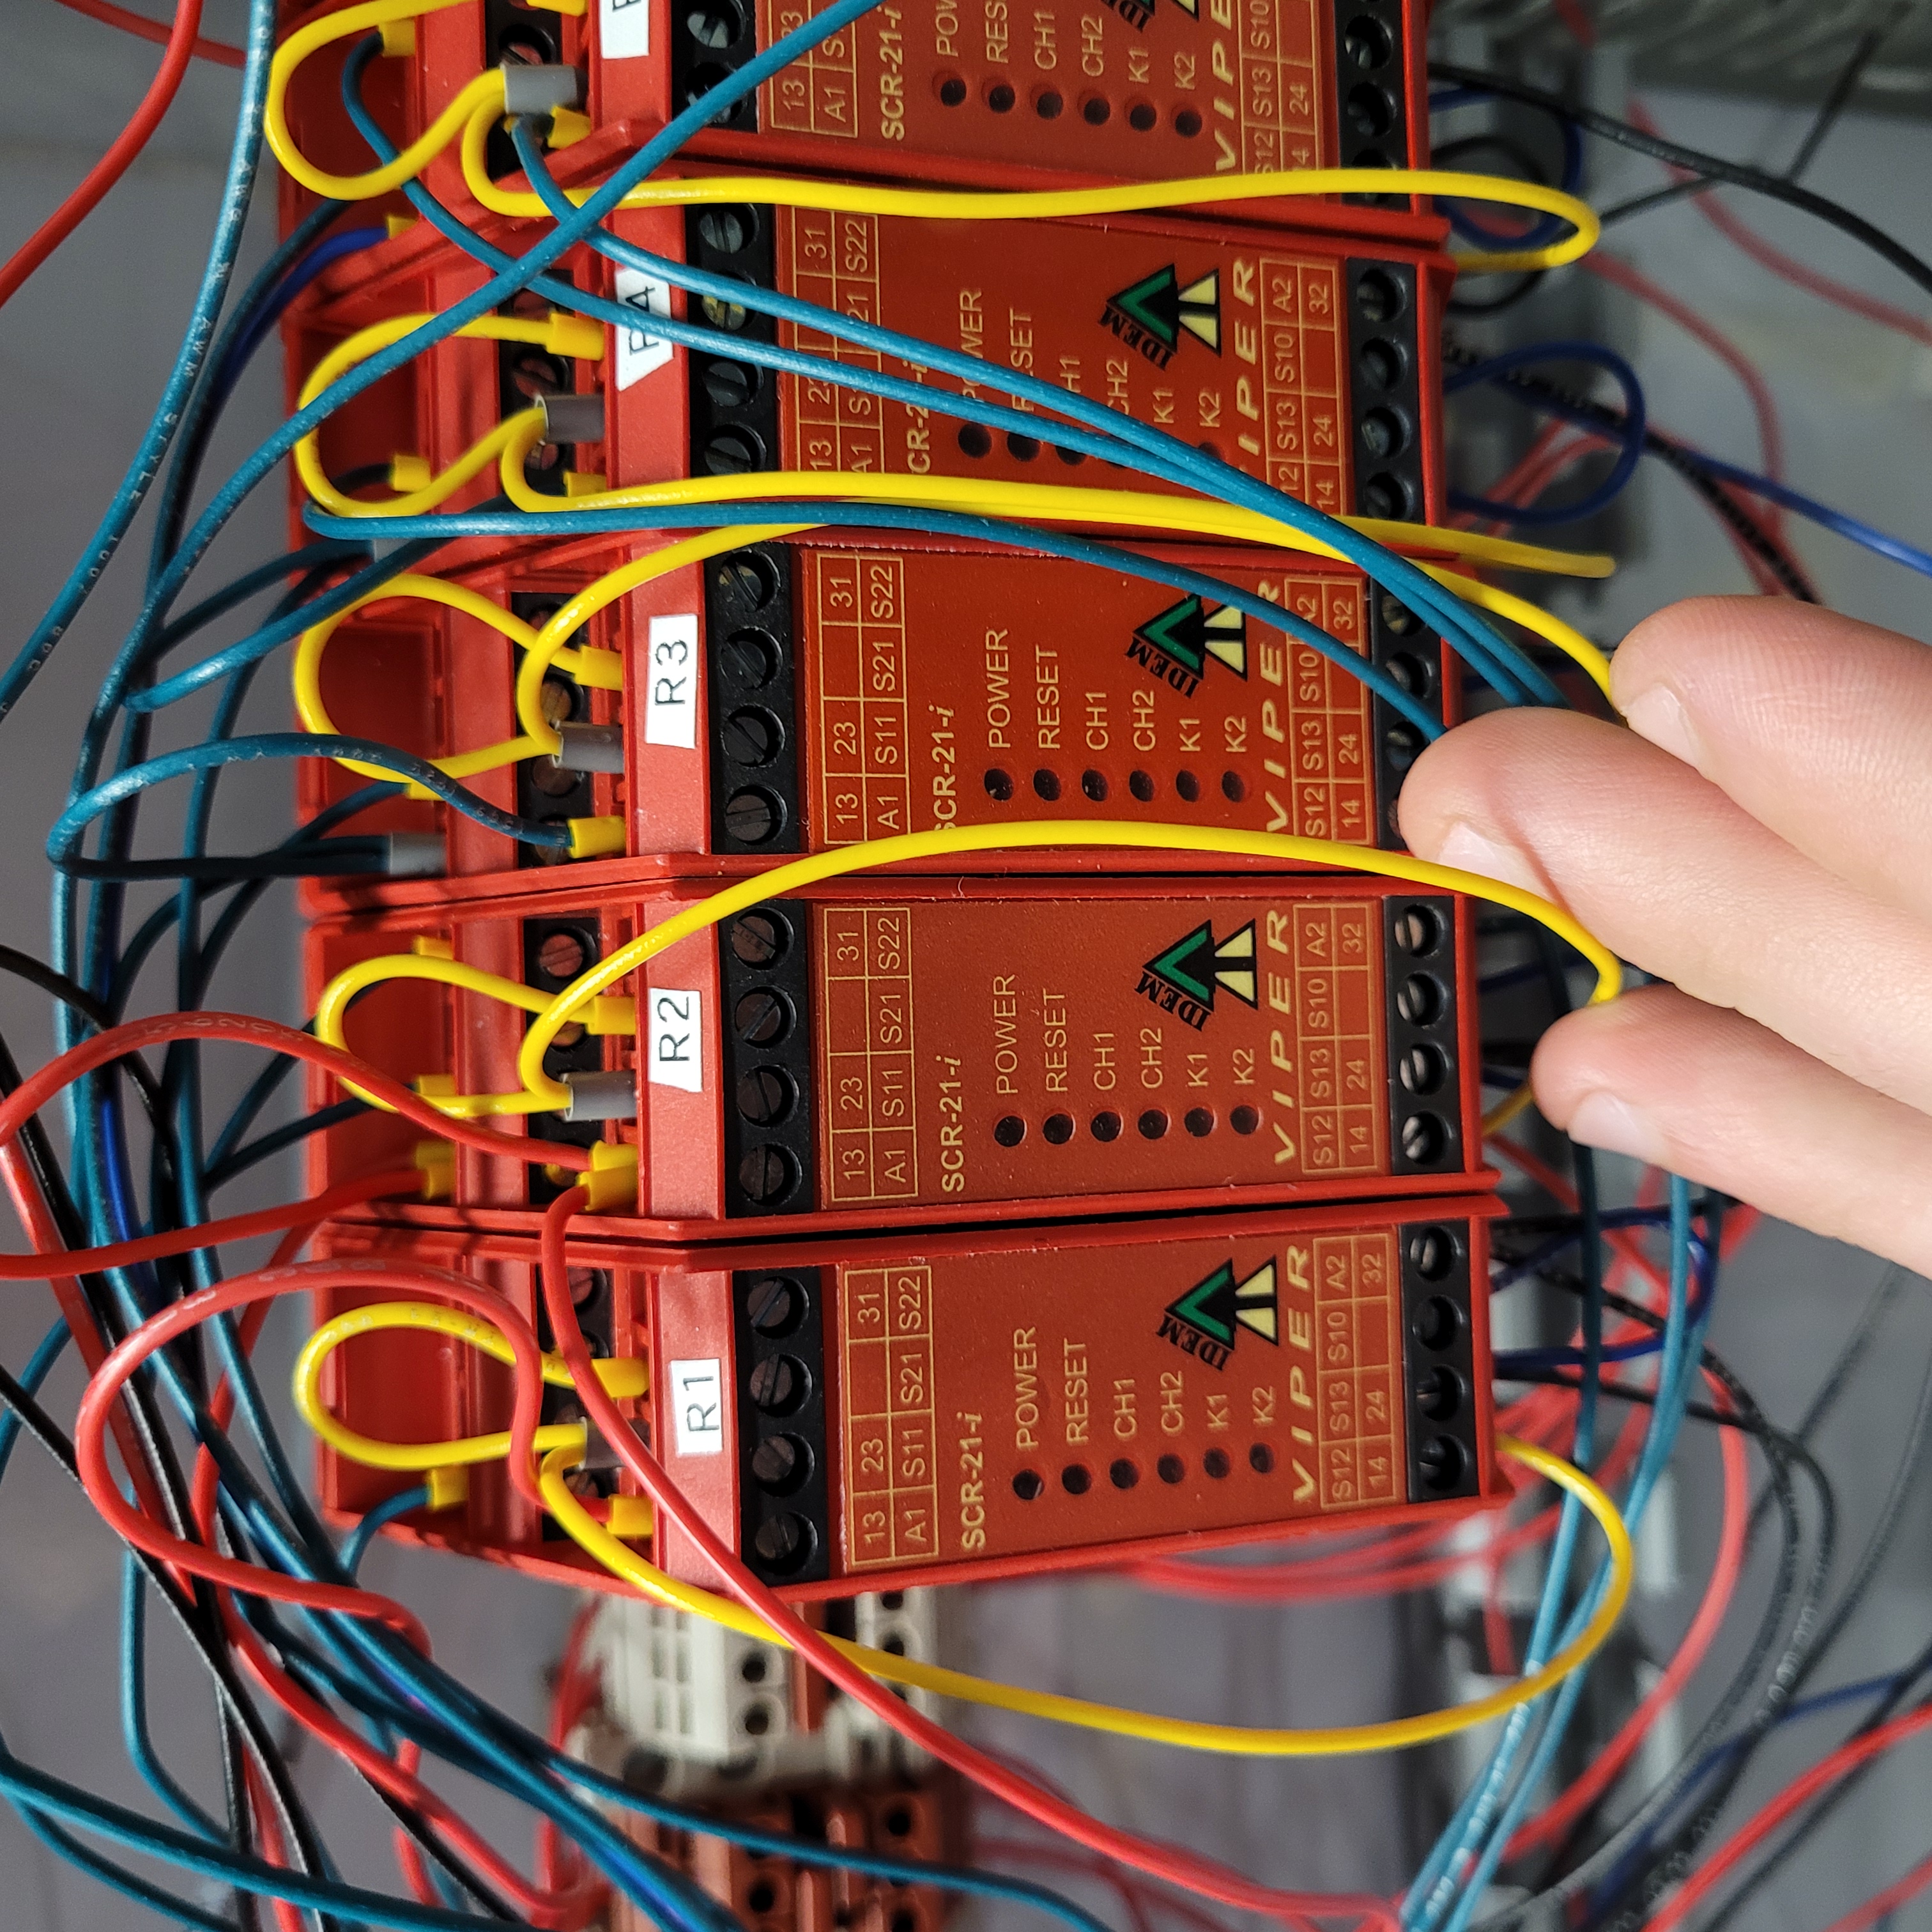
Figure 4: Vault-1 Control west panel relays for arming the accelerator and transmitters.
Searching Procedure
Push search buttons three and two and verify they will not activate without going in the correct sequence.
Button 3
Button 2
Go through the vault and in sequence, click the three search buttons. The LED on the search button should turn on and the corresponding lamp on the Vault-1 Control IONIZING RADIATION INTERLOCK protocase should turn green.
Button 1
Button 2
Button 3
When the third search button is hit, a chime will start, and the LED on the chime will flash. The chime is located on the Vault-1 east wall.
Once all three search buttons have been hit in order, close the shield door. The shield door lamp on the Vault-1 Control IONIZING RADIATION INTERLOCK protocase will turn green once the mechanical door switches are fully actuated.
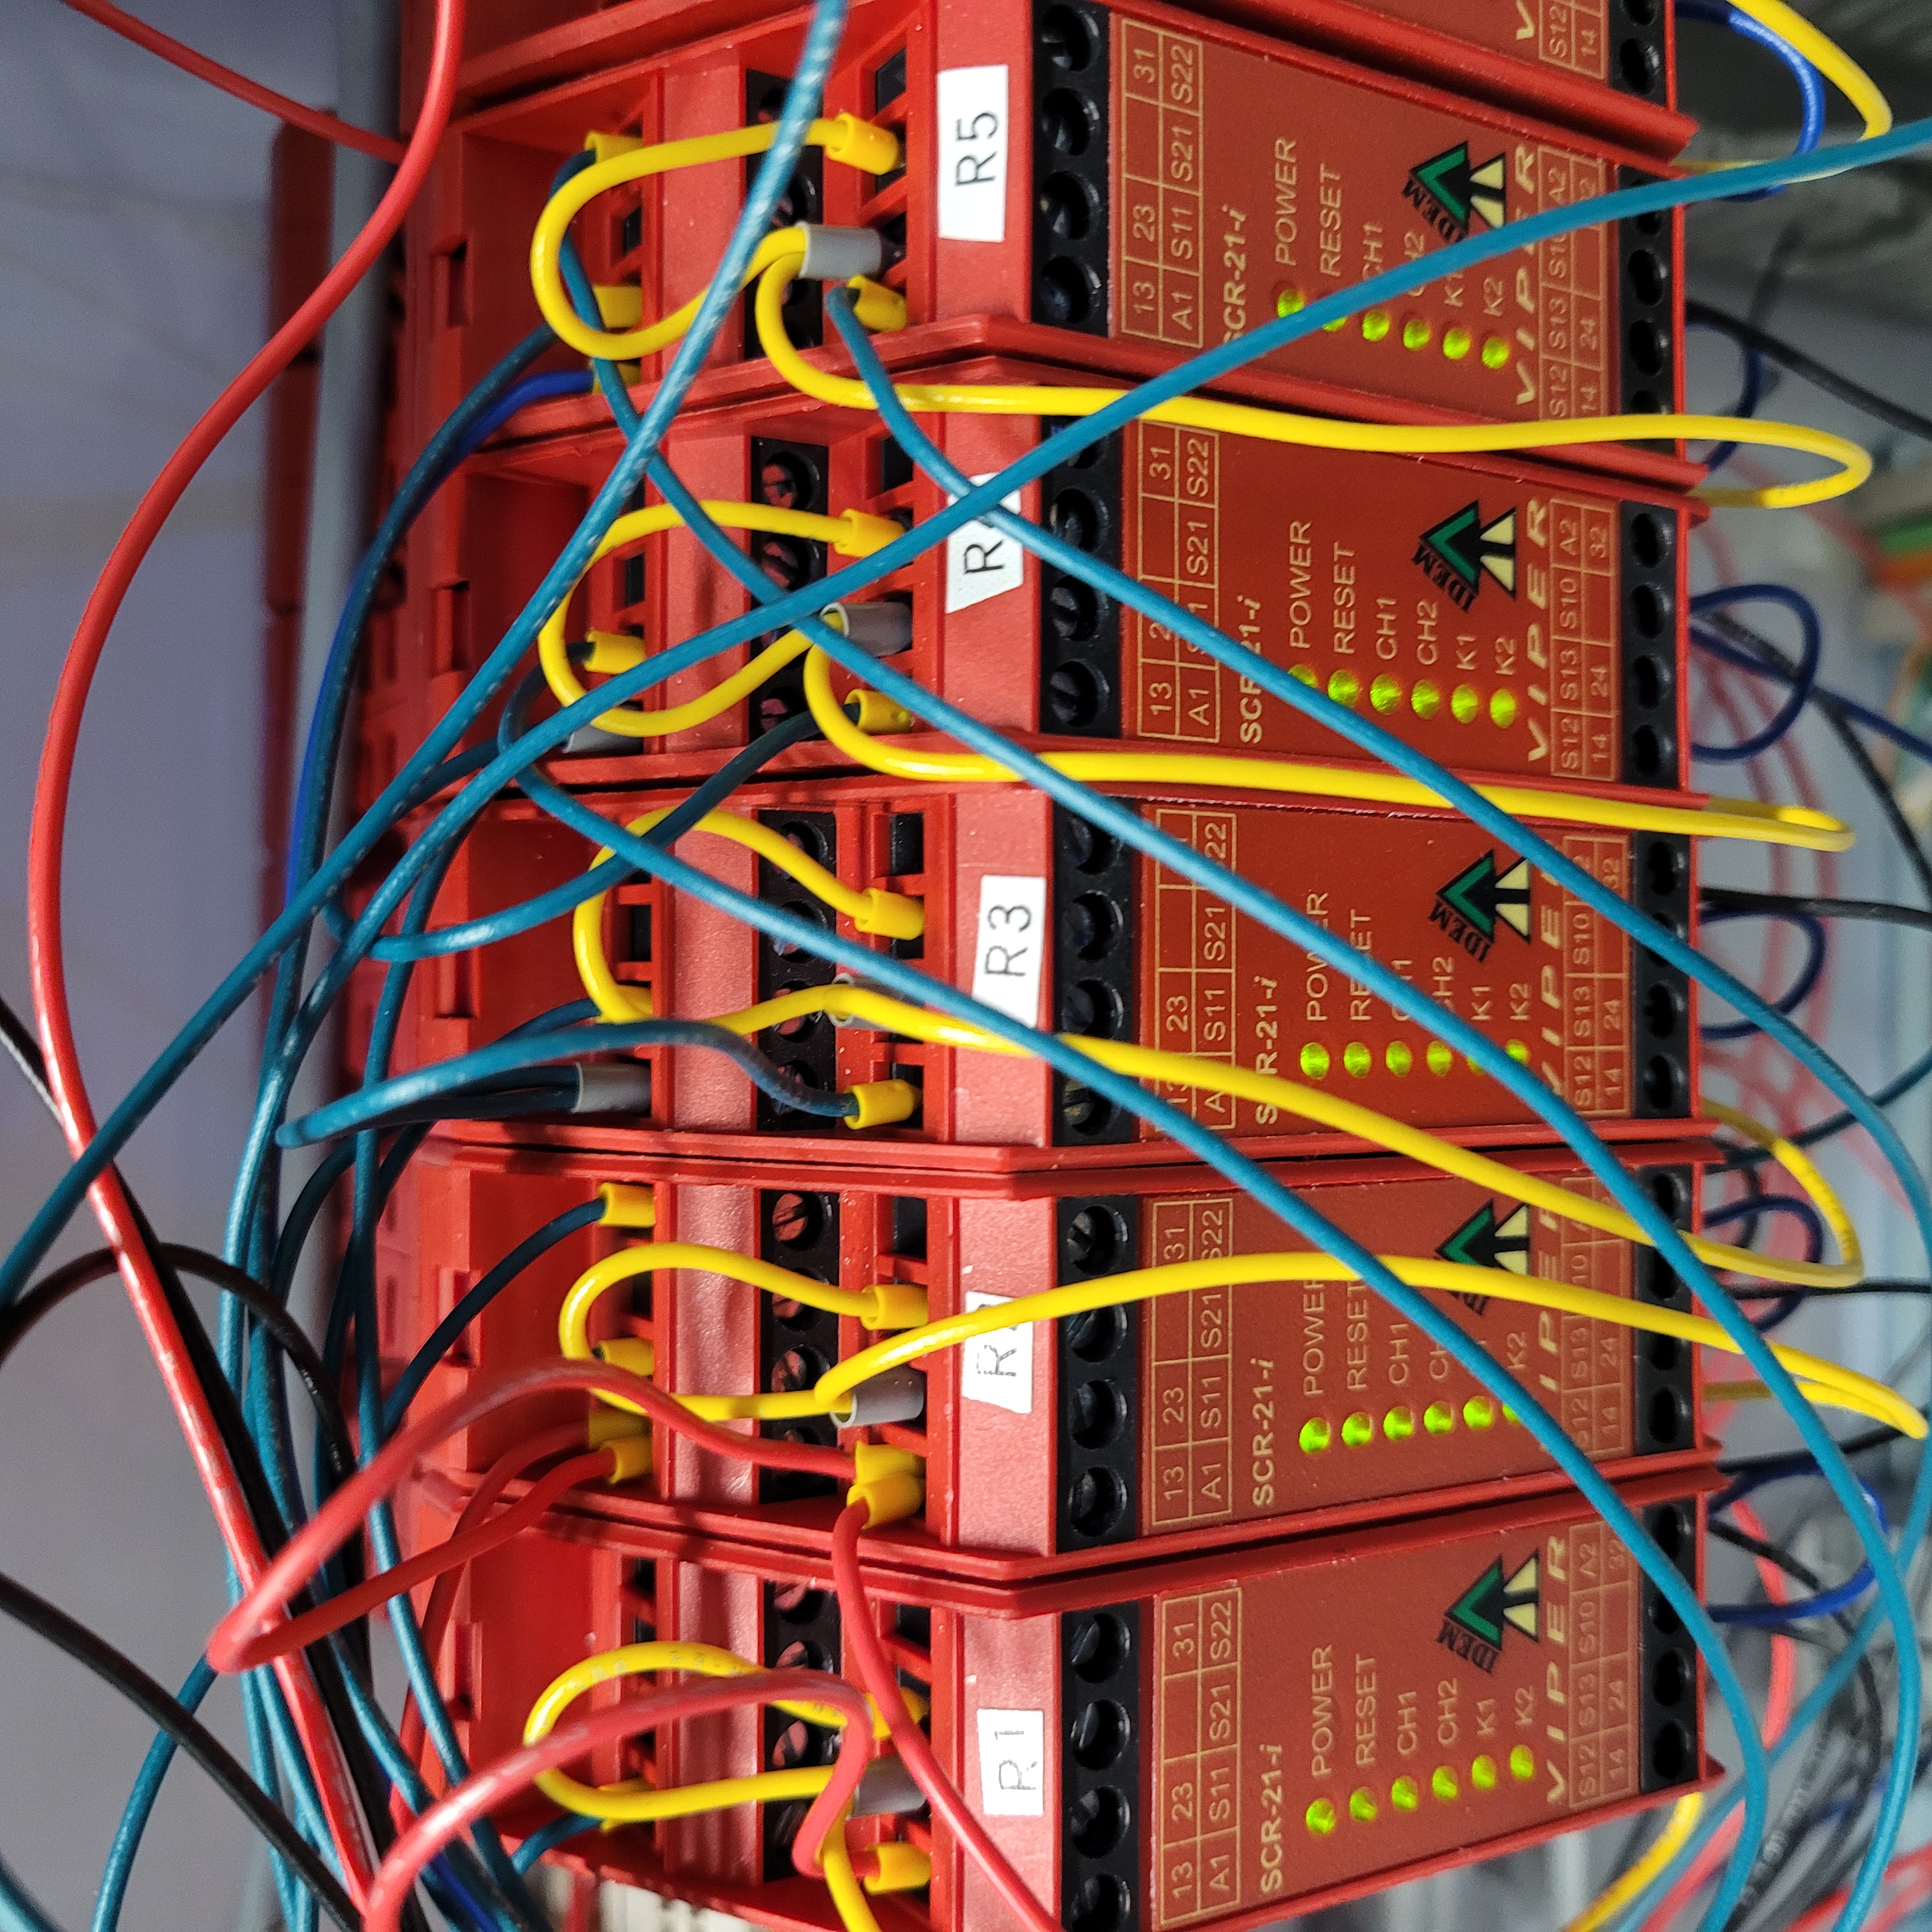
R1 in Vault-1 Control west panel turns on.

Figure 5: Vault-1 IONIZING RADIATION INTERLOCK protocase when Vault-1 is searched.
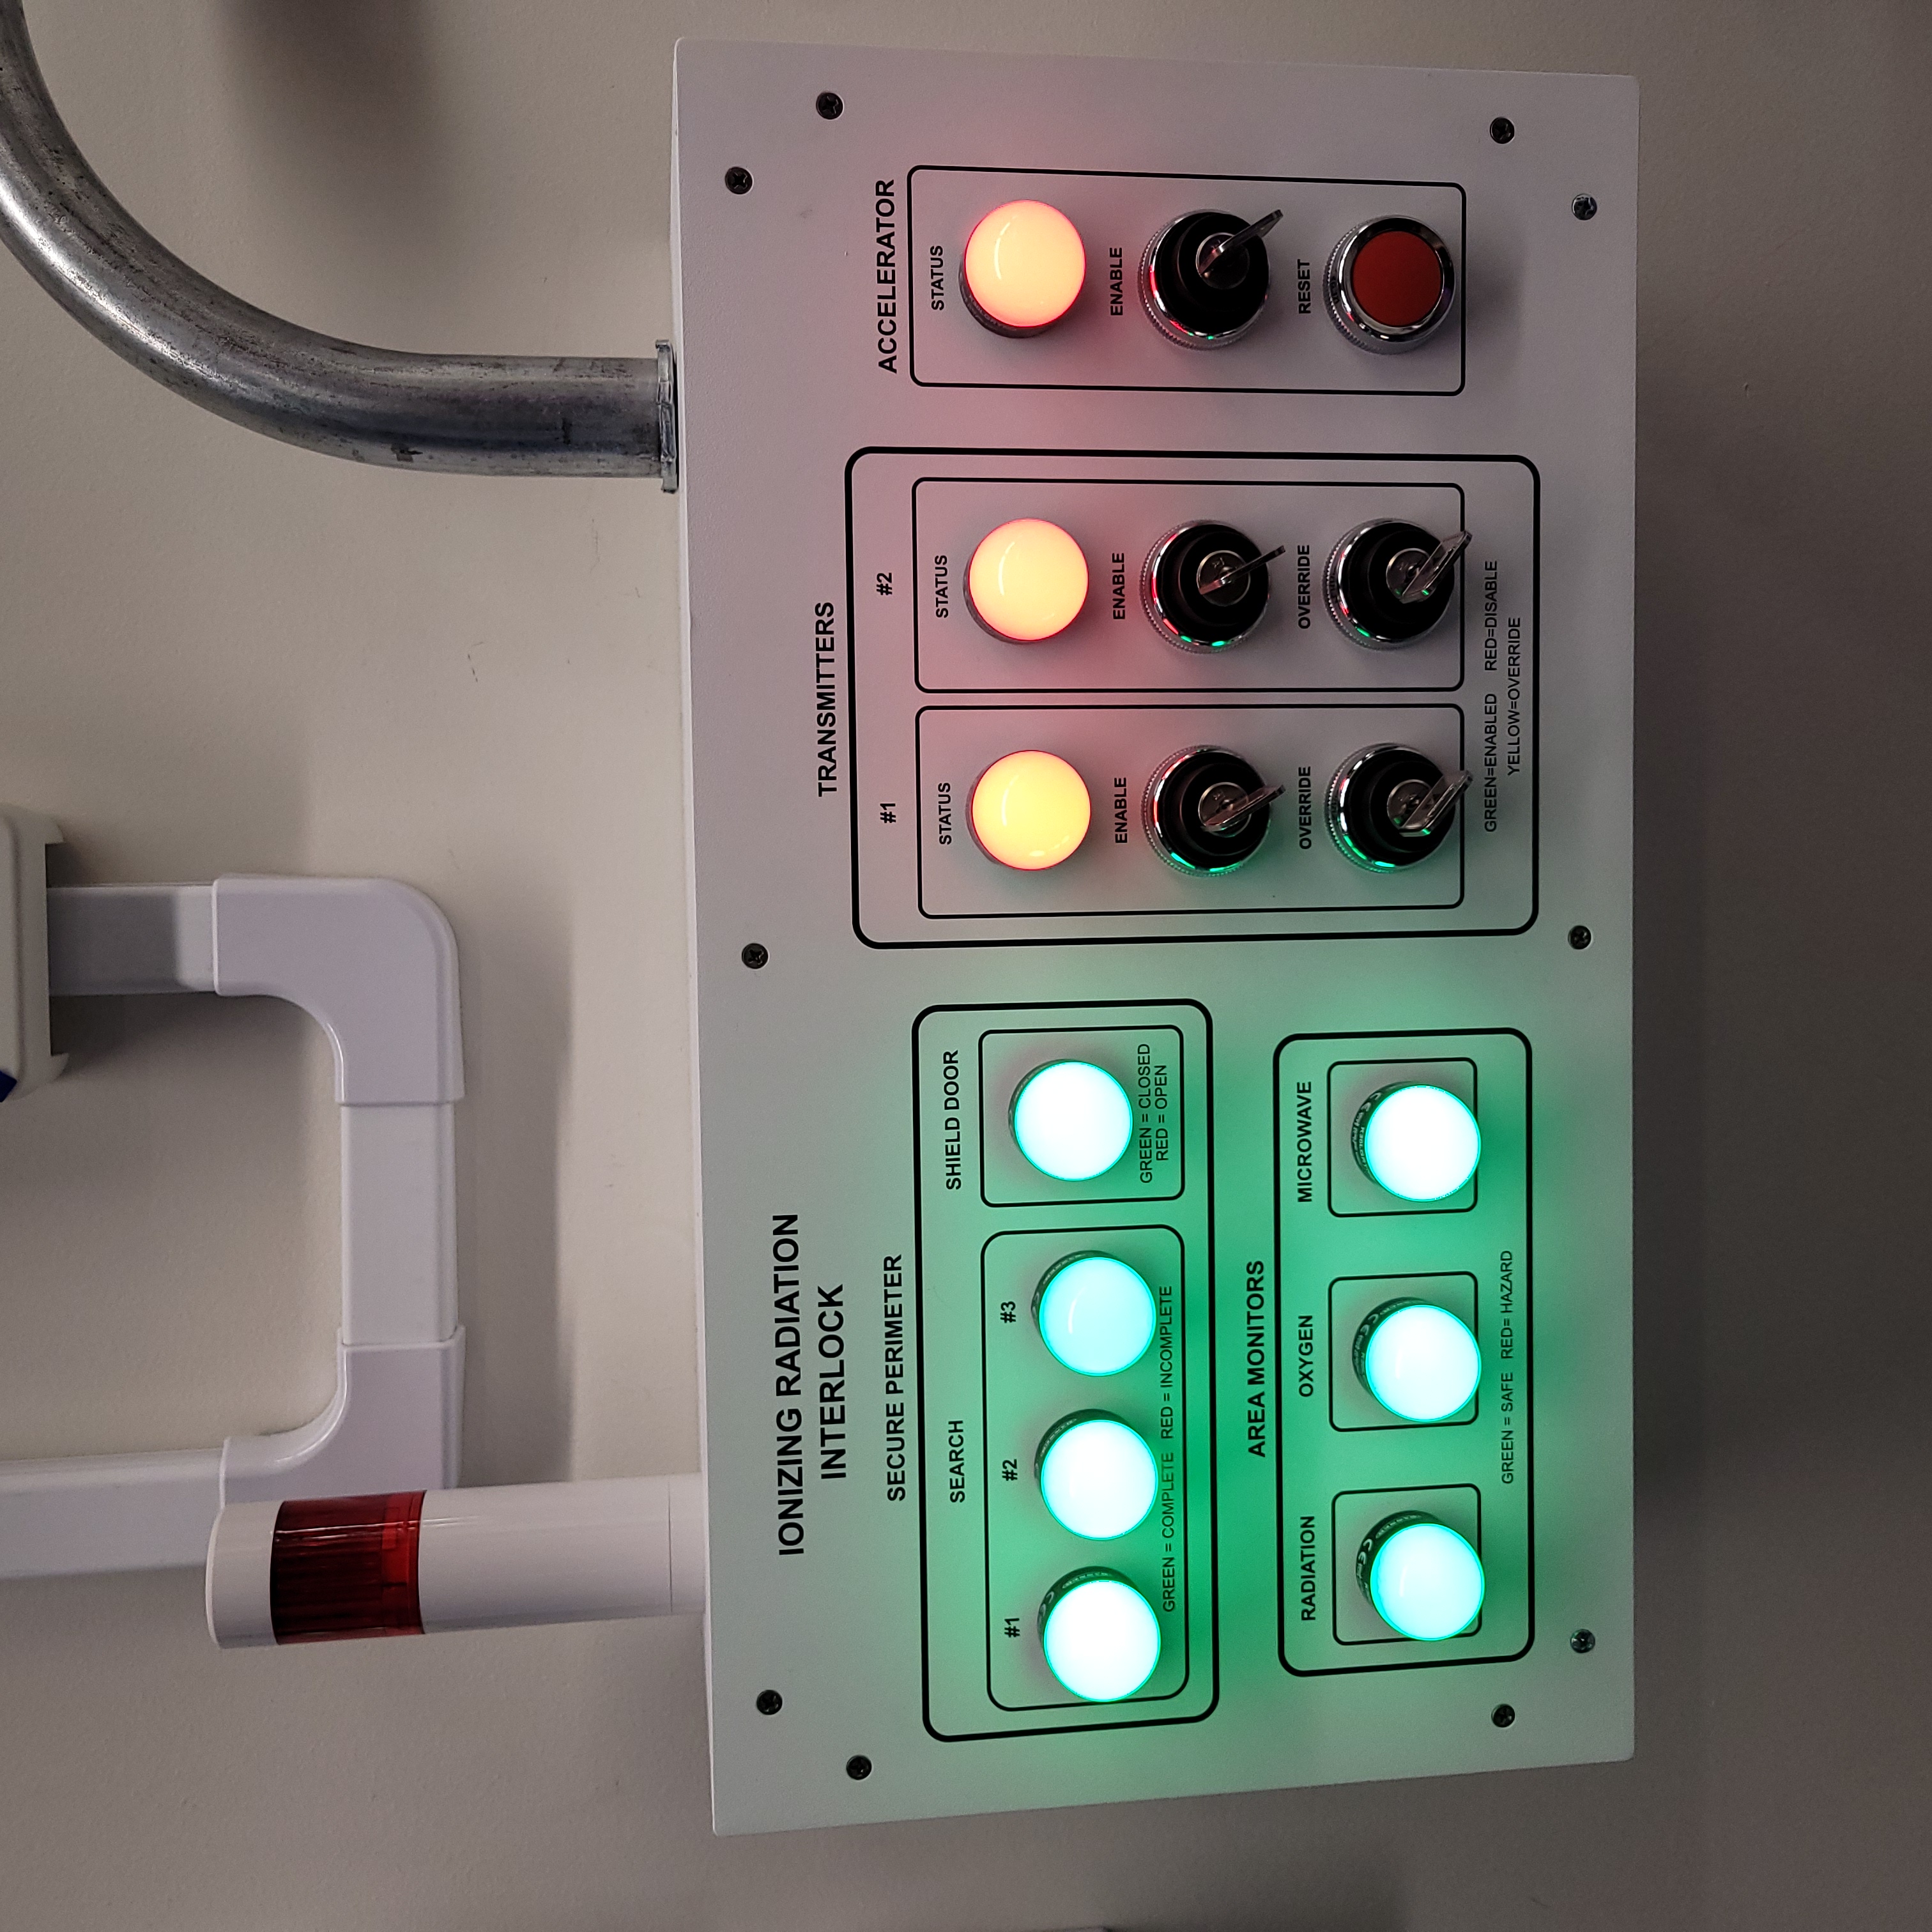
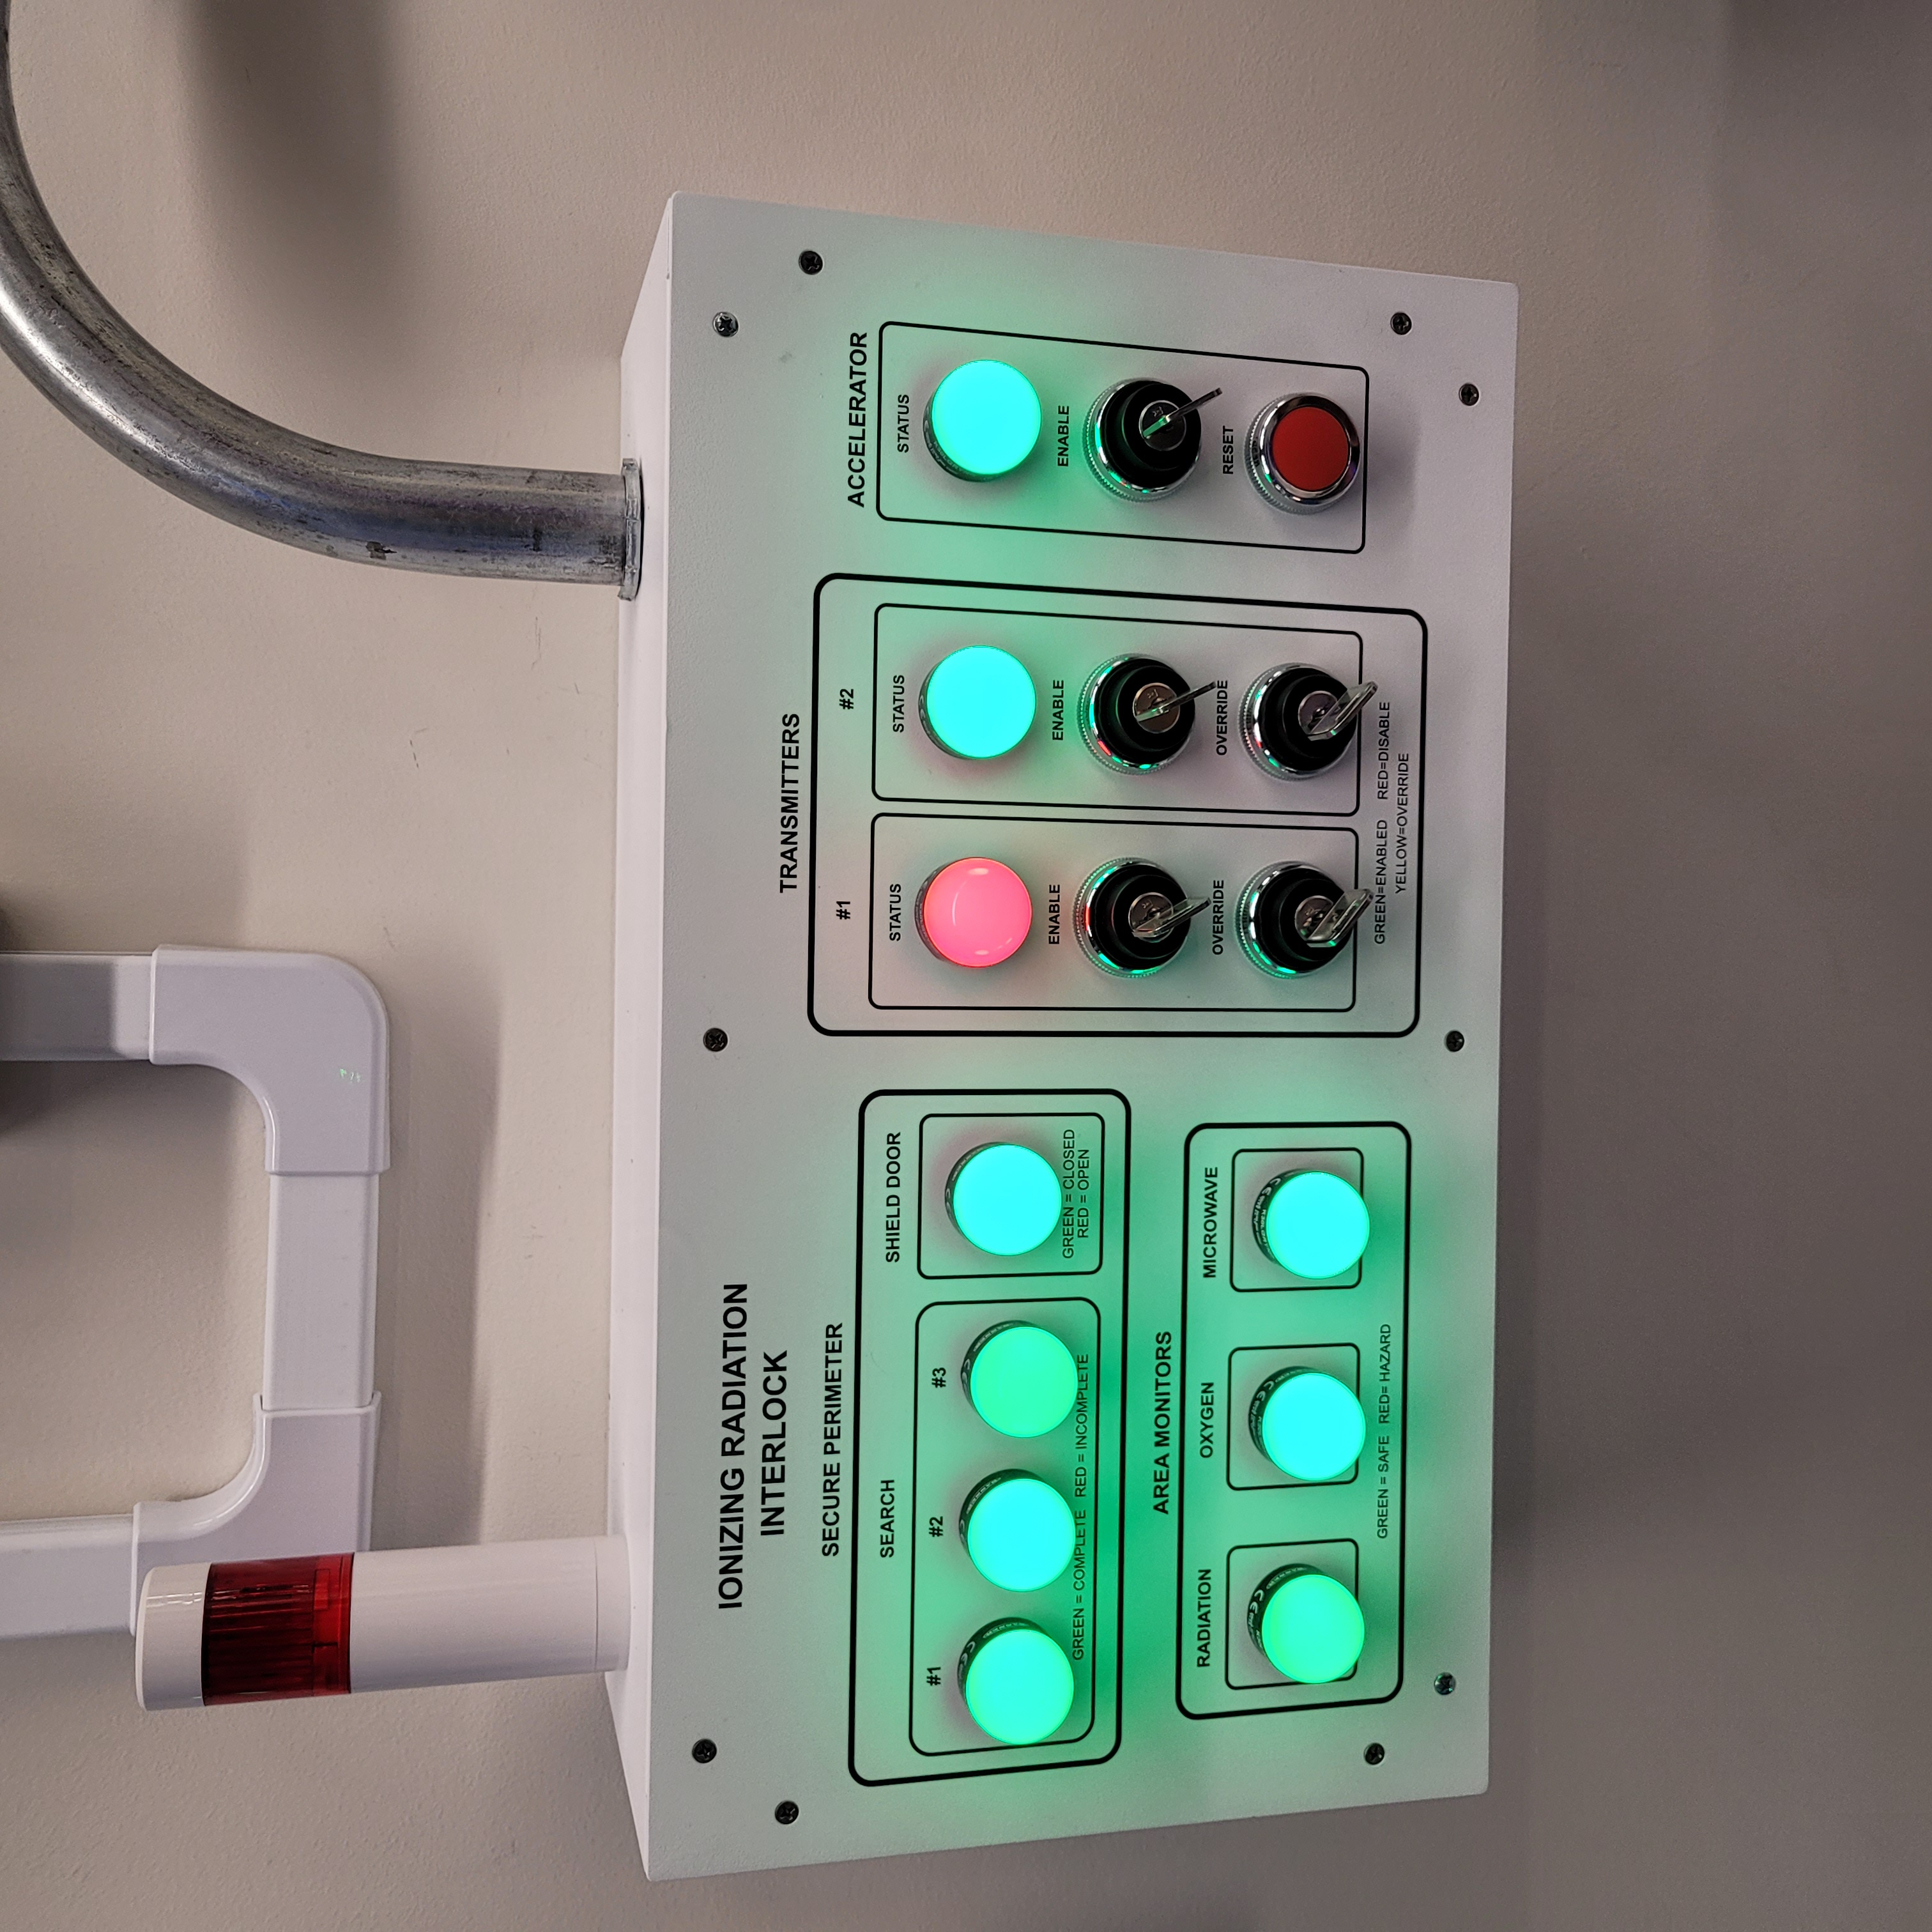
Figure 6: Vault-1 IONIZING RADIATION INTERLOCK protocase when the shield door is closed and Vault-1 is secured. Under this state the accelerator can now be armed.
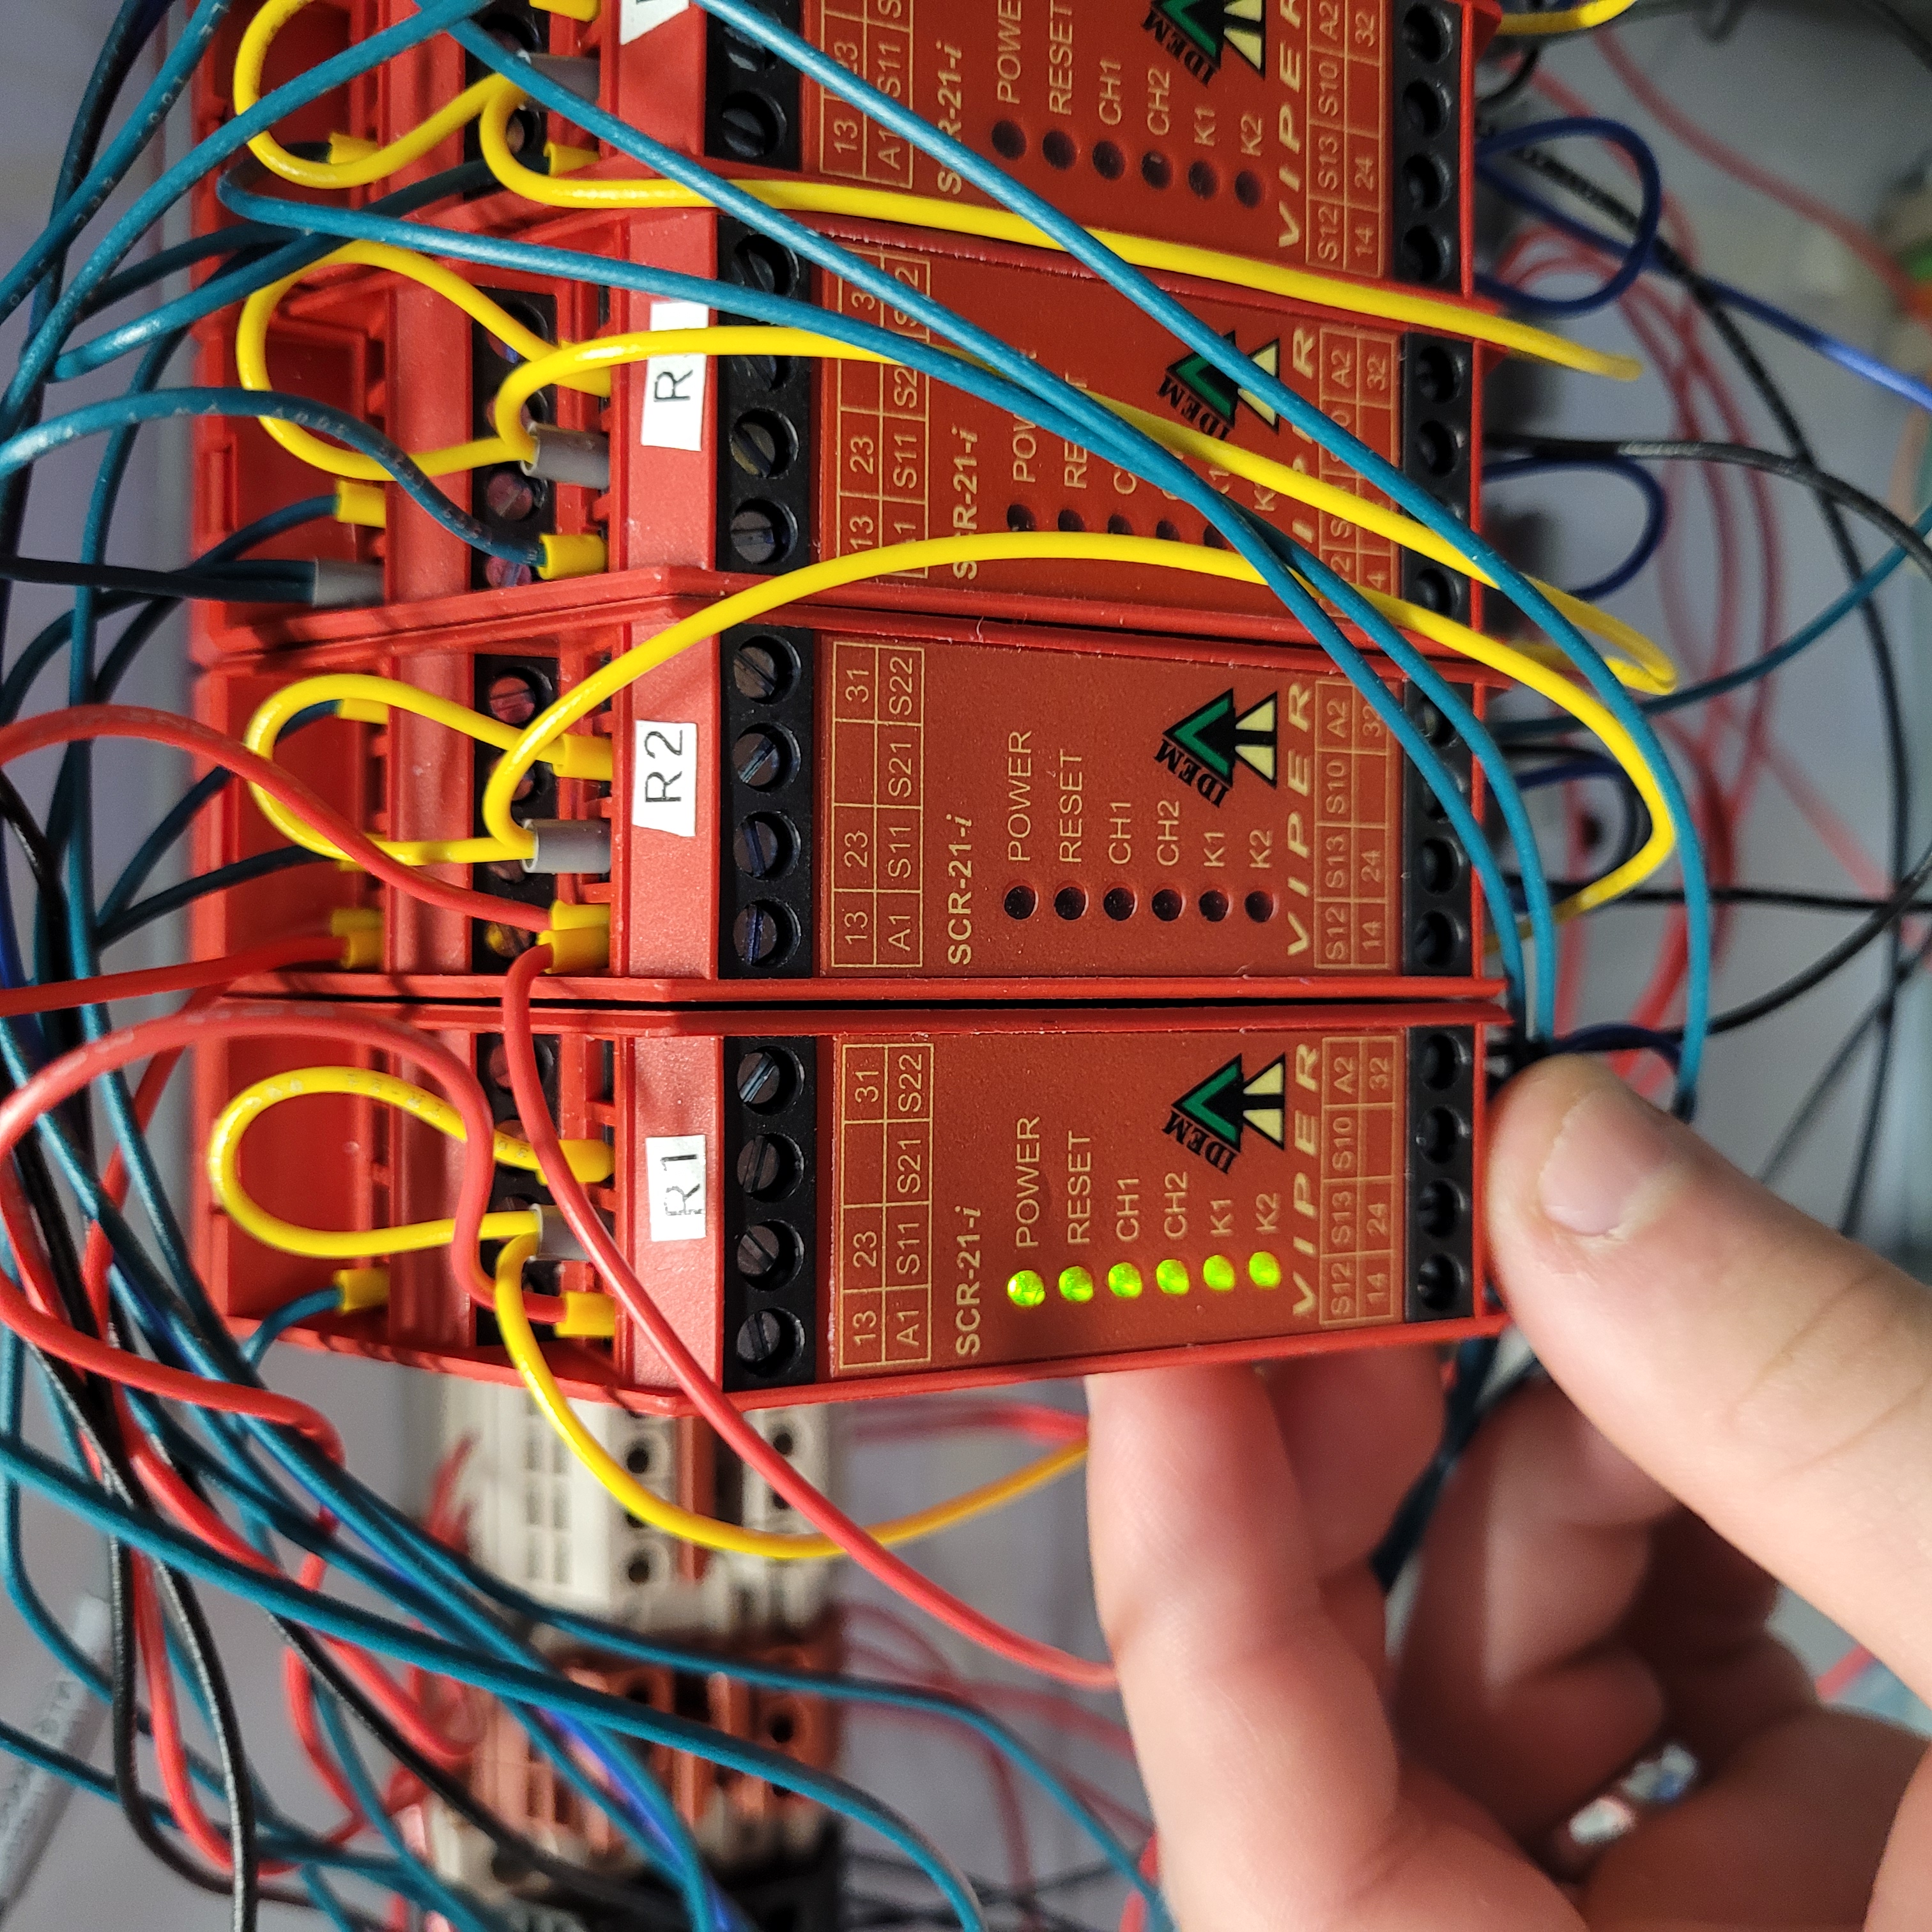
Figure 7: Vault-1 Control west panel when the Vault-1 shield door is closed, turing on relay R1.
Arming the Accelerator and transmitters
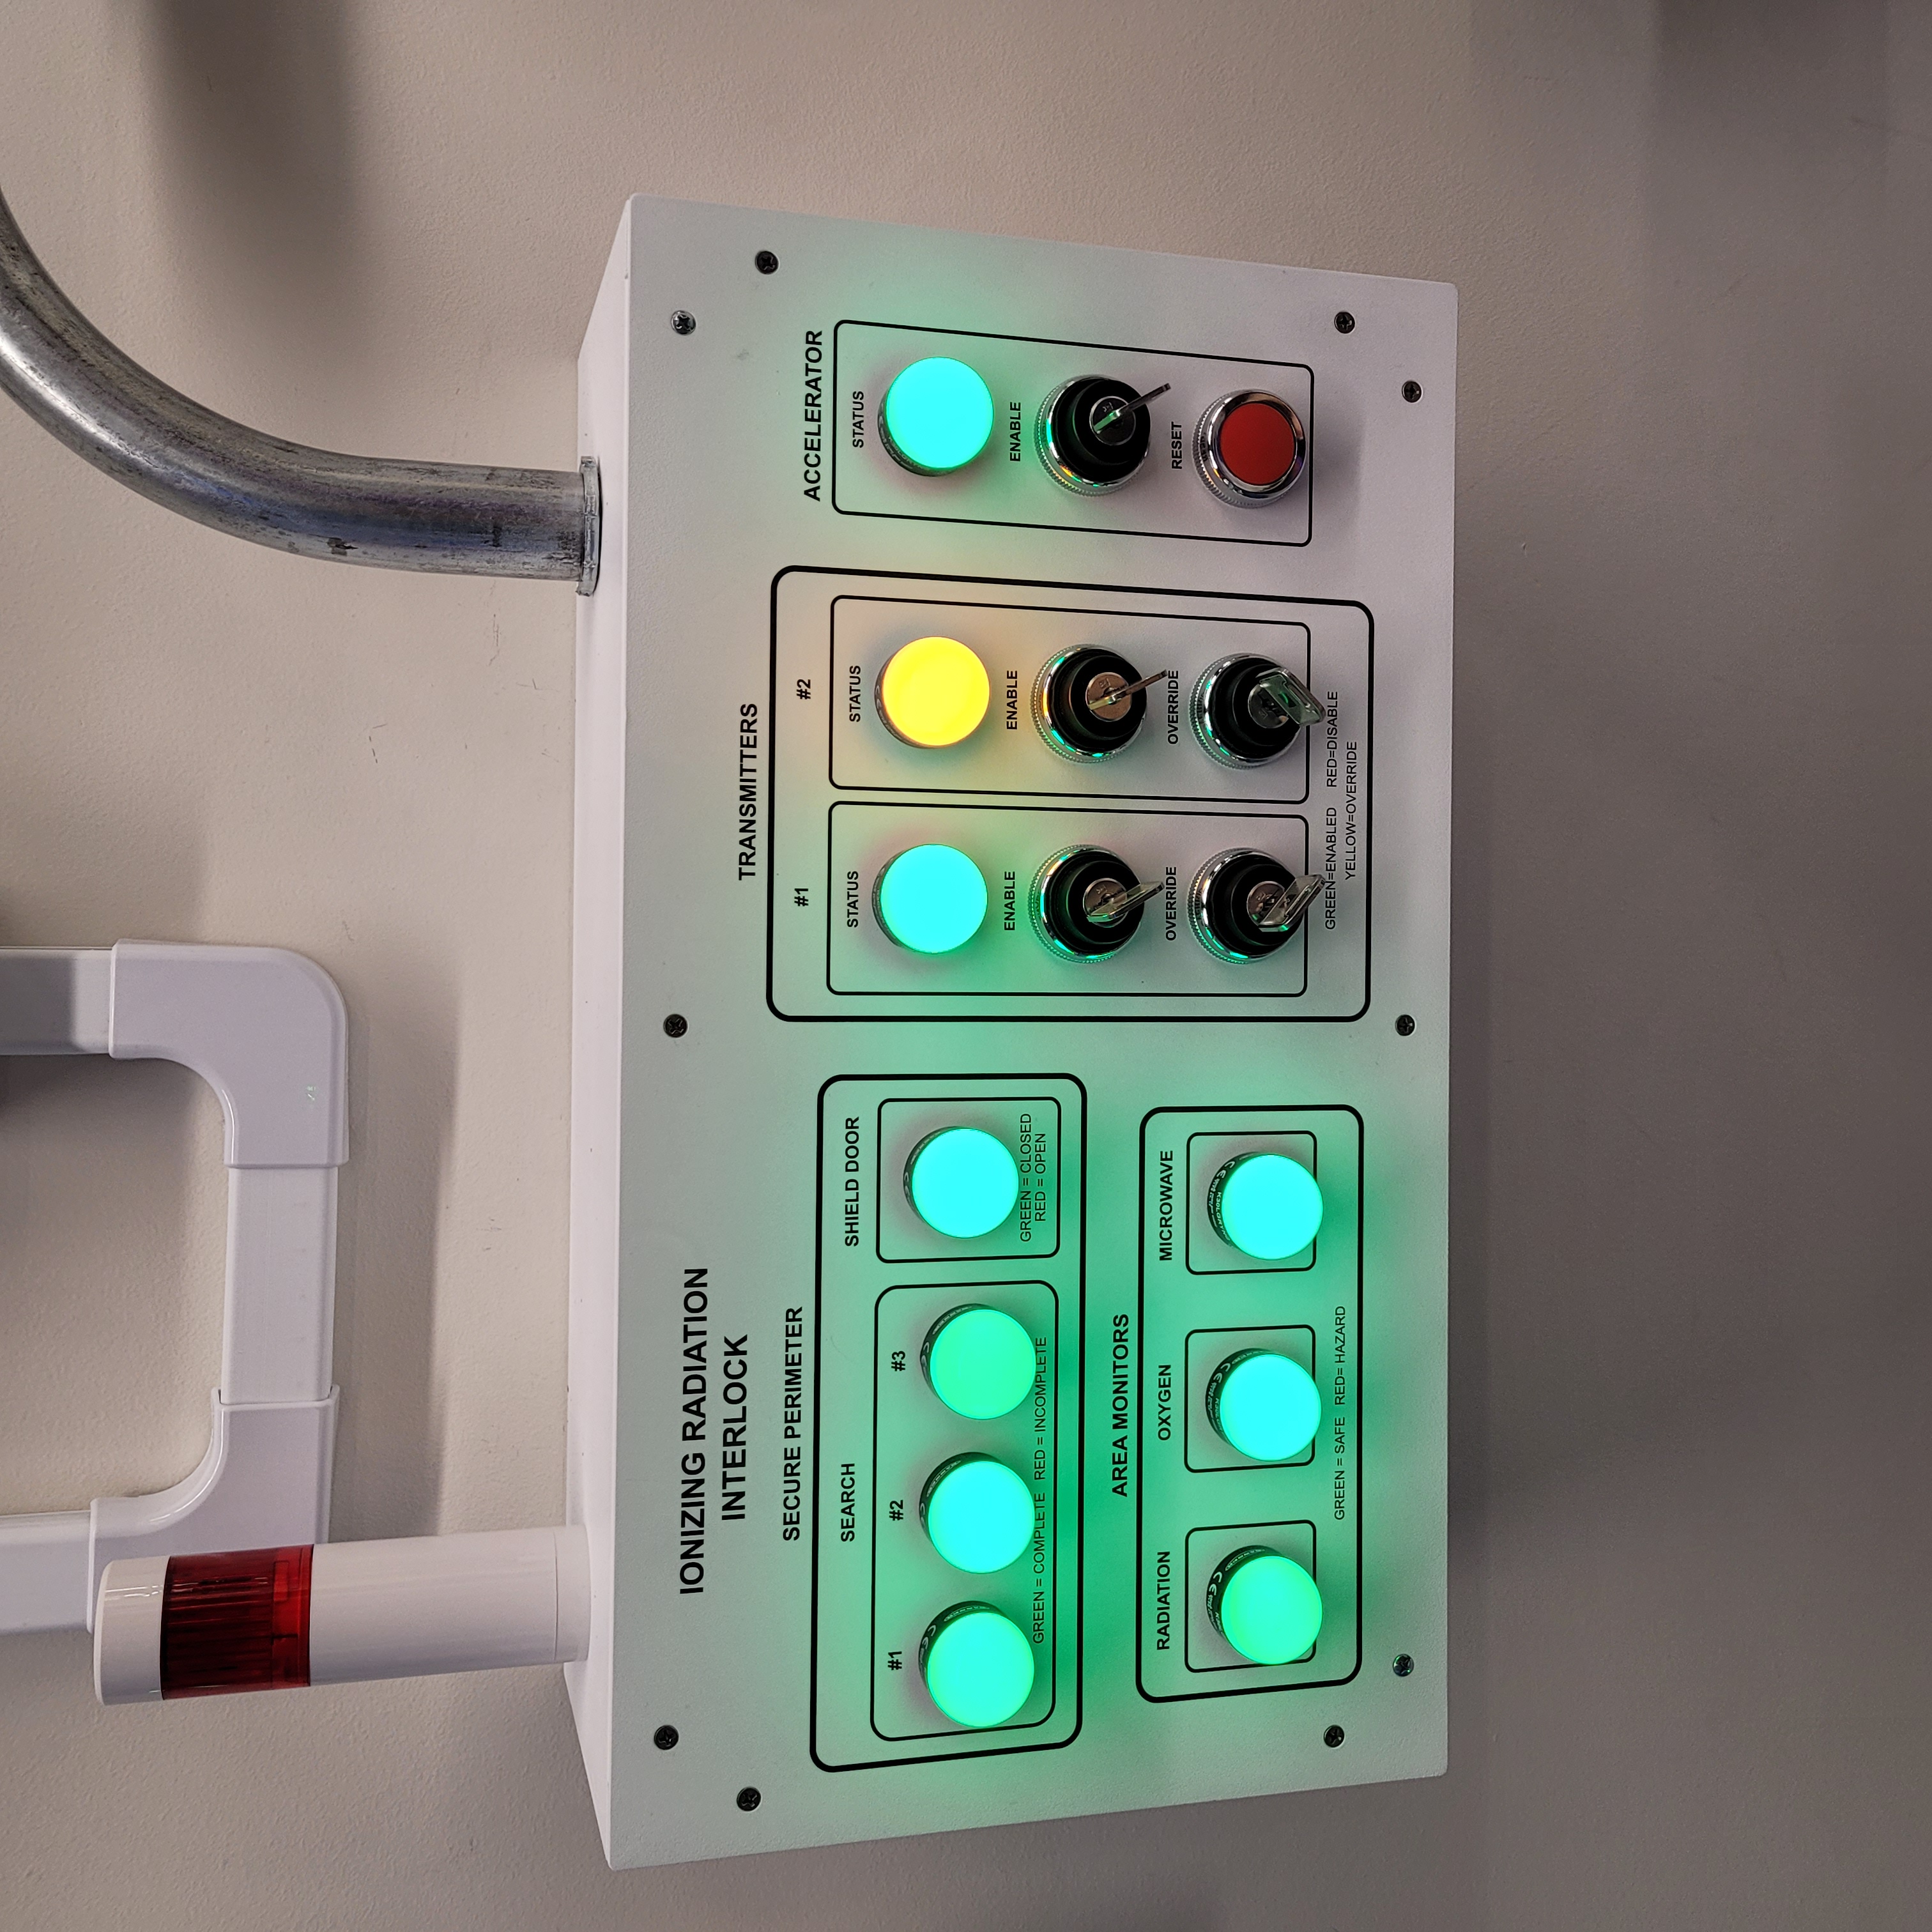
With the shield door still closed, enable the accelerator on the Vault-1 Control IONIZING RADIATION INTERLOCK protocase using the ENABLE key. The accelerator status lamp should turn green.
Relay R2 in Vault-1 Control west panel turns on.
Turn the ENABLE key for transmitter 1 on the Vault-1 Control IONIZING RADIATION INTERLOCK protocase. The transmitter 1 status lamp should turn green.
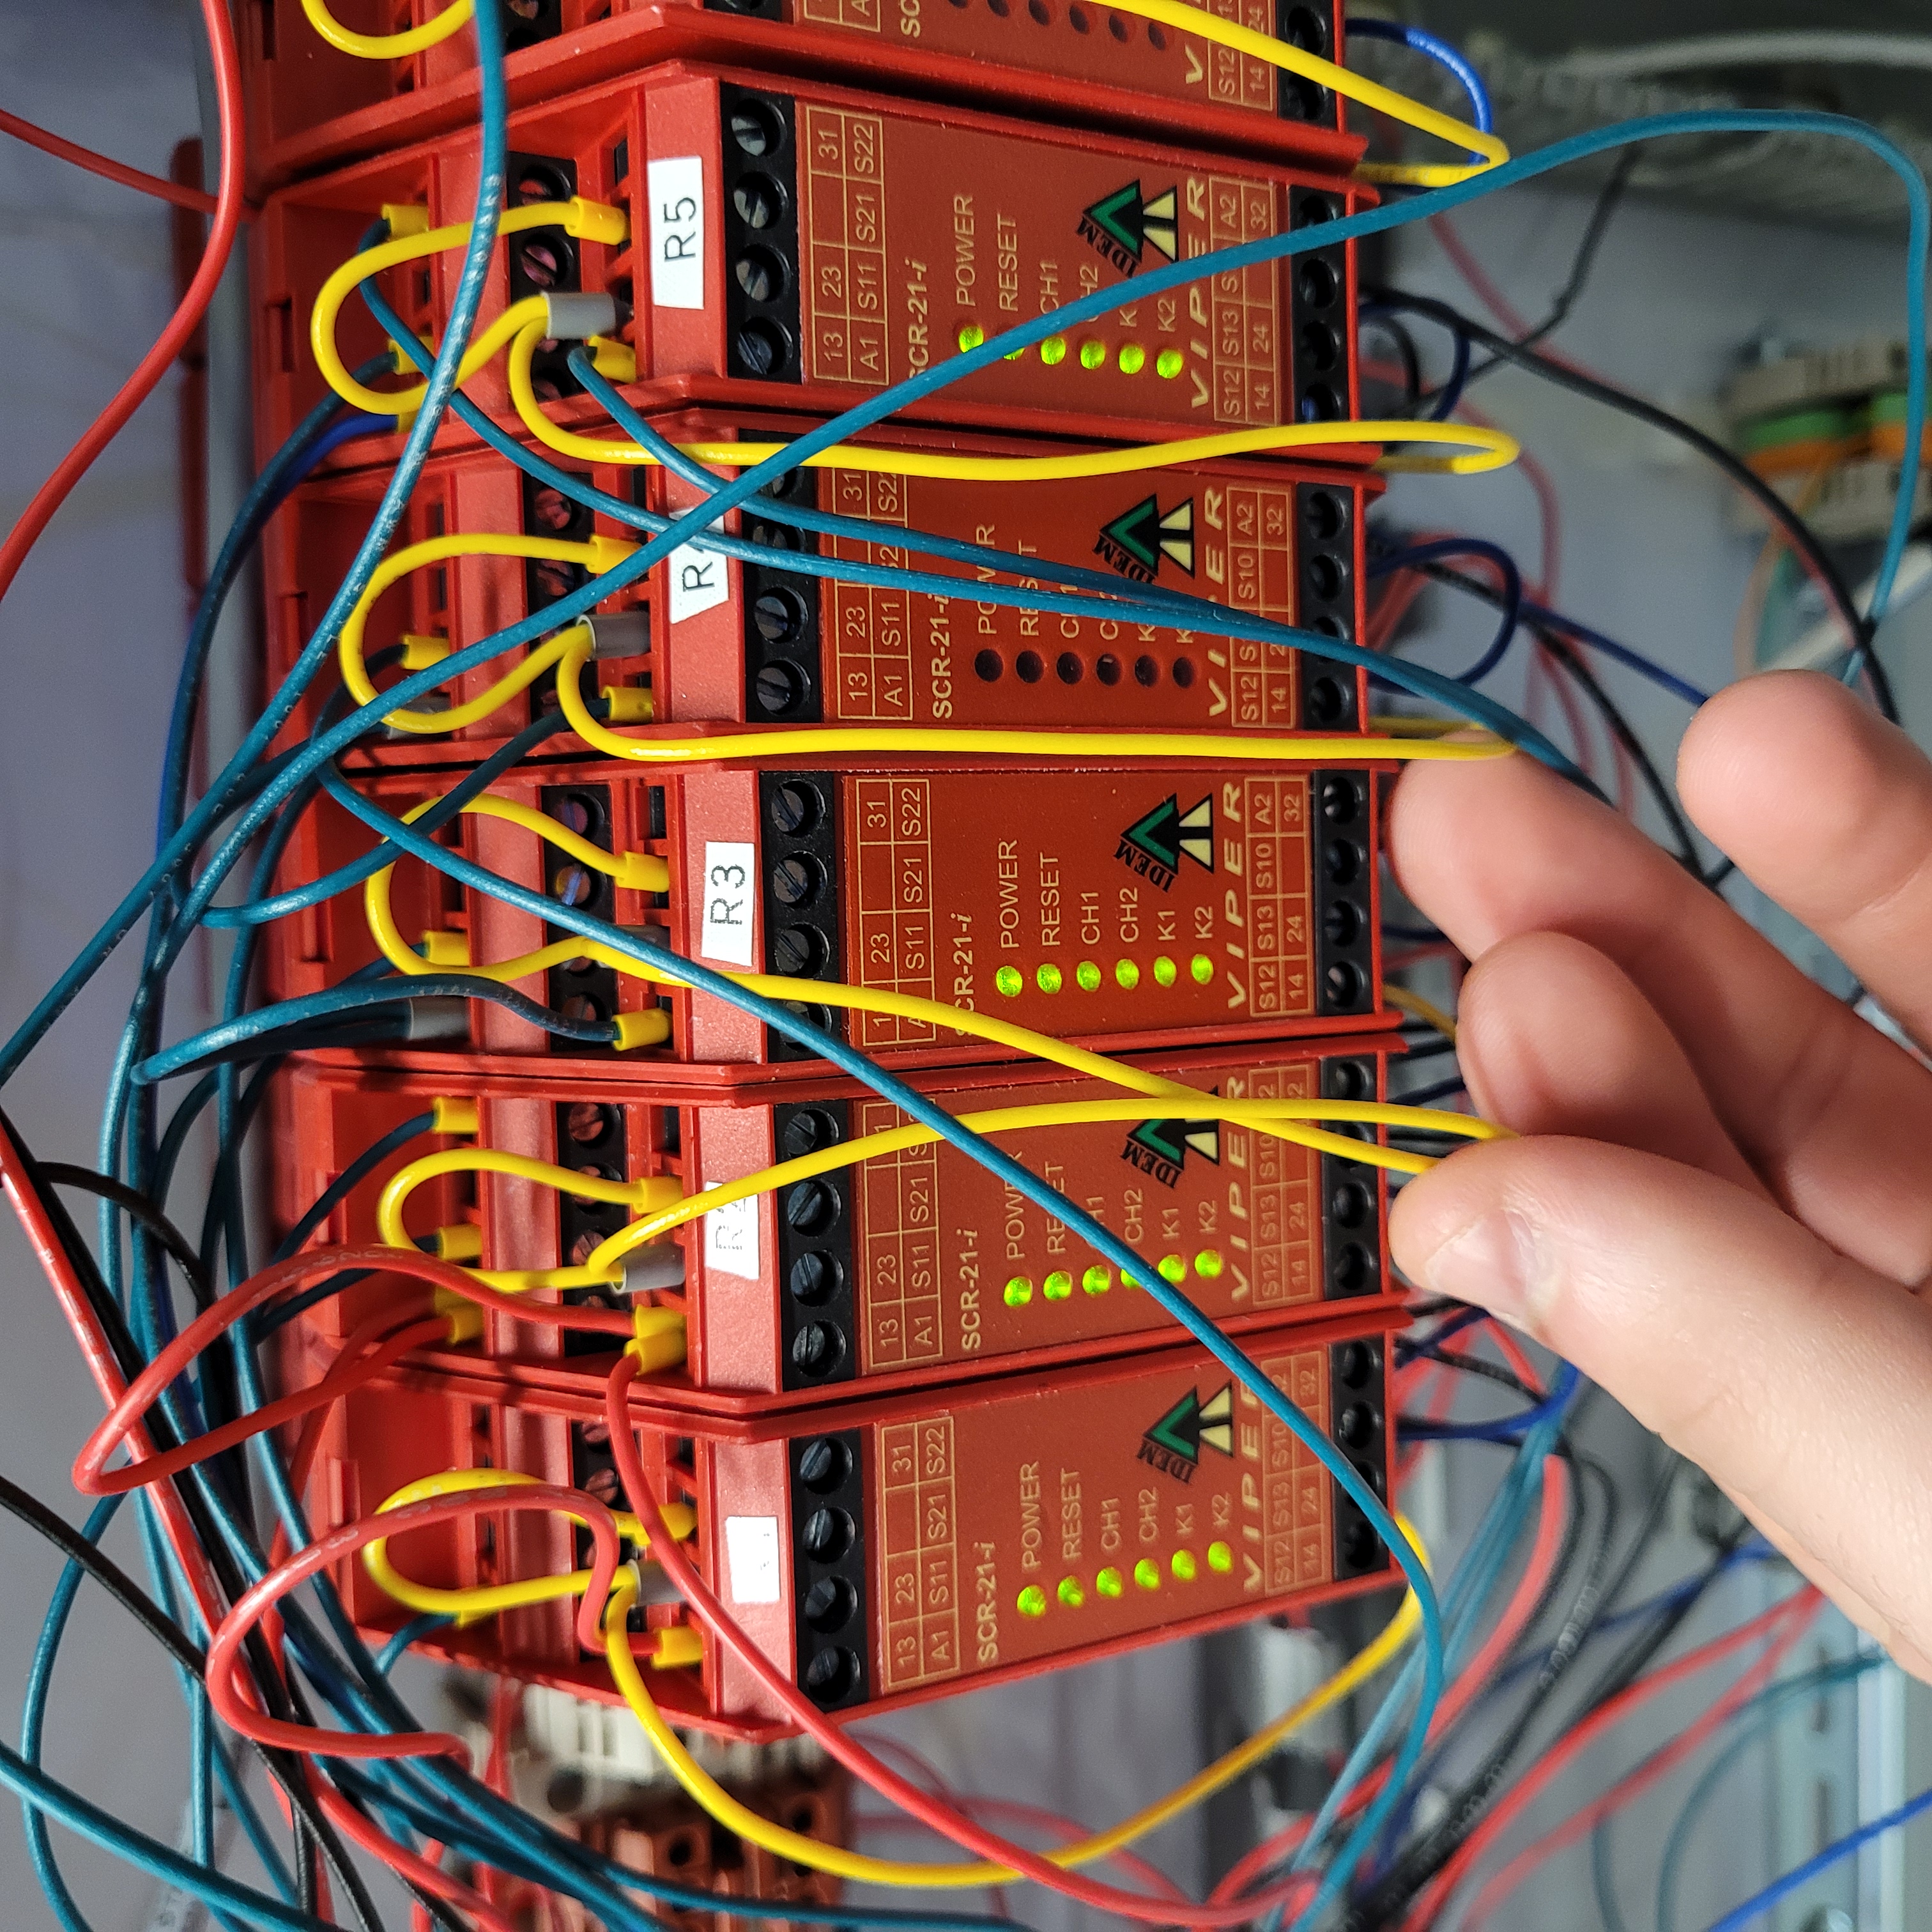
Relay R3 and R5 in Vault-1 Control west panel turns on.
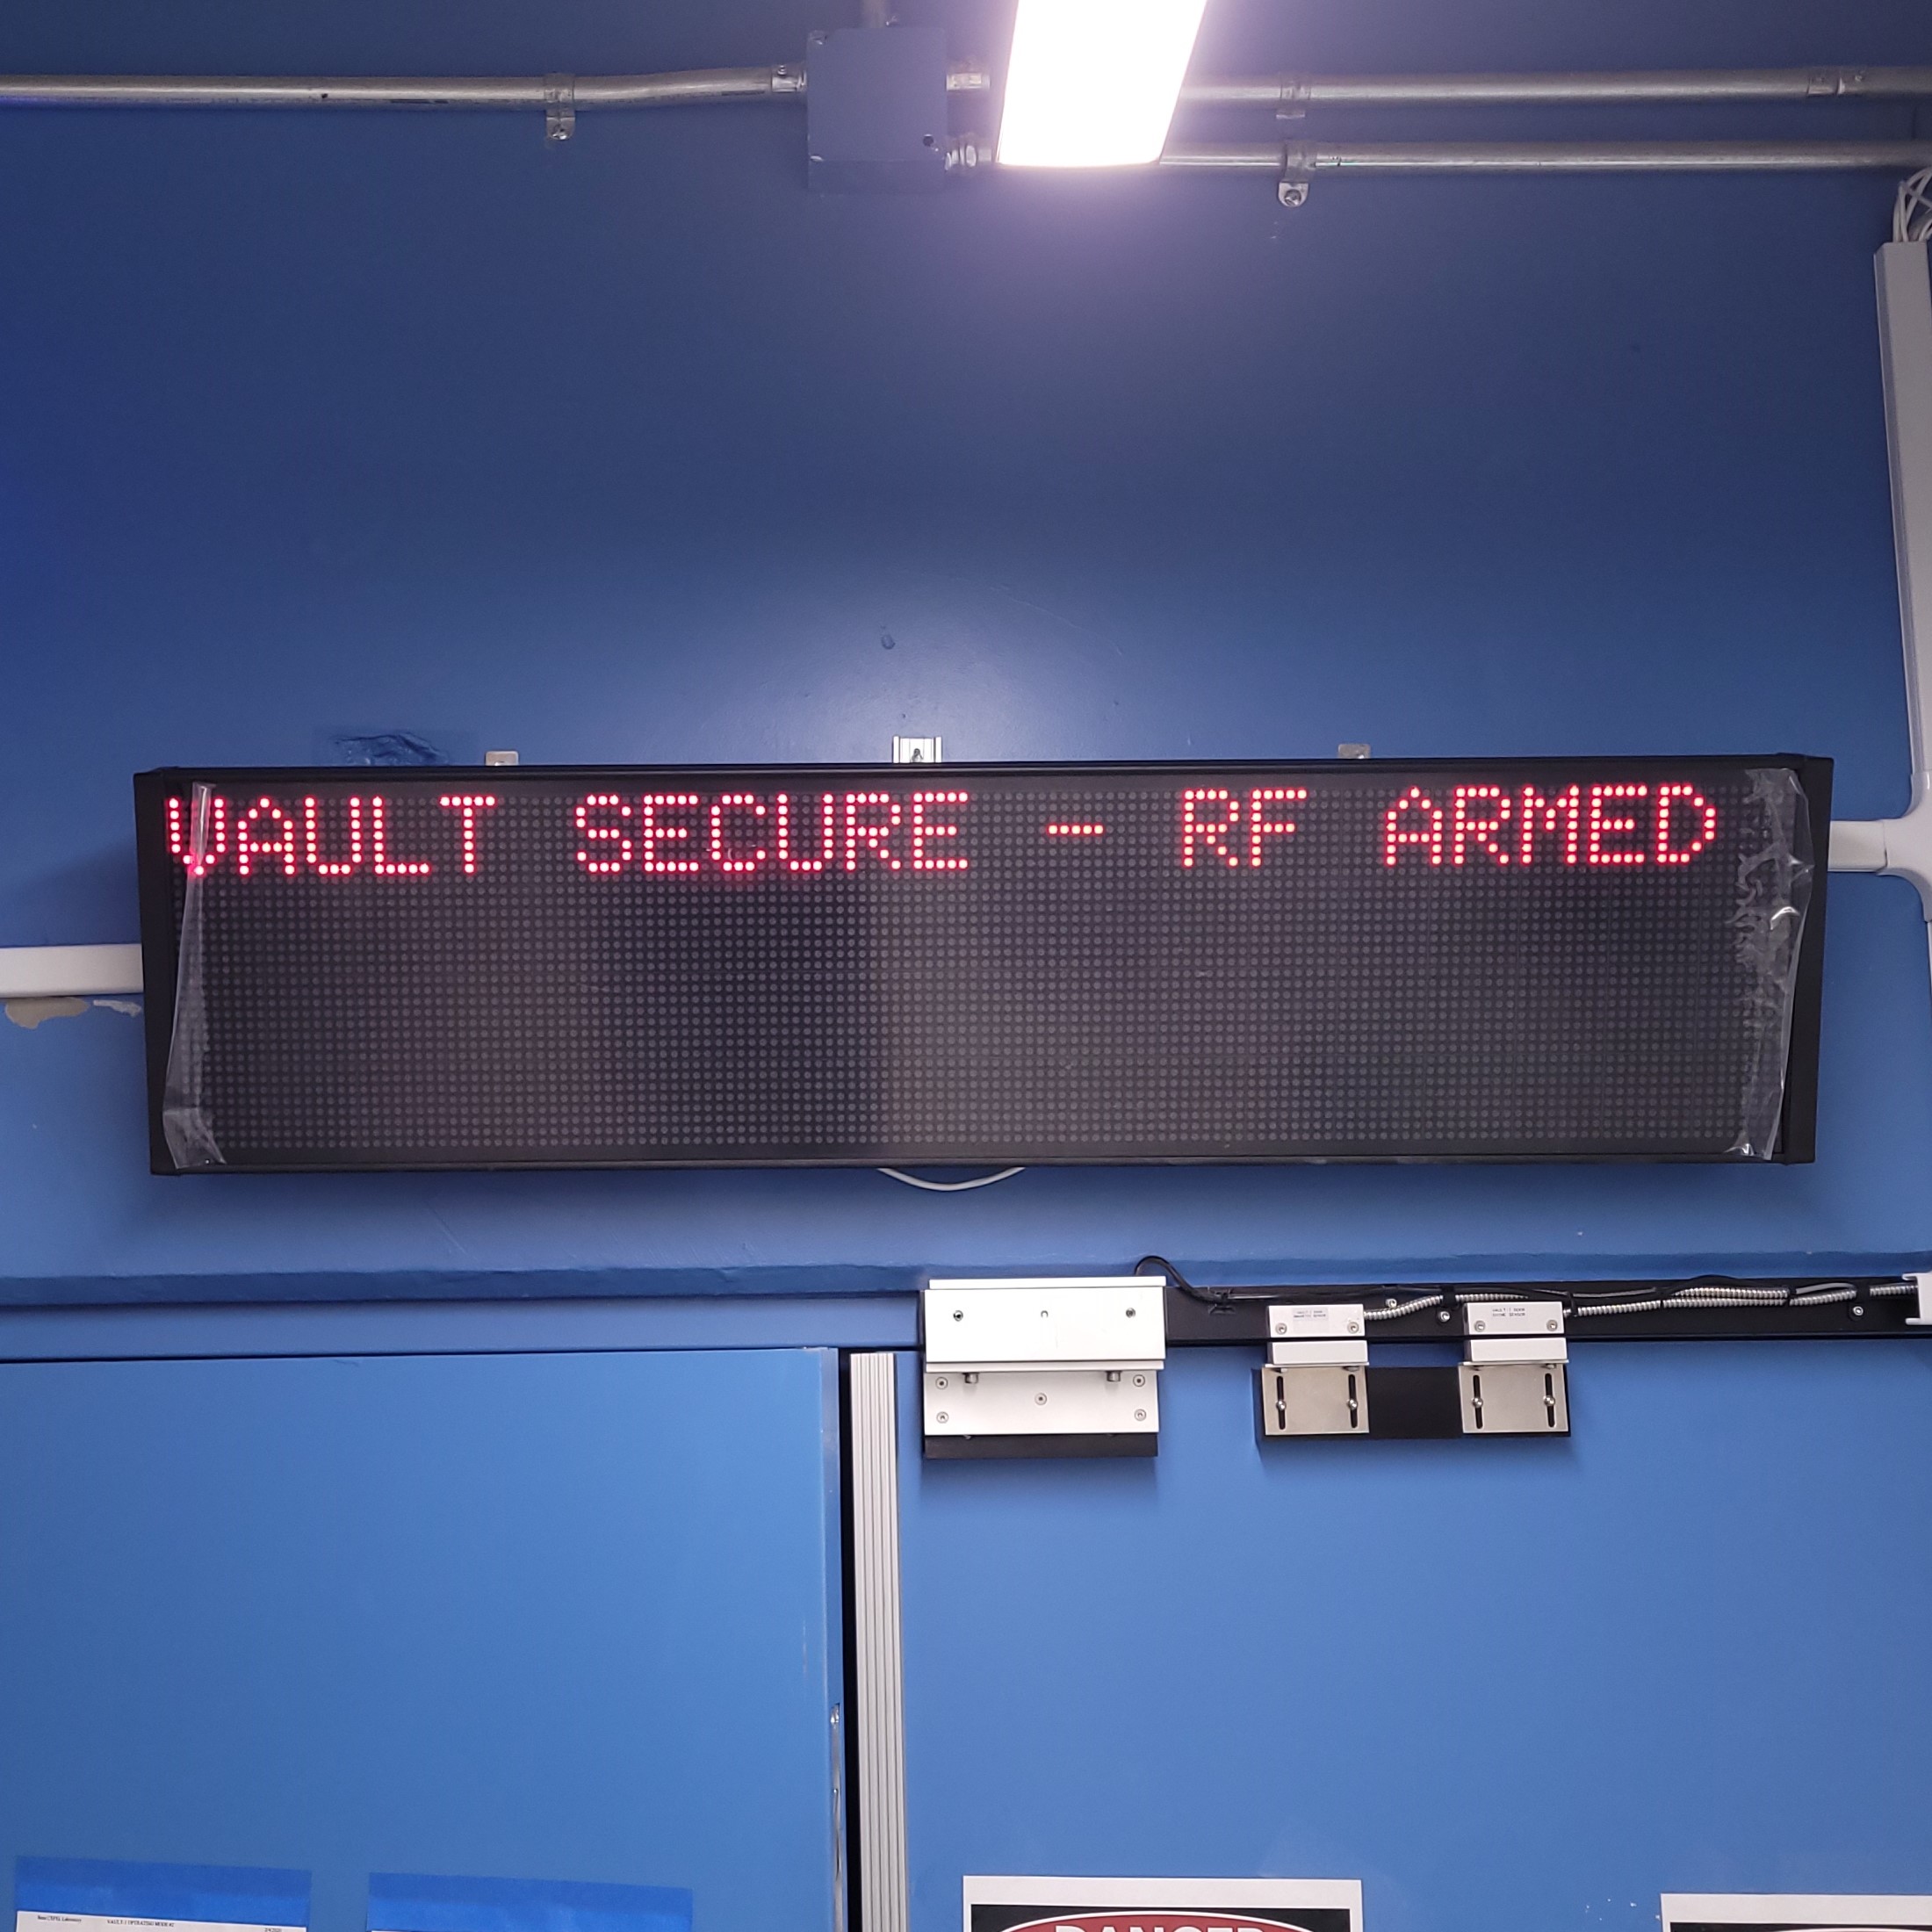
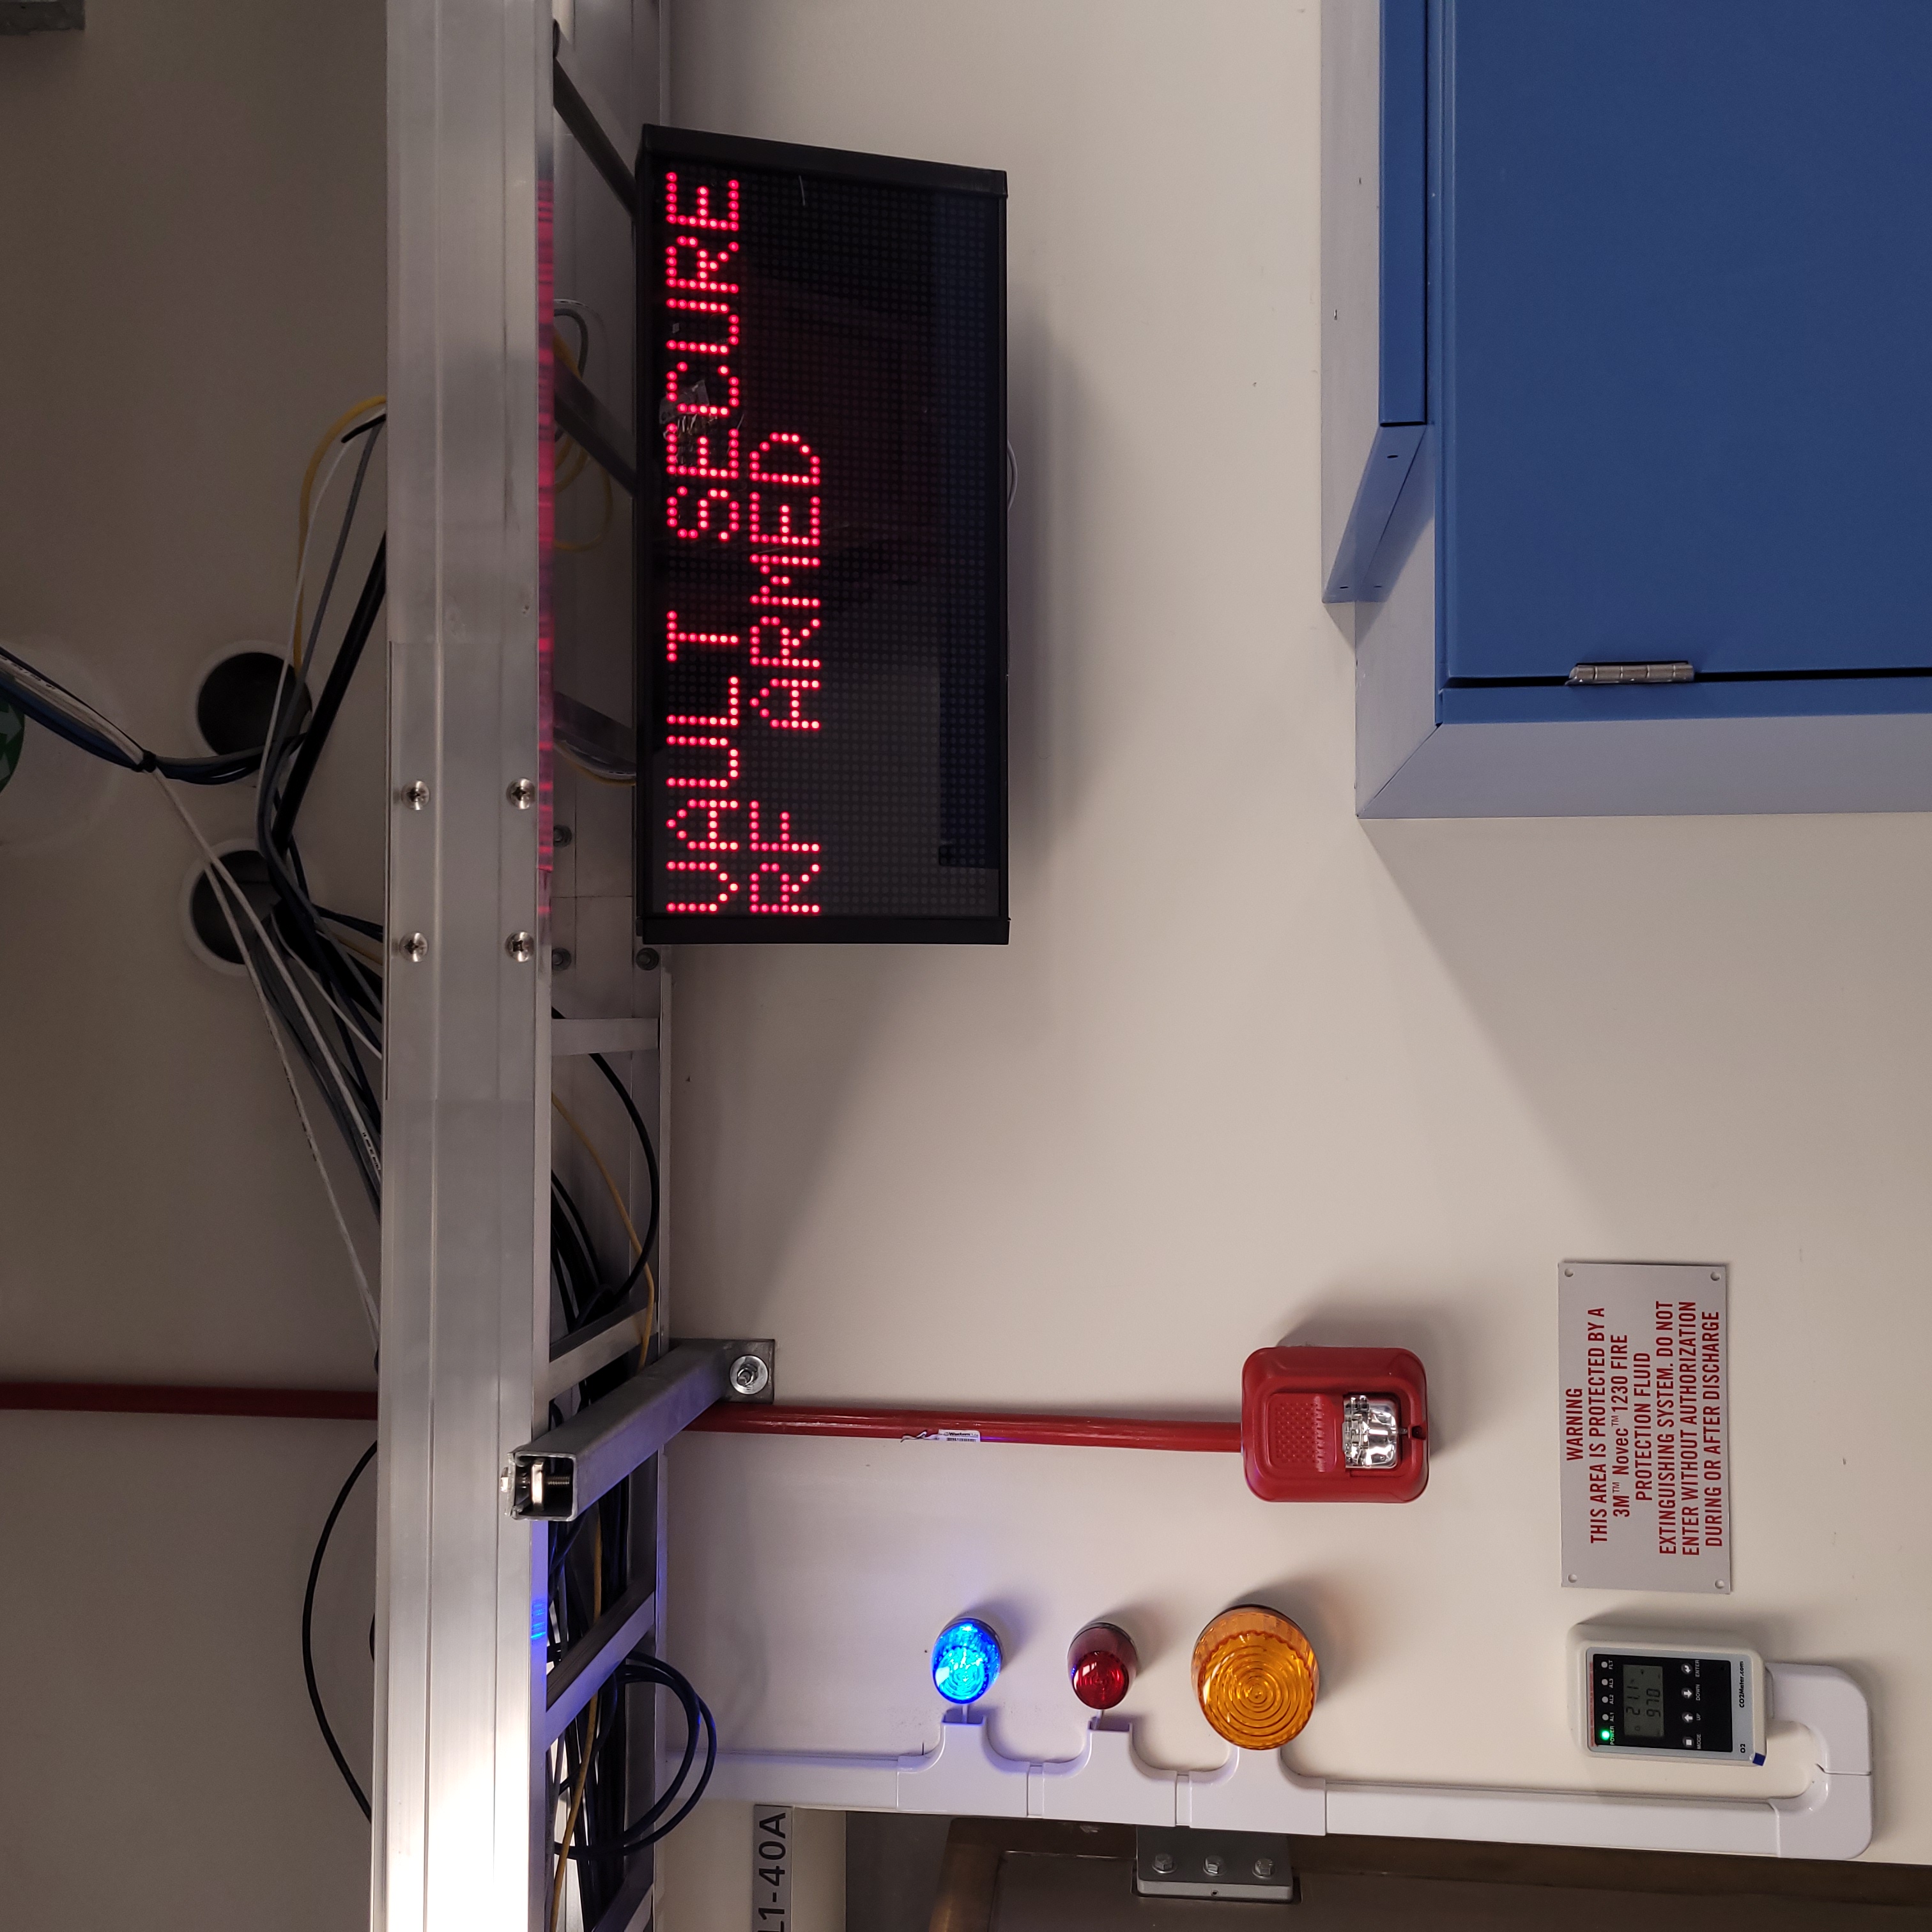
Once the transmitter is enabled, the VIEWMARQ displays will show VAULT SECURE - RF ARMED.
Vault-1 Control
Accelerator Lab
The blue beacons next to each VIEWMARQ are on.
Vault-1 Control
Accelerator Lab
Hit the reset button and repeat 2-4 with transmitter 2.
Relay R4 and R6 in Vault-1 Control west panel turns on.
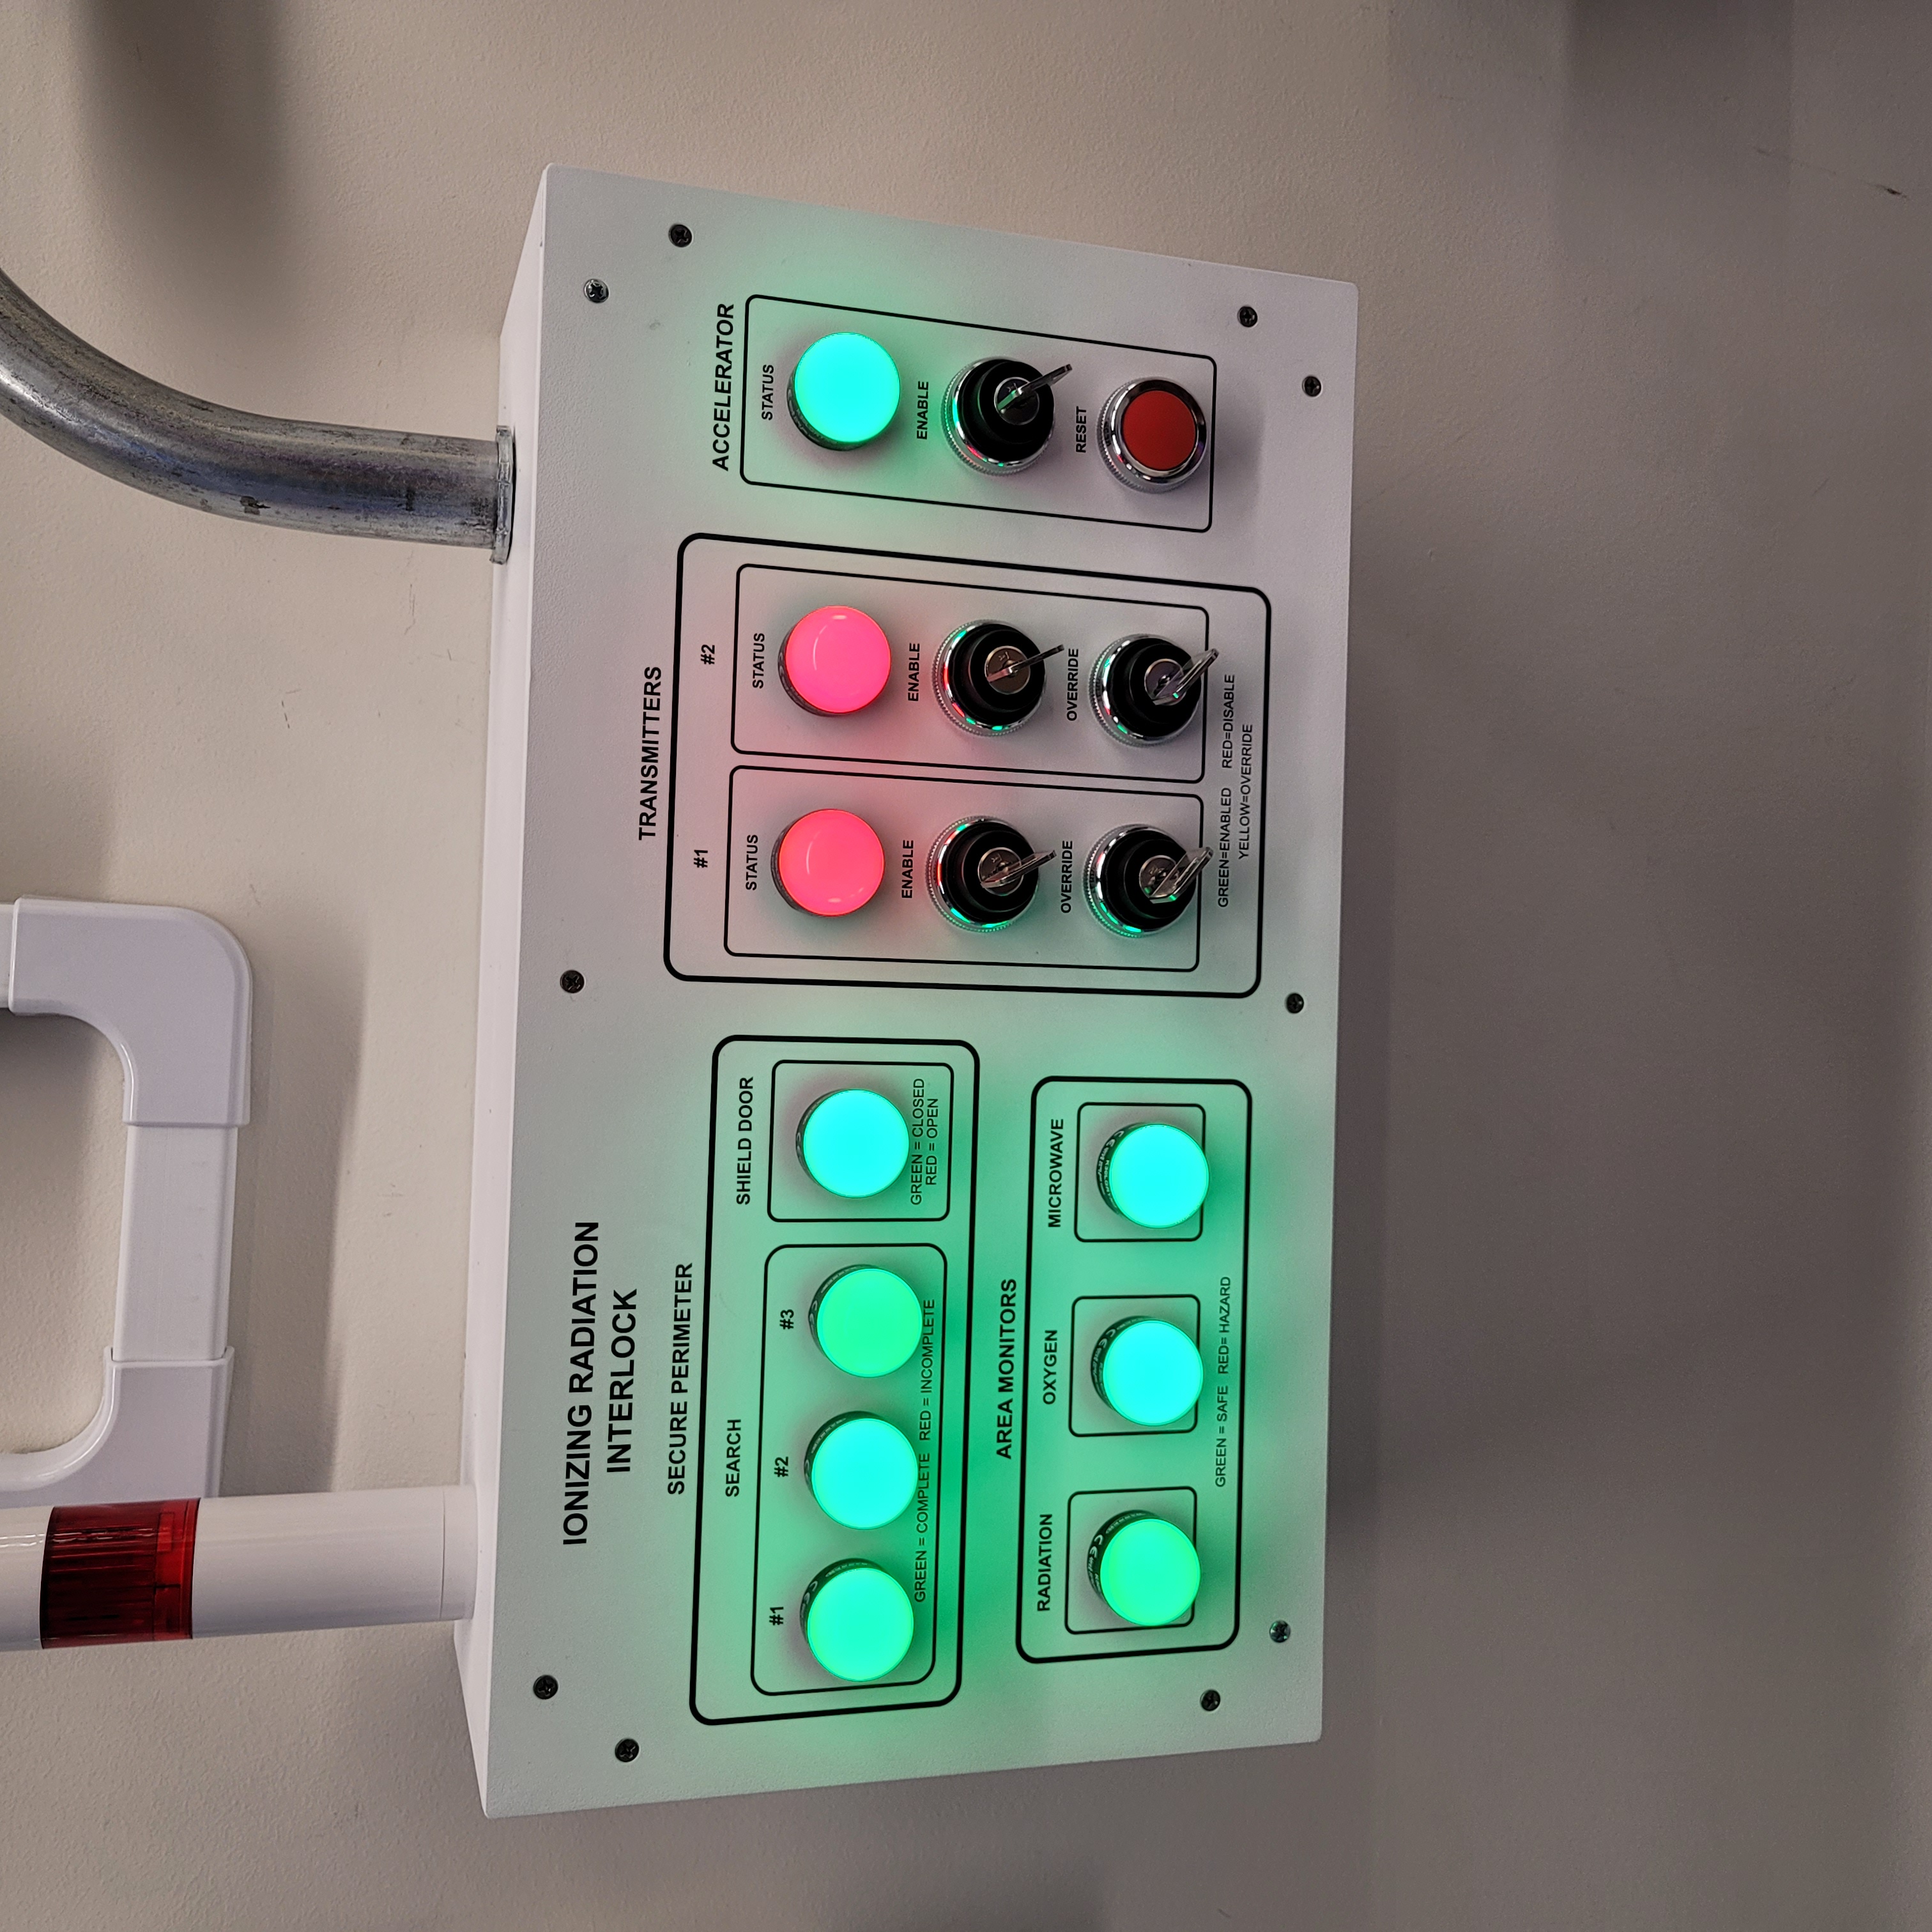
Figure 8: Vault-1 Control IONIZING RADIATION INTERLOCK protocase when the accelerator is armed.
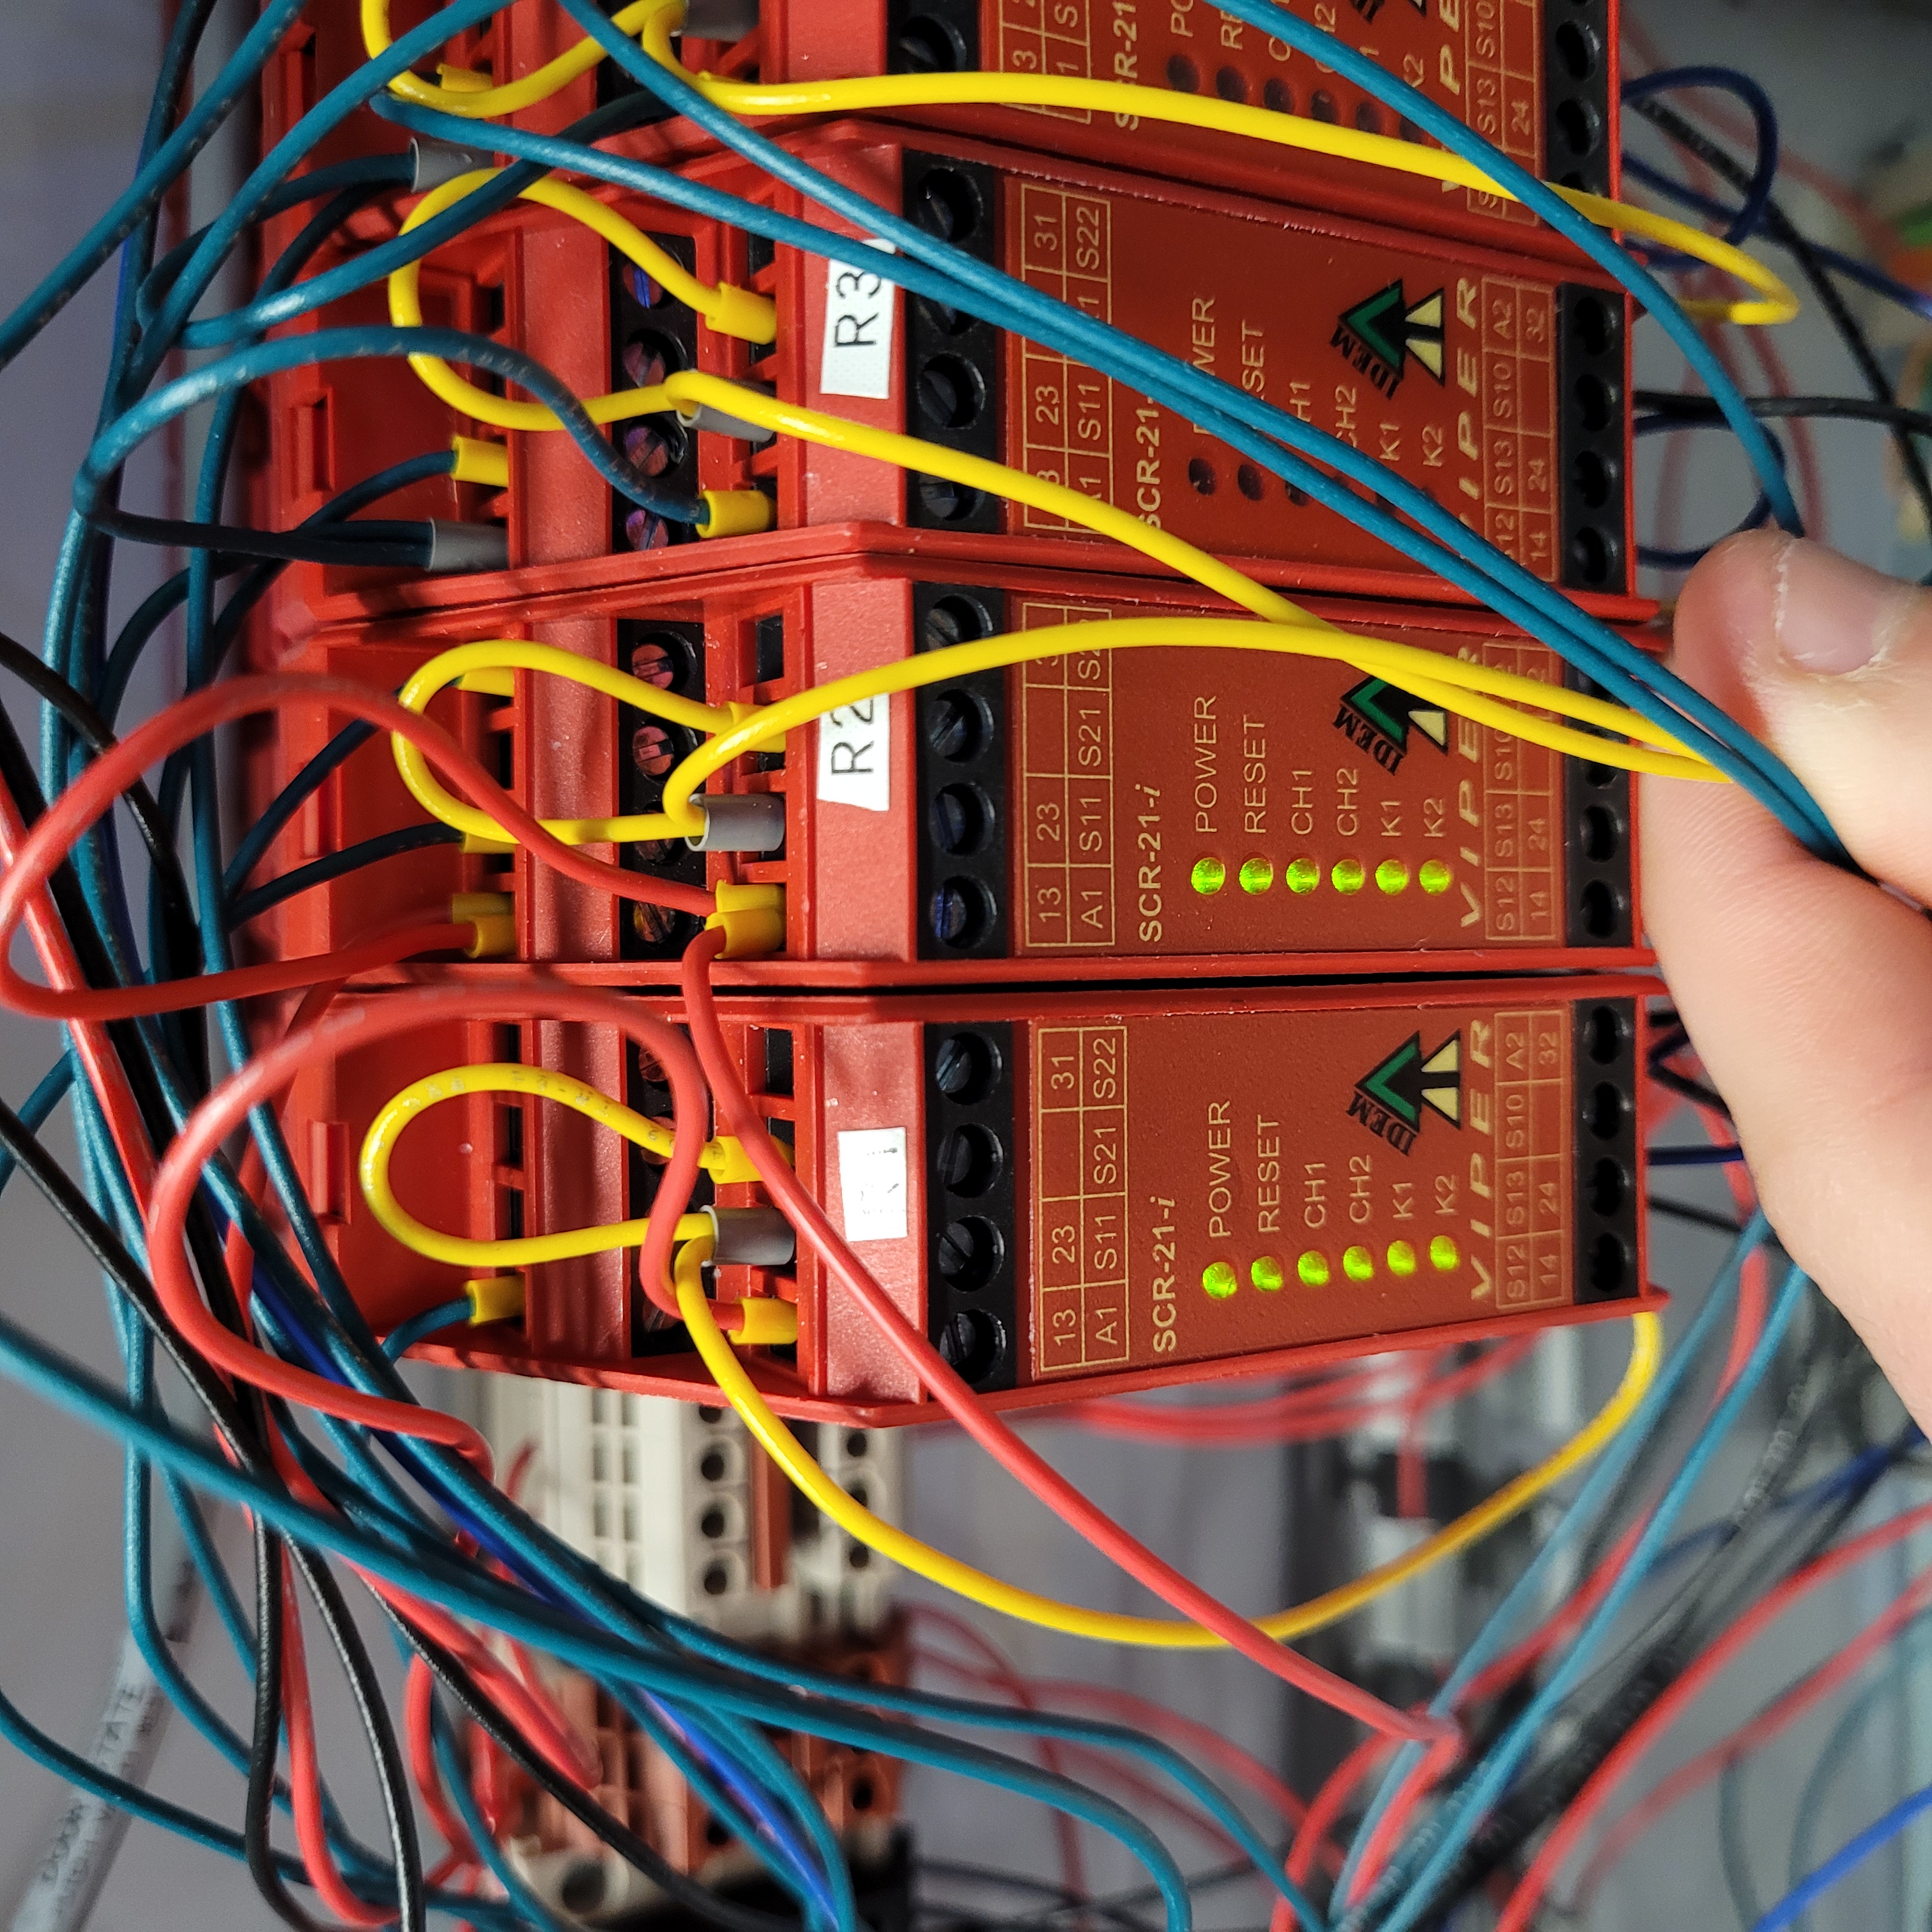
Figure 9: Vault-1 Control west panel when the accelerator is armed, turning on relays R2.
|
|
Vault-1 Control IONIZING RADIATION INTERLOCK protocase when transmitter 1 is armed. ============ |
Vault-1 Control IONIZING RADIATION INTERLOCK protocase when transmitter 2 is armed. ============ |
Figure 10: This is the Vault-1 Control IONIZING RADIATION INTERLOCK protocase when the transmitters are armed.
|
|
|
Vault-1 Control west panel when transmitter 1 is armed, turning on relays R3 and R5 =============== |
Vault-1 Control west panel when transmitter 2 is armed, turning on relays R4 and R6. ============== |
Vault-1 Control west panel when both transmitters are armed, turning on all 4 relays. ============= |
Figure 11: These are the Vault-1 Control west panel relays for arming the transmitters.
|
|
Vault-1 Control VIEWMARQ display when the RF is armed. ================================= |
Accelerator Lab VIEWMARQ display when the RF is armed. ================================= |
Figure 12: These are the VIEWMARQ displays in Vault-1 Control and Accelerator Lab when the RF is armed.
Overriding and Resetting Transmitters and Accelerator
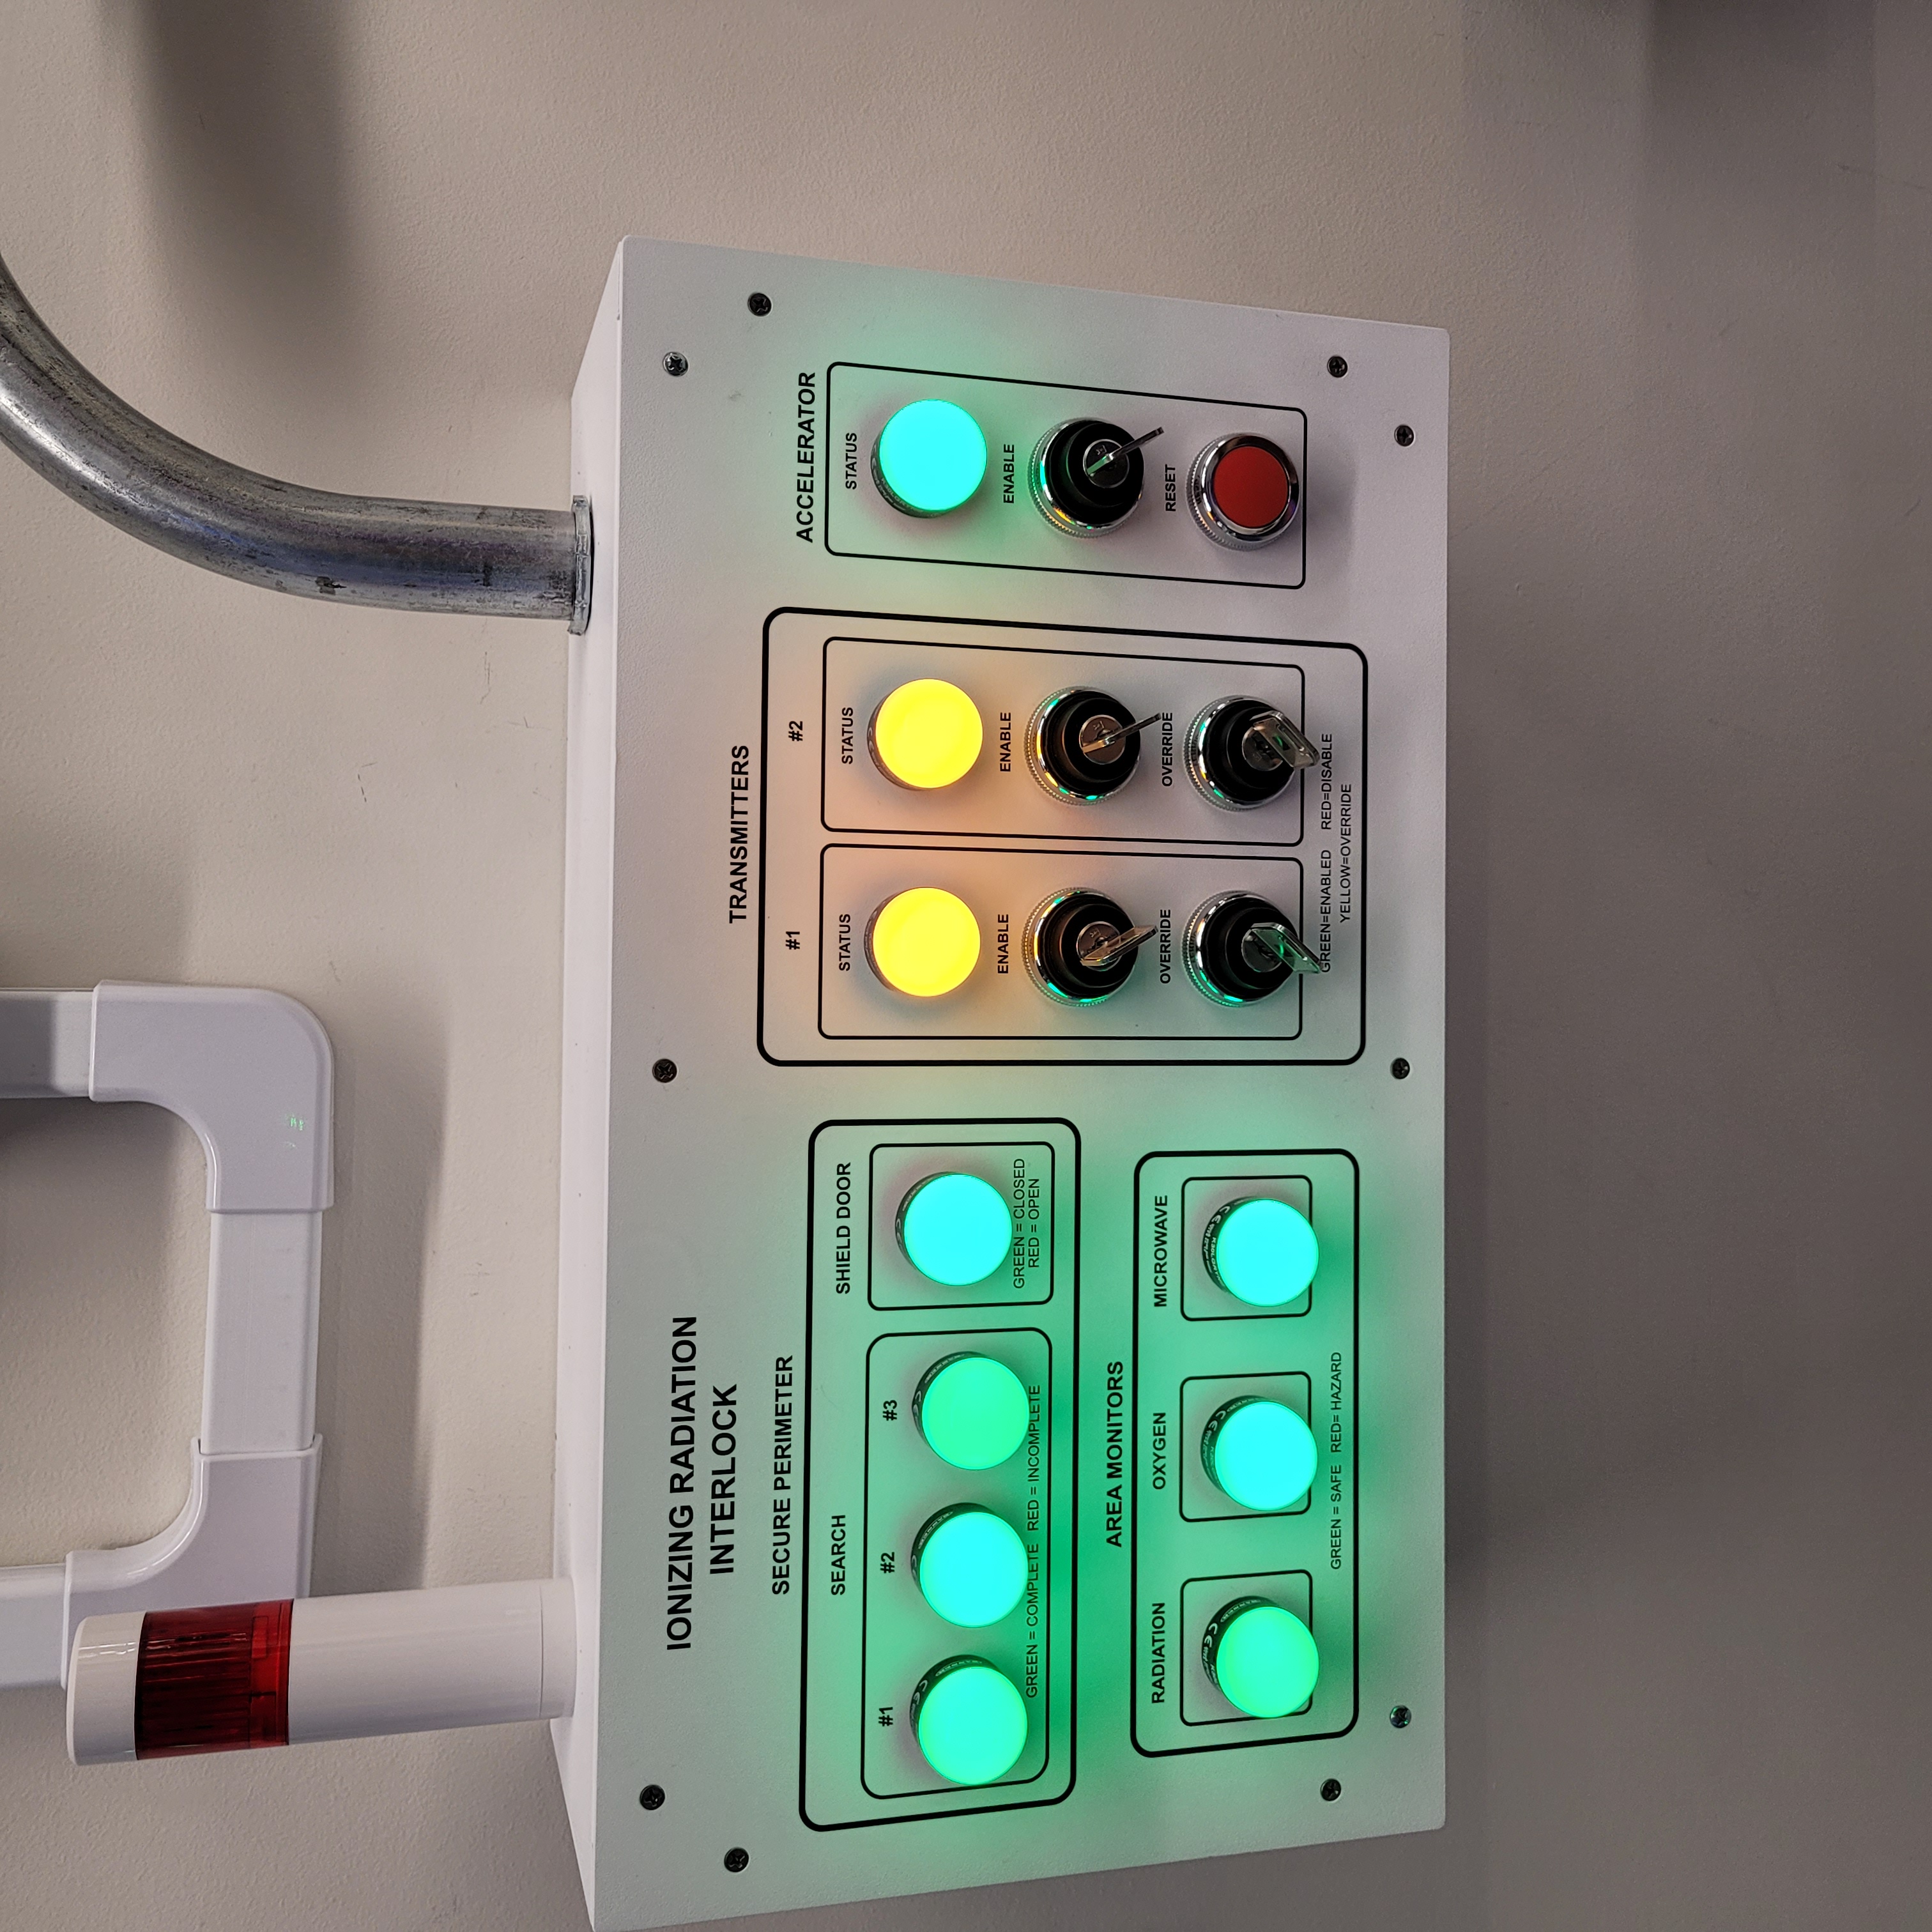
With the accelerator and transmitters armed, switch the OVERRIDE keys on the Vault-1 Control IONIZING RADIATION INTERLOCK protocase. The TRANSMITTERS lamps will turn orange.
Switch the OVERRIDE keys back to interlock. The TRANSMITTERS lamps will turn green.
Hit the reset button on the Vault-1 Control IONIZING RADIATION INTERLOCK protocase. The ACCELERATOR and TRANSMITTERS lamps will turn red.
|
|
Vault-1 Control IONIZING RADIATION INTERLOCK protocase when transmitter 2 is in override. ======= |
Vault-1 Control IONIZING RADIATION INTERLOCK protocase when both transmitters are in override. == |
Figure 11: This is the Vault-1 Control IONIZING RADIATION INTERLOCK protocase when the transmitters are in override.
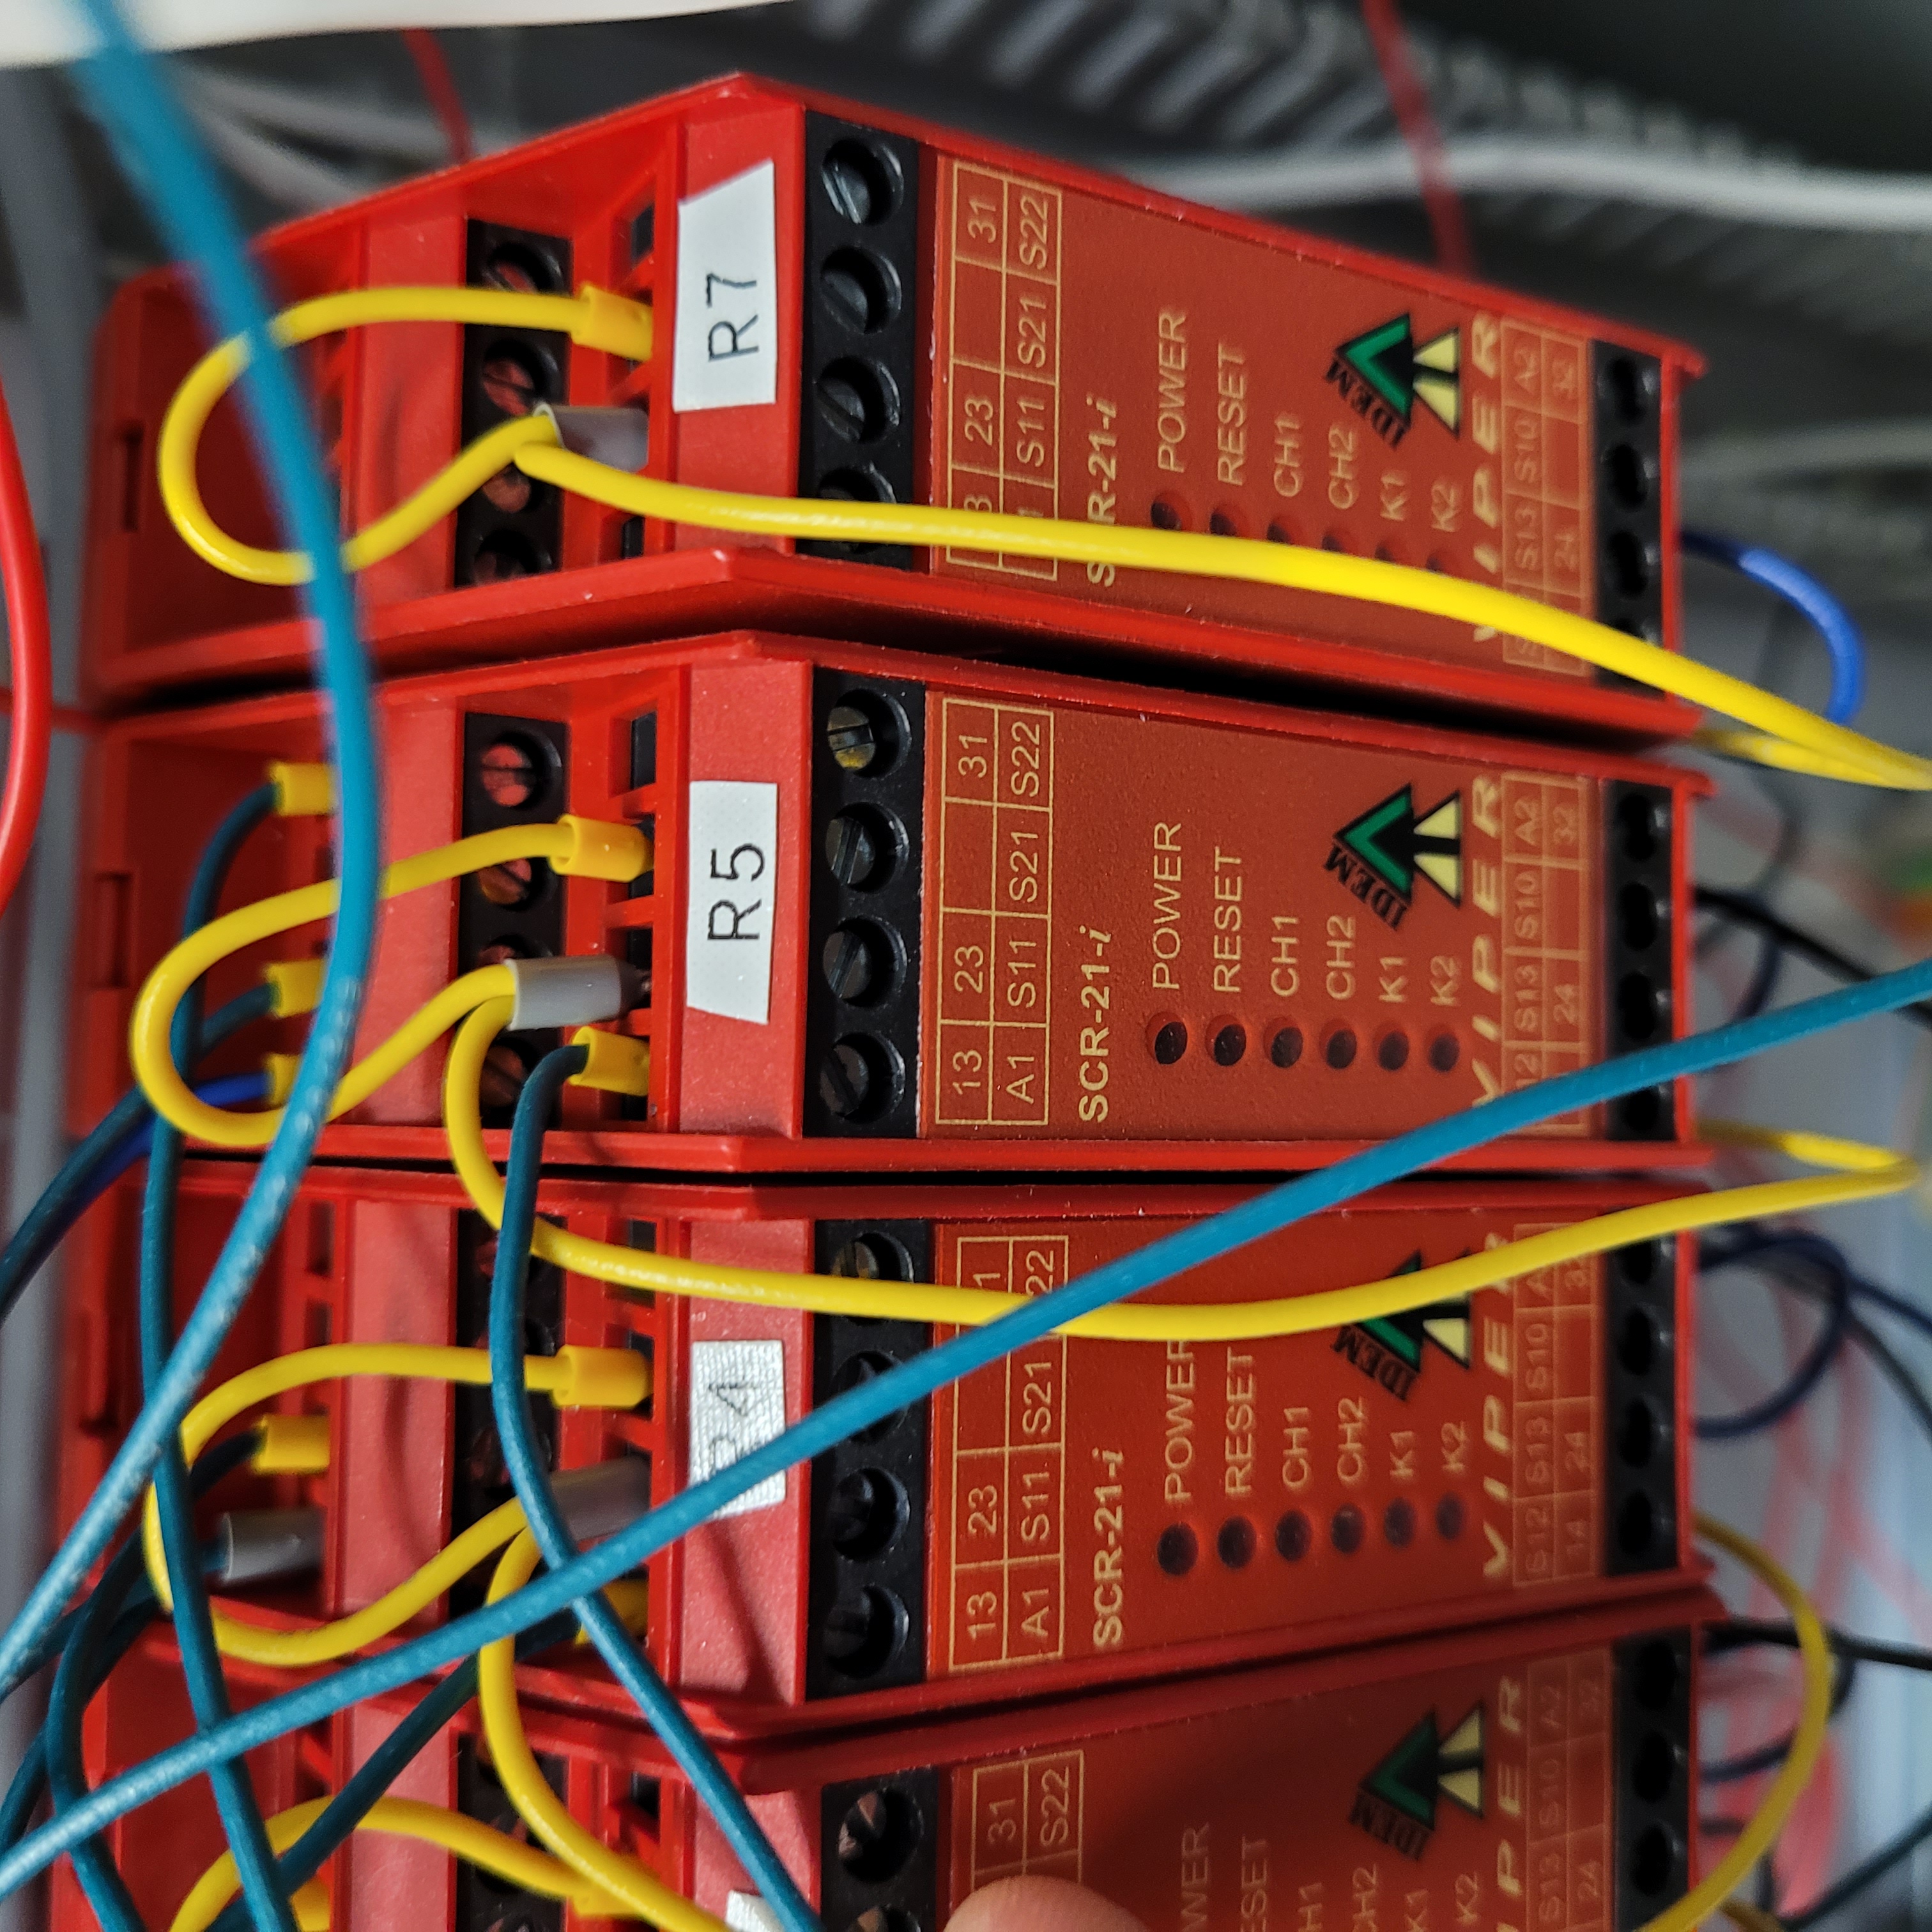
Figure 13: Vault-1 Control west panel relays for overriding the transmitters.
Timing out the Shield Door and Search sequence
Rearm the accelerator and transmitters and open the shield door. The ACCELERATOR, TRANSMITTERS, and SECURE PERIMETER lamps should turn red.
Push only the first search button. After x seconds, the button LED should turn off.
Go through the search procedure again except do not close the shield door and allow the system to trip. After x, the search lamps should turn red.
Return to Starting Conditions
Return Vault-1 ionizing radiation interlock system to the default state.