Hutch-1 Laser Interlock System User Manual
This document provides a user overview for the Hutch-1 Laser Interlock System. It covers the laser modules, hazard indicators, control protocases, VIEWMARQ display, and the beacons in Hutch-1 and Hutch-1 Control. The laser modules are used for indicating the status of the laser interlock system and arming the laser systems. The control protocase allows the users to view the override state of the laser enclosure and control the manual shutter control. The VIEWMARQ display provides a quick overview of the laser hazard status in Hutch-1. The beacons are used to indicate the state of laser hazards in Hutch-1 and the laser enclosure.
Hutch-1 Laser Hazard Warning Indicators
This section will cover the laser hazard indicators in Hutch-1 Control and Hutch-1.
Astrella Enclosure Protocase
The Astrella LASER ENCLOSURE INTERLOCK protocase shows hazards in for the administrative override status of the Astrella enclosure.
The PERIMETER section of the Astrella LASER ENCLOSURE INTERLOCK protocase has a laser warning module and door monitor module. The laser warning module displays if the Astrella is forced into a safe state. This means it will always show DANGER LASER ON unless the interlocks are tripped. The door monitor shows if the enclosure doors are opened or closed. If the enclosure is put into an override state, then the monitor will always show closed because the interlocks are bypassed.
The LOCAL INTERLOCK CONTACT CONTROL section of the Astrella LASER ENCLOSURE INTERLOCK protocase are two local interlock modules. These modules are for arming the UV and IV shutter controllers for manual operation. These can only be armed when the enclosure is armed. However, if the enclosure is not set to override, then these will disarm when opening the enclosure.
The INTERLOCK OVERRIDE section of the Astrella LASER ENCLOSURE INTERLOCK protocase shows the status of the enclosure interlocks. If the key is set to OVERRIDE and the STATUS LED is red, that means that the enclosure interlocks are bypass, and there could be a laser hazard if the enclosure is opened.
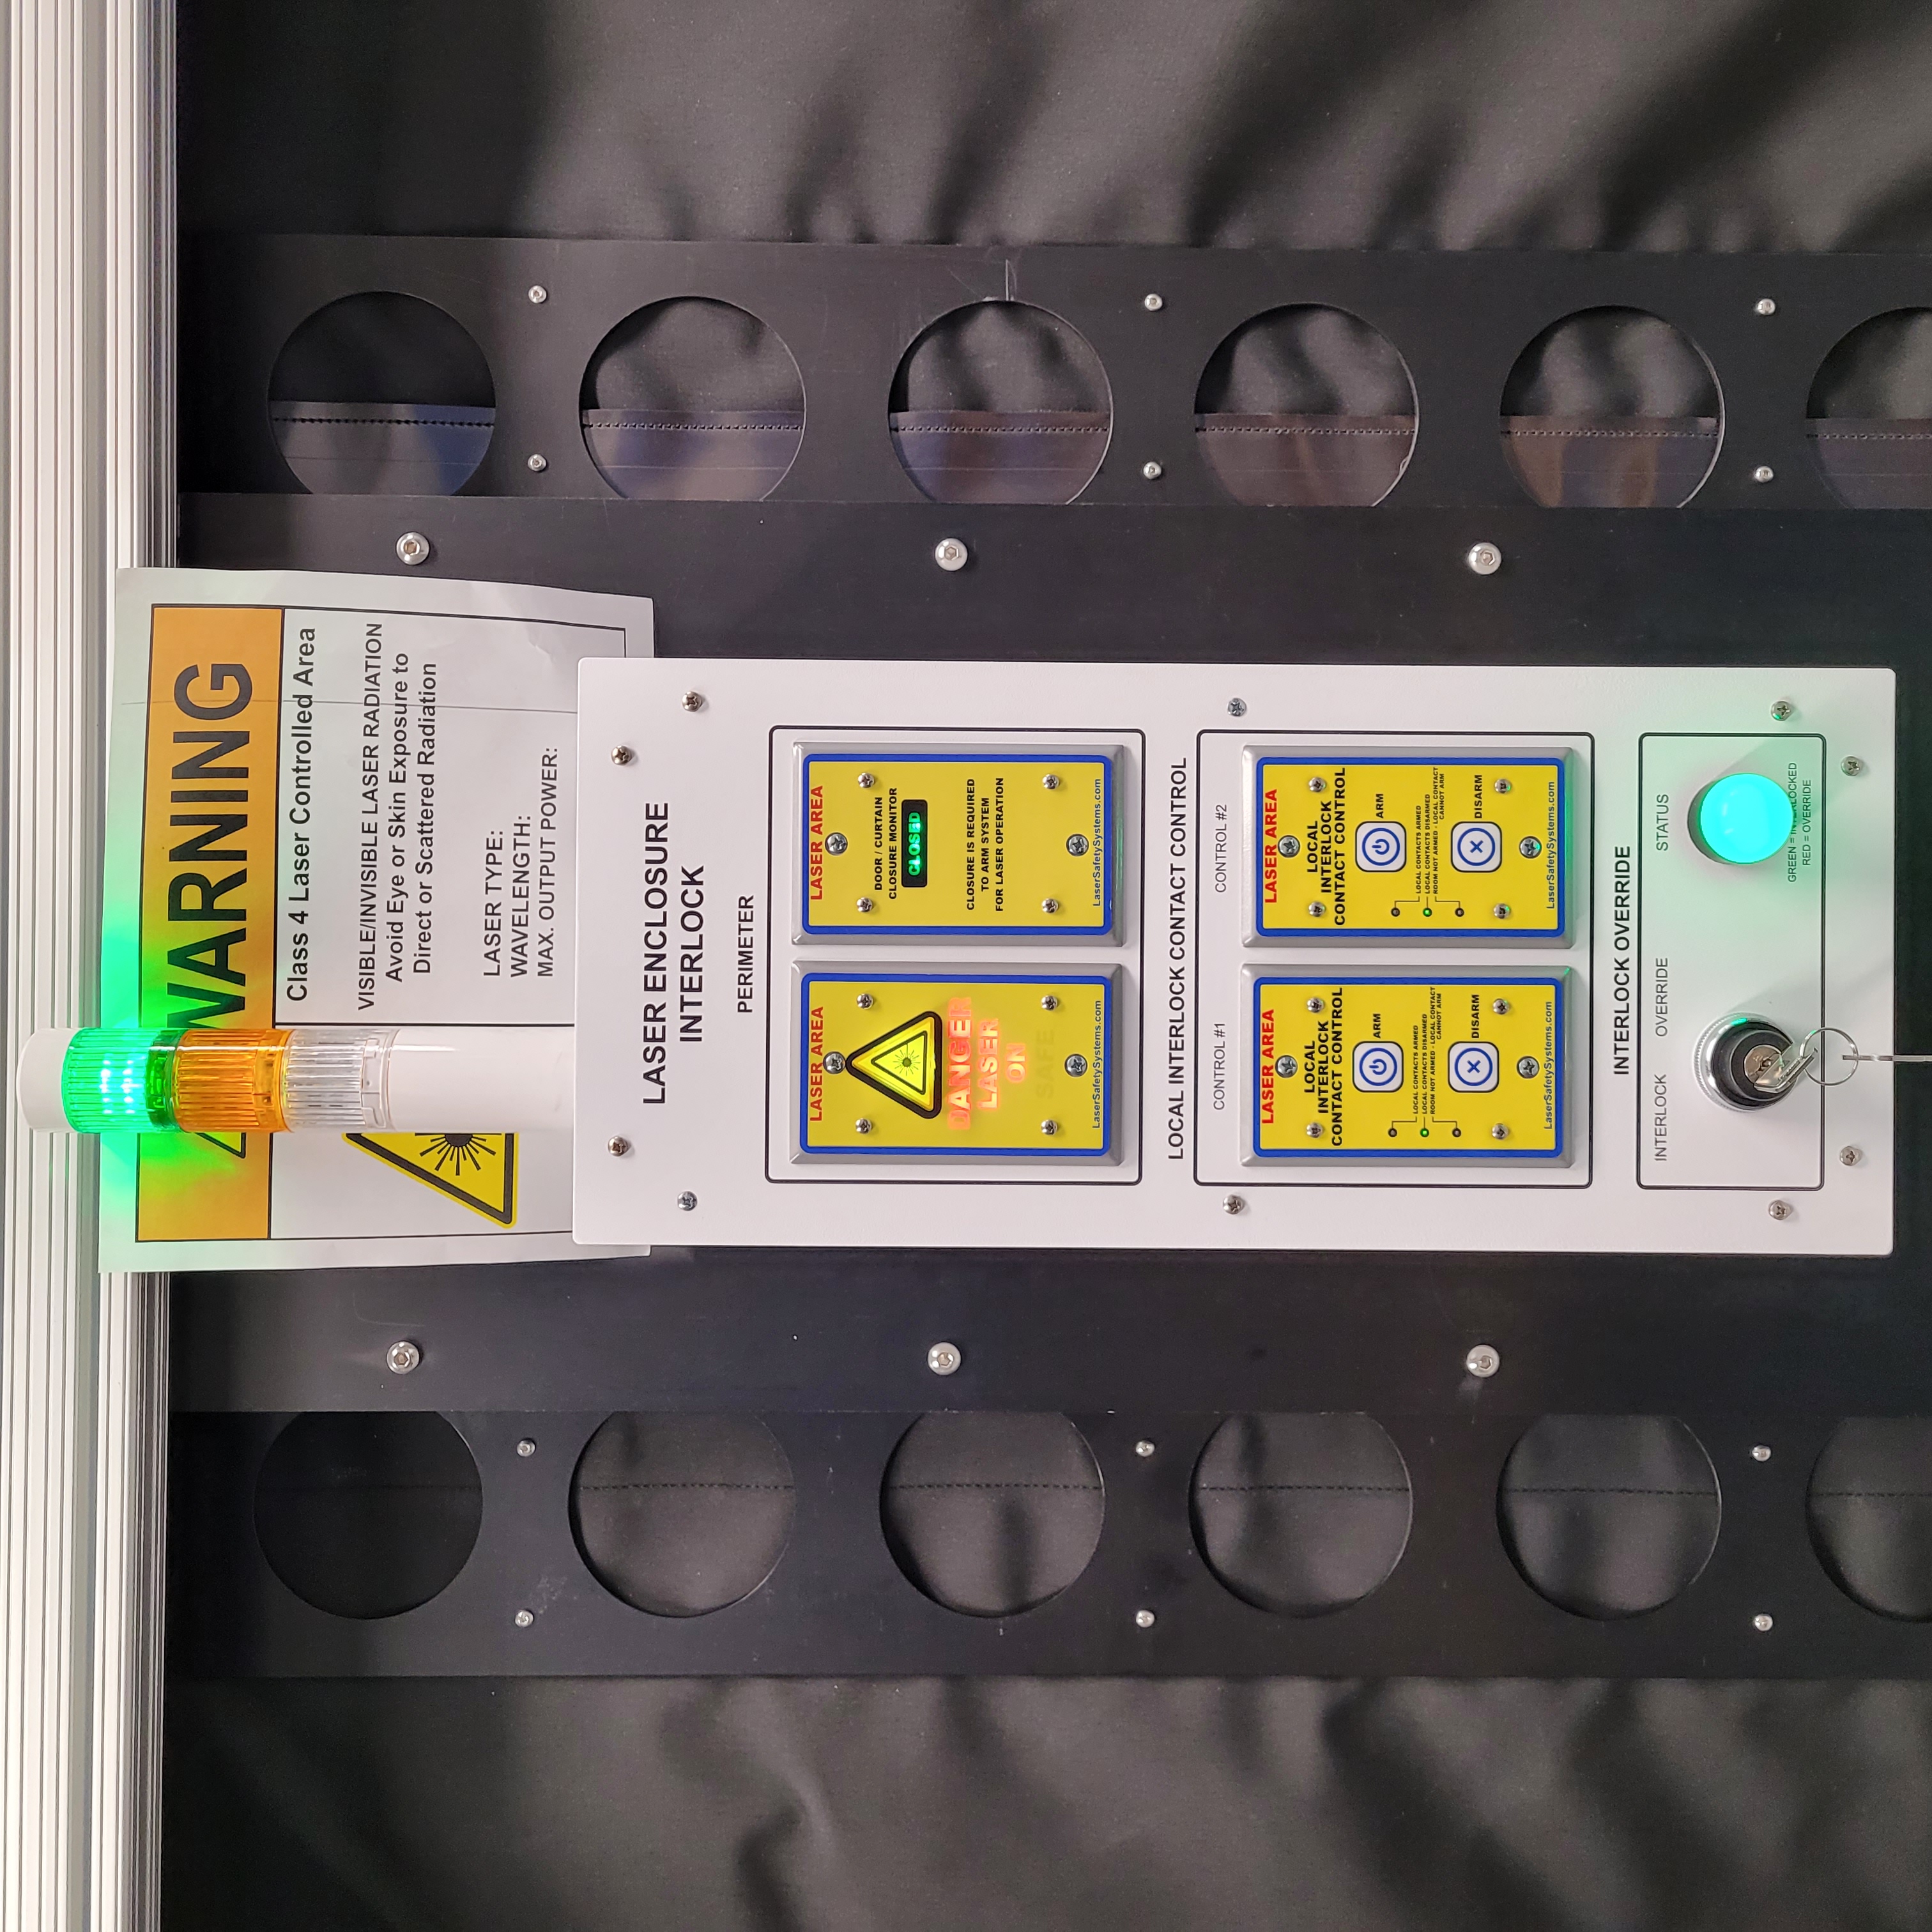
Figure 1: Hutch-1 Astrella enclosure protocase. It is located on the south wall of the enclosure.
Beacon Stacks
There are beacon stacks in Hutch-1 Control and on the Astrella LASER ENCLOSURE INTERLOCK protocase. The beacons stacks can notify you of the arming status for Hutch-1 and the Astella, as well as the override status of the enclosure.
Status |
Beacon Color |
|---|---|
Hutch-1 is not armed as a laser lab. |
Beacon Color |
The Astrella is set to administrative override. This state is only possible if Hutch-1 is armed. |
Beacon Color |
The Astrella is armed. This state is possible with or without Hutch-1 being armed. |
Beacon Color |
VIEWMARQ Display
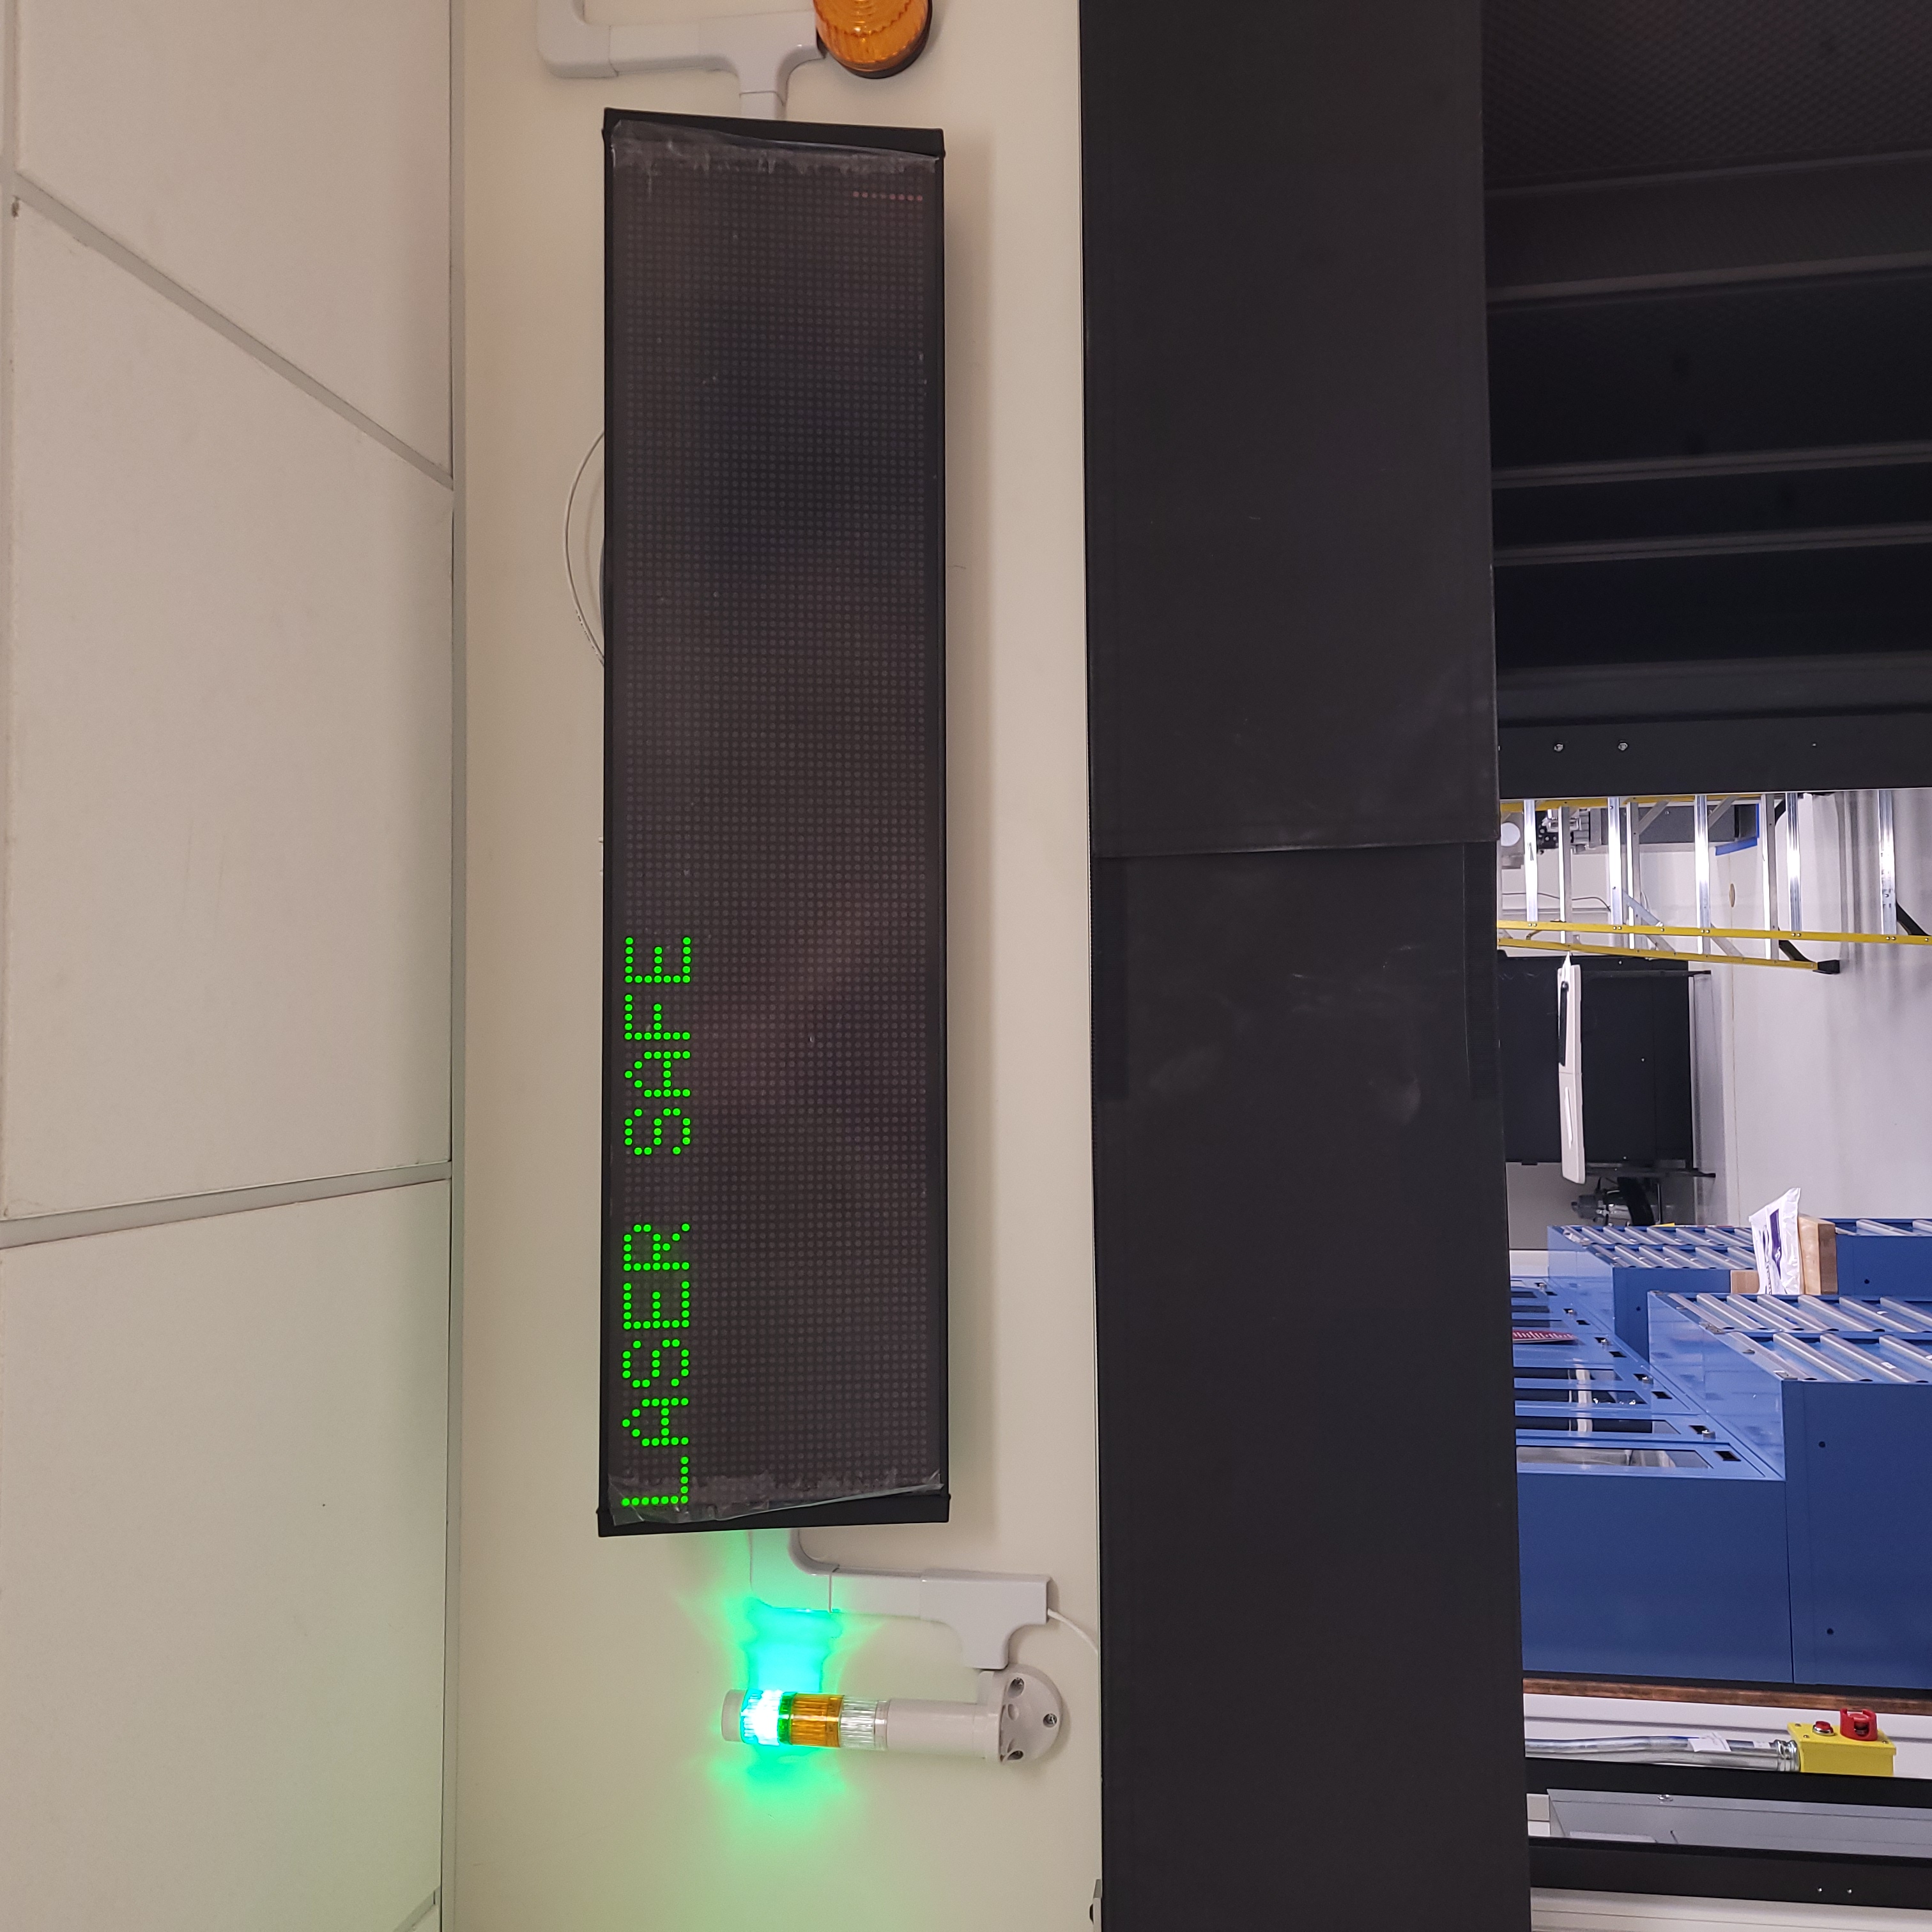
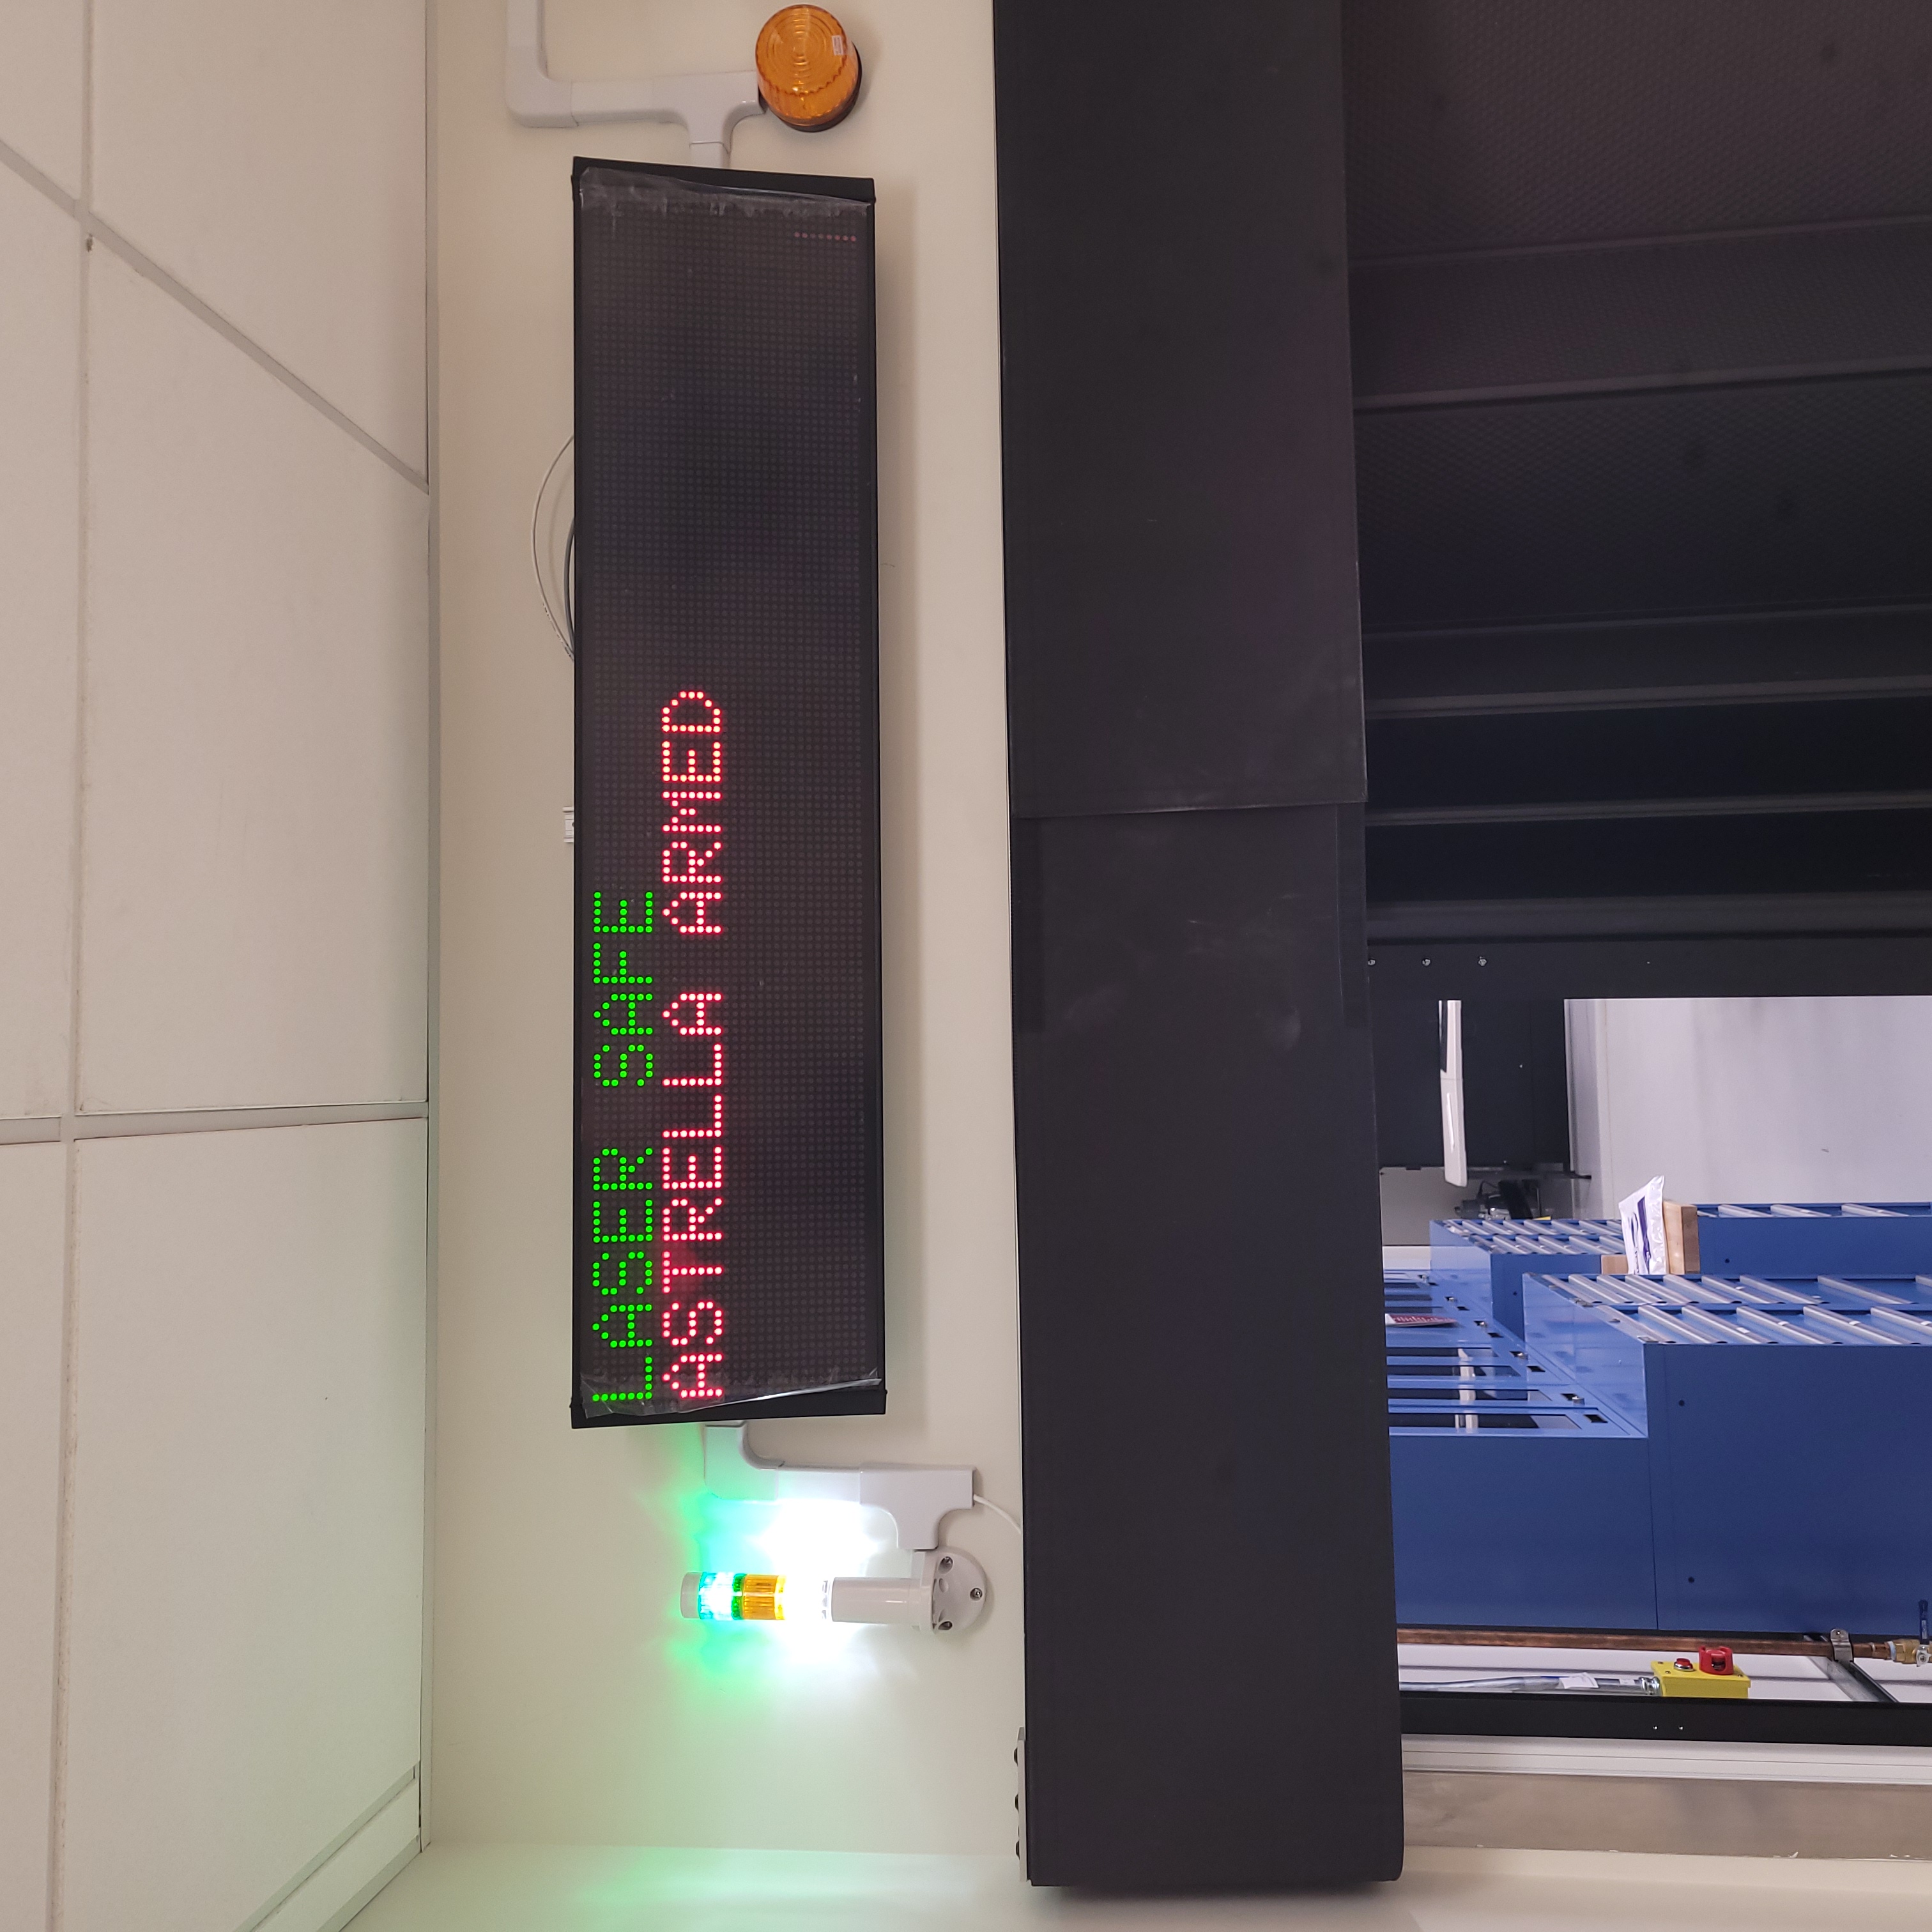
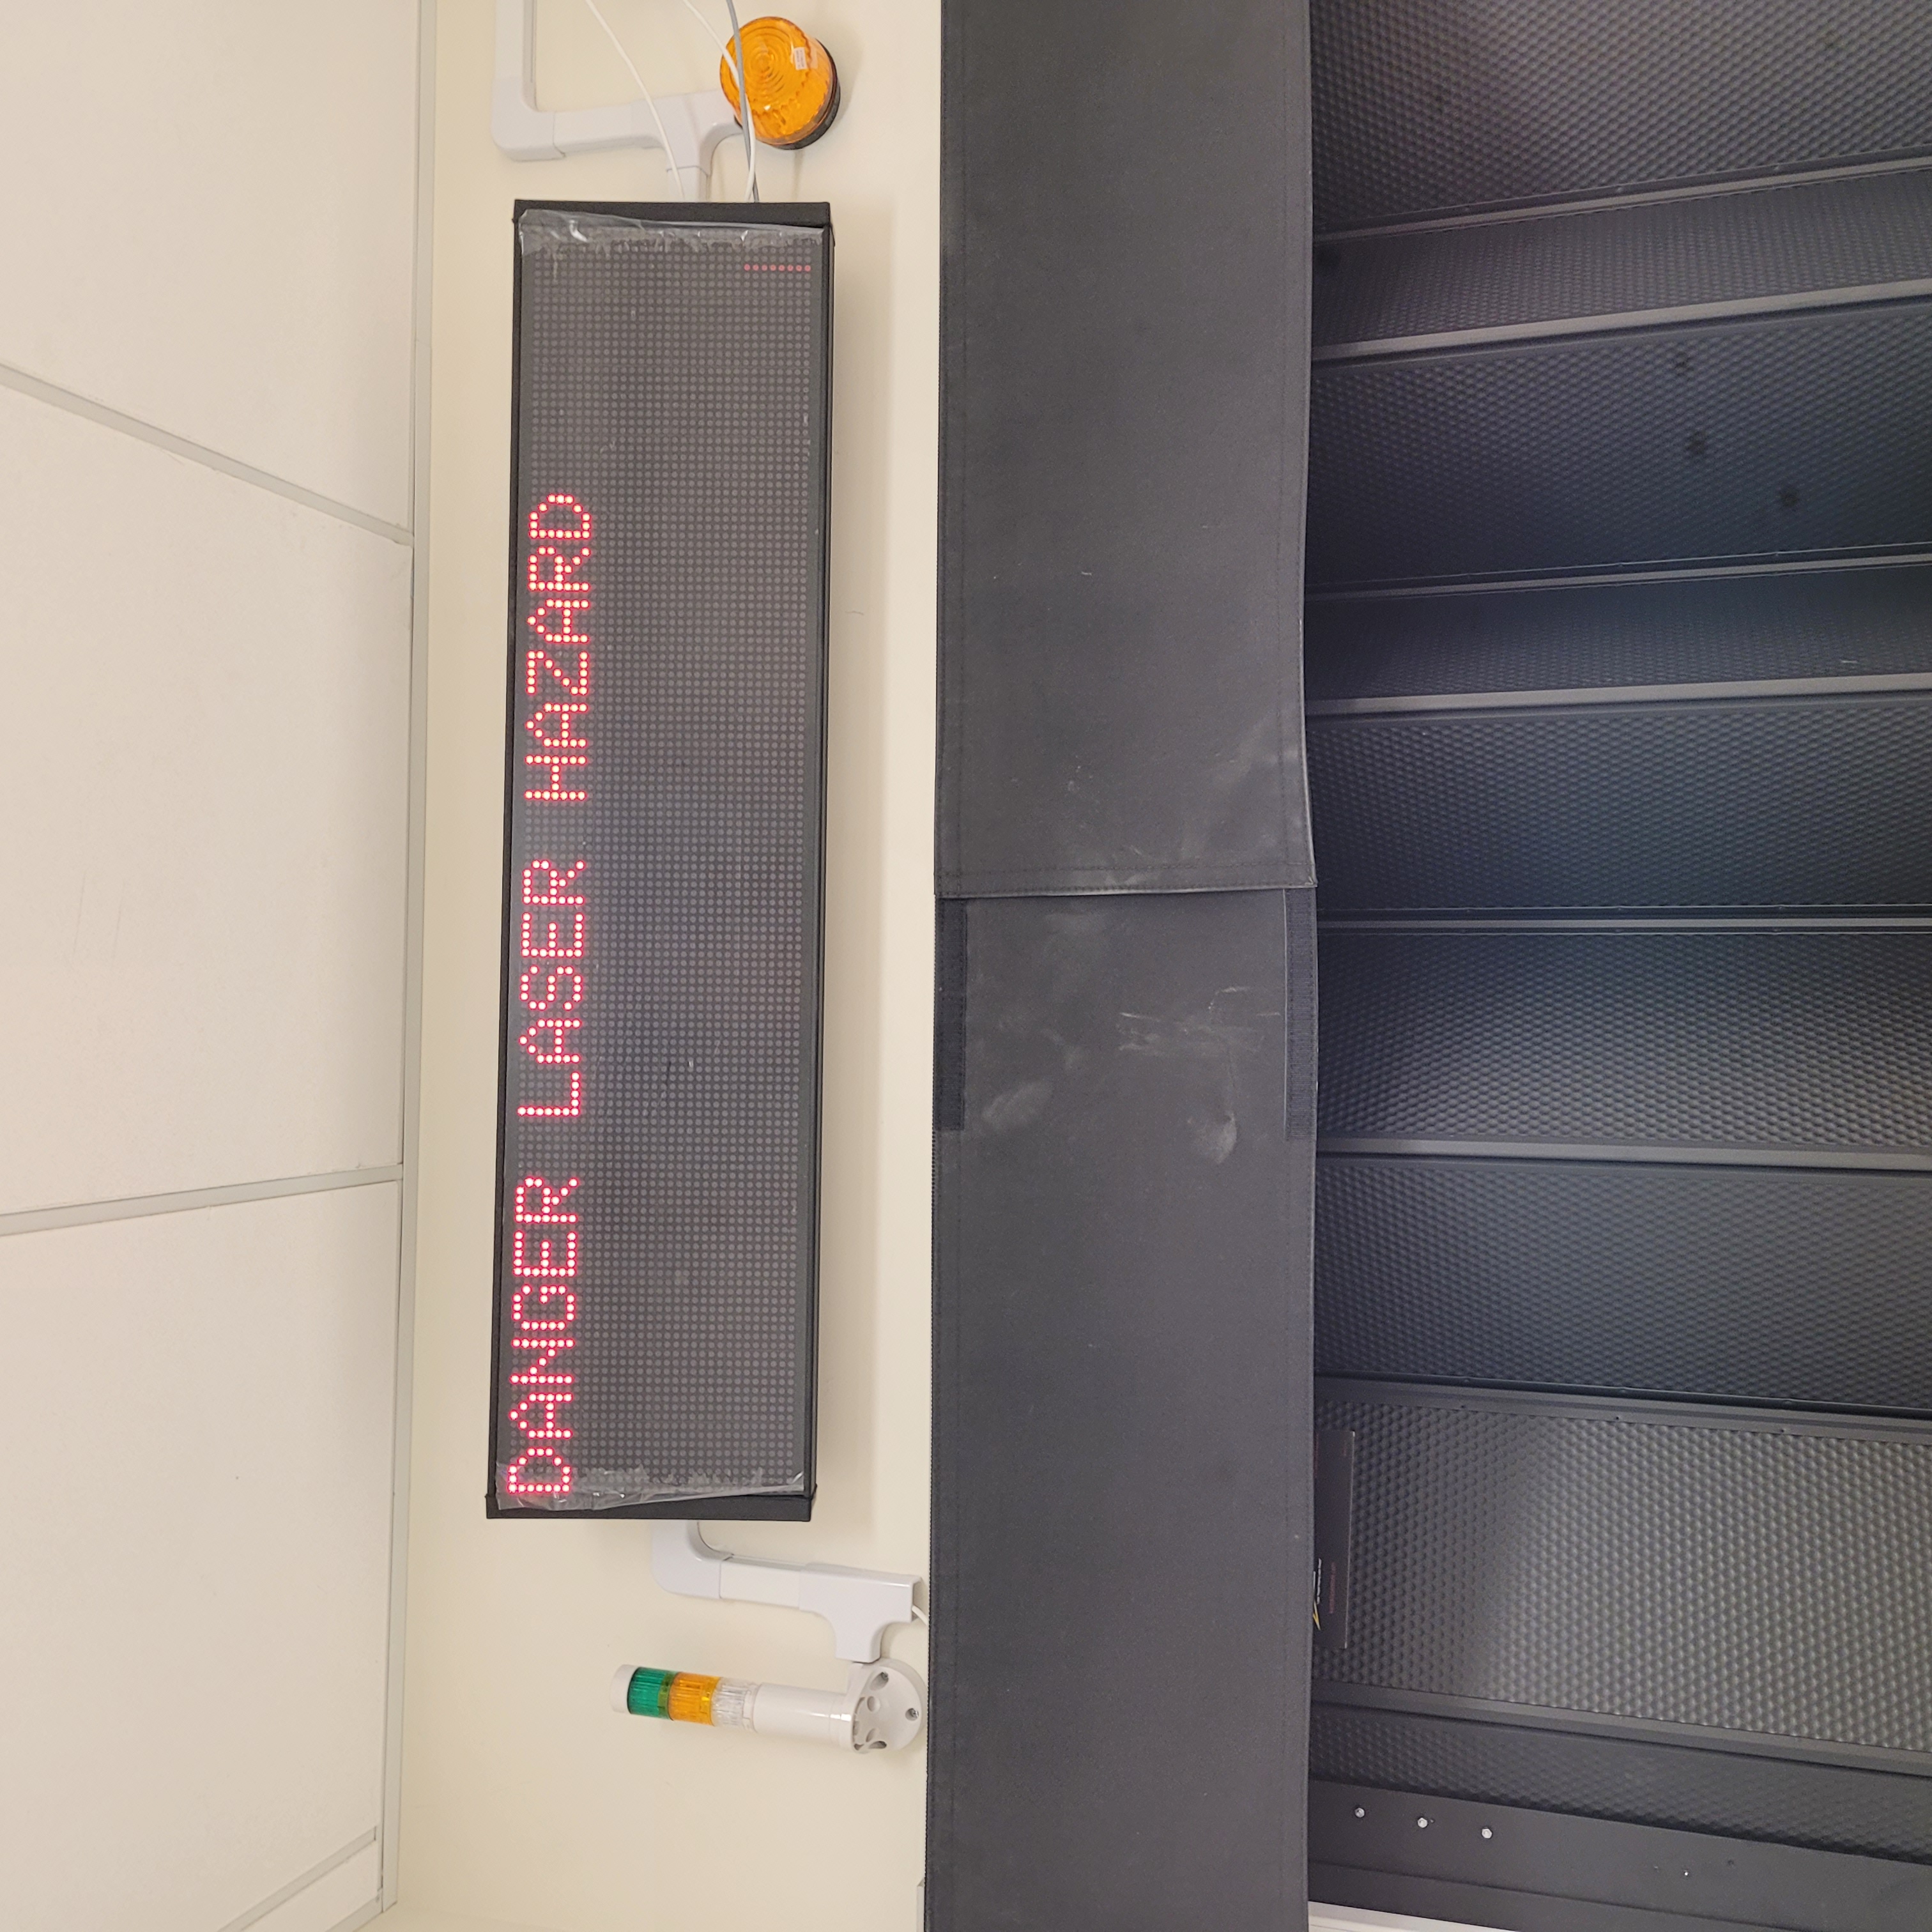
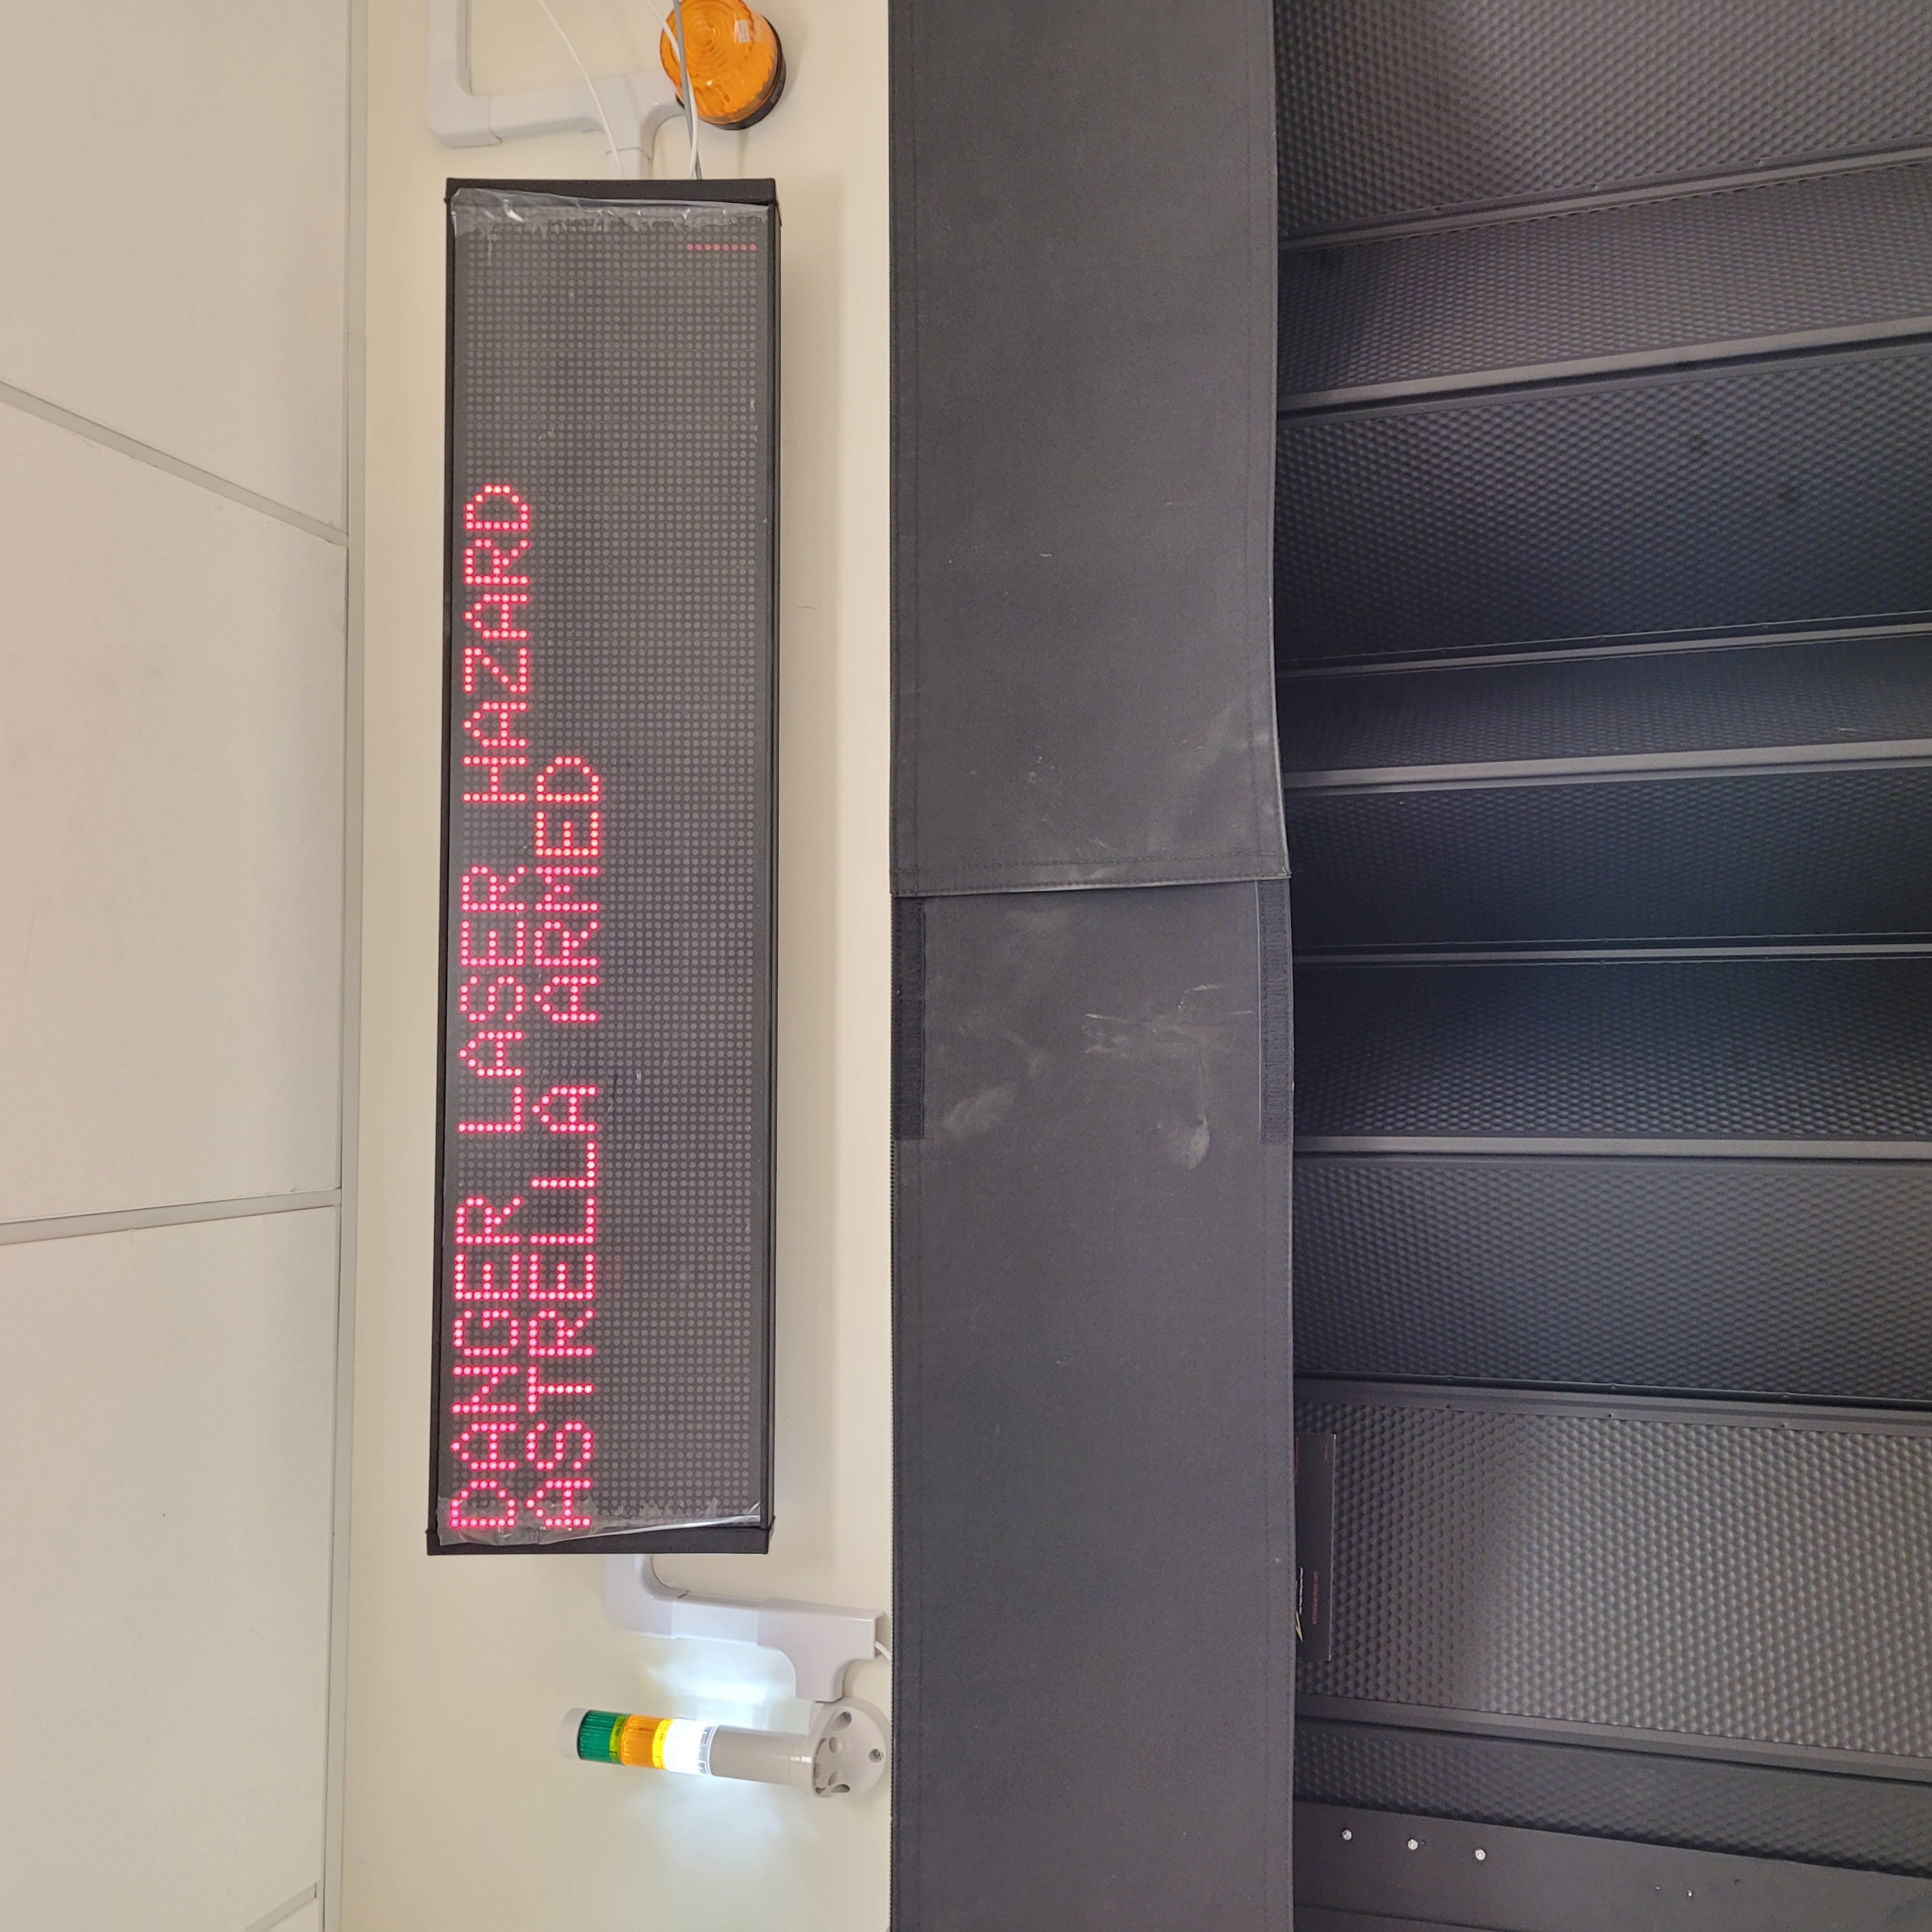
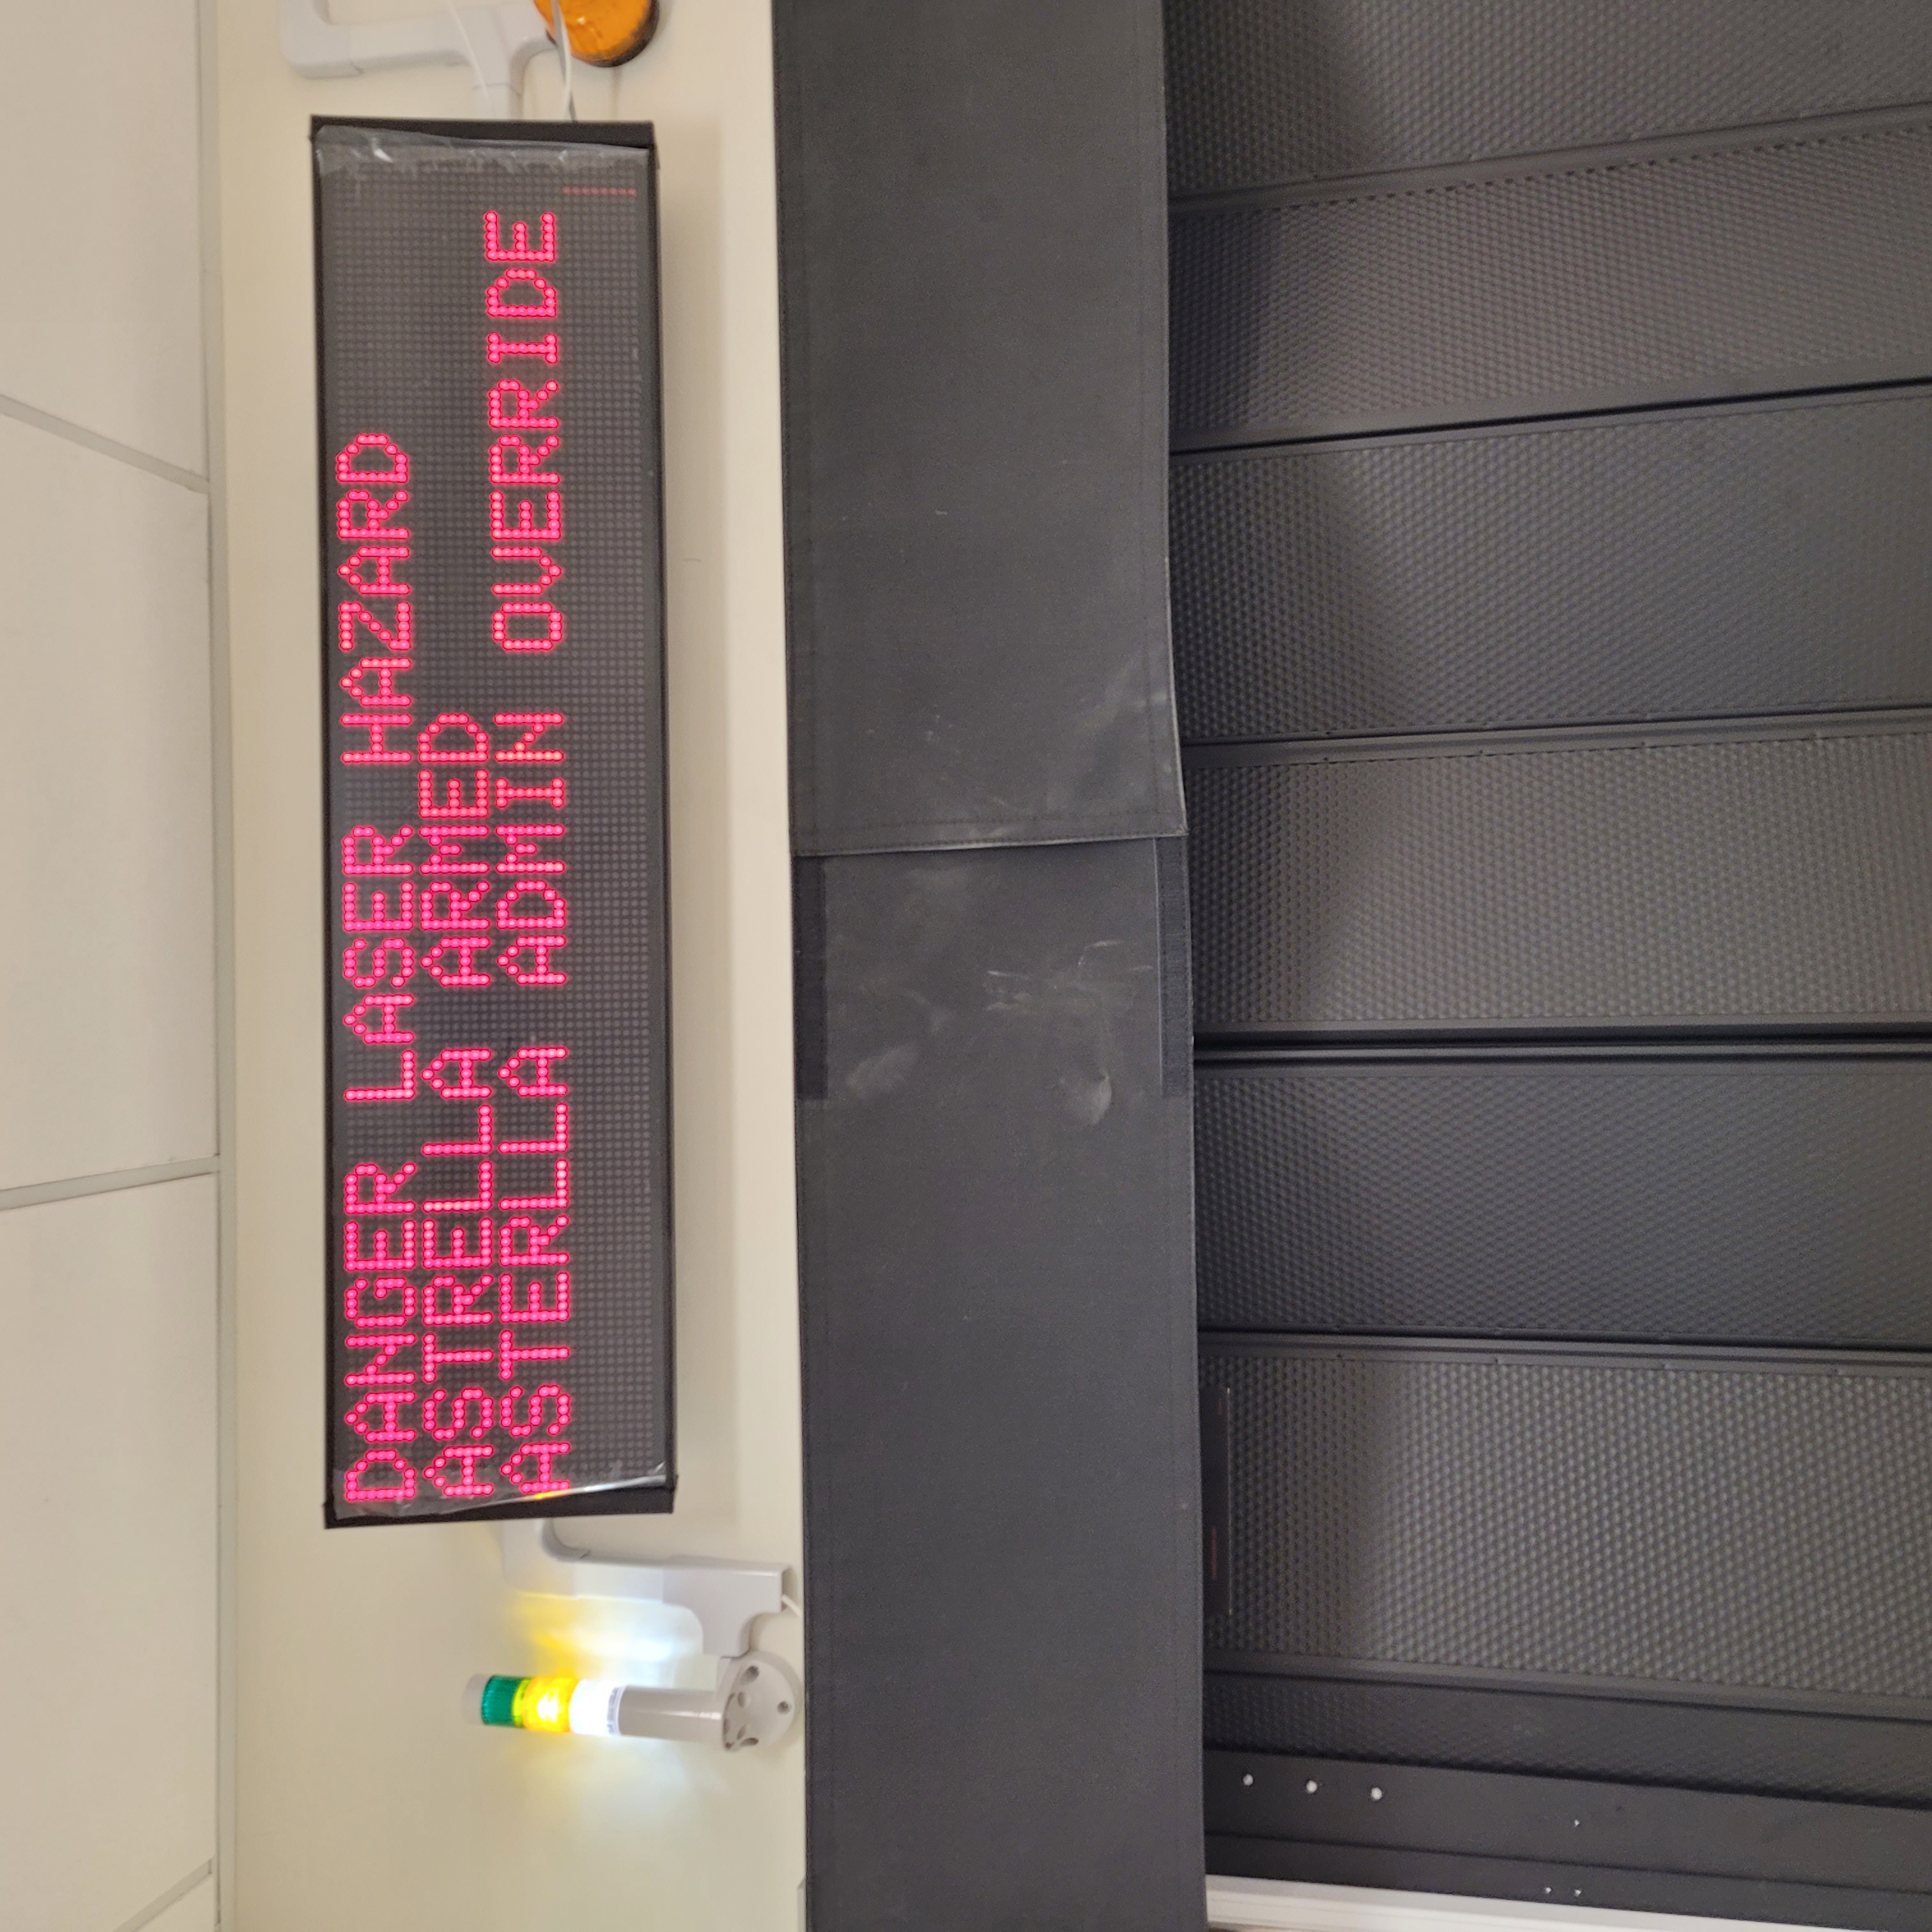
There is a VIEWMARQ display in Hutch-1 Control that states the status of potential laser hazards in Hutch-1. This display can notify you of the arming status for Hutch-1 and the Astella, as well as the interlock status of the enclosure.
VIEWMARQ Display Notes |
VIEWMARQ Display Text |
|---|---|
This states if Hutch-1 is armed as a laser lab or not. |
LASER SAFE / DANGER LASER HAZARD |
This states if the Astrella is armed. |
Astrella ARMED |
This states if the Astrella is in administrative override. |
Astrella ADMIN OVERRIDE |
The top line always will either display LASER SAFE or DANGER LASER HAZARD. All other possible states will only appear on the display when the hazard is presented.
Laser Safety System Modules
The laser interlock system is interfaced through the laser safety systems modules. Below is an outline of the modules and what they do.
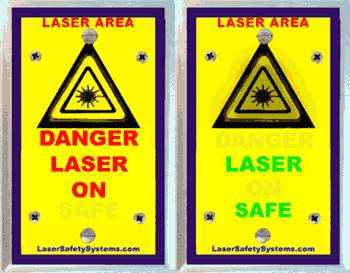
Figure 3: Area Warming Module
Module Location |
Module Meaning |
|---|---|
General Area Module
Vault-1 Control
Vault-1 Entry
|
These are warning modules tell you if Vault-1 is armed as a laser lab.
DANGER LASER ON = ARMED
|
Enclosure Modules
Pharos enclosure south wall
Pharos enclosure west wall
|
These warning modules tell you if the enclosure is armed.
There is no indication on if the laser is armed.
DANGER LASER ON = ARMED
|
Protocase Modules
Pharos enclosure protocase
Dira enclosure protocase
|
These warning modules tell you if the enclosure is forced to a safe state.
DANGER LASER HAZARD = SAFE STATE IS NOT FORCED
|
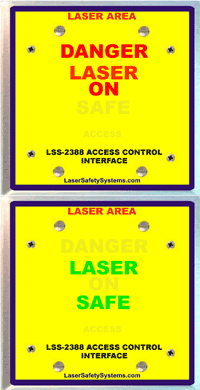
Figure 4: Control Module
This module is a control module for the local laser interlock, however, for the users it serves as another warning module. This warning module tells you if the local interlock is armed or not.
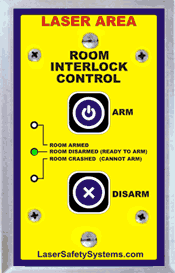
Figure 5: Room Arm Module
This module is used to arming system systems in the laser interlock system. For example, there are two in Vault-1, one to arm the vault and one to arm the Pharos enclosure.
Module Message |
Message Meaning |
|---|---|
ROOM ARMED |
If this LED is on, then the corresponding system is armed
and interlocked.
|
ROOM DISARMED (READY TO ARM) |
If this LED is on, the the system is the correct state to armed
the module.
|
ROOM CRASHED (CANNOT ARM) |
If this LED is on, then there was a fault that tripped the
system, or a fault that will not allow the system to be armed.
|
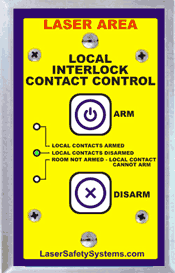
Figure 6: Local Arm Module
This module is used to arm the local interlock modules that are sub-systems of the room arm modules. For example, one the Pharos enclosure is armed, it enables the laser and the shutters to be armed by their local arming modules.
Module Message |
Message Meaning |
|---|---|
LOCAL CONTACTS ARMED |
If this LED is on, then the corresponding sub-system is armed. |
LOCAL CONTACTS DISARMED |
If this LED is on, then the connected room module is armed,
but this module is not.
|
LOCAL CONTACTS DISARMED
ROOM NOT ARMED
LOCAL CONTACT CANNOT ARM
|
If this LED is on, then there was a fault that tripped, or the room
module is not armed.
|
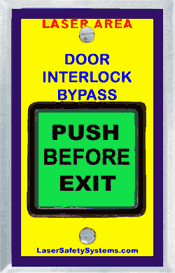
Figure 7: Push to Exit Module
This module is used to exit when a room is armed as a laser lab. When the rooms are armed, the doors are magnetically locked. This button will temporarily unlock the door to allow you to exit the room.
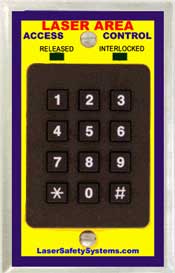
Figure 8: Keypad
This is the key pad that is used to enter a room that is armed as a laser lab. This keypad has a primary pin for permanent users, and a secondary pin for temporary users that is meant to be changed frequently.
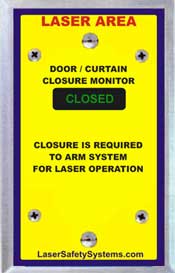
Figure 9: Door Monitor Module
This module is used to monitor the state of a door or curtain. It will display does not show CLOSED, then it is open. If the system is put into an administrative override state, then the door monitor will always show CLOSED.
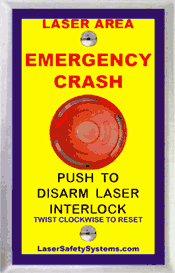
Figure 10: Laser Emergency Stop Button.
All the laser enclosures are equipped with laser emergency stop buttons. The e-stops on an enclosure can only crash that specific laser.
Additionally, there are ionizing radiation emergency stop buttons in Vault-1 and Vault-1 Control. Those only serve the purpose of crashing the transmitters and are not located on the laser enclosures.
When the e-stop is pressed, the LED in the center will turn on. To reset the e-stop, twist the button clockwise.
Arming Hutch-1 Laser Systems
The laser systems that can be armed are Hutch-1, the Astrella enclosure, and the Astrella laser.
Arming the Astrella Enclosure and Laser
Because the Astrella is contained in an enclosure, Hutch-1 does not need to be armed to arm the Astrella enclosure and laser. To arm the Astrella enclosure, press arm on the room interlock module on the south wall of the enclosure. The room interlock module arms the enclosure.
Once the Astrella enclosure is armed, the Astrella laser can be armed with the local interlock module to the right of the room interlock module.
Once the Astrella system is armed the following will change in the interlock system:
Beacon stack white LEDs will turn on, indicating that the Astrella is armed.
The VIEWMARQ display will show ASTRELLA ARMED.
The laser warning module on the Astrella enclosure protocase will show DANGER LASER ON.
Astrella enclosure e-stop buttons will turn on, shown by the LED in the center. The e-stops are now functional and will crash the Astrella laser if pressed.
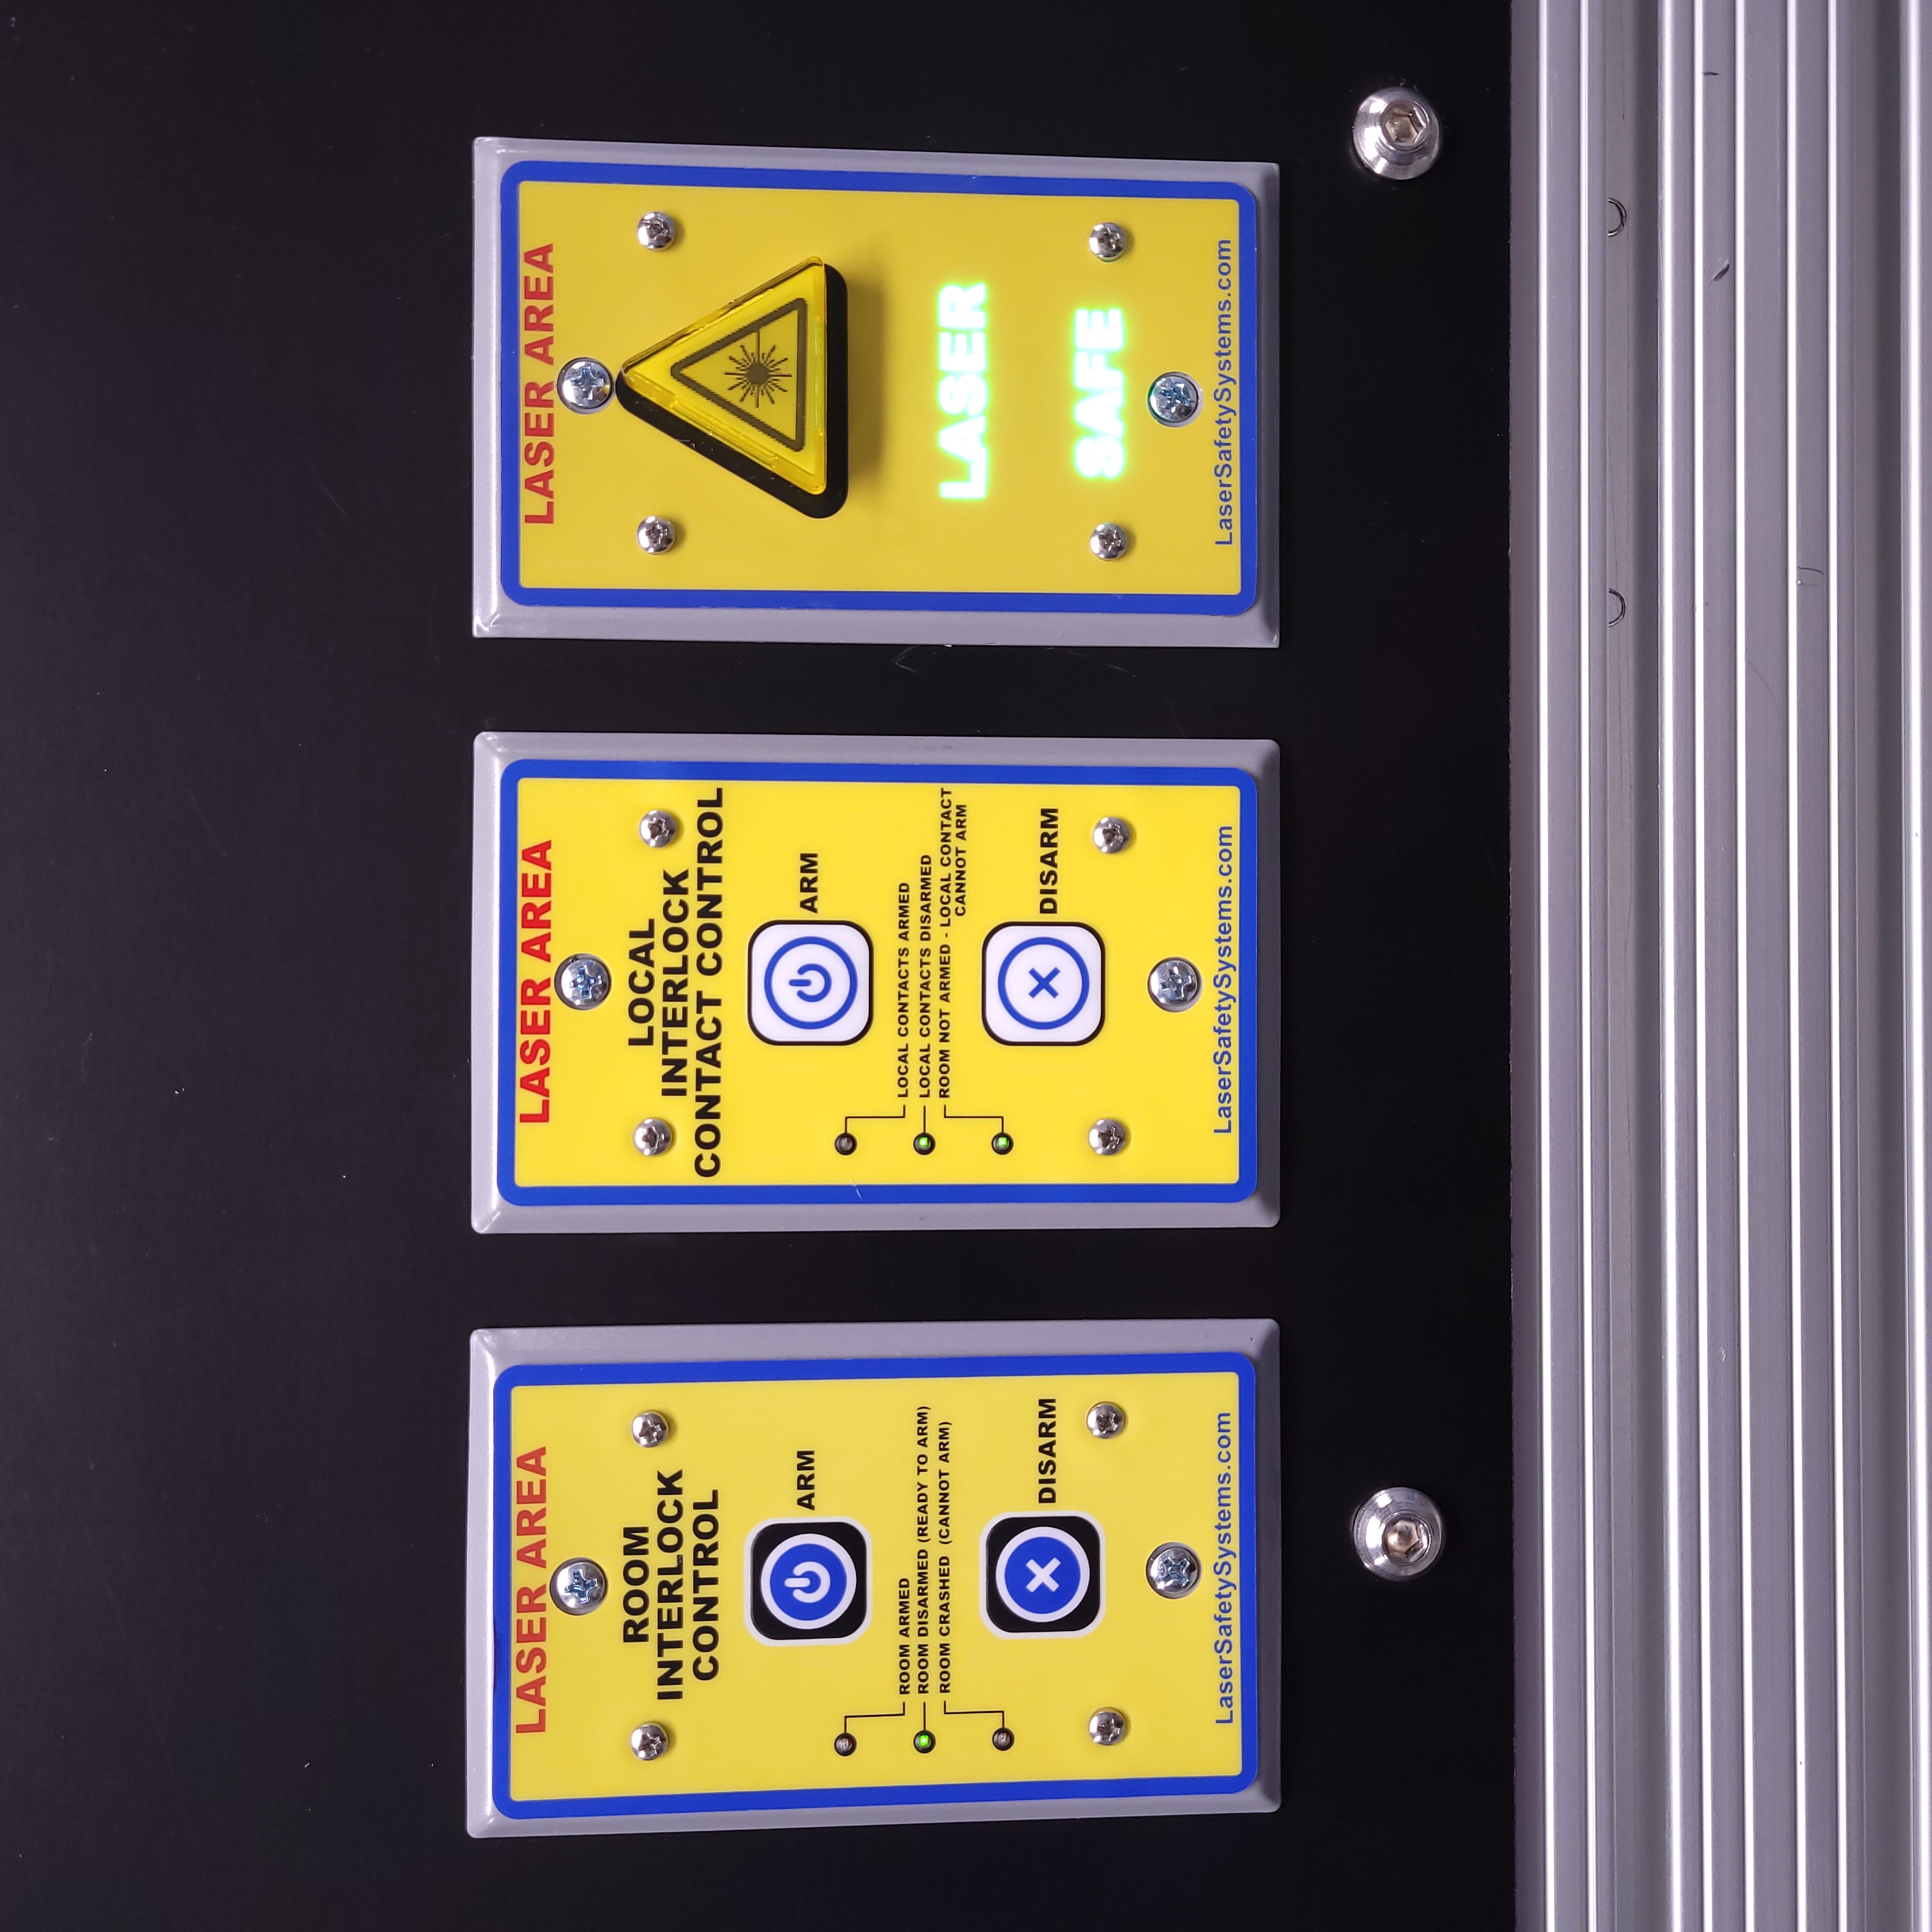
|
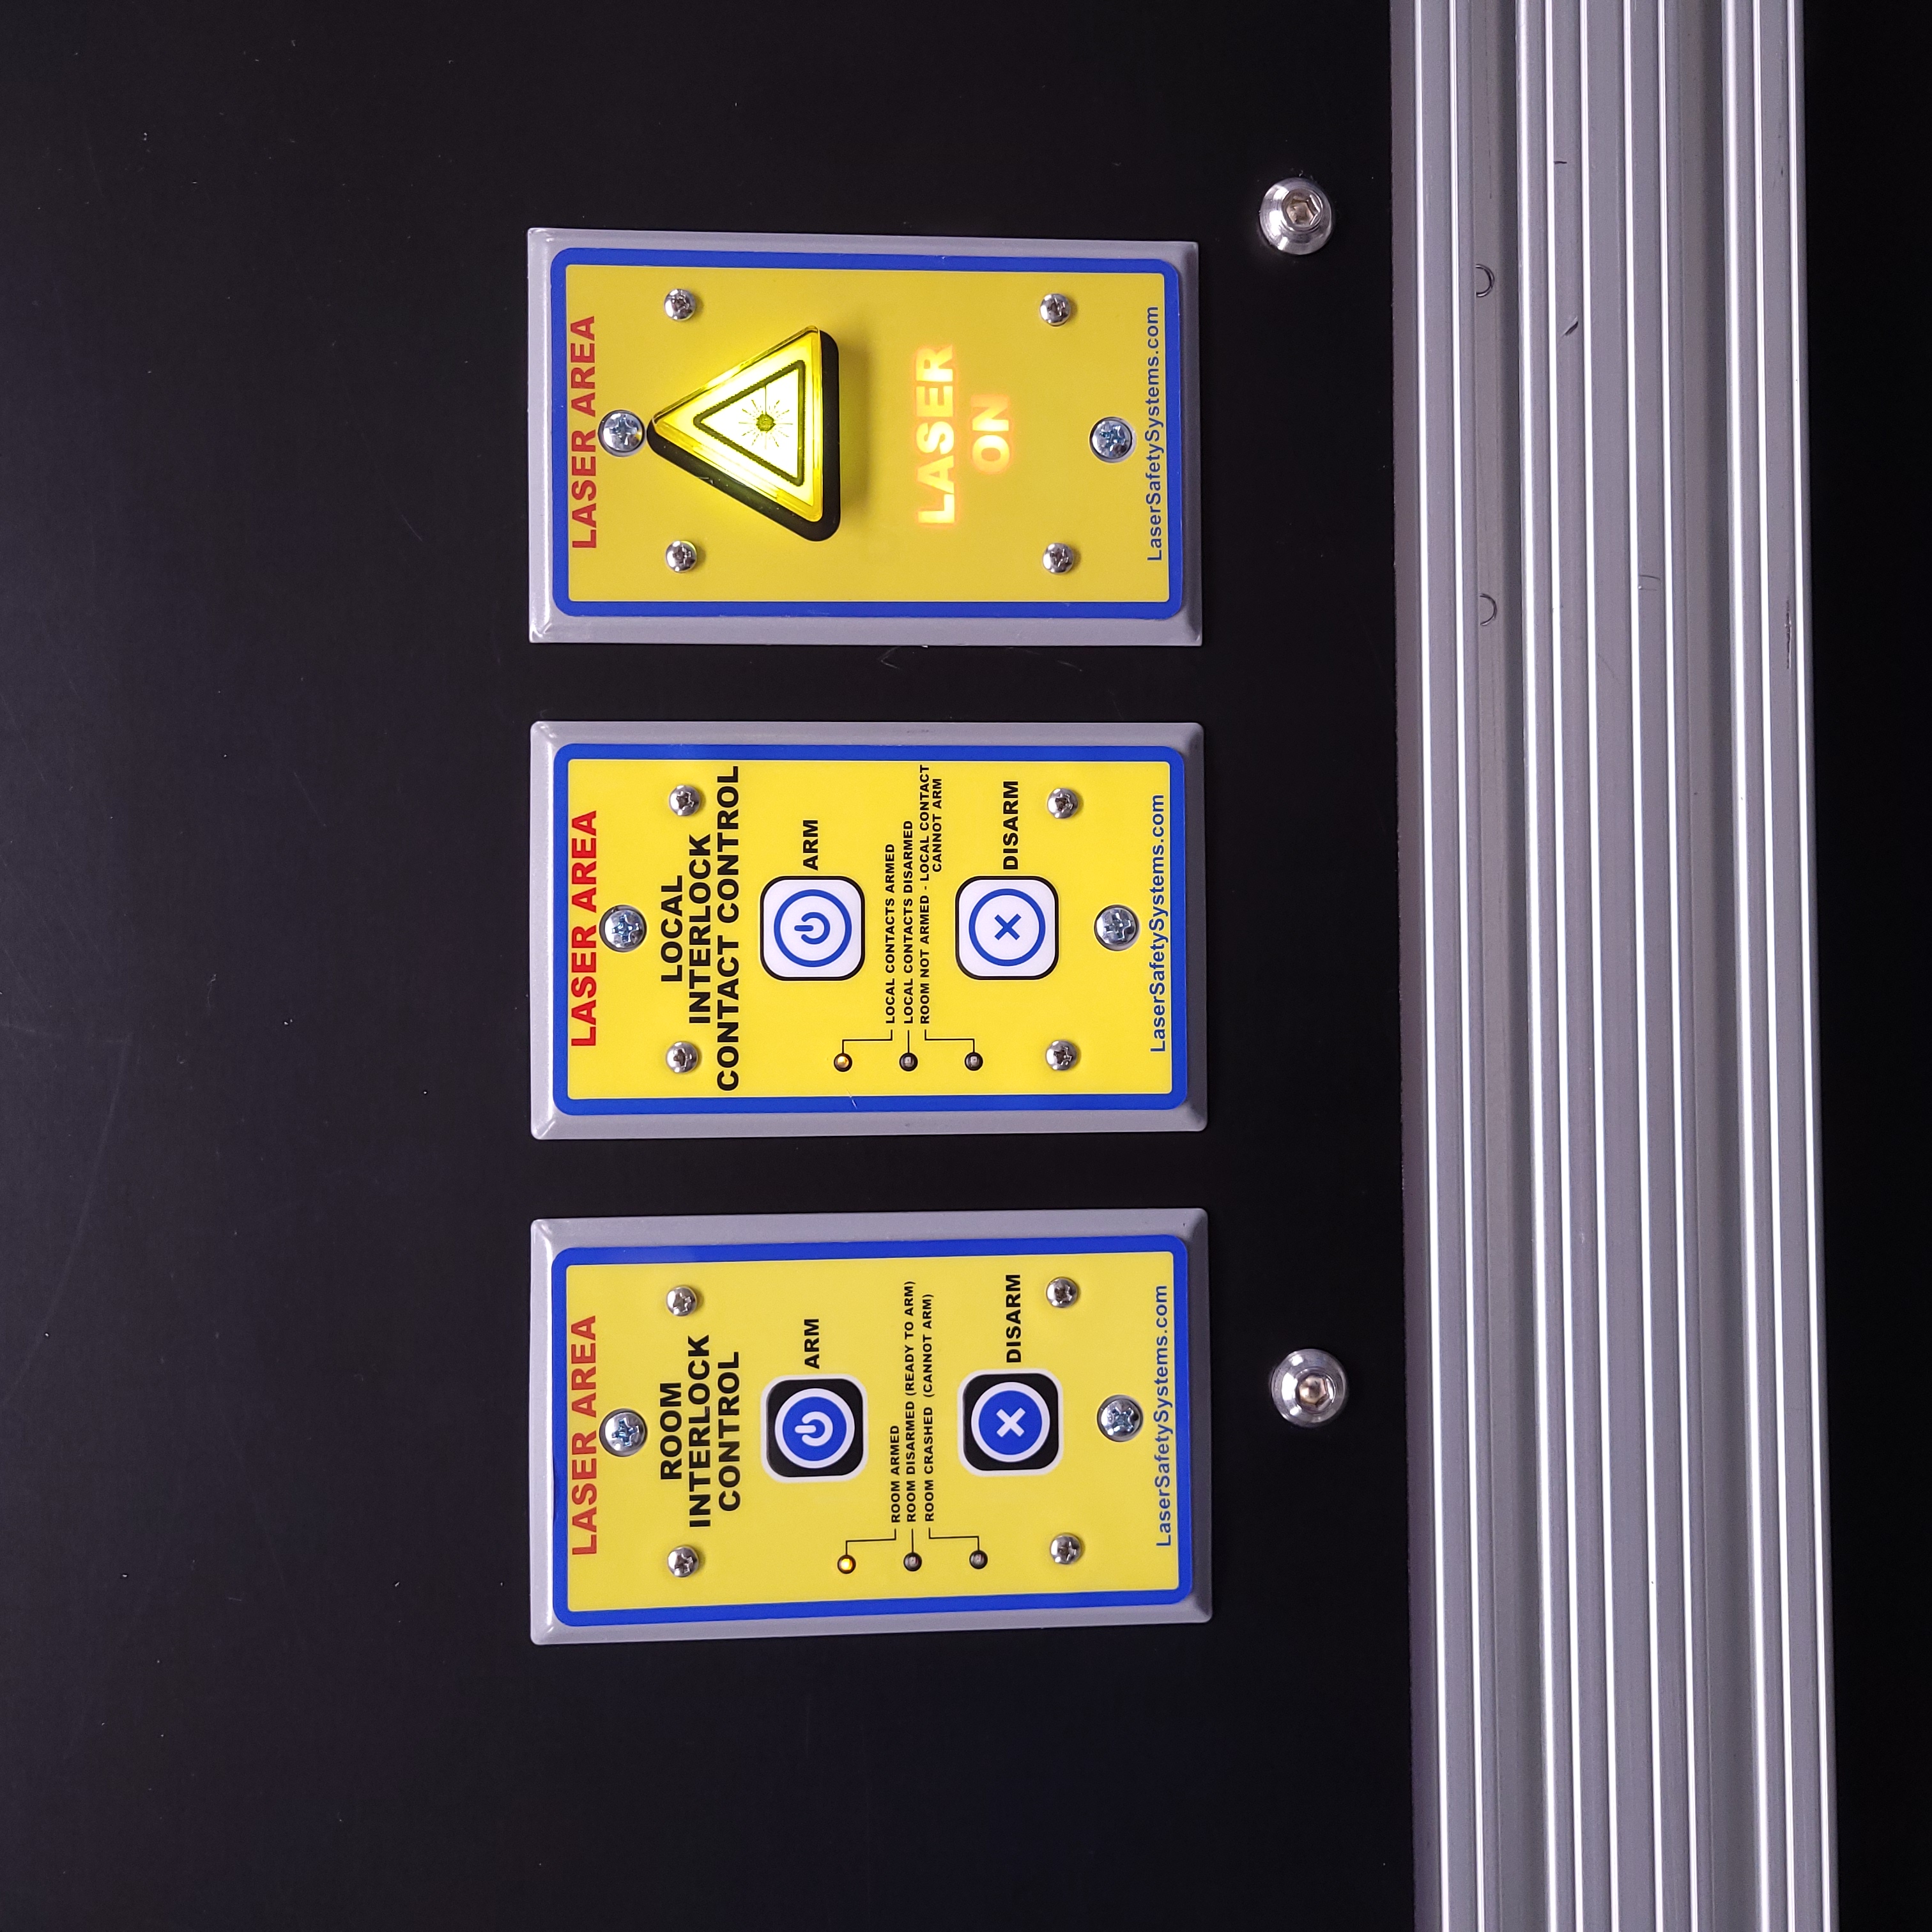
|
Astrella enclosure in an unarmed state. =================================================== |
Astrella enclosure in an armed state. ===================================================== |
Figure 11: Astrella enclosure armed and unarmed.
Arming Hutch-1
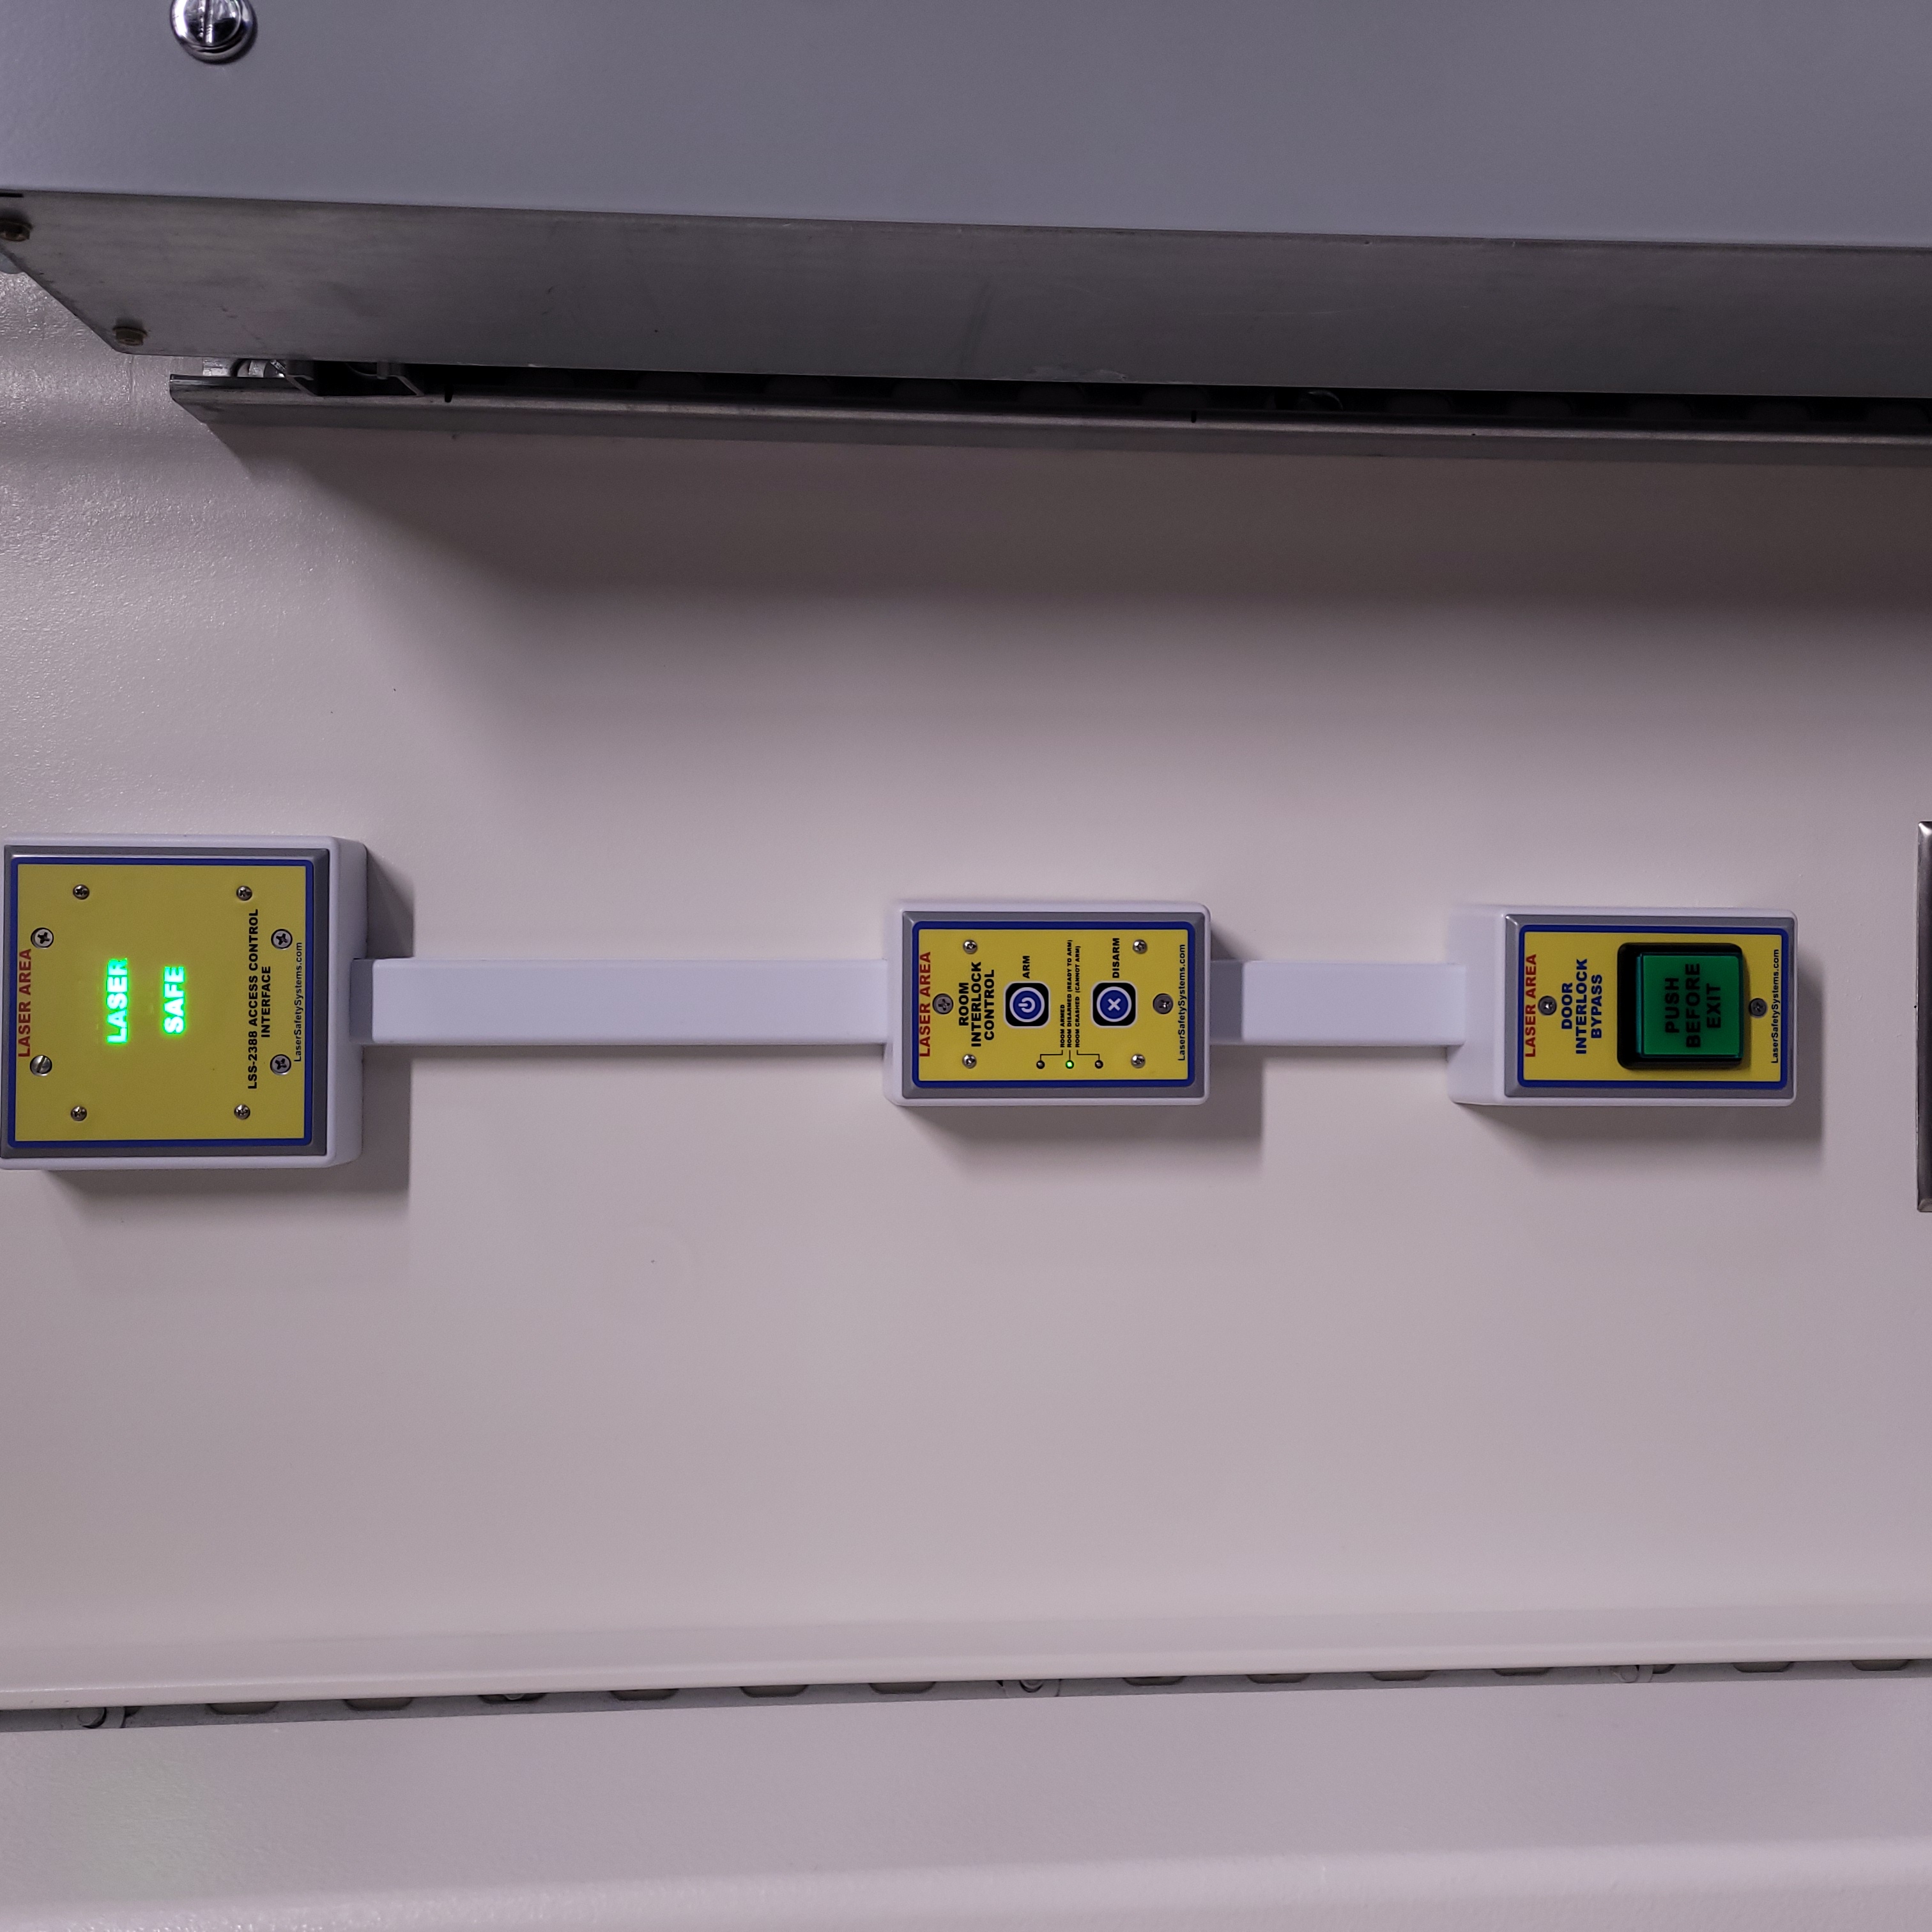
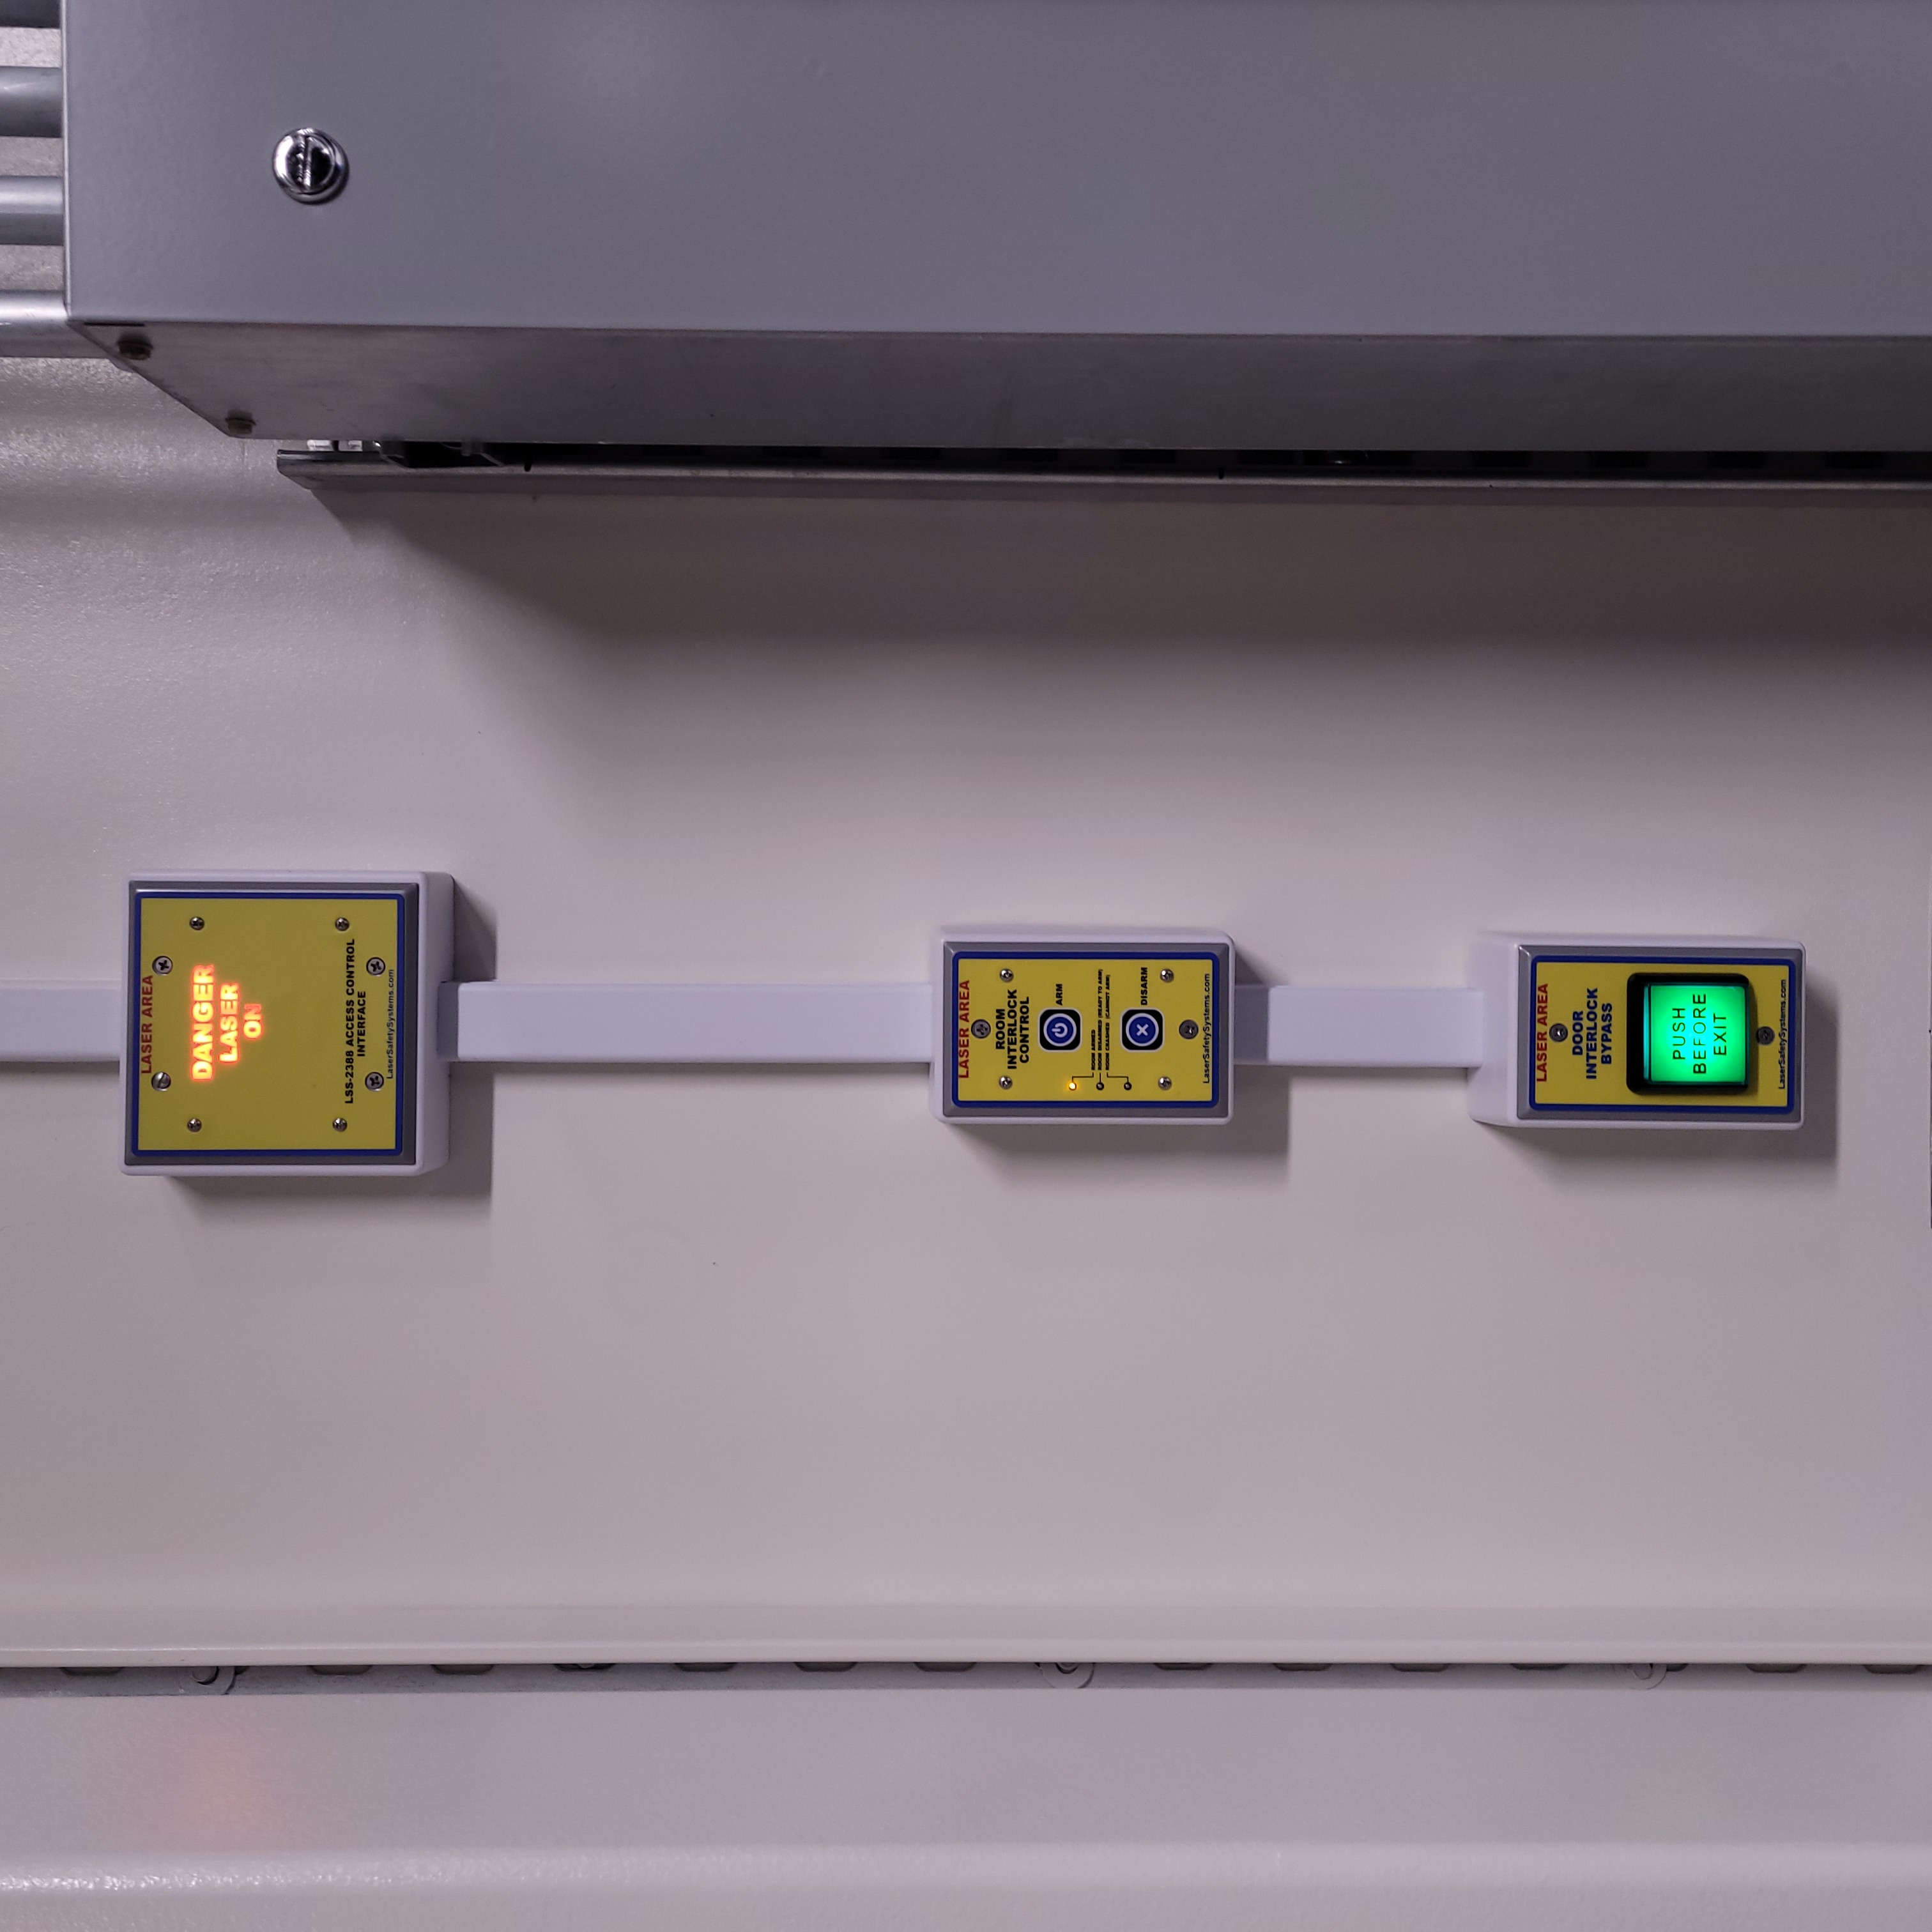
If work with a live laser must be performed in the enclosure, then Hutch-1 must be armed as a laser lab. To arm Hutch-1 as a laser lab, press arm on the room interlock module in the Hutch-1 entry. Unlike for the ionizing radiation interlock system, the laser system does not have search buttons, however it is the responsibility of the user to ensure that Vault-1 is cleared or proper PPE is distributed before arming Hutch-1. Once Hutch-1 is armed, the laser curtain door must be closed. The curtain door is not interlocked and it strictly the responsibility of the user. When the laser curtain is open, there will be a chiming prompting the user to close the curtain and informing people outside that the curtain is open.
|
|
Hutch-1 in an unarmed state. ========================================================= |
Hutch-1 in an armed state. =========================================================== |
Figure 12: Hutch-1 armed and unarmed.
These are the laser safety modules in the Hutch-1 entry. On the left are the modules in an unarmed state, and on the right are the modules in an armed state. In these images, from the top down are the laser control module (serving as a warning module), the push to exit button, and the room interlock module (arms Hutch-1 as a laser lab).
Once Hutch-1 is armed as a laser lab the following will change in the interlock system:
Beacon stack green LEDs will turn off, indicating that Hutch-1 is armed.
The VIEWMARQ display will show DANGER LASER HAZARD in place of LASER SAFE.
The laser warning modules in Hutch-1 Control and Hutch-1 Entry will show DANGER LASER ON.
The push to exit button will be on, shown by the LED in the button.
The Hutch-1 curtain door will be magnetically locked.
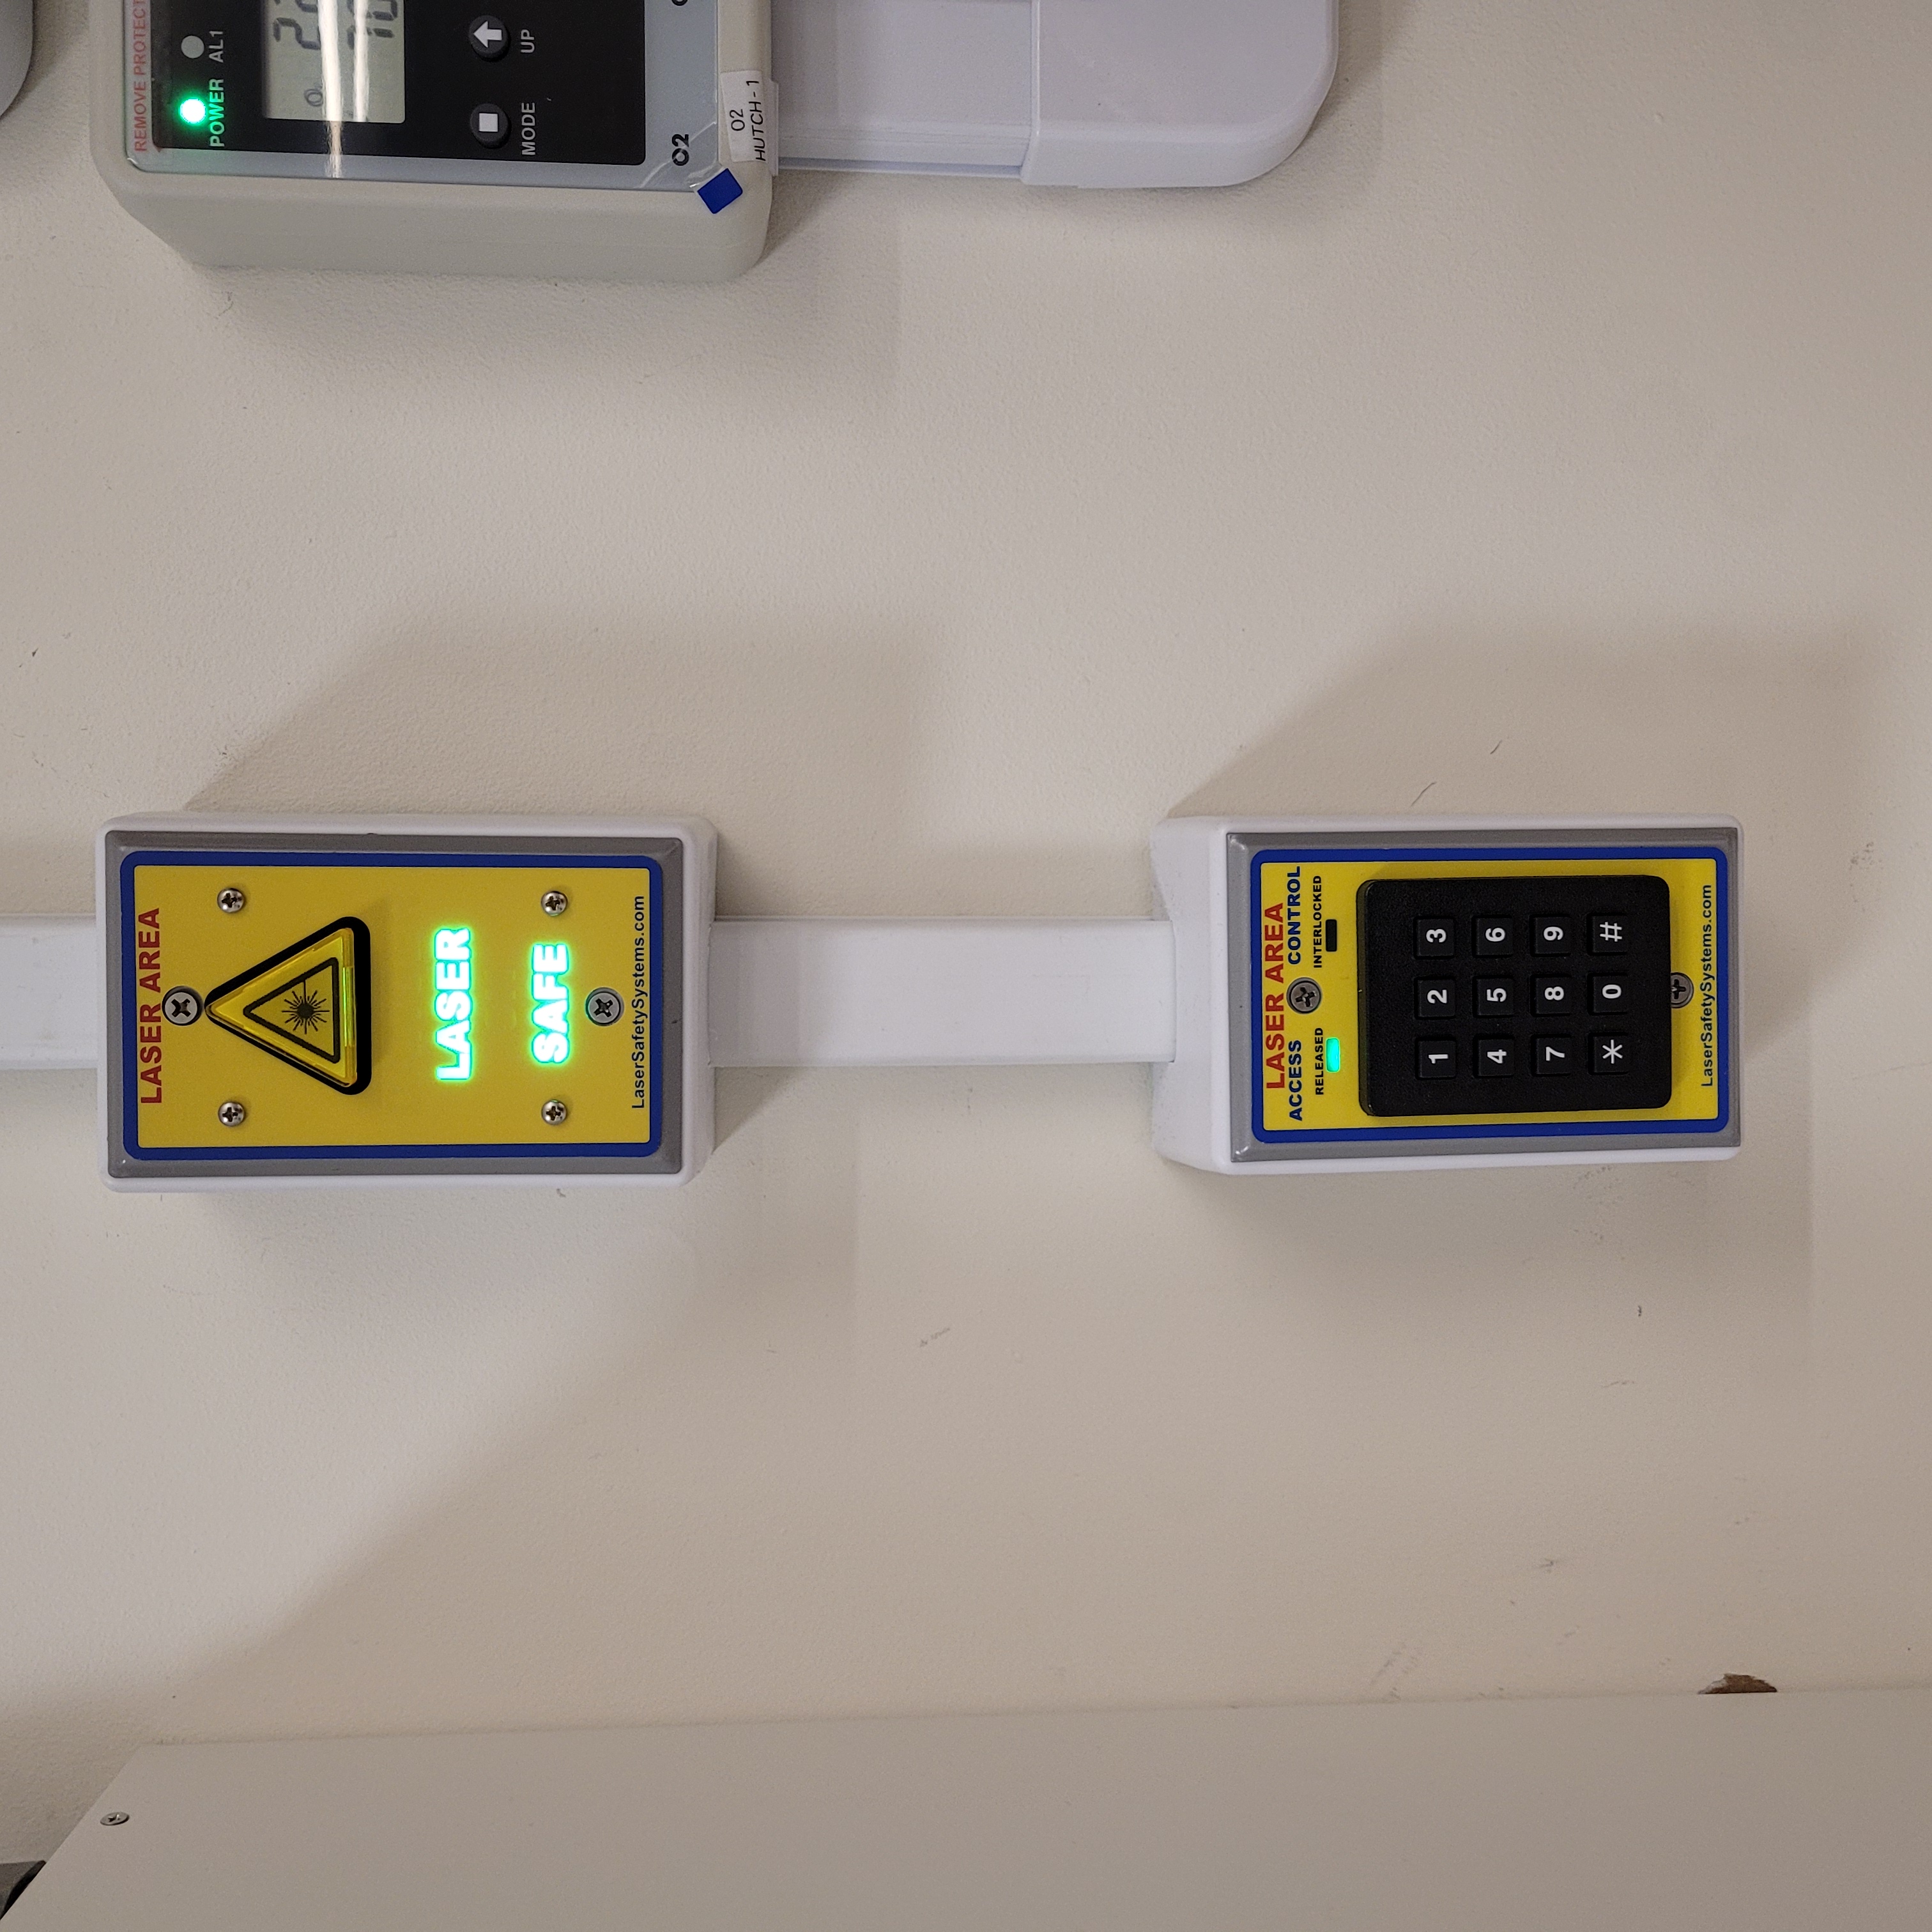
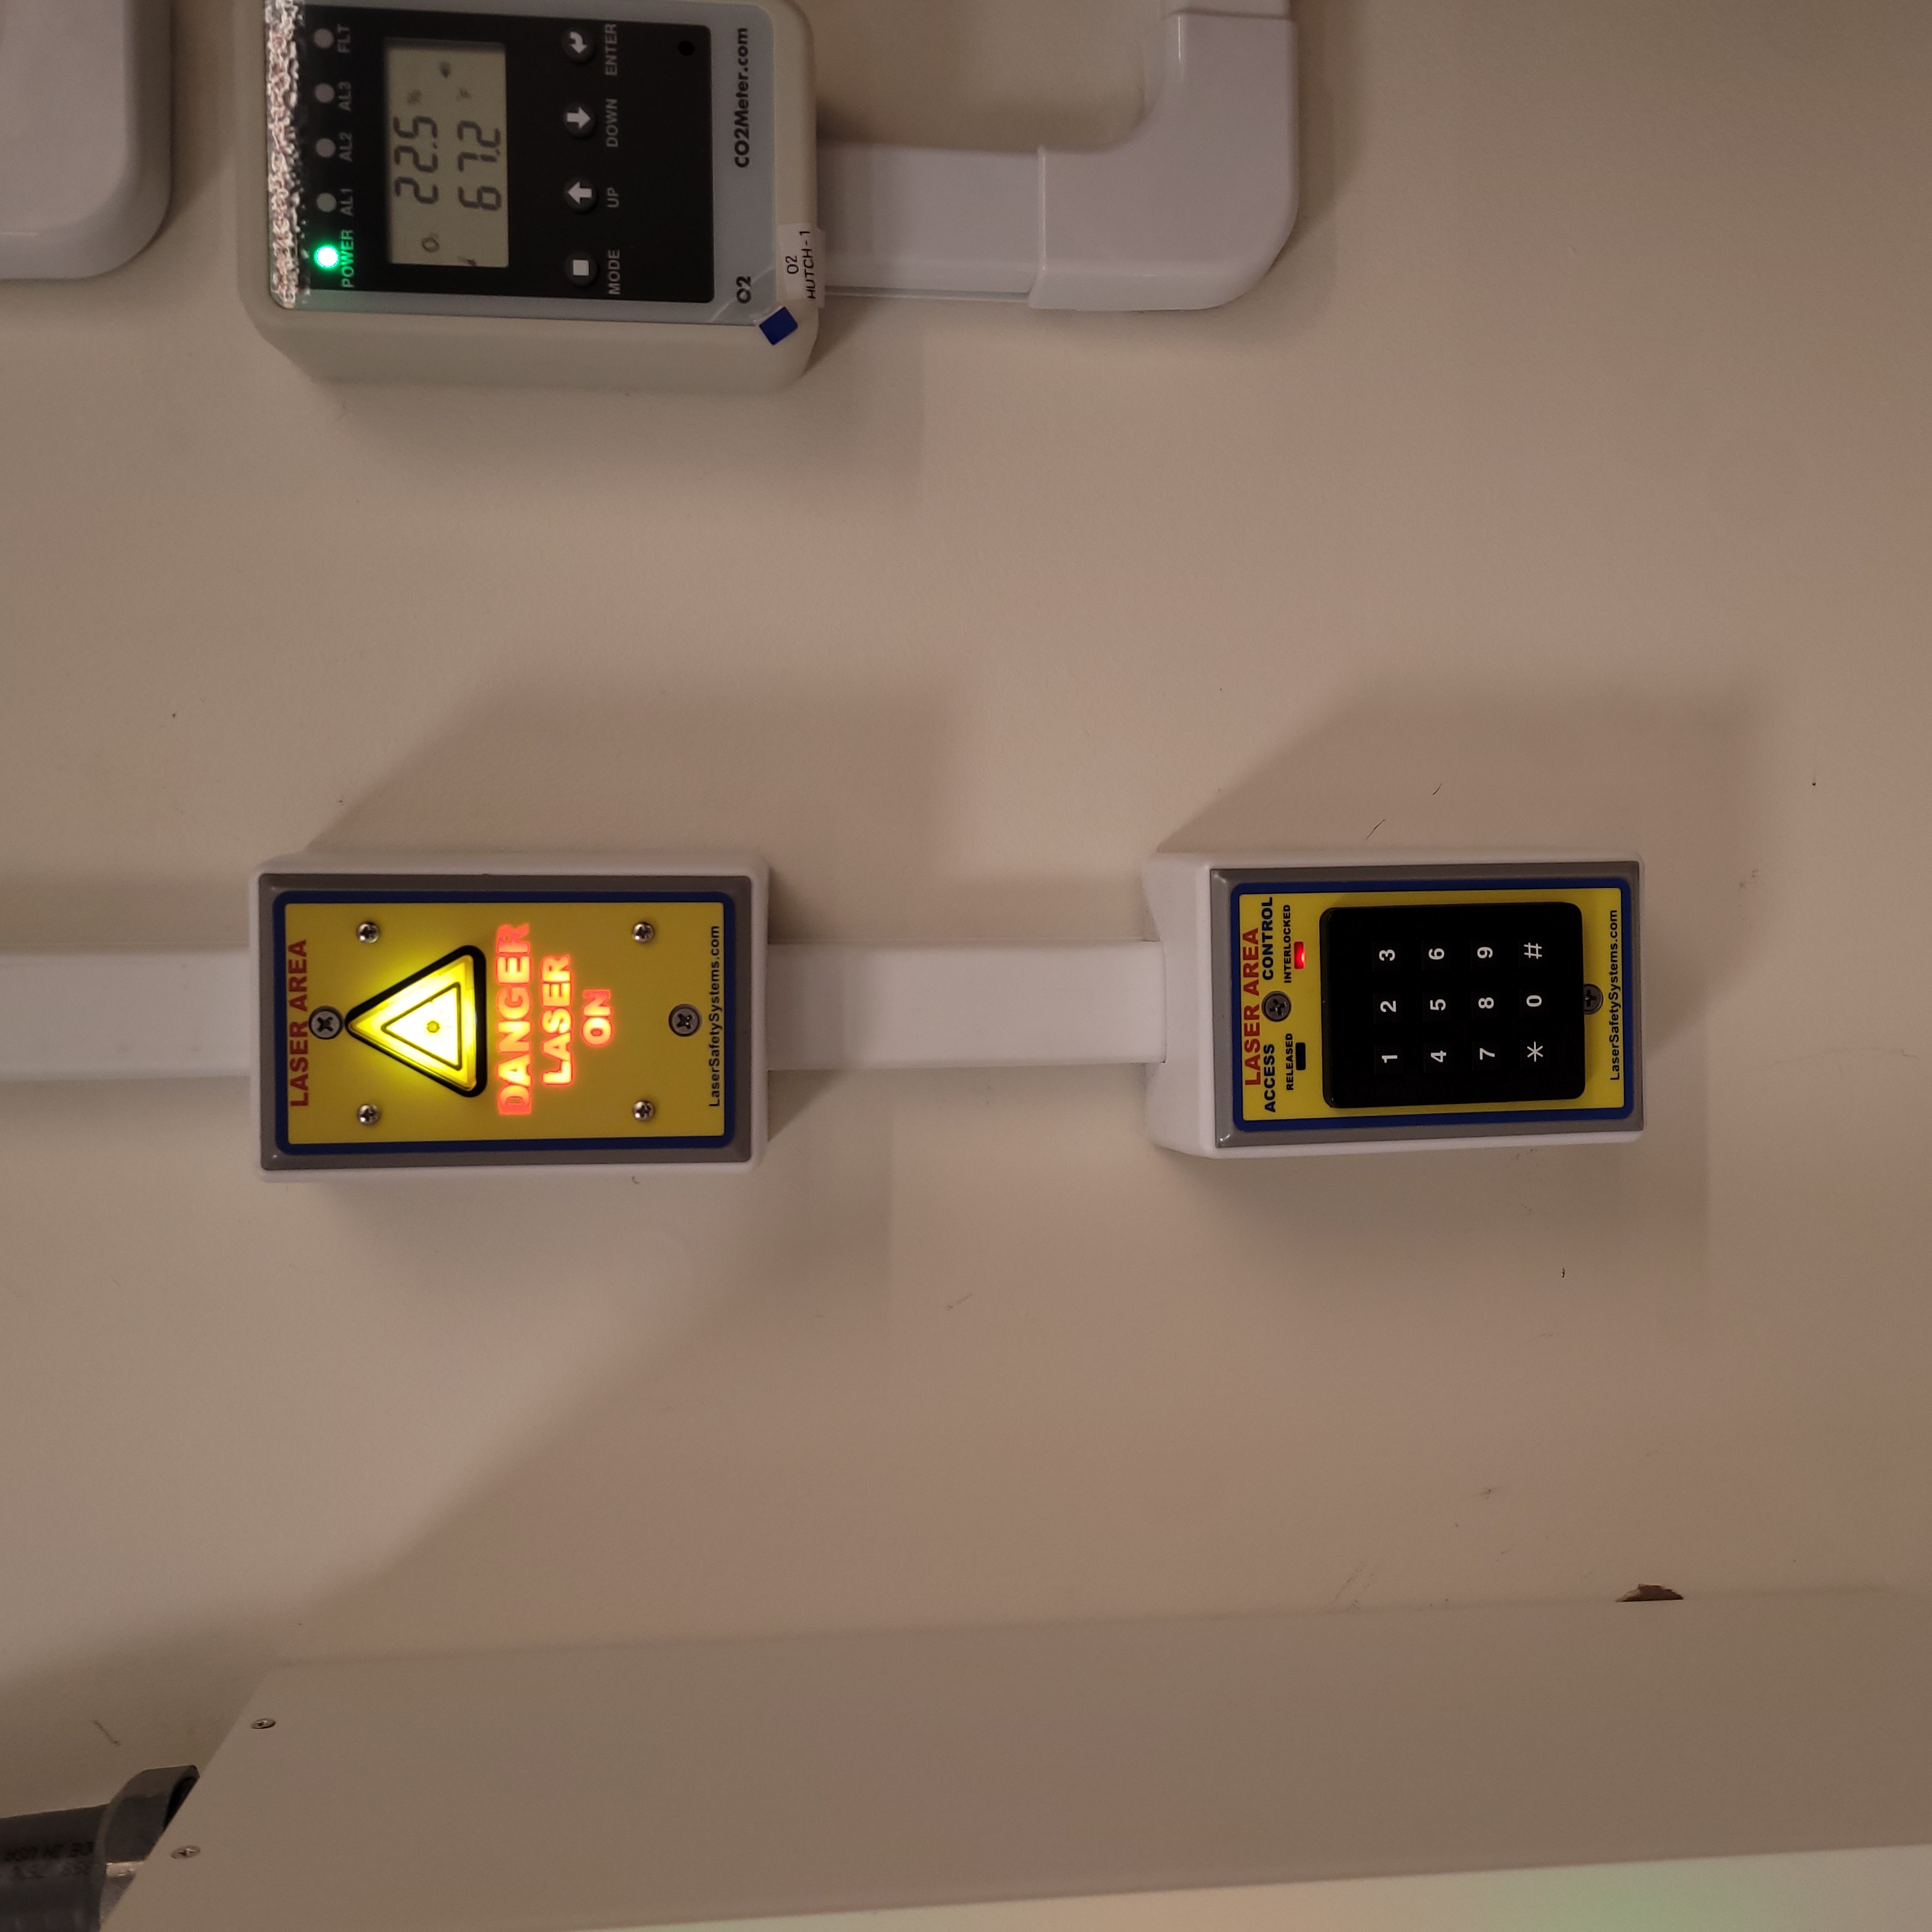
Once Hutch-1 is armed the door is magnetically locked. To get into Hutch-1, you must type the Vault-1 laser pin into the keypad in Hutch-1 Control. Once the pin is entered, the door will temporarily unlock. To exit Hutch-1, you must push the push to exit button, which will again temporarily unlock the door. It is important to note that Vault-1 will disarm itself and shutter all exposed laser hazards if the Hutch-1 door is open for longer than the timer.
|
|
Hutch-1 entry in an unarmed state. ====================================================== |
Hutch-1 entry in an armed state. ======================================================== |
Figure 13: Hutch-1 entry armed and unarmed.
Using Laser Enclosure Interlock Protocase for Overriding Interlocks and Manual Shutter Control
The shutters in the laser enclosures can be armed for manual control by the protocase LOCAL INTERLOCK CONTRACT CONTROL local interlock modules. However, when the laser enclosures are interlocked, regardless of the arming status of the enclosure and Hutch-1, if someone attempts to open the enclosure doors the shutters will close.
What you will see happen on the enclosure protocase if the door is opened when interlocked is:
Laser warning module will show LASER SAFE.
Door monitor module will be blank, meaning open.
LOCAL INTERLOCK CONTACT CONTROL local interlock modules will disarm if armed, automatically closing the shutters.
Interlock to Override
The only way to work in the laser enclosures with light on the table is to change the enclosures interlocks to administrative override. In administrative override the interlocks system sees the rolling doors and closed even if they are opened, bypassing the interlocks.
For a laser enclosure to be put into administrative override, both Hutch-1 and the enclosure must be armed. The controls for the administrative overrides are on the enclosures LASER ENCLOSURE INTERLOCK protocase. Turn the key on the protocase under INTERLOCK OVERRIDE from INTERLOCK TO OVERRIDE.
Once the enclosure is put into override the following will change in the interlock system:
The VIEWMARQ display will show ASTRELLA ADMIN OVERRIDE.
The Hutch-1 Control and Hutch-1 protocase beacon stack orange administrative override LED will turn on.
If you open the enclosure, the laser warning module will still show DANGER LASER ON, the door monitor module will show CLOSED, and the local interlock modules for arming shutters manual control will not disarm.
At this point, the LOCAL INTERLOCK CONTACT CONTROL local interlock modules can be armed, and the shutters can be controlled manually without the interlocks disarming manual usage.
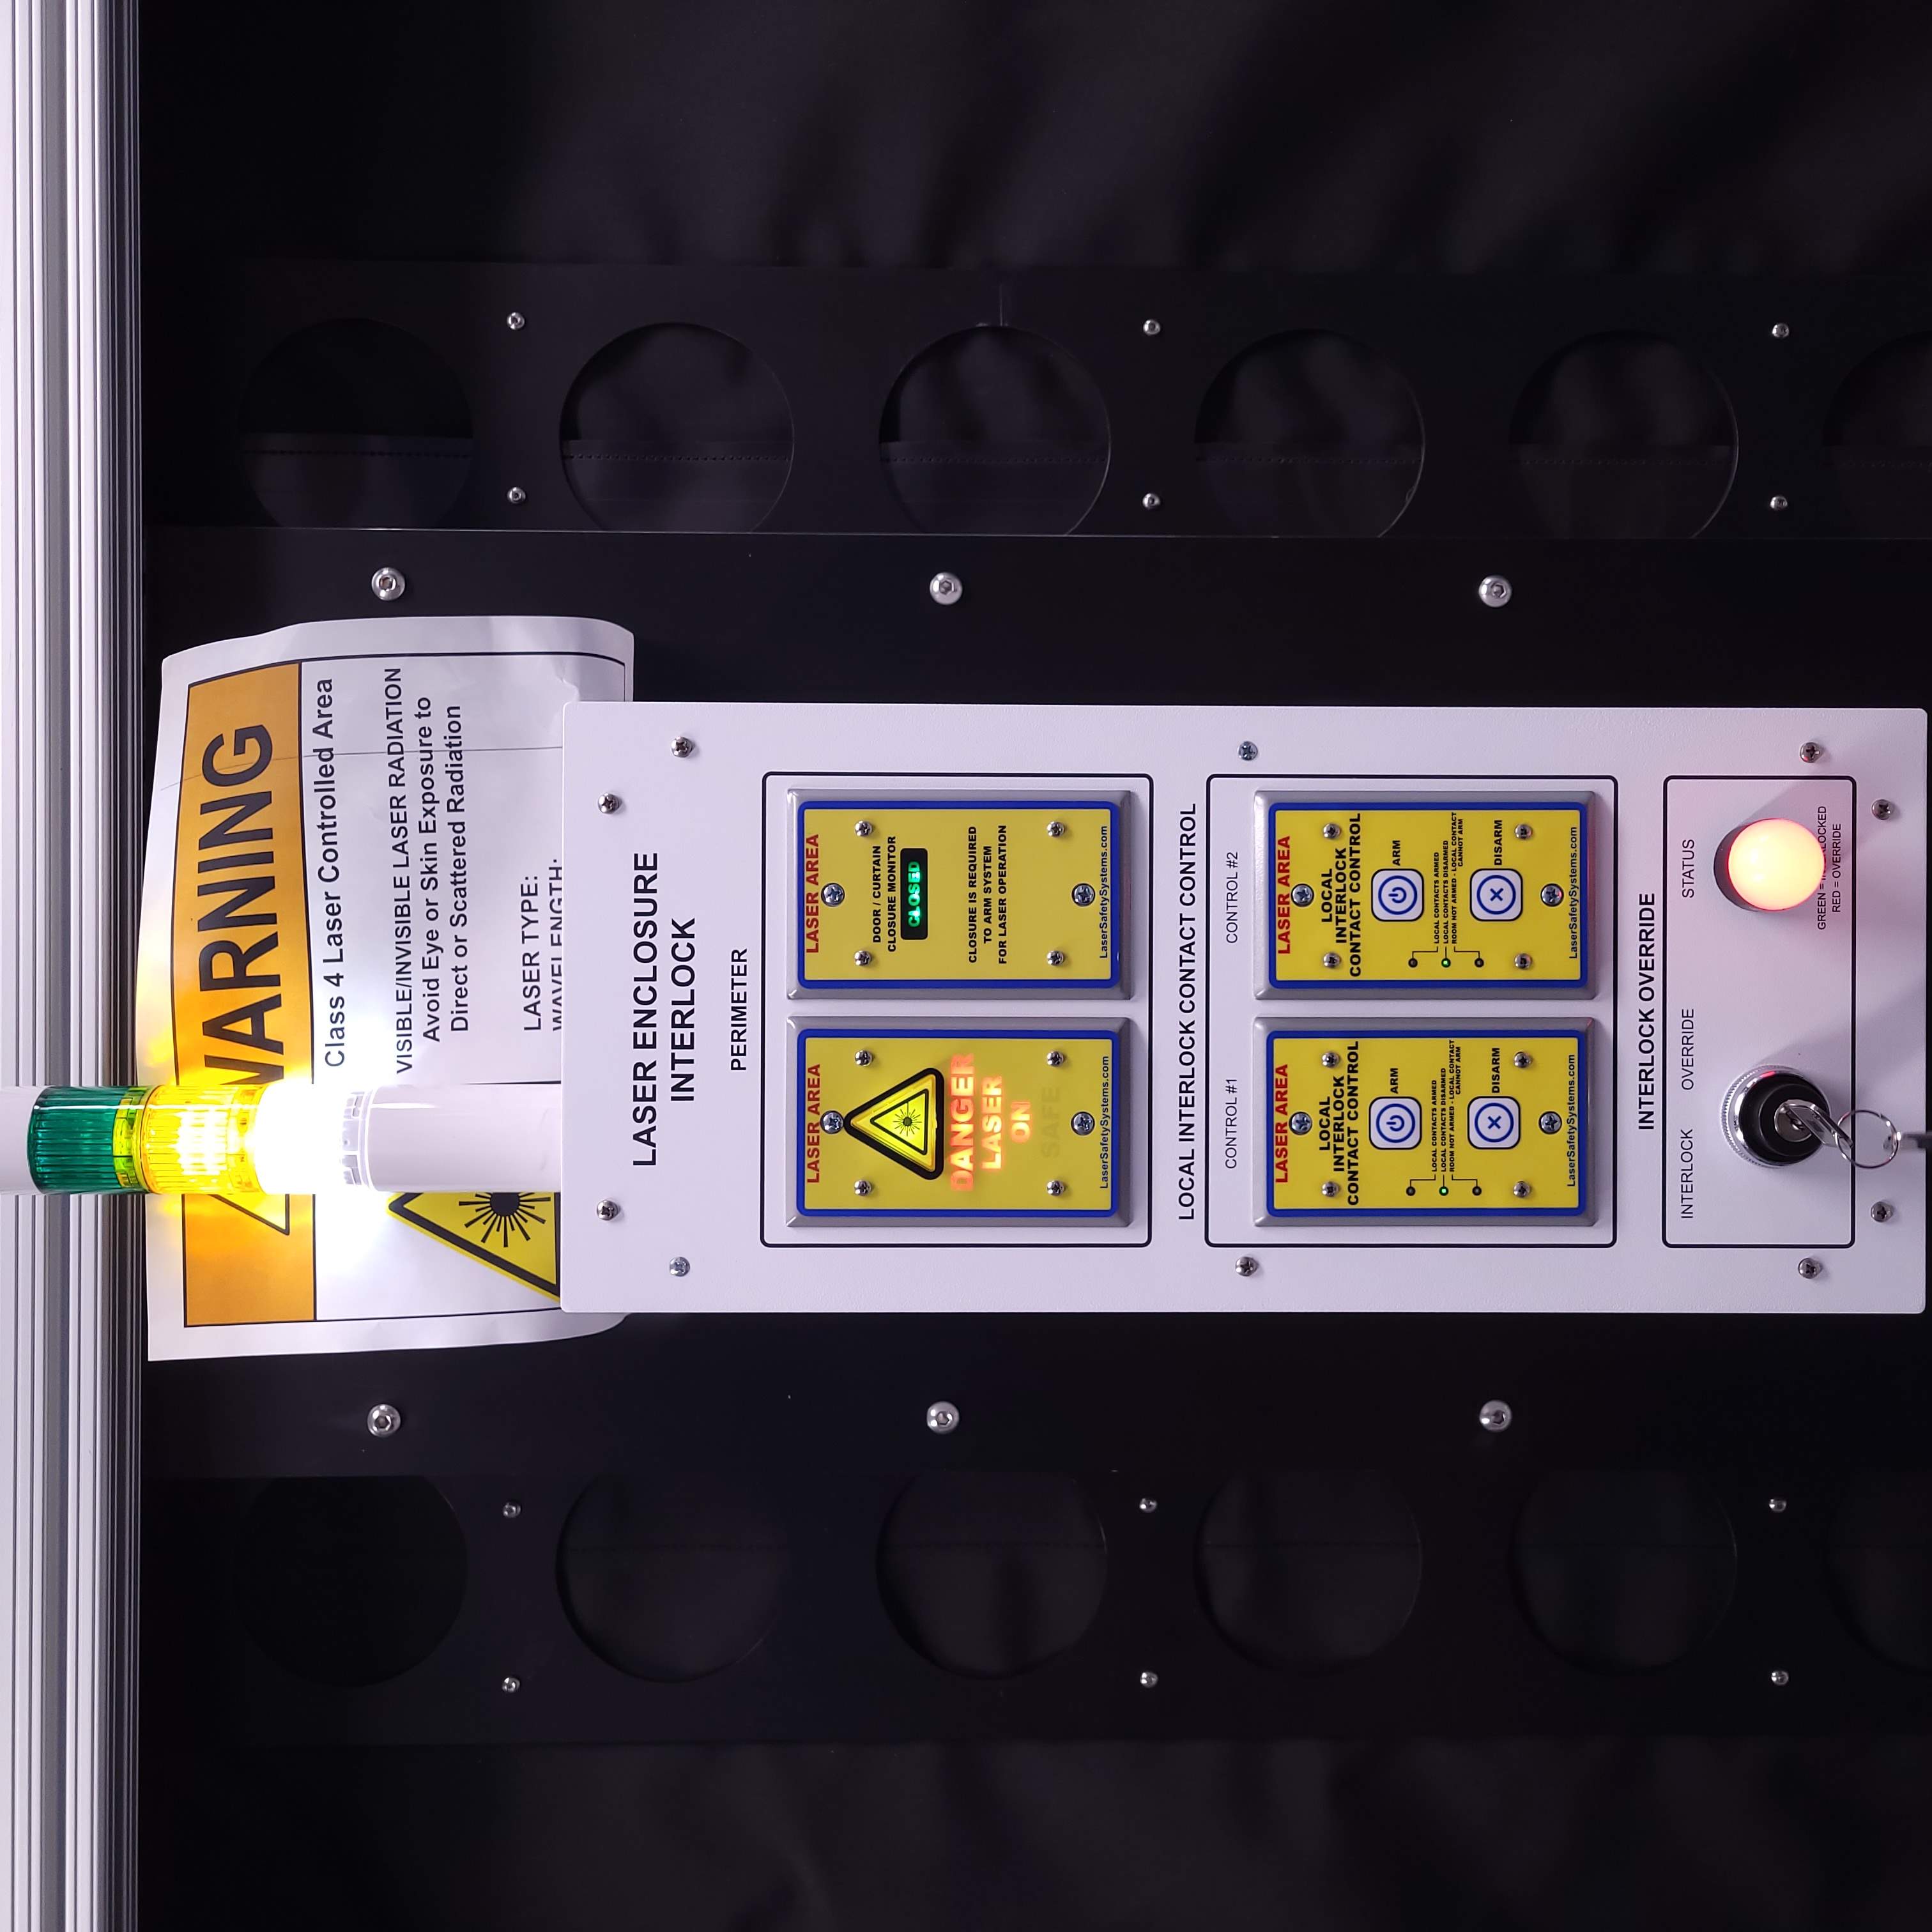
Figure 14: Astrella enclosure override.
Disarming the Laser Interlock System
To take the Astrella enclosure out of administrative override, simply change the INTERLOCK OVERRIDE key on the Astrella LASER ENCLOSURE INTERLOCK protocase back from OVERRIDE to INTERLOCK. Also, all the arming laser modules have disarming buttons where you can either disarm specific modules you no longer need, or you can disarm the room modules to auto-disarm their local modules.
