Vault-1 Laser Interlock System Testing Protocol
The purpose of this testing procedure if the Verify the functionality of the Vault-1 laser interlock system including arming Vault-1 as a laser lab, and arming the Pharos system. Additionally, the administrative override on the Pharos and Dira enclosures will be tested.
Starting Conditions
VIEWMARQ in Vault-1 Control displays LASER SAFE.
Vault-1 beacon stacks show green LED on.
Vault-1 Control.
Vault-1 east wall.
Pharos LASER ENCLOSURE INTERLOCK protocase.
Dira LASER ENCLOSURE INTERLOCK protoacse.
Vault-1 entry keypad LED for RELEASED is on.
Vault-1 laser warning modules show LASER SAFE.
Vault-1 Control.
Pharos enclosure south wall.
Pharos enclosure north wall.
Dira LASER ENCLOSURE INTERLOCK protoacse.
Laser control module shows LASER SAFE. When the Vault-1 door is open, the module shows ACCESS.
Laser warning module on the Pharos LASER ENCLOSURE INTERLOCK protocase shows DANGER LASER ON.
None of the laser E-stops are engaged or glowing.
Pharos enclosure east wall.
Pharos enclosure north wall.
Dira enclosure east wall.
Dira enclosure west wall.
All room interlock modules LED for ROOM DISABLED (READY TO ARM) is on.
Vault-1.
Pharos enclosure.
Local interlock modules LEDs for LOCAL CONTACTS DISARMED, and ROOM NOT ARMED - LOCAL CONTACTS CANNOT ARM is on.
Pharos enclosure.
Dira LASER ENCLOSURE INTERLOCK protocase AUX #1.
Dira LASER ENCLOSURE INTERLOCK protocase AUX #2.
Local interlock modules LEDs for LOCAL CONTACTS DISARMED are on.
Pharos LASER ENCLOSURE INTERLOCK protocase CONTROL #1.
Pharos LASER ENCLOSURE INTERLOCK protocase CONTROL #2.
Administrative override keys are set to INTERLOCK, with STATUS LED green.
Pharos LASER ENCLOSURE INTERLOCK protocase INTERLOCK OVERRIDE.
Dira LASER ENCLOSURE INTERLOCK protocase INTERLOCK OVERRIDE.
Both enclosures are closed, and the Door / Curtain Monitors should show CLOSED.
Pharos enclosure.
Dira enclosure.
Push before exit buttons is not on.
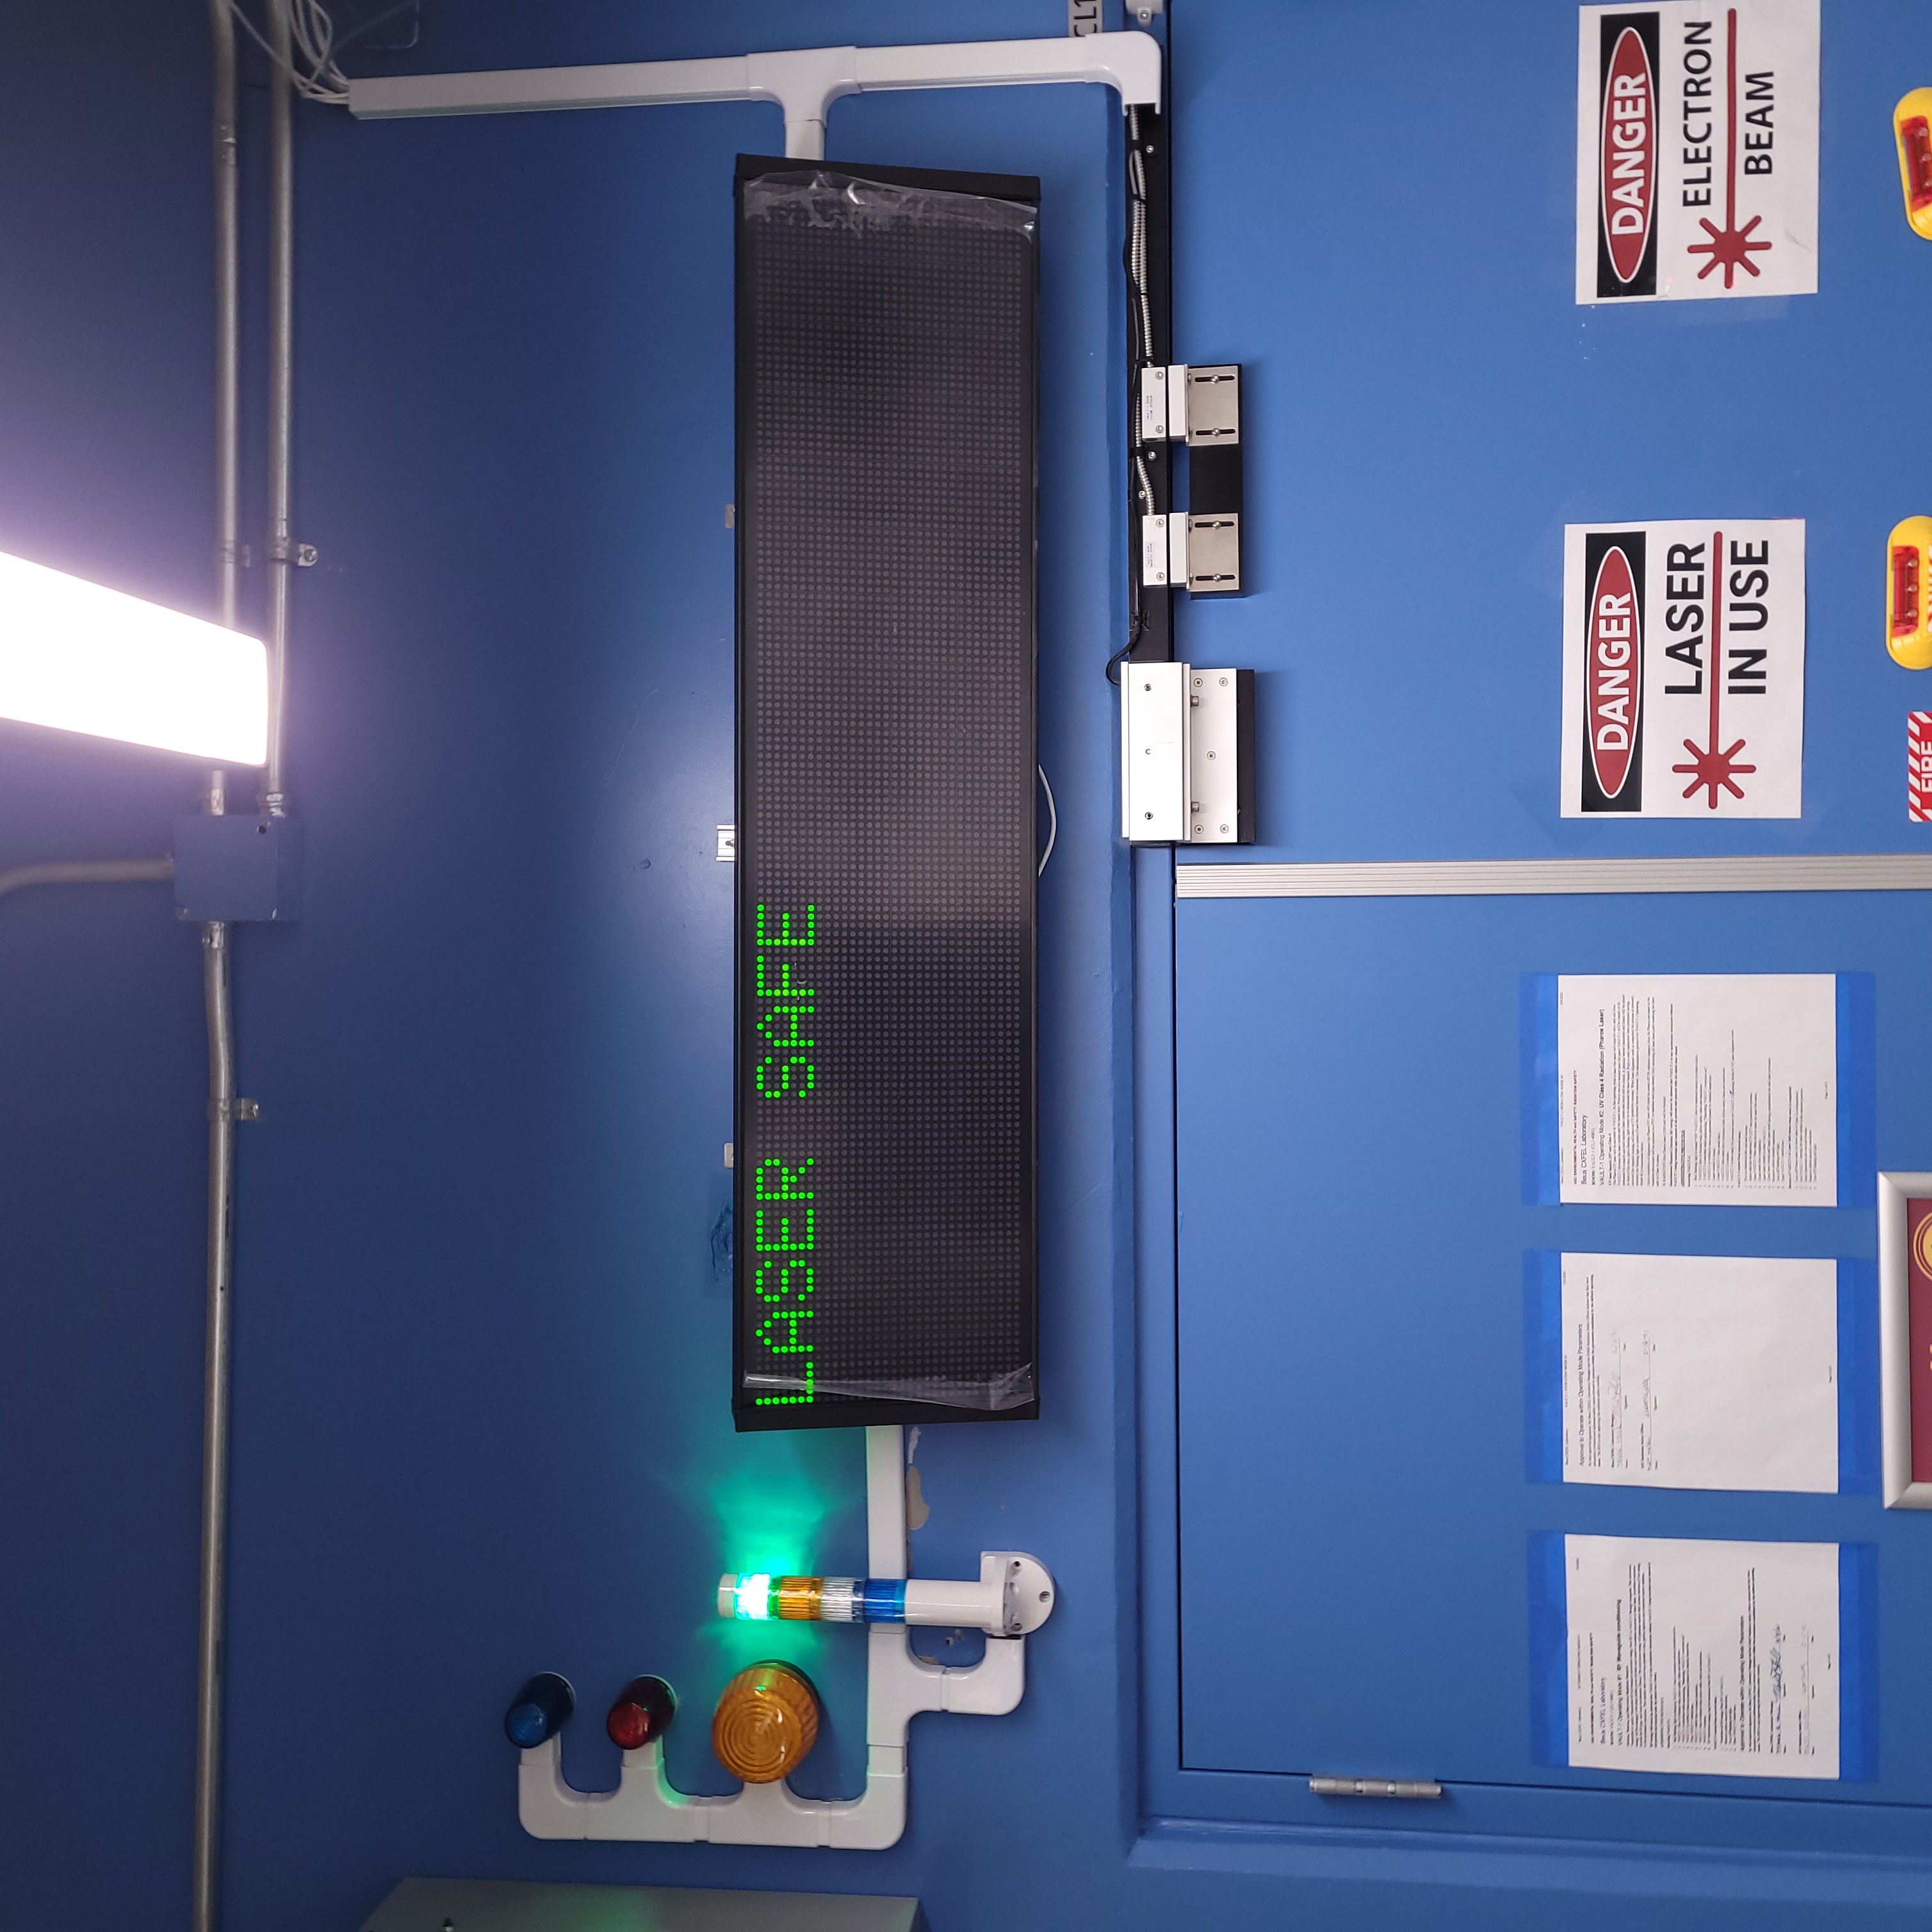
Figure 1: This is the Vault-1 Control VIEWMARQ display when the system is in a safe state.
Table 2: These are the Vault-1 laser interlock system beacon stacks.
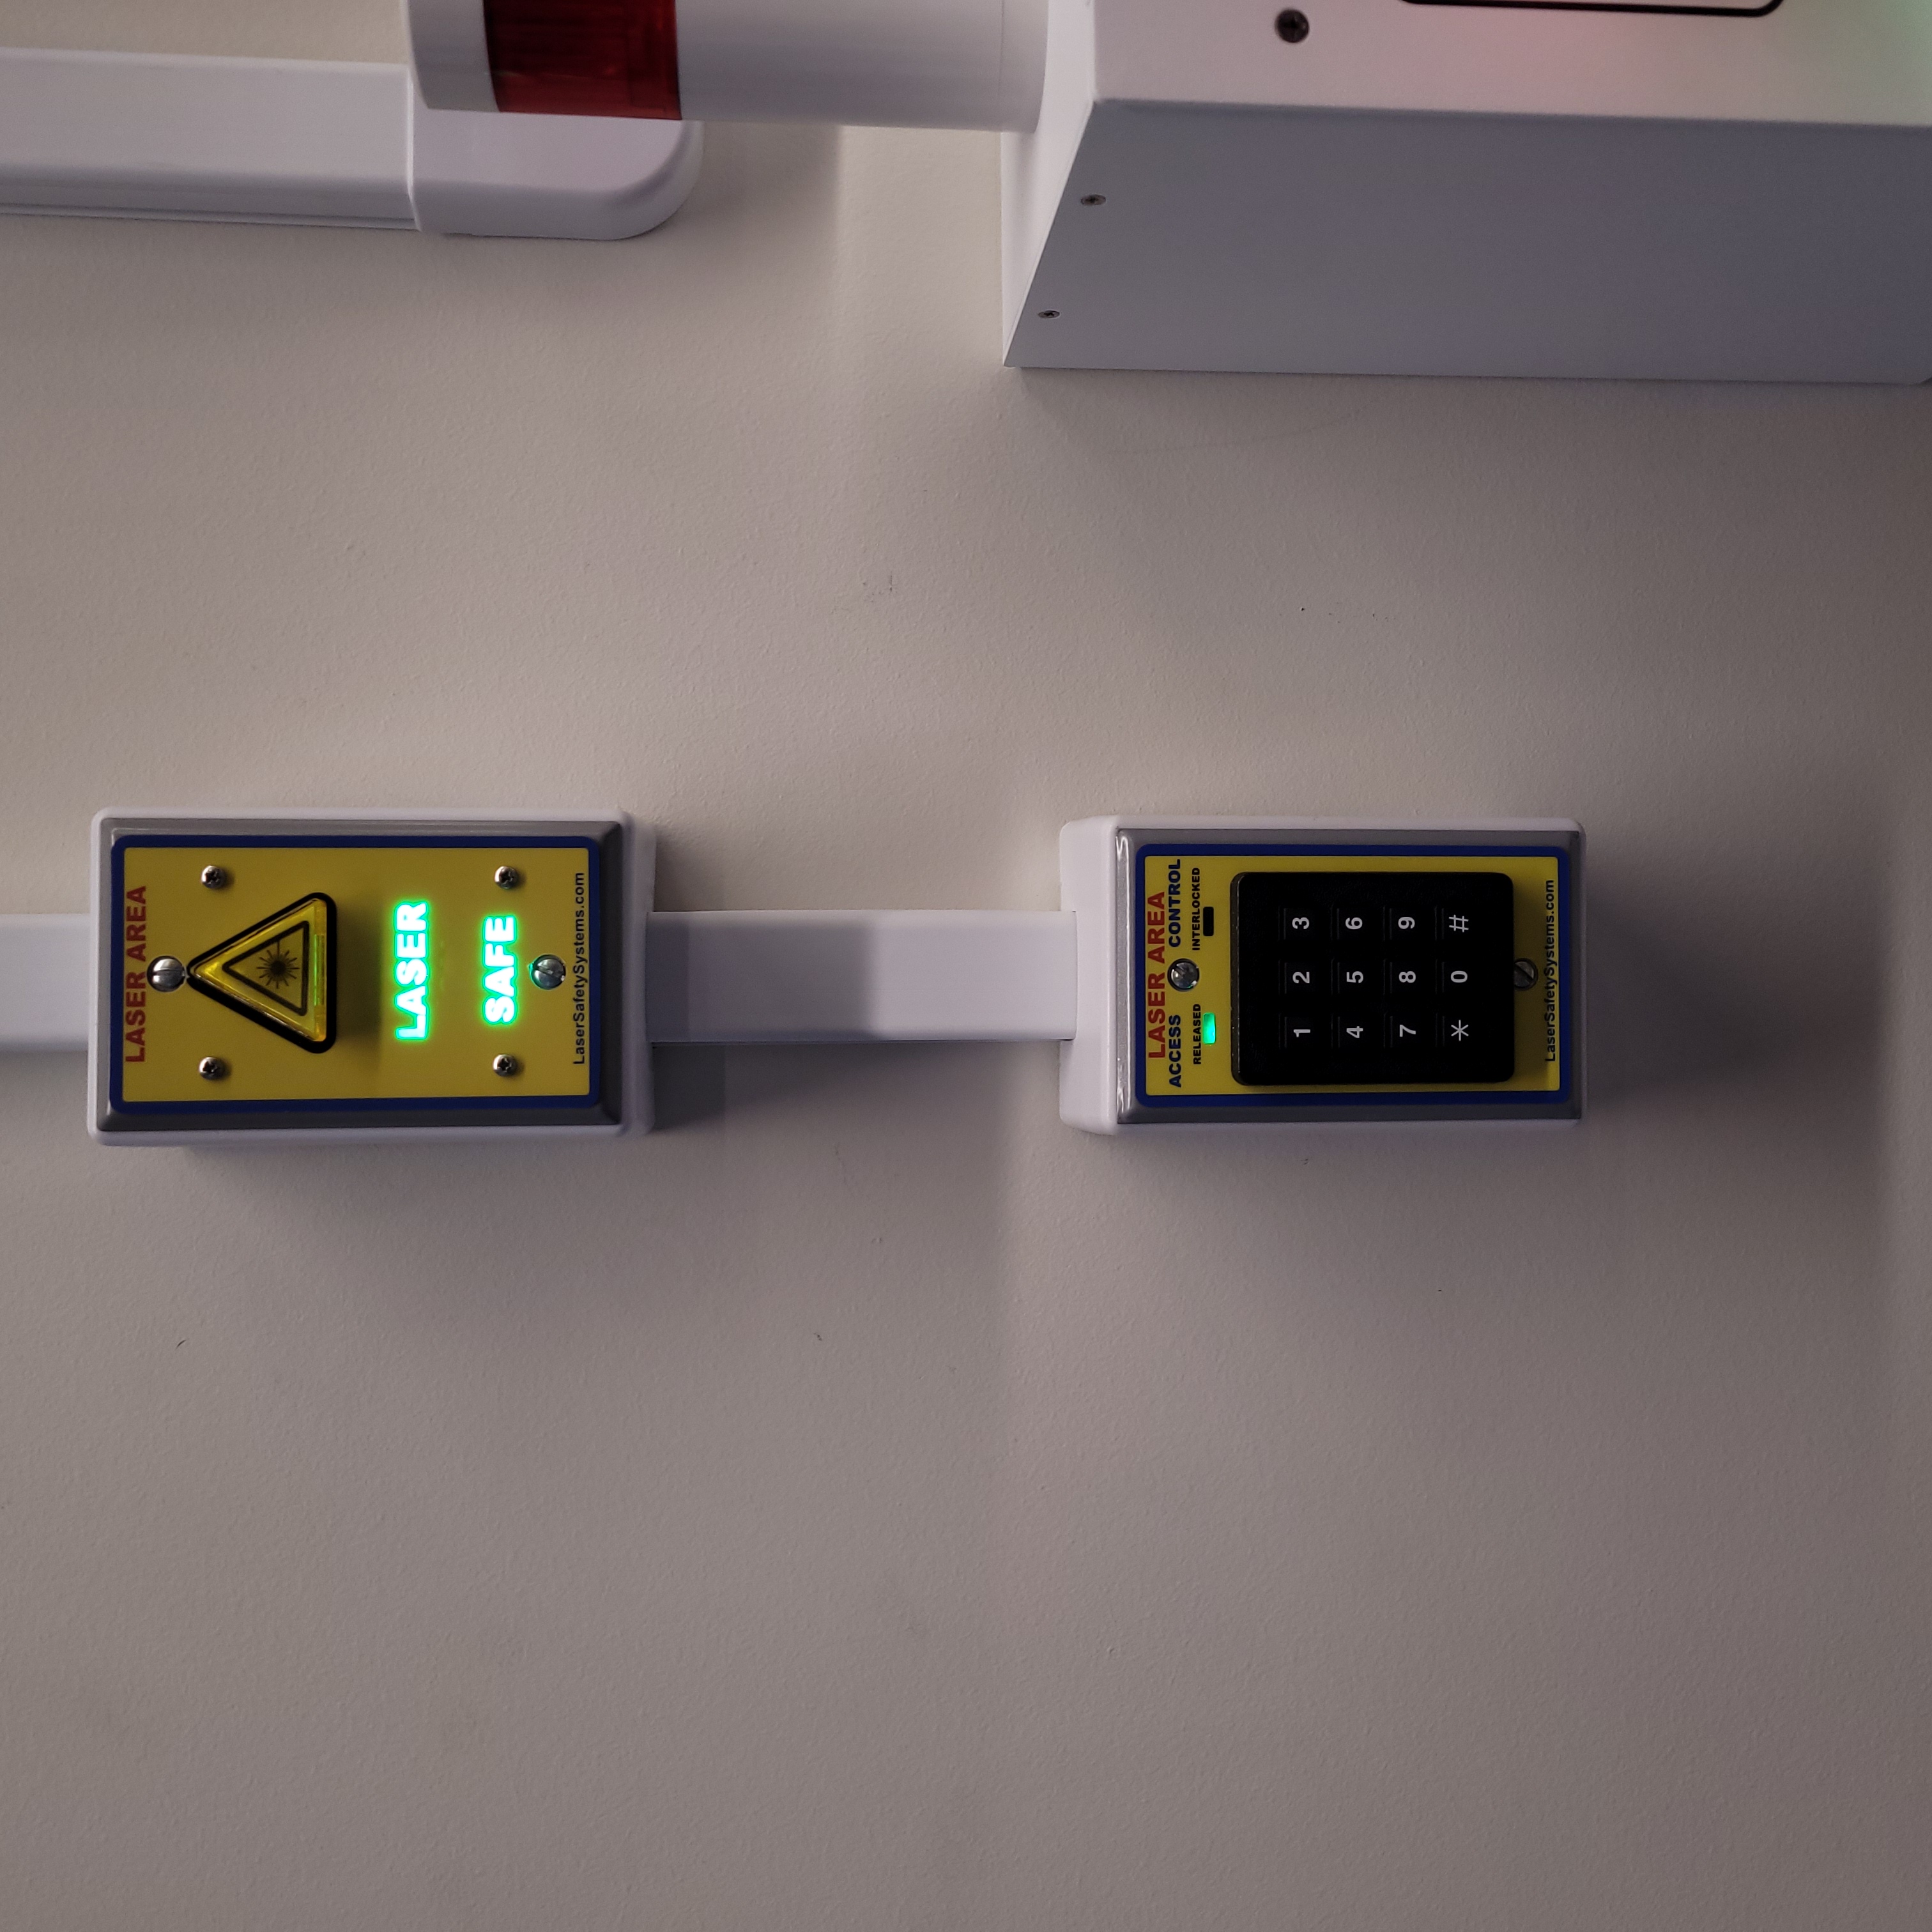
Figure 3: This is the Vault-1 entry modules when the system is in a safe state.
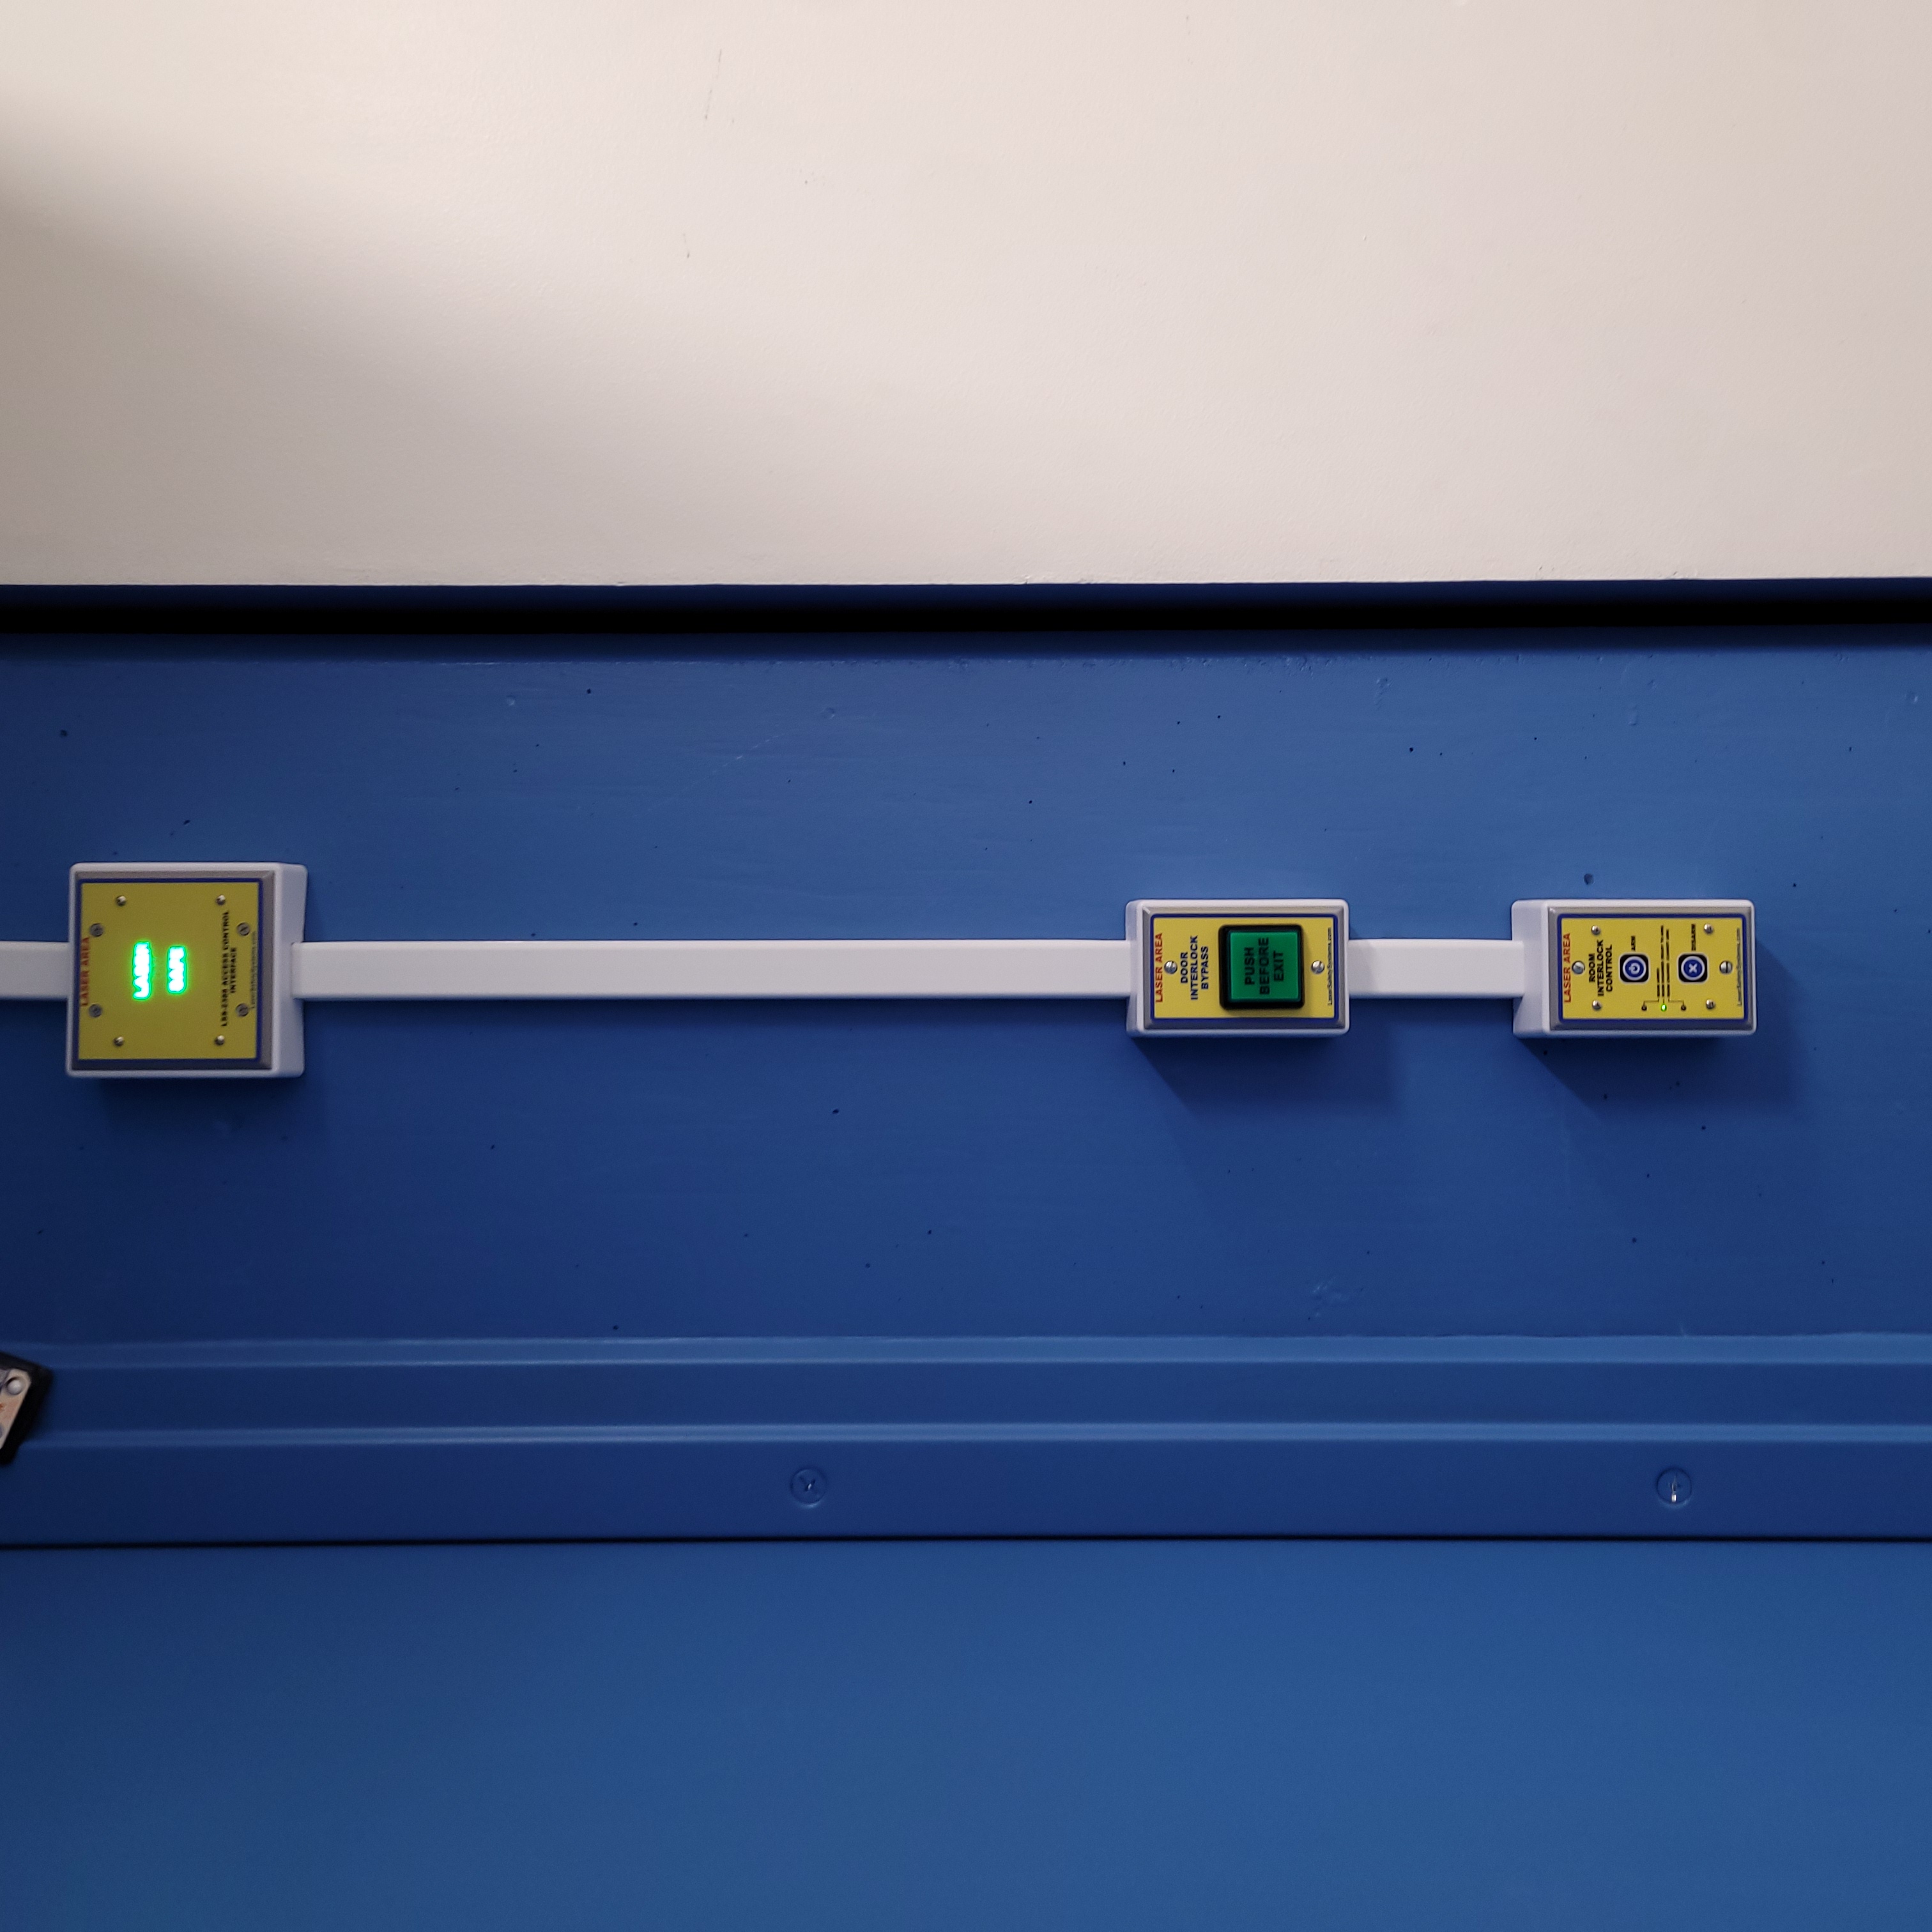
Figure 4: This is the Vault-1 laser control module when the system is in a safe state.
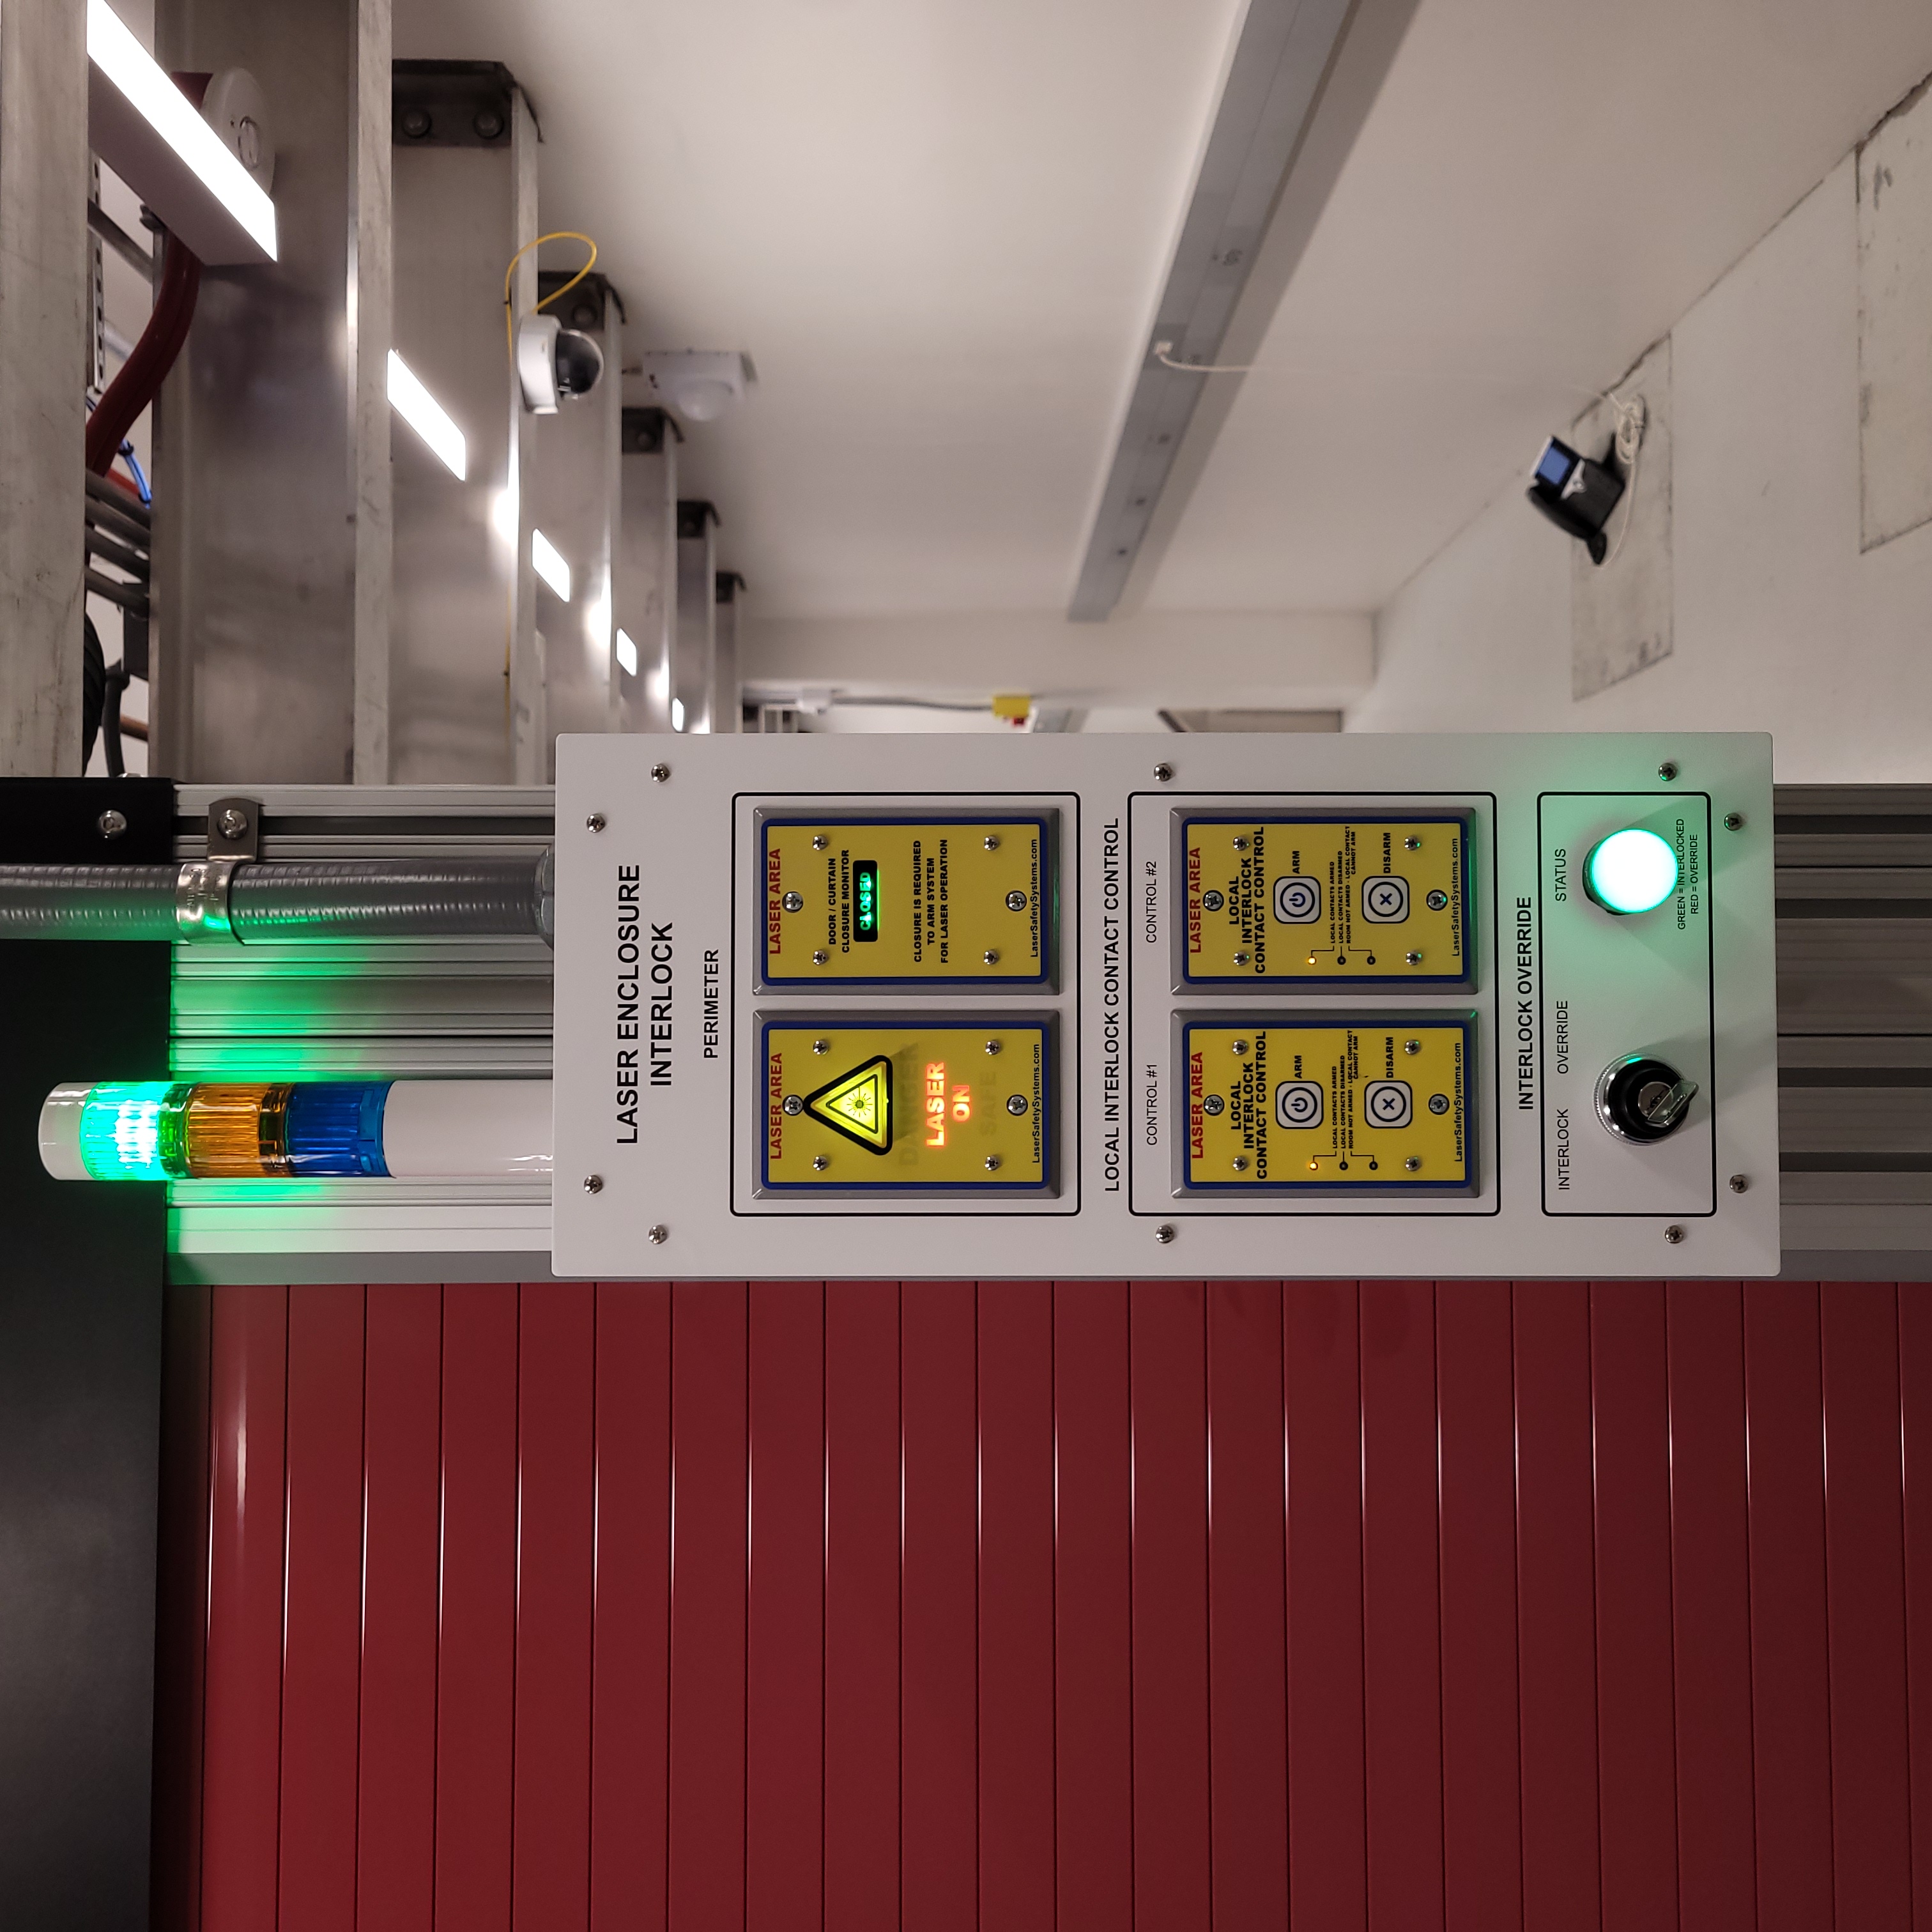
Figure 5: This is the Pharos enclosure laser warning module when the system is in a safe state.
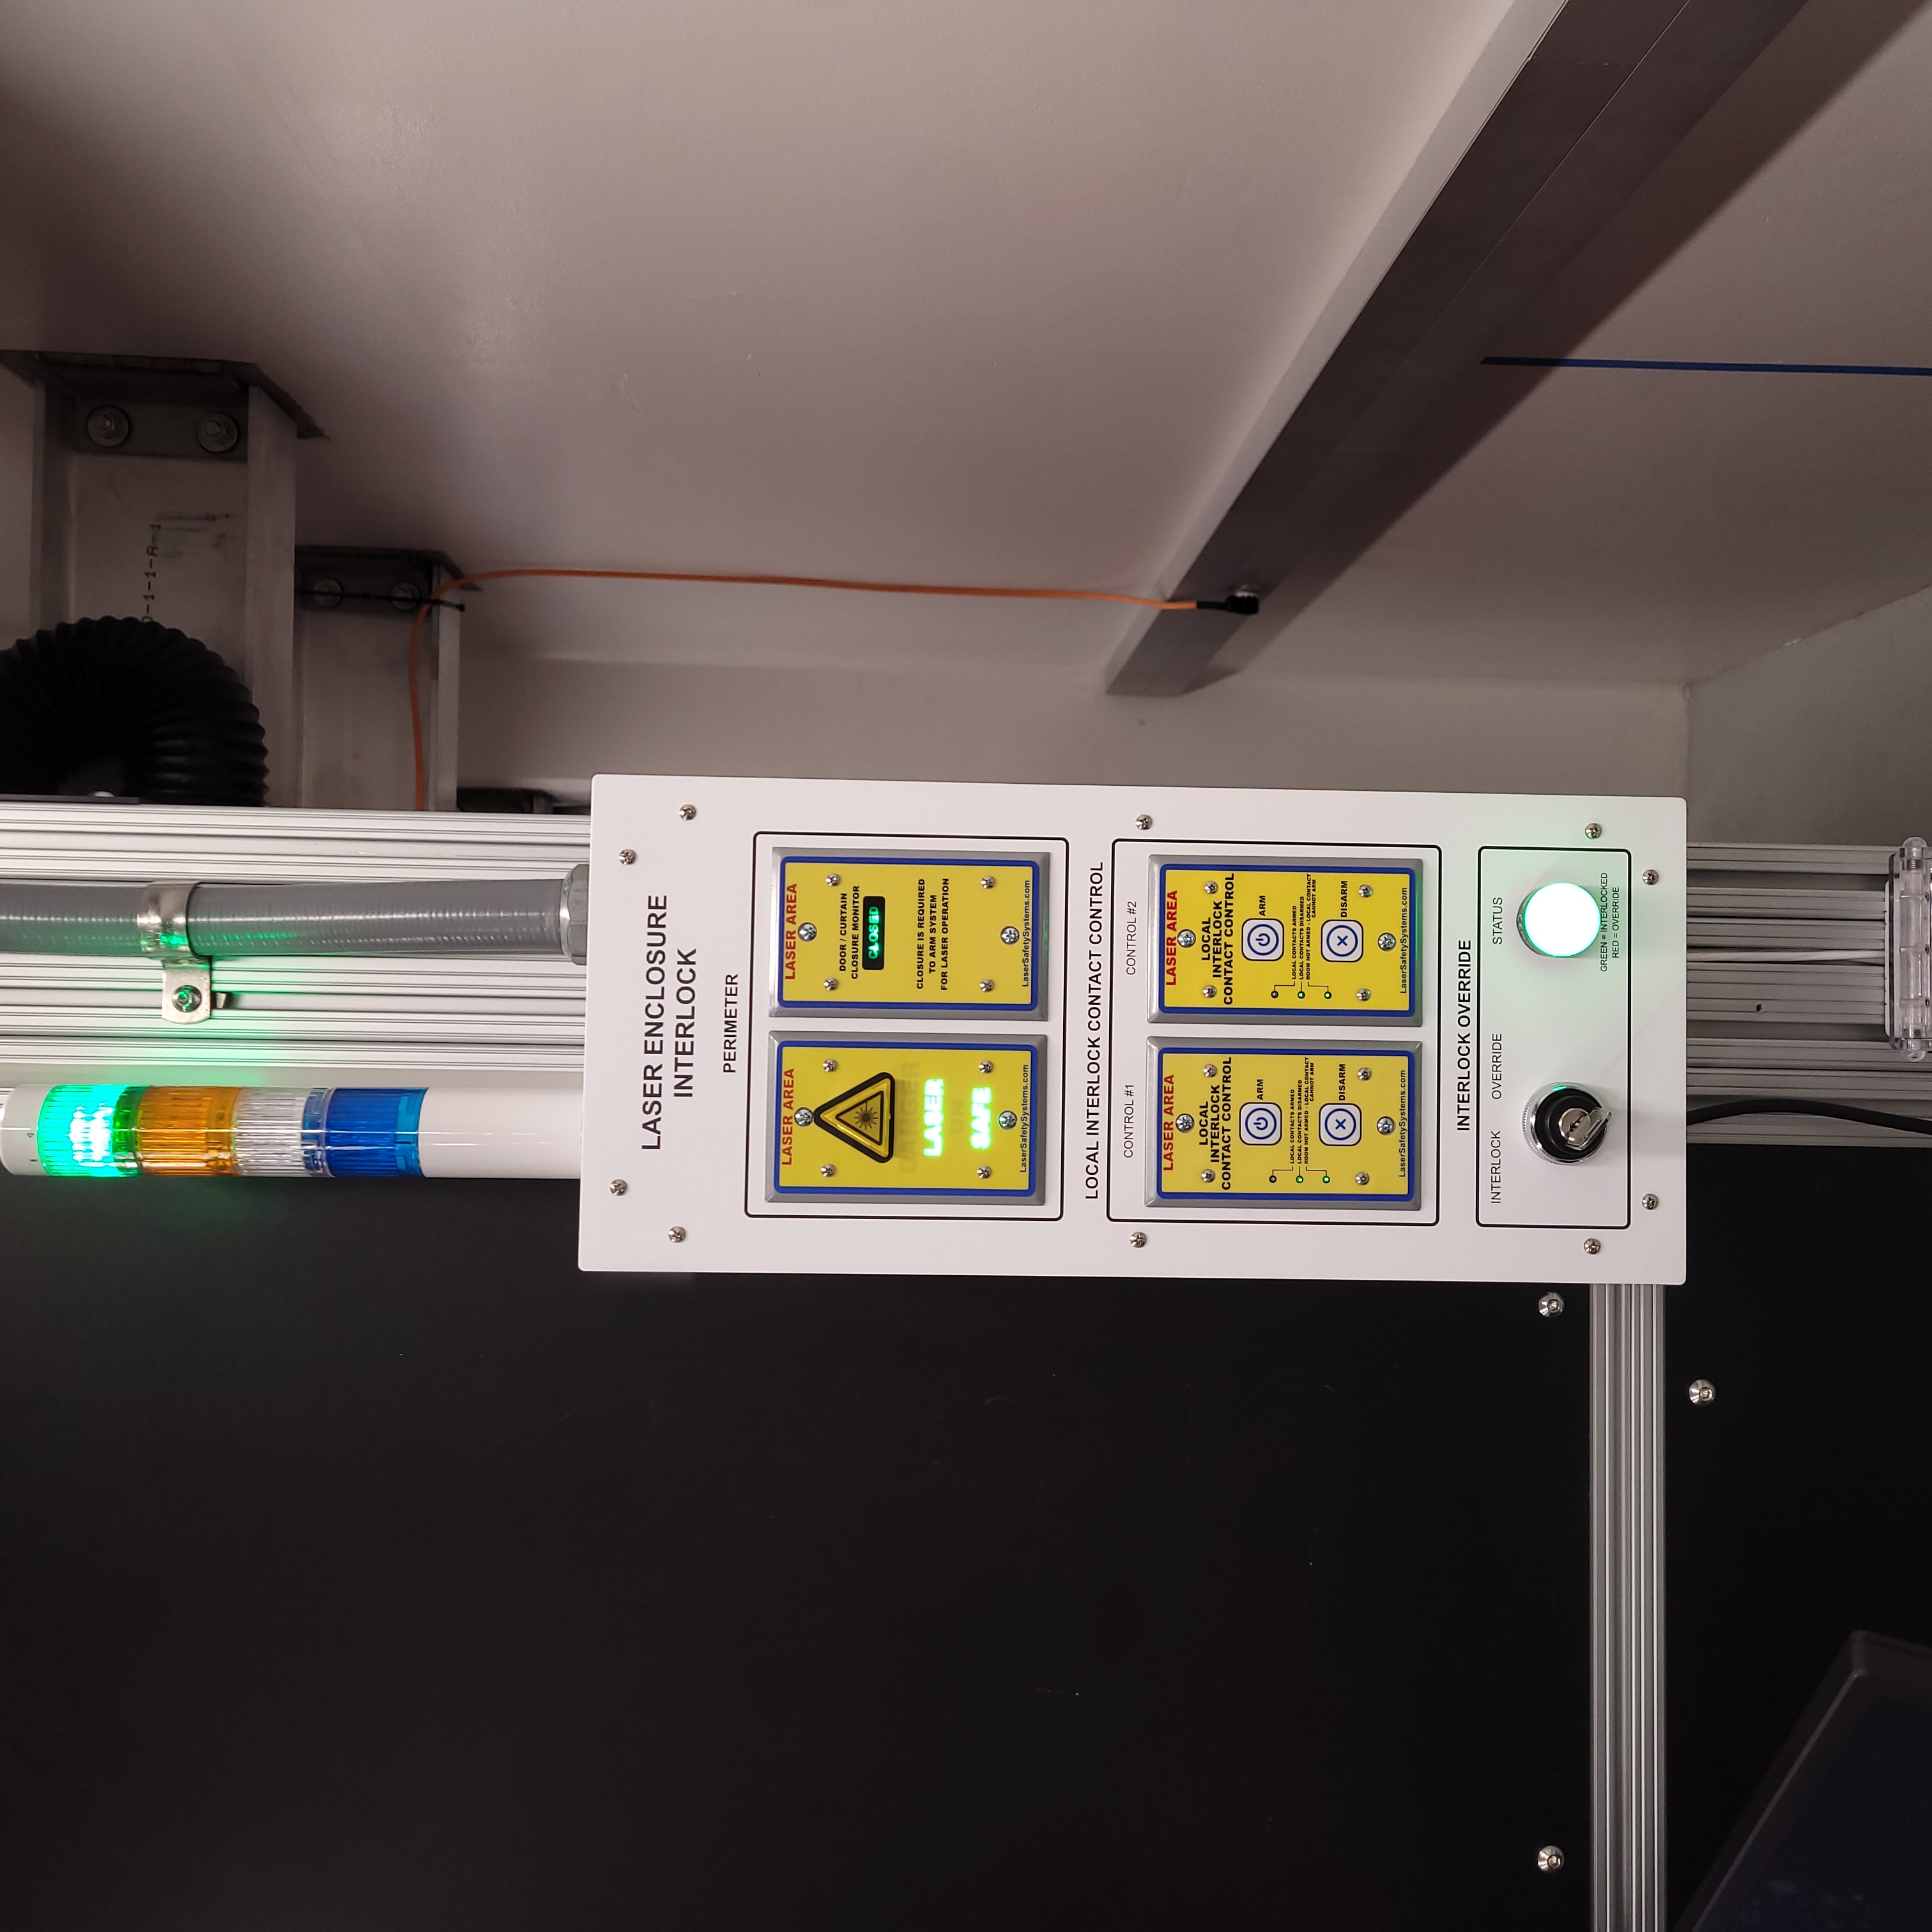
Figure 6: This is the Dira enclosure laser warning module when the system is in a safe state.
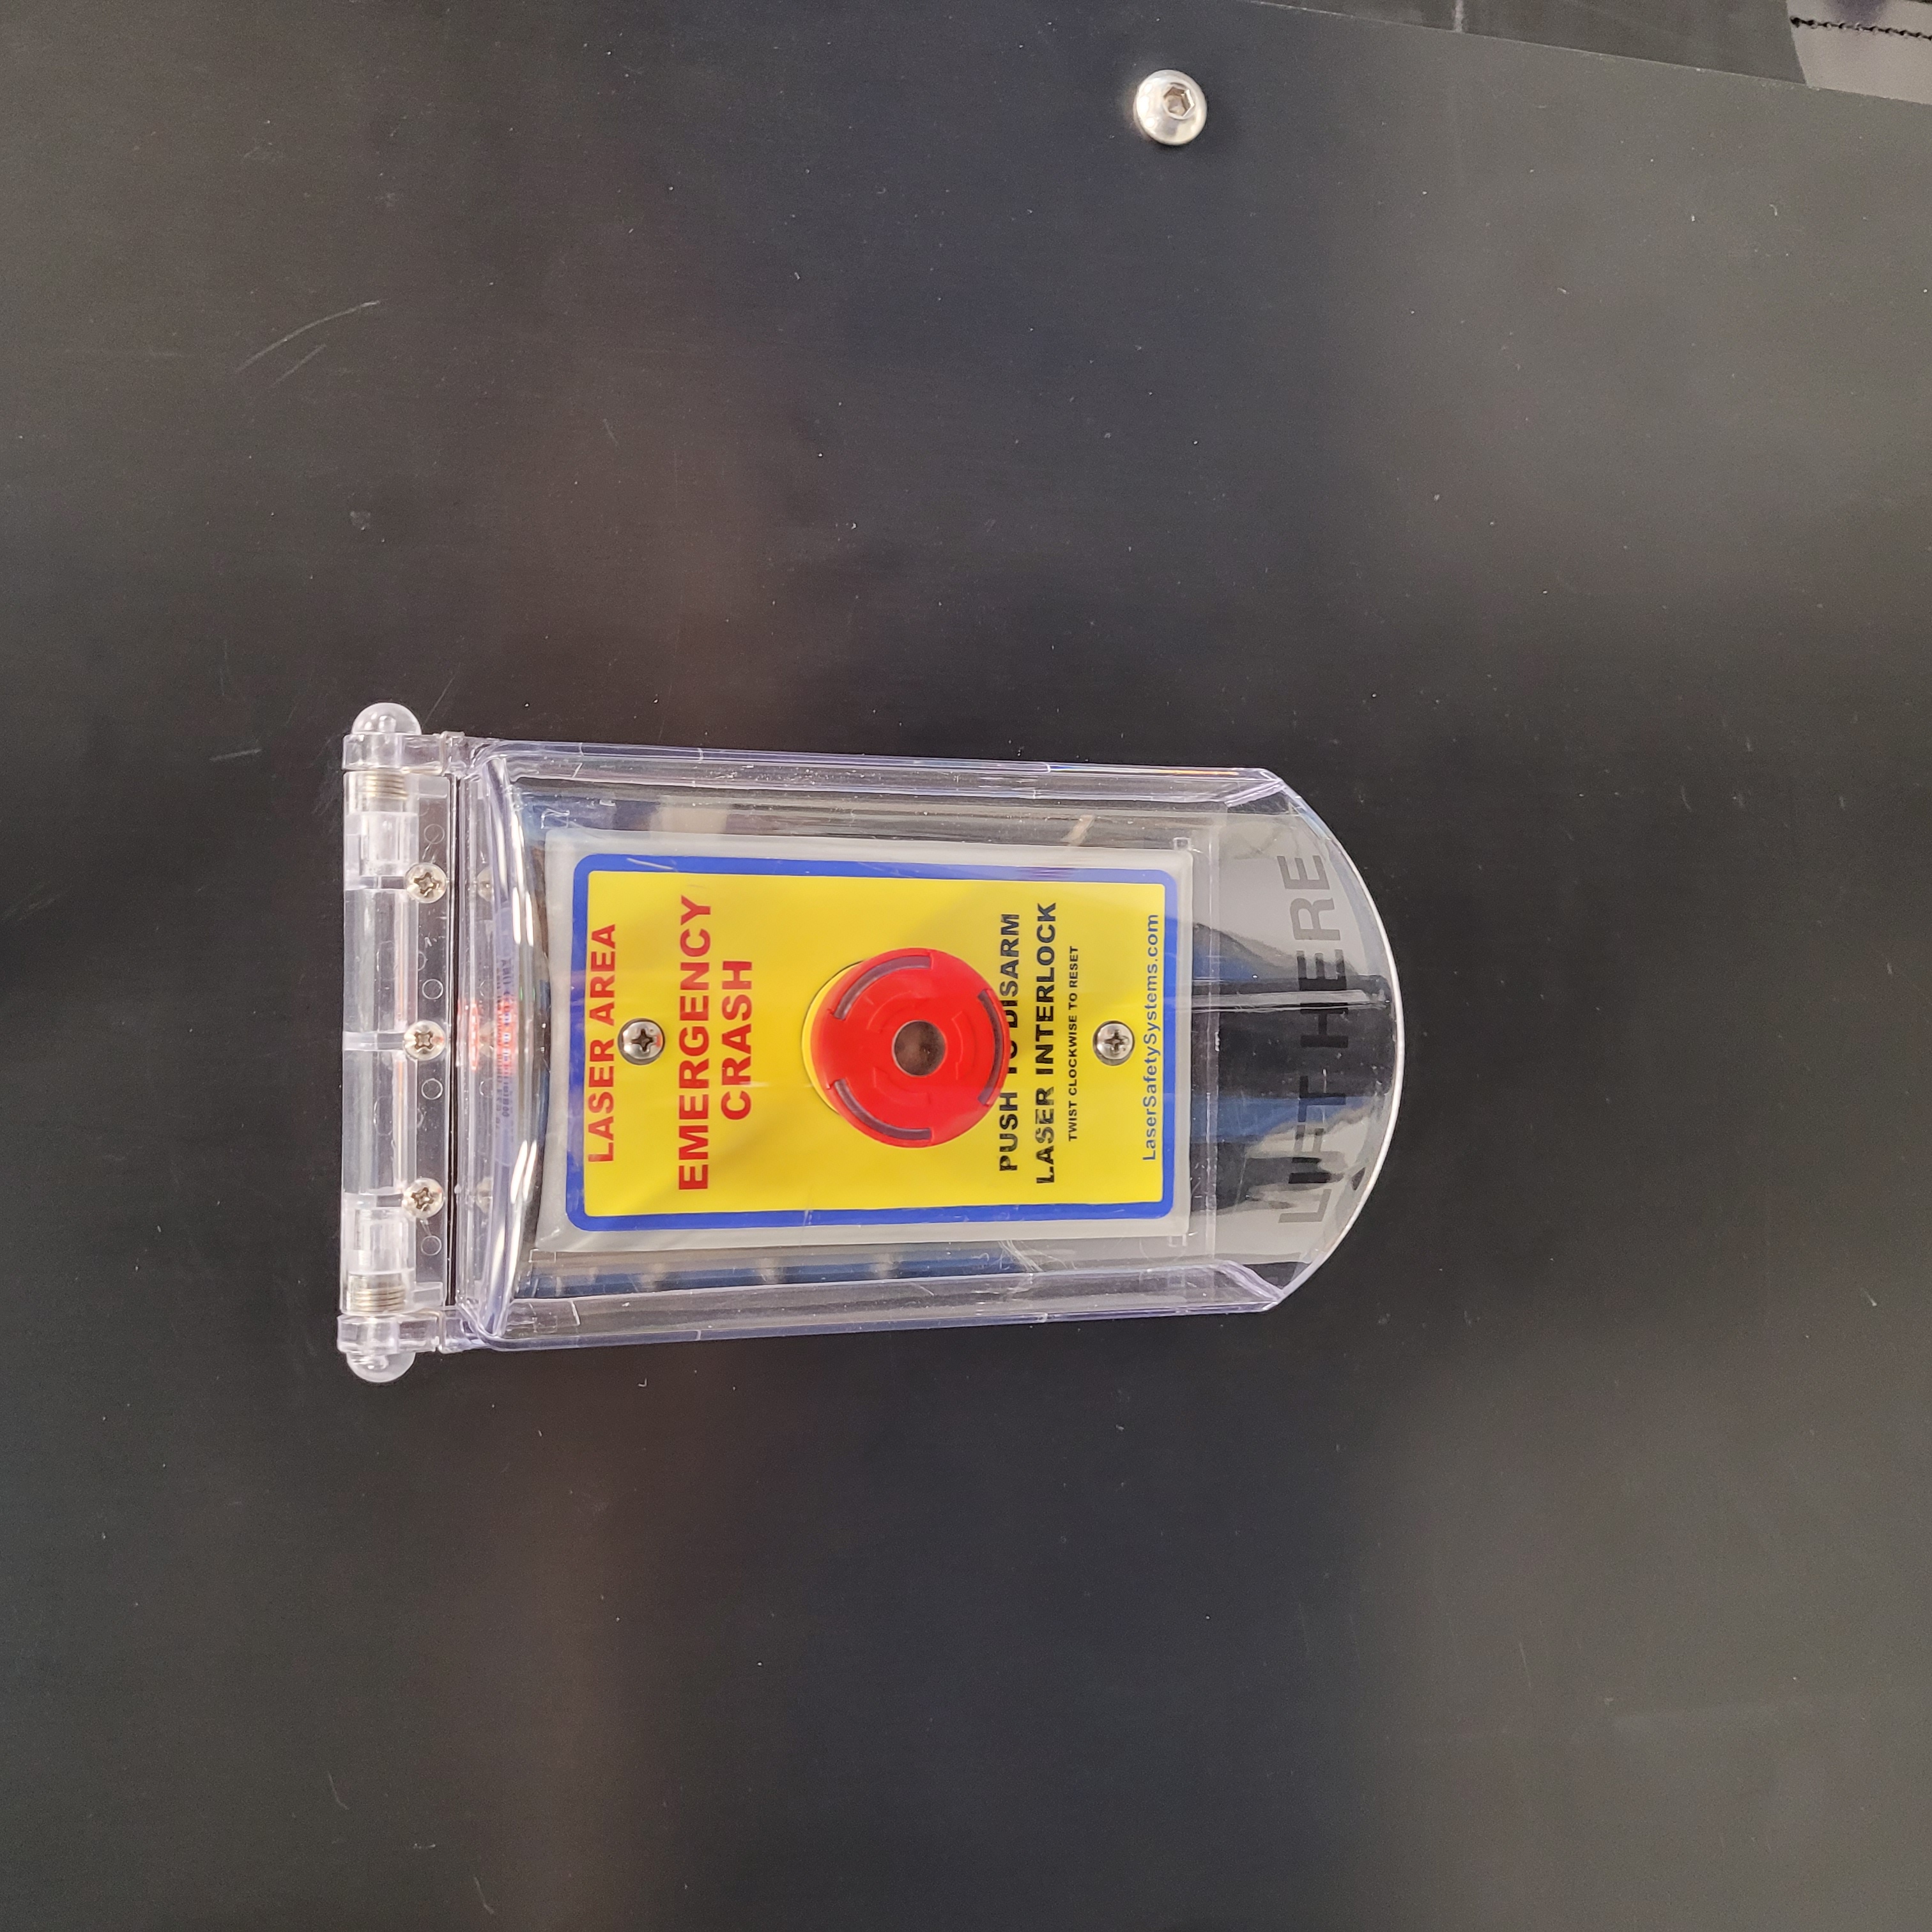
Figure 7: This is the laser e-stop button when the system is in a safe state.
Arming Vault-1 as a Laser Lab
While inside of Vault-1 with the vault door latched, press ARM on the room interlock arming module. It should light the LED for ROOM ARMED, and there will be an audible chime.
The laser control module shows DANGER LASER ON.
The push to exit button is on.
The Vault-1 door is magnetically locked.
The VIEWMARQ display in Vault-1 Control displays DANGER LASER ON.
Vault-1 laser warning modules display DANGER LASER ON.
Entry keypad LED for INTERLOCKED is on.
They in a random pin. The Vault-1 door will not unlock.
Type in the correct pin and open the Vault-1 door.
The entry keypad LED for RELEASED is on.
Vault-1 beacon stacks show no LEDs on.
Vault-1 Control.
Vault-1 east wall.
Pharos LASER ENCLOSURE INTERLOCK protocase.
Dira LASER ENCLOSURE INTERLOCK protocase.
Leave the vault door open for x seconds and allow the system to trip.
The Vault-1 laser interlock system should return to its initial conditions.
The Vault-1 room arming module should show ROOM CRASHED (CANNOT ARM), then ROOM DISABLED (READY TO ARM) once the door is closed.
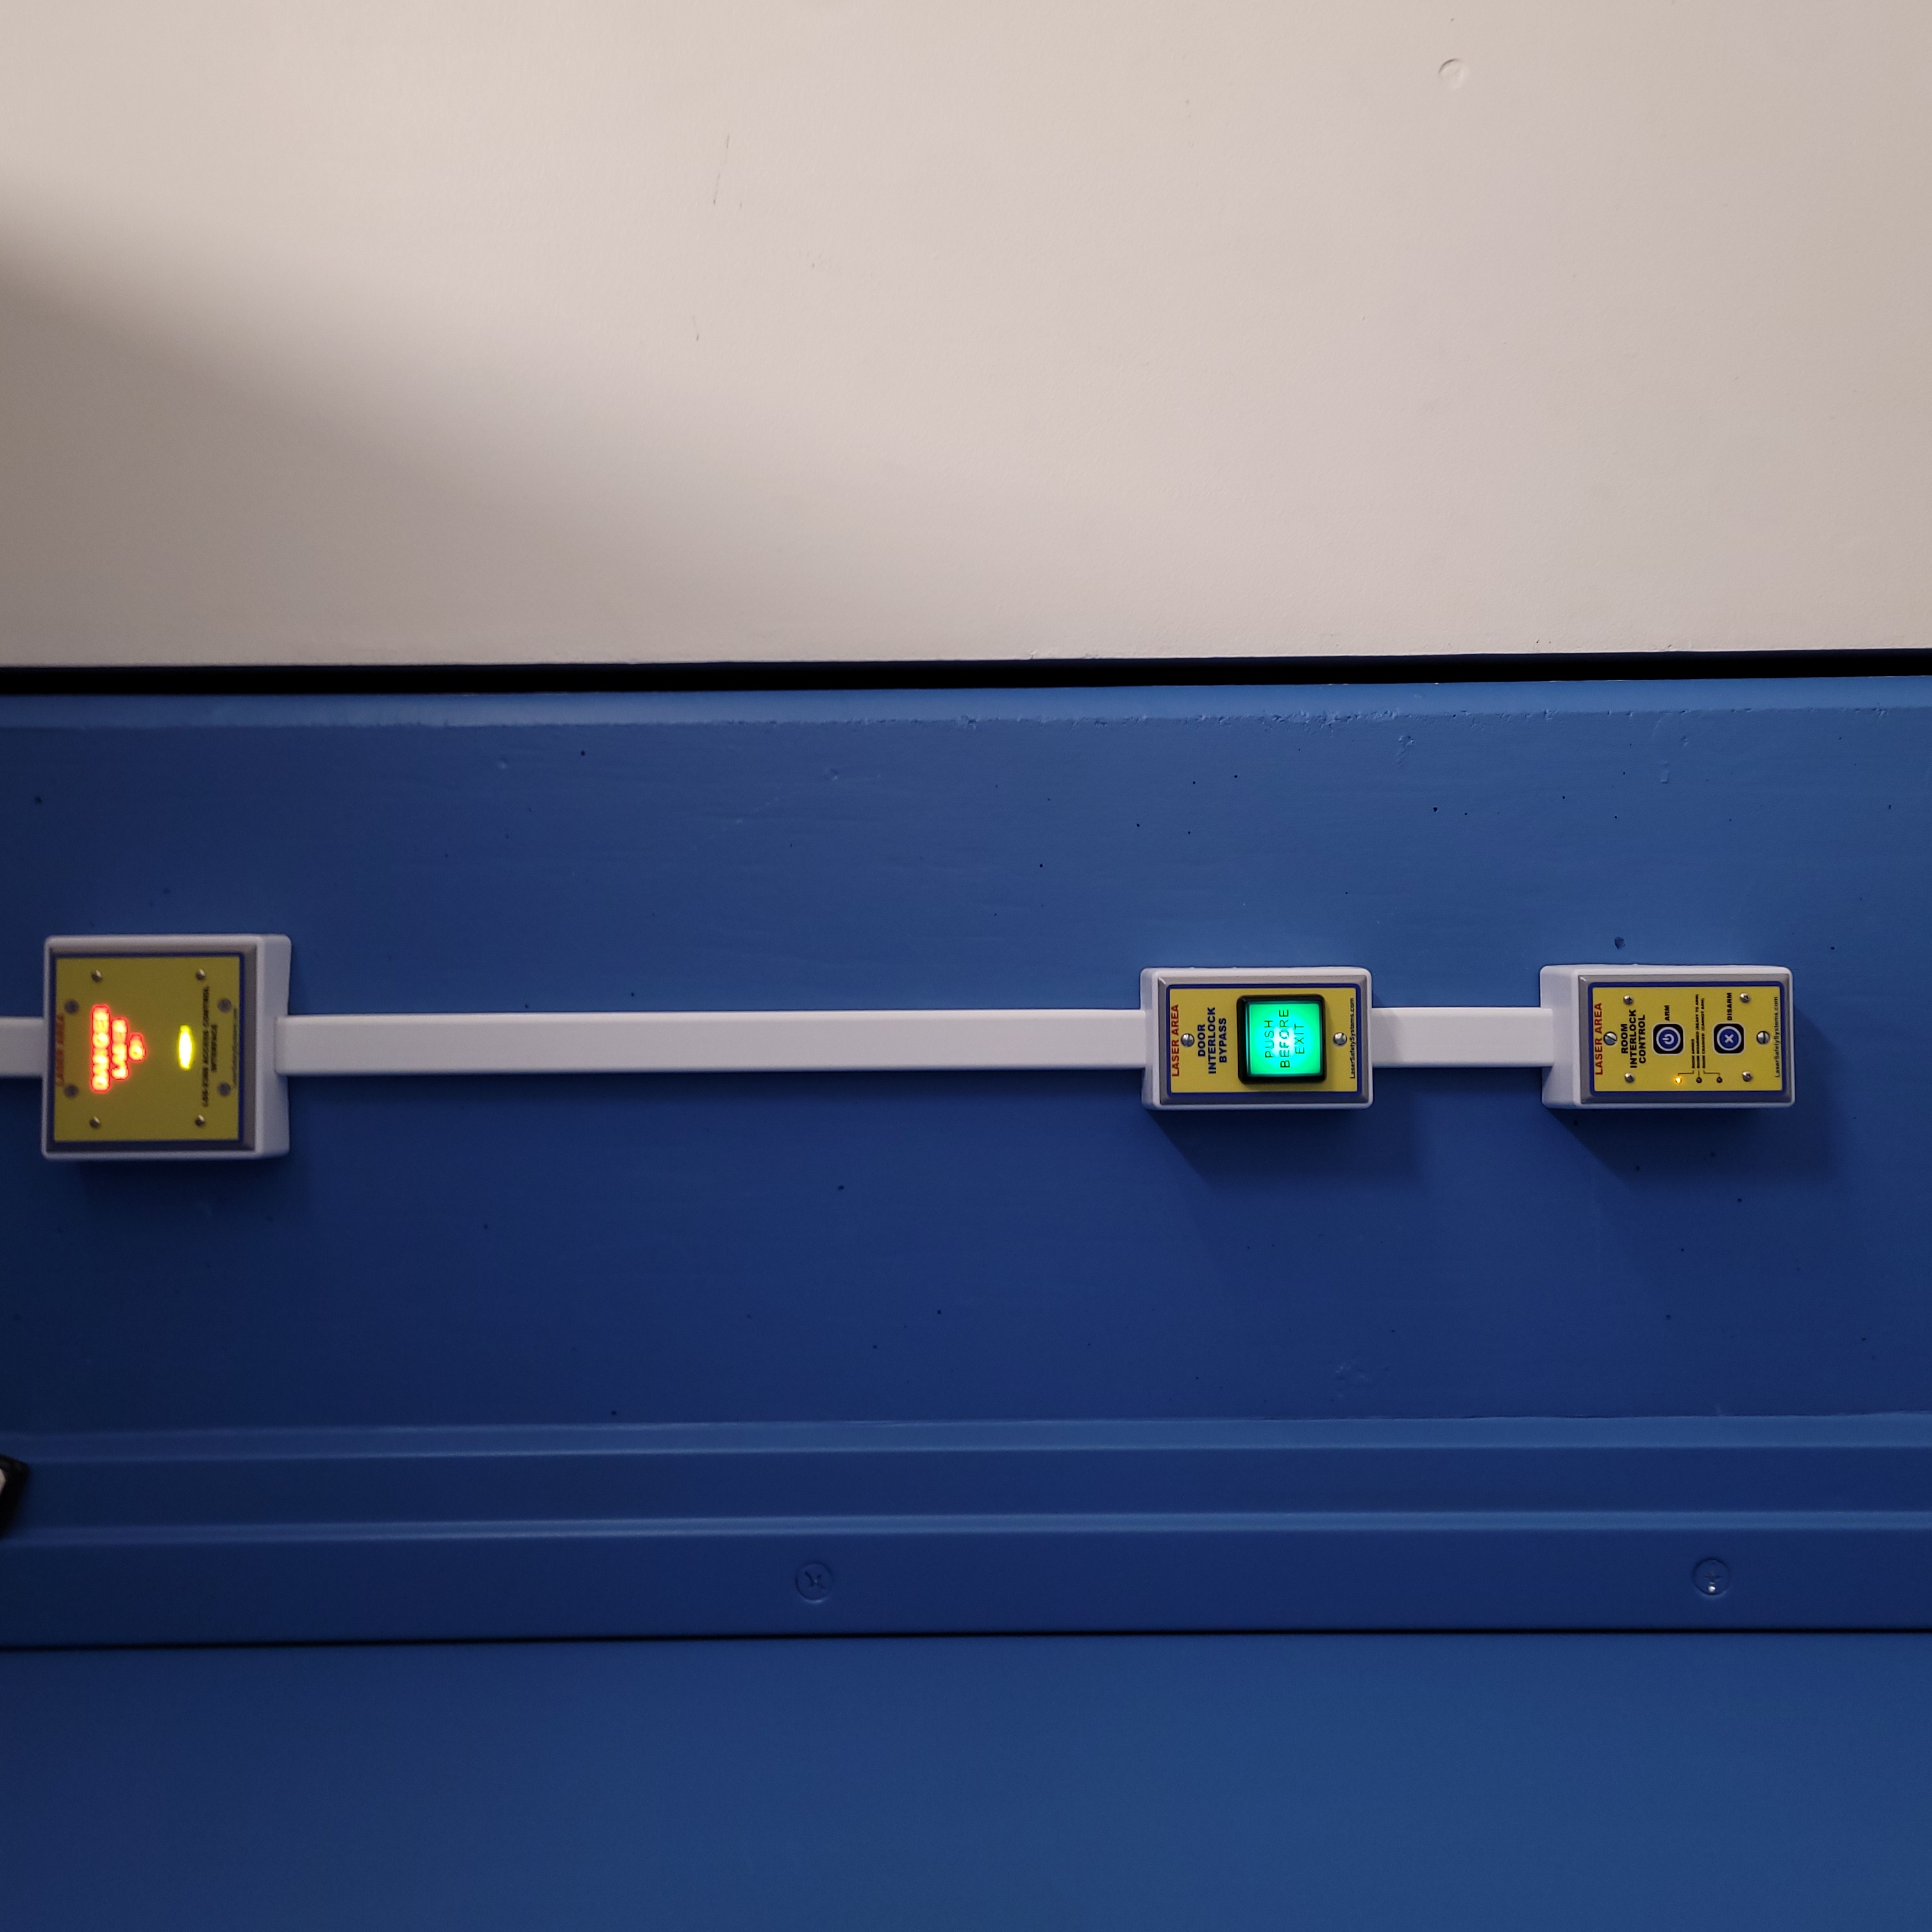
Figure 8: This is the Vault-1 laser control module when the system is armed.
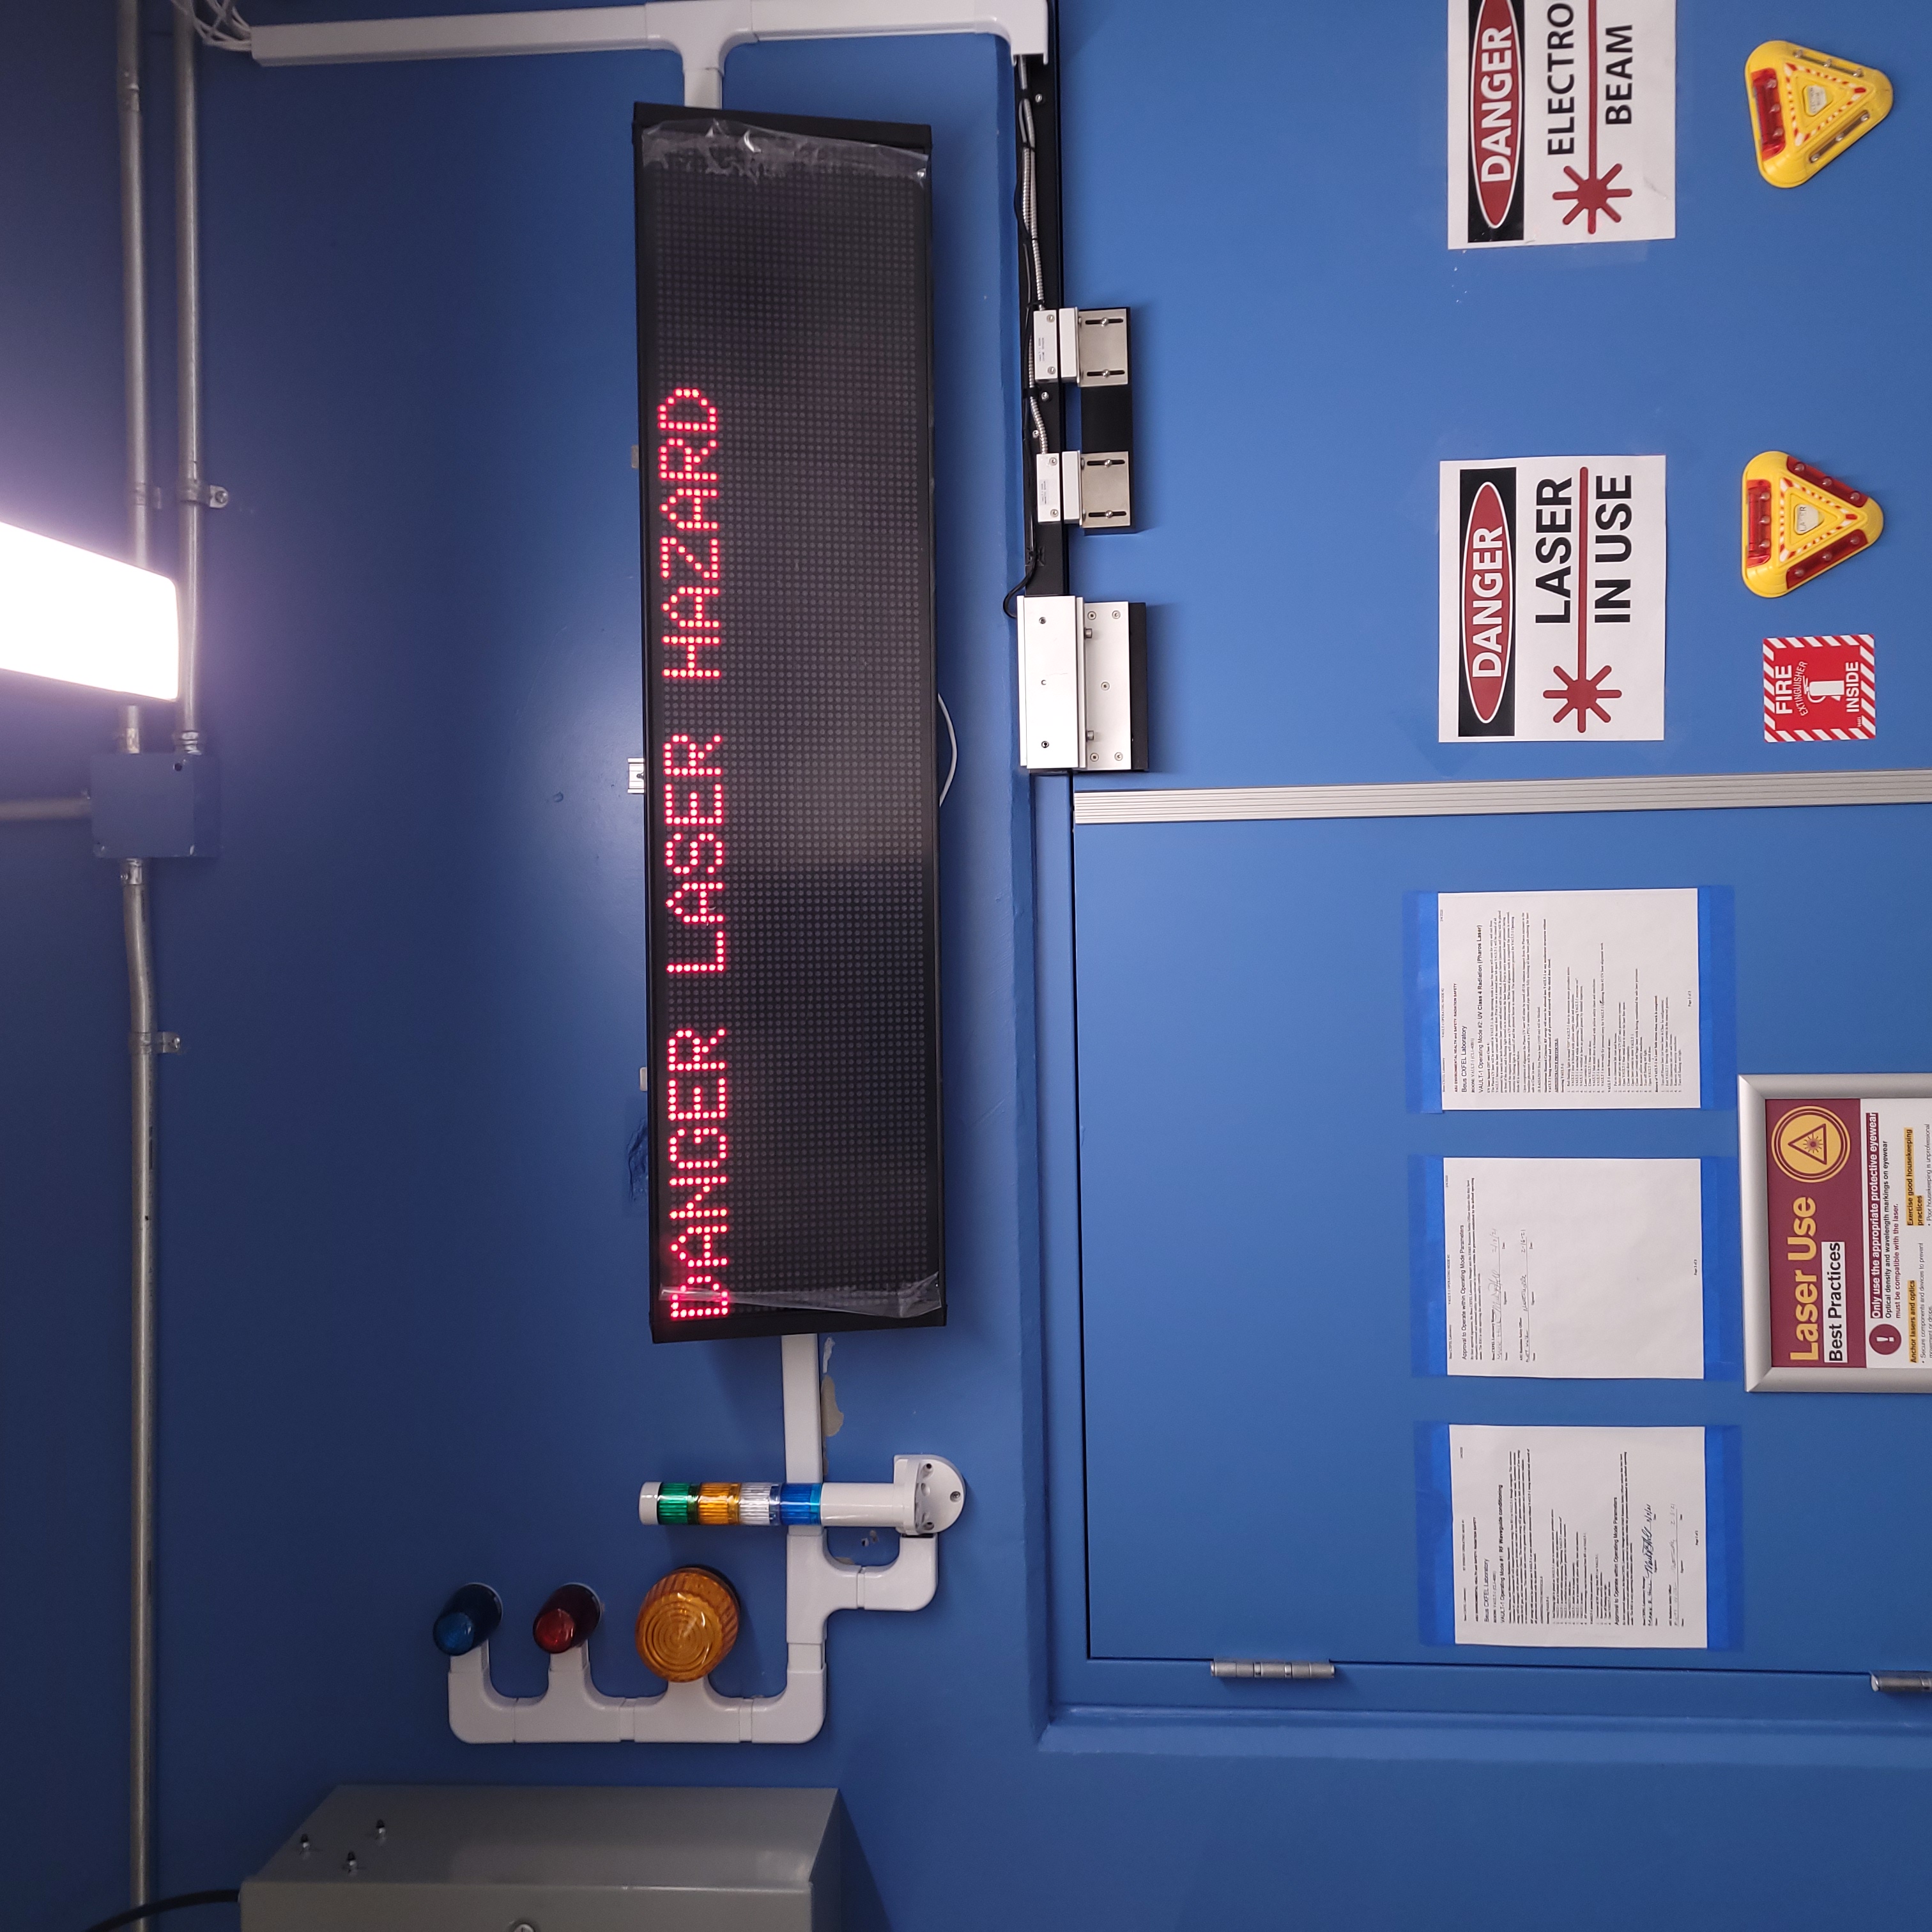
Figure 9: This is the Vault-1 Control VIEWMARQ display when the system is armed.
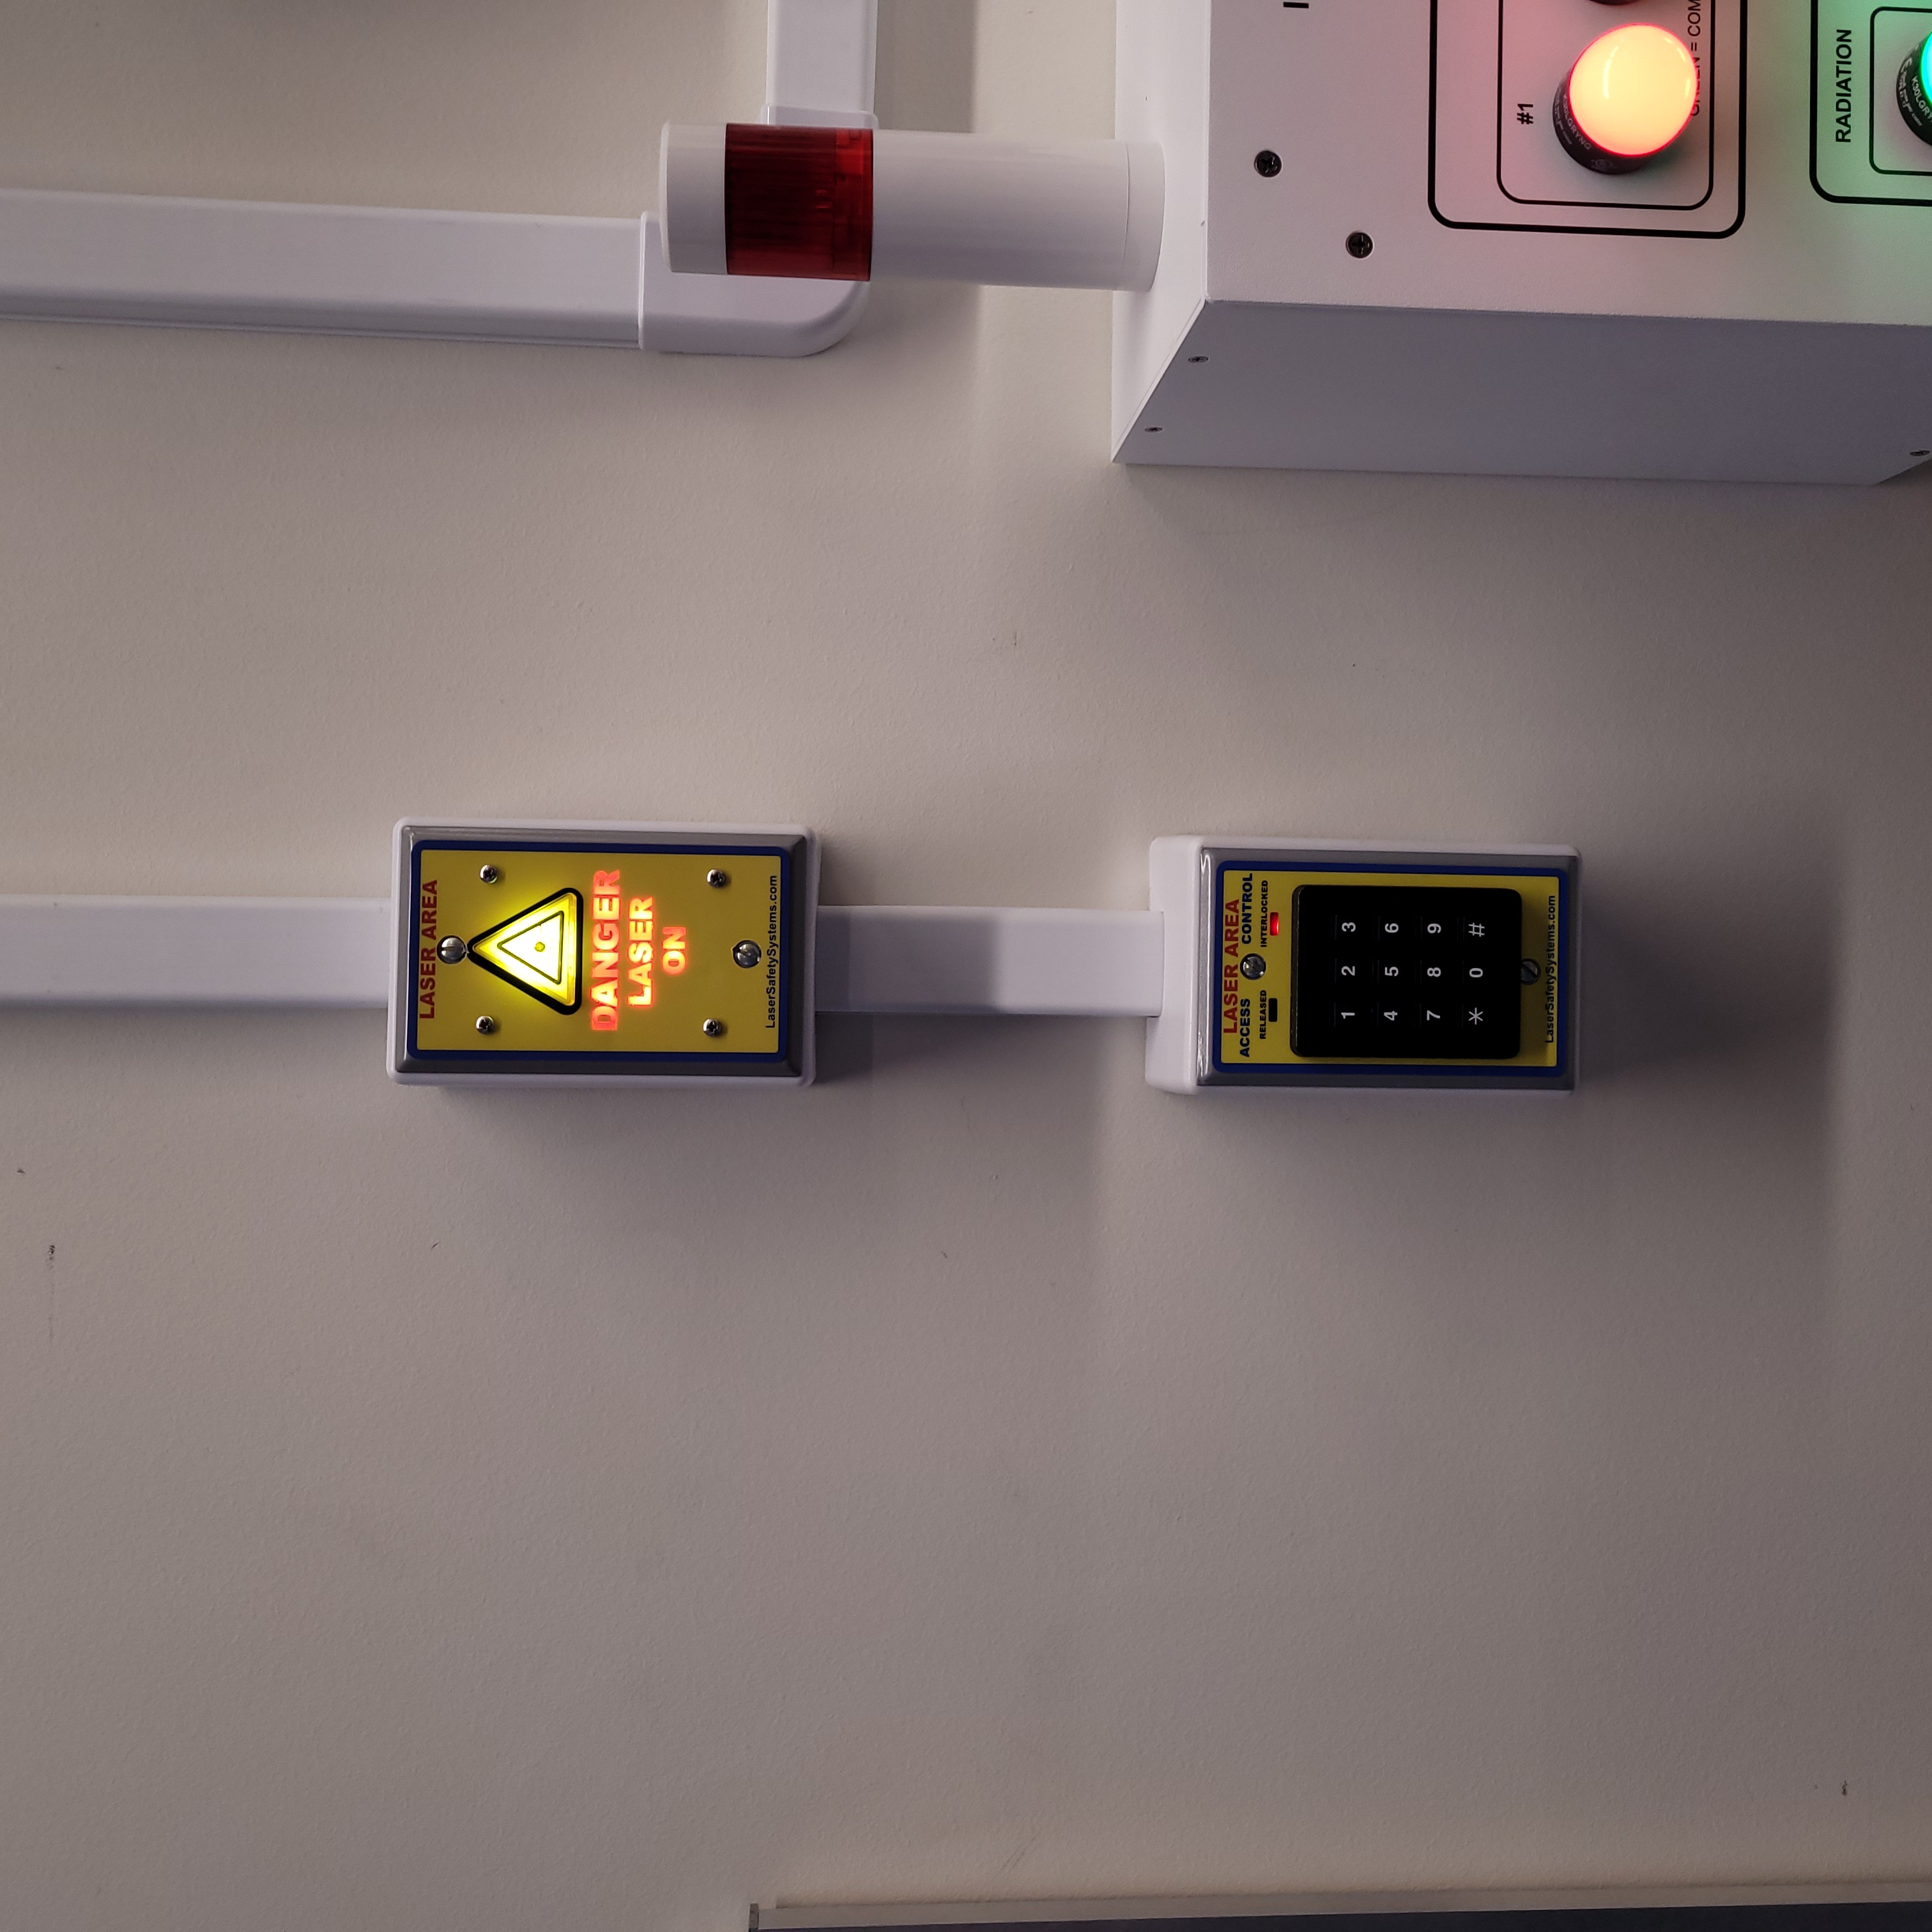
Figure 10: This is the Vault-1 entry modules when the system is armed.
Arming the Pharos Enclosure and Laser
With the Vault-1 unarmed, arm the room interlock module on the Pharos enclosure.
The room interlock module only lights the LED for ROOM ARMED.
The local interlock module will auto-arm only lights the LED for LOCAL CONTACTS ARMED.
The laser warning control module shows DANGER LASER ON.
Laser E-stops buttons are on.
Pharos enclosure west wall
Pharos enclosure north wall
The VIEWMARQ in Vault-1 Control will display LASER SAFE - PHAROS ARMED.
Beacon stacks show green and blue LEDs activated.
Vault-1 Control
Vault-1 east wall
Pharos LASER ENCLOSURE INTERLOCK protocase
Dira LASER ENCLOSURE INTERLOCK protocase
Change the Pharos LASER ENCLOSURE INTERLOCK protocase INTERLOCK OVERRIDE key from INTERLOCK to OVERRIDE. The STATUS LED remains green. Change back to INTERLOCK.
Rearm Vault-1 as a laser lab.
The VIEWMARQ in Vault-1 Control displays DANGER LASER HAZARD - PHAROS ARMED.
Beacon stacks show blue LED activated.
Vault-1 Control
Vault-1 east wall
Pharos LASER ENCLOSURE INTERLOCK protocase
Dira LASER ENCLOSURE INTERLOCK protocase
|
|
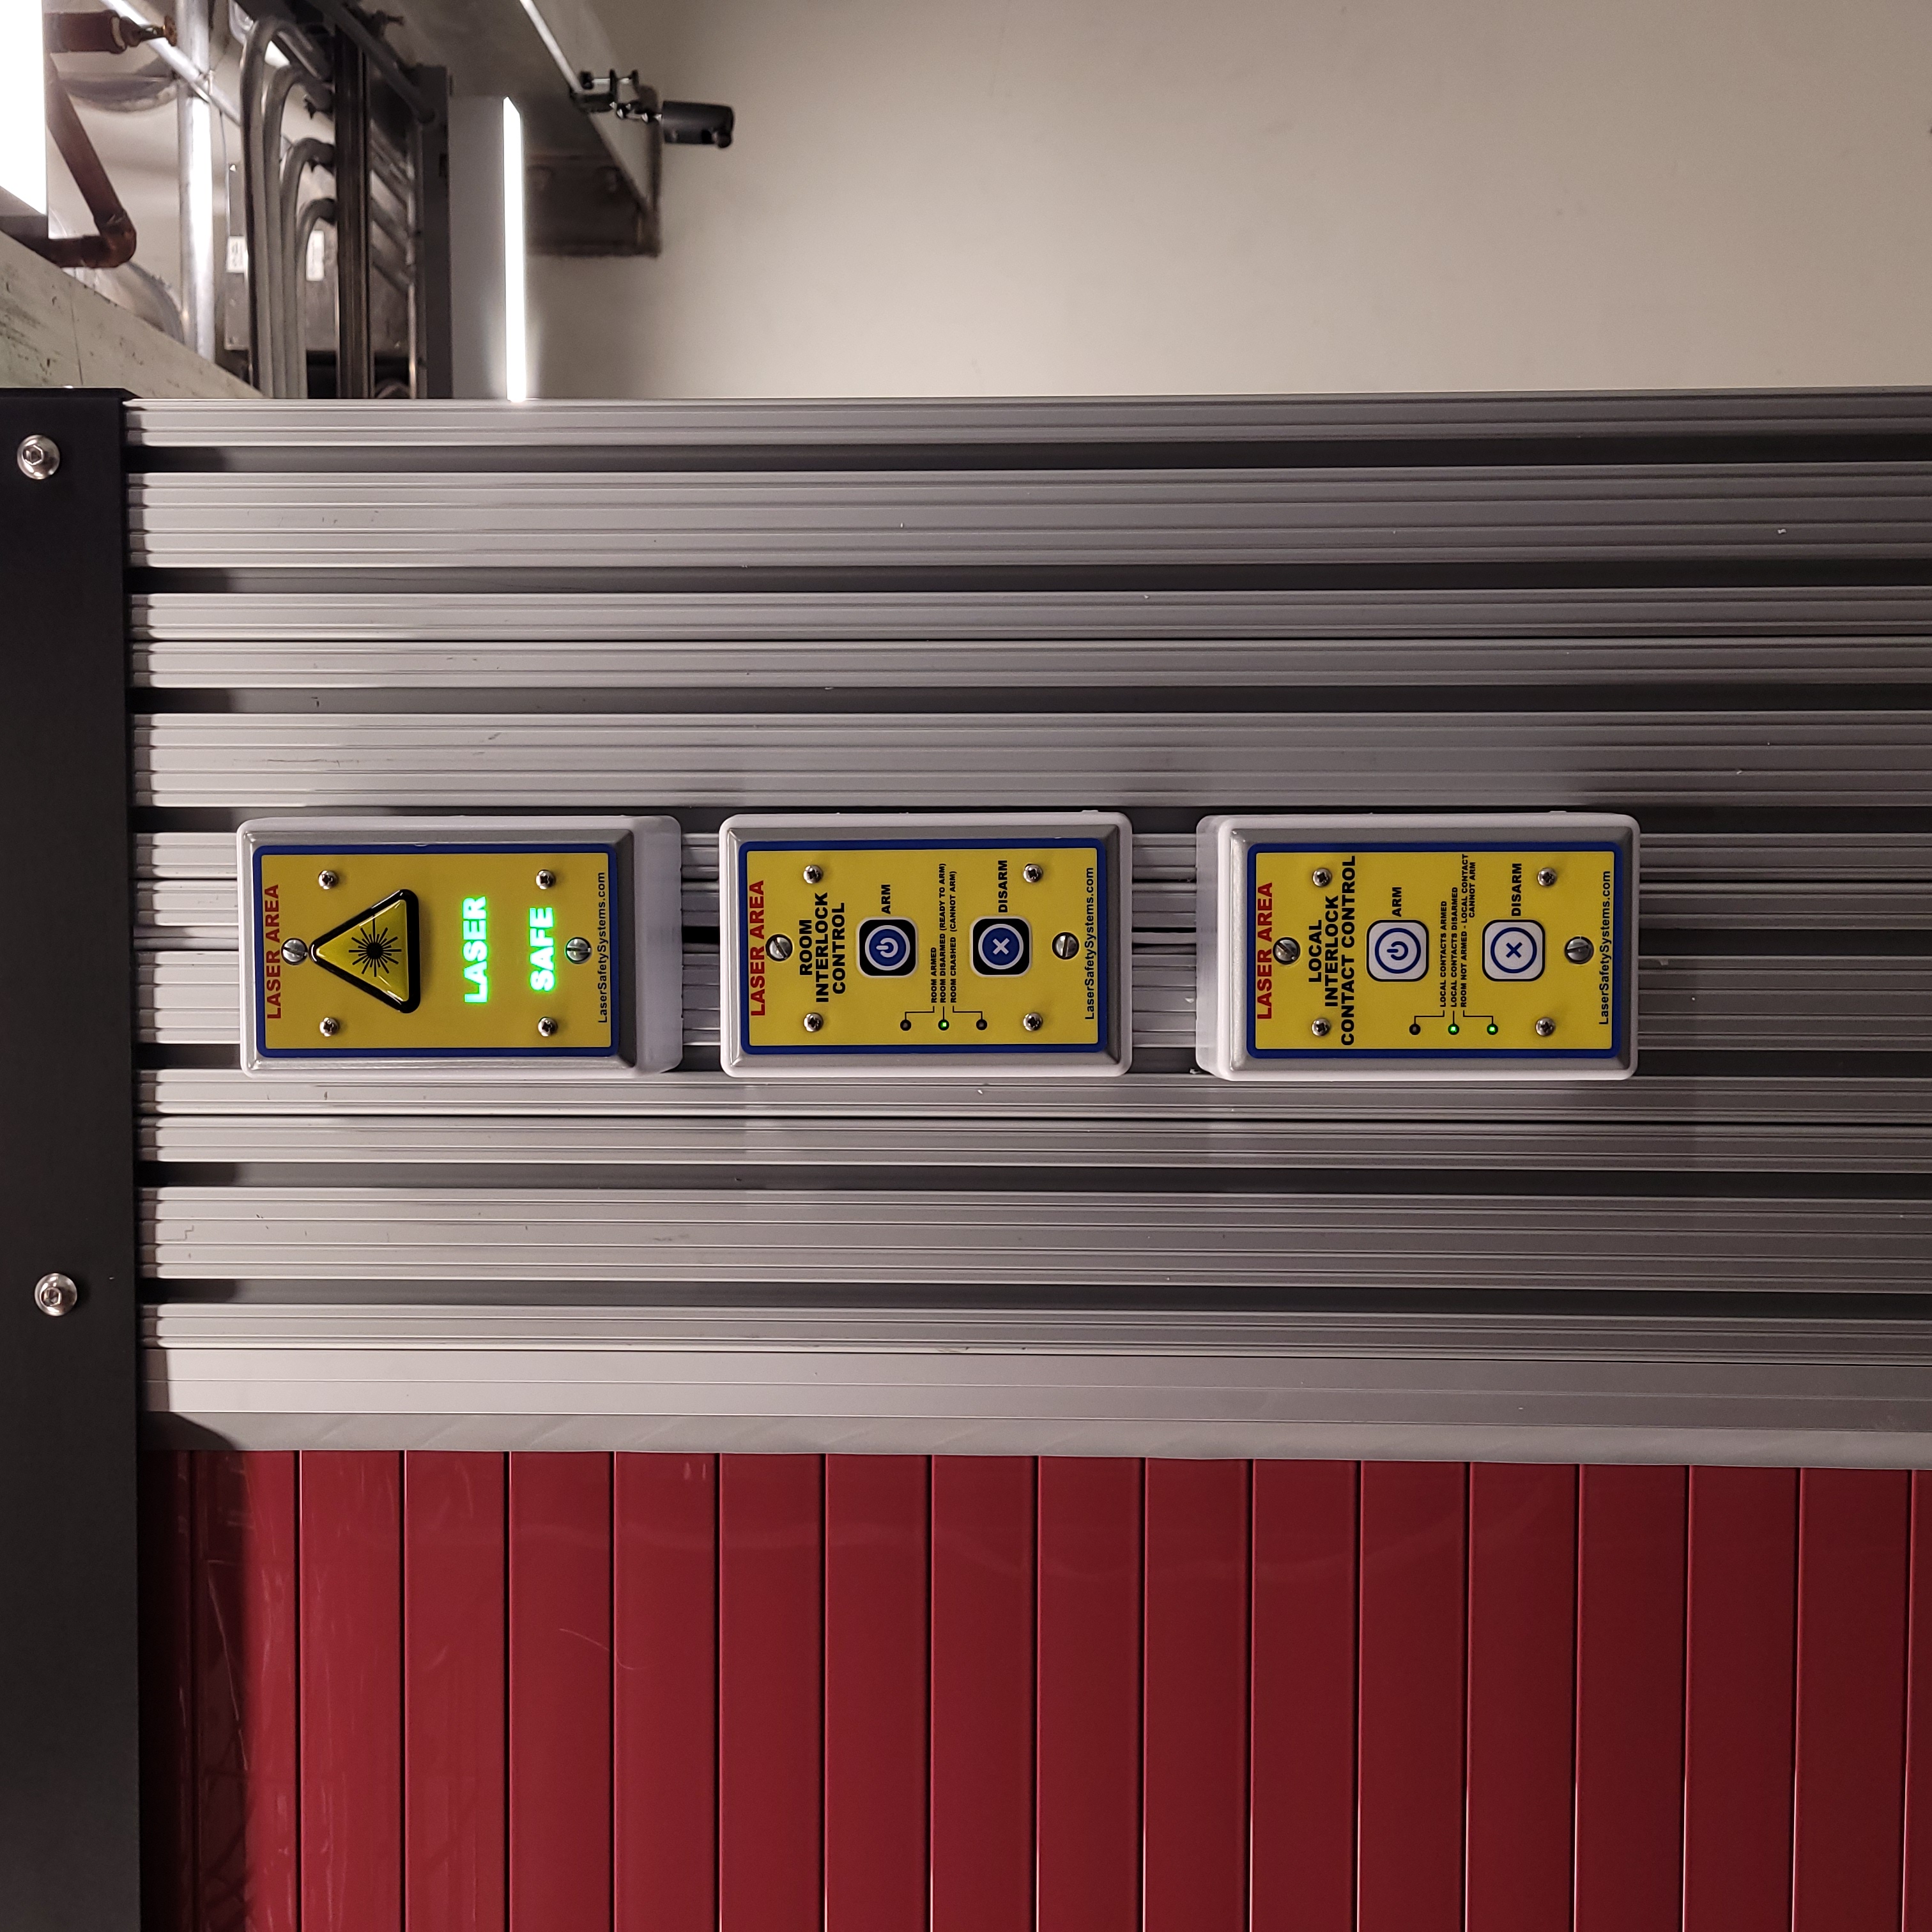
Pharos enclosure when unarmed. ====================================================== |
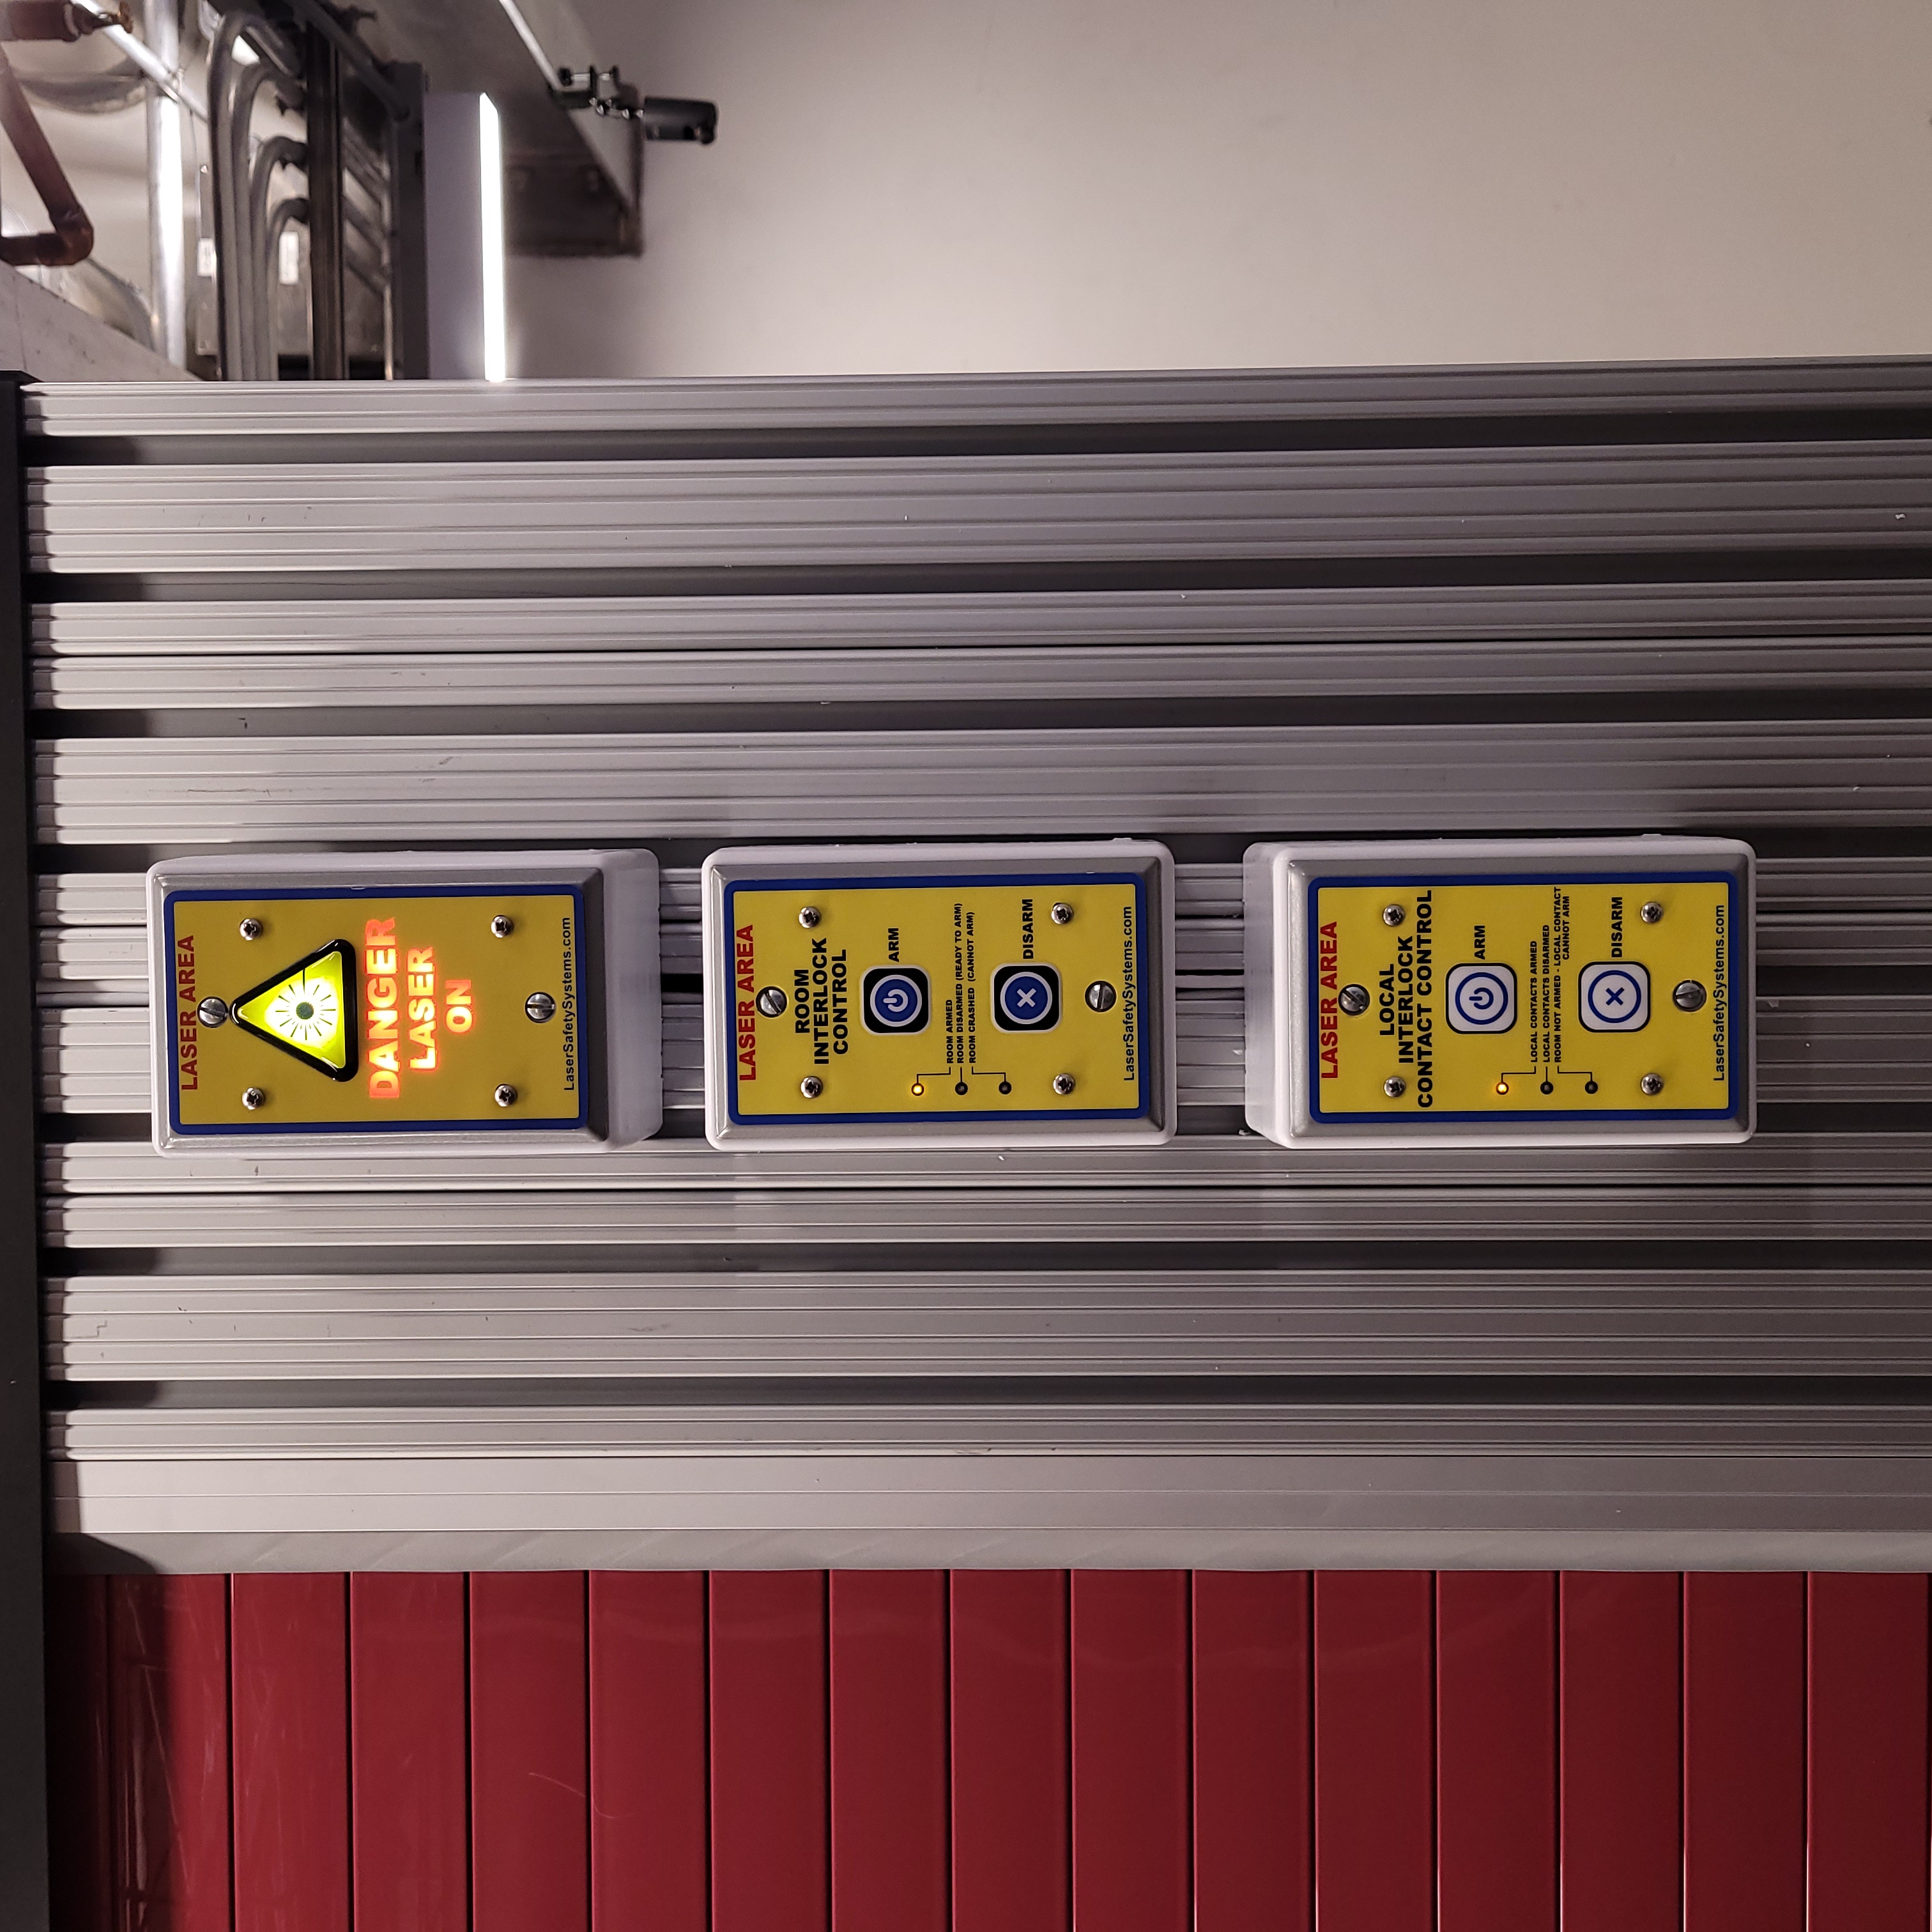
Pharos enclosure when armed. ======================================================== |
Figure 11: These are the Pharos enclosure laser warning modules when the system is unarmed and armed.
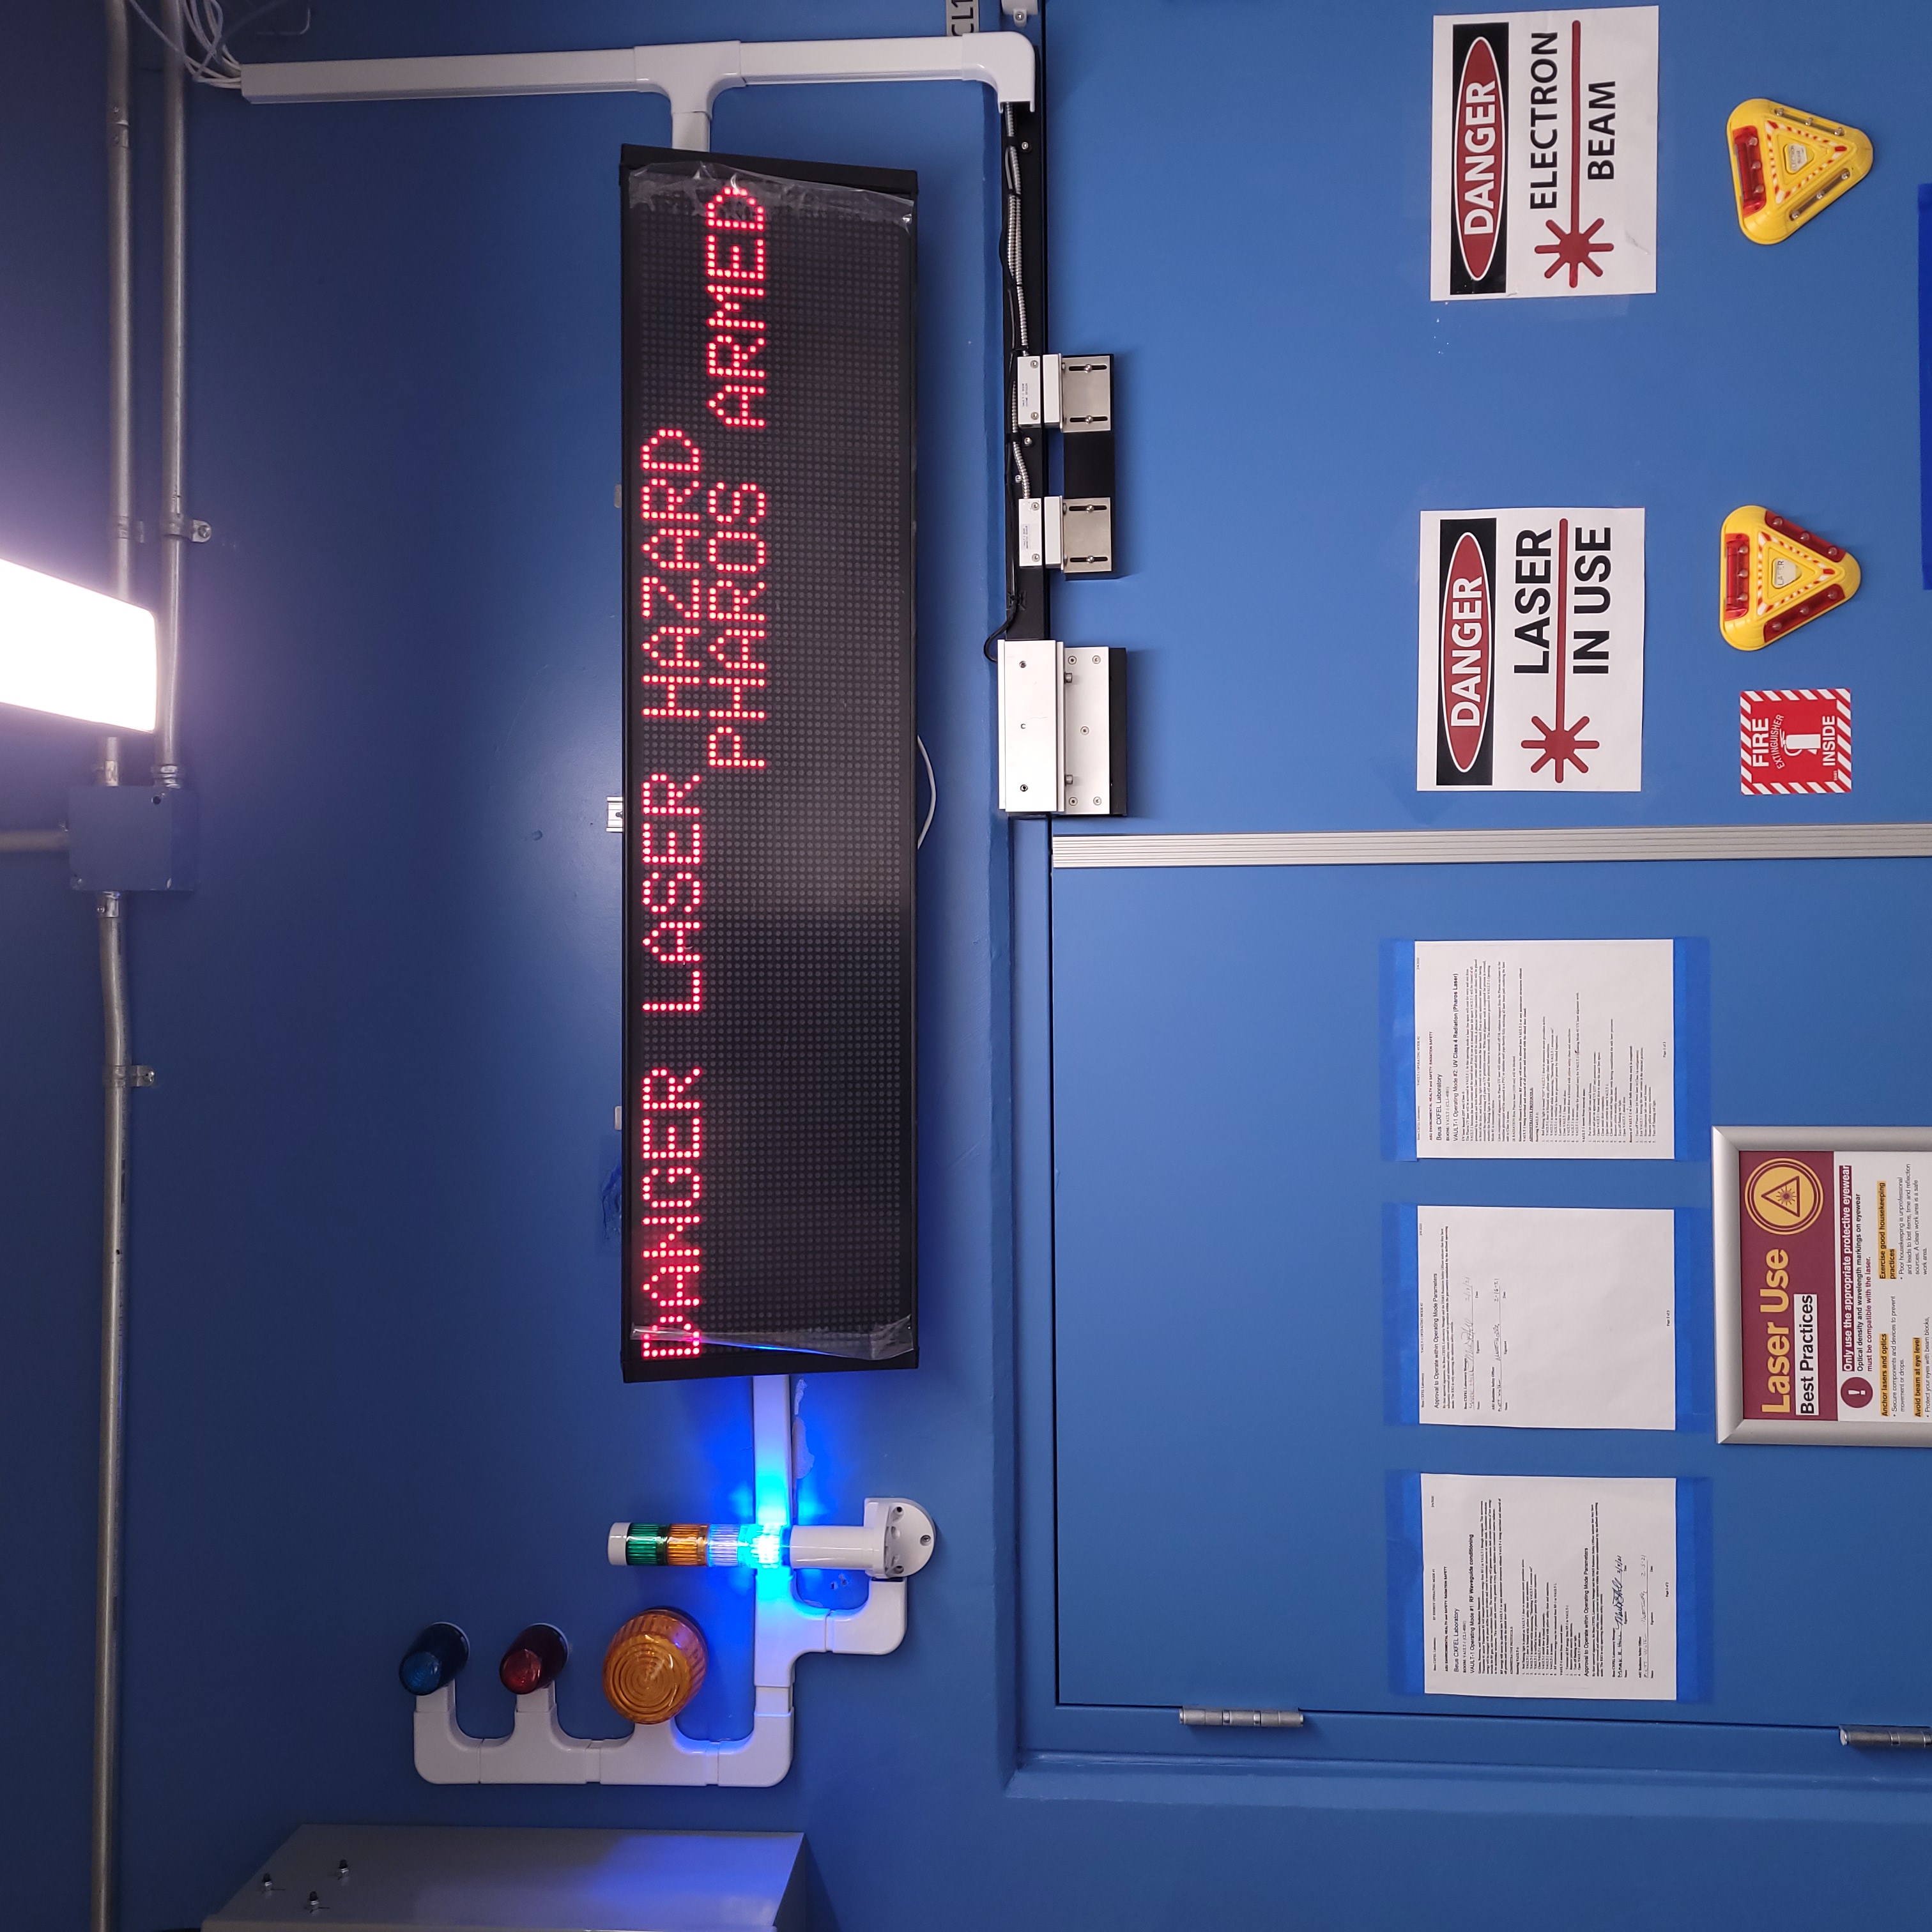
Figure 12: This is the Vault-1 Control VIEWMARQ display when the system is armed.
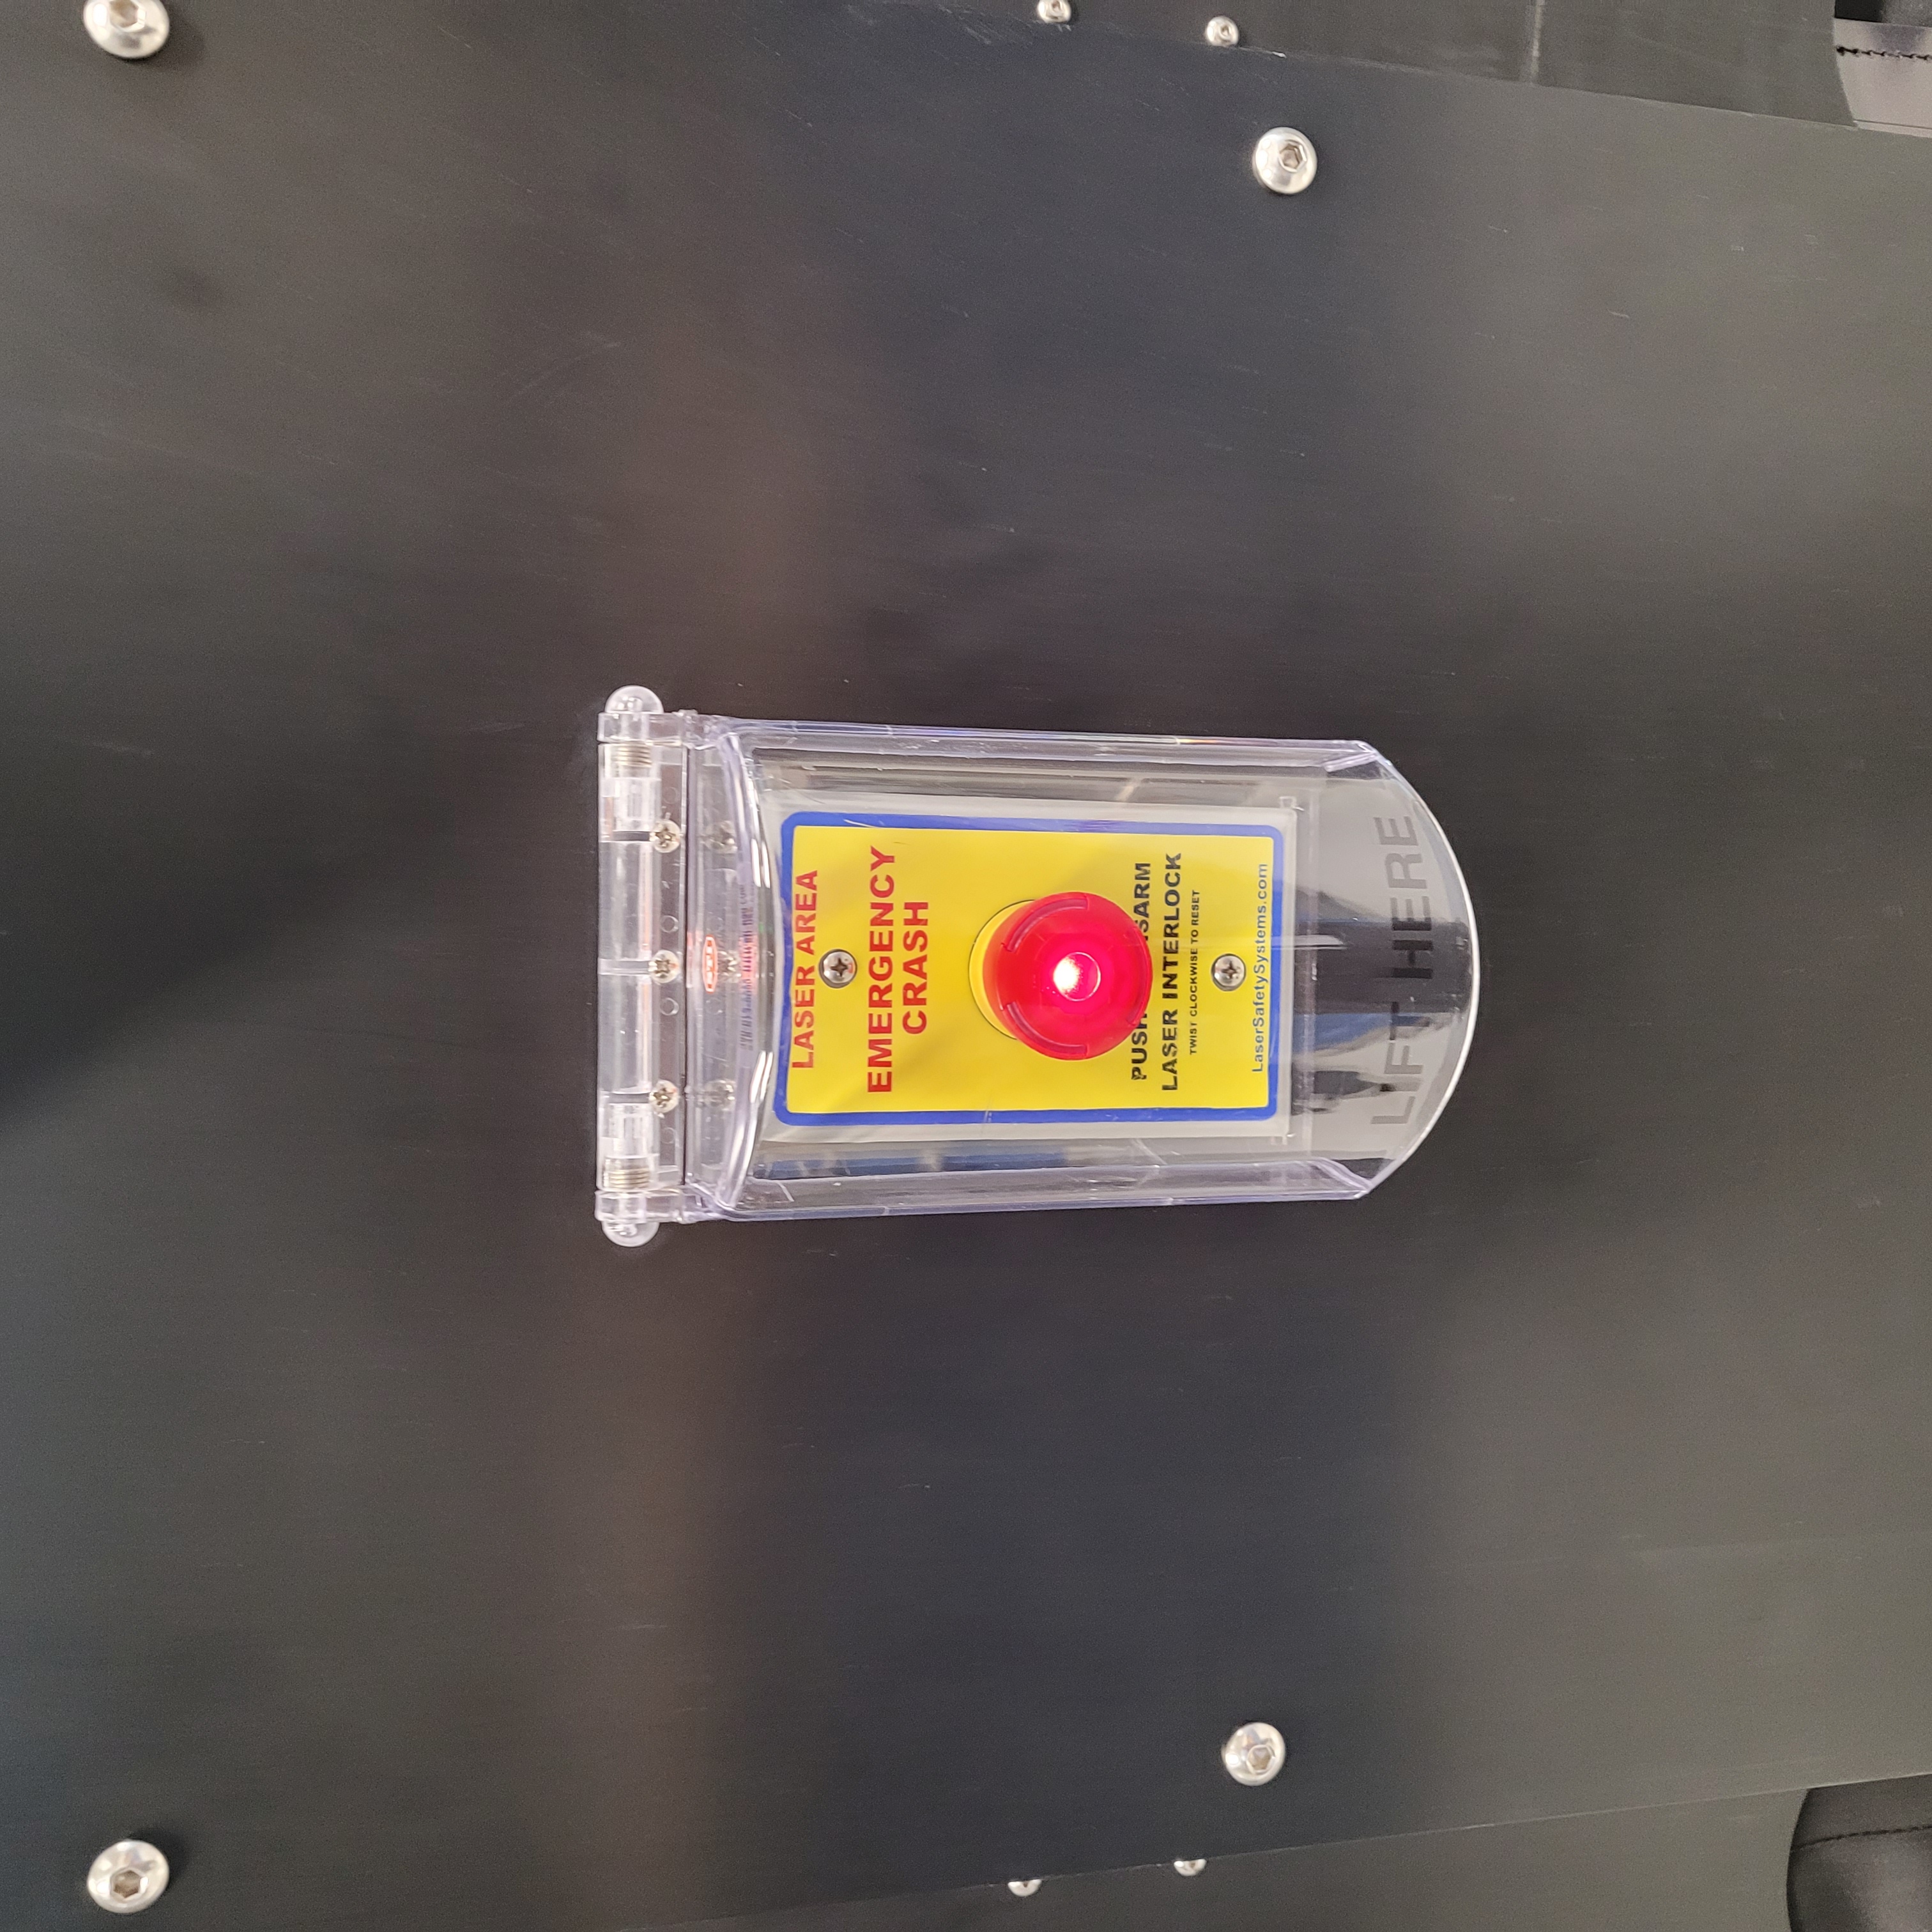
Figure 13: This is the laser e-stop button when the system is armed.
Safe Pharos E-Stop Test
Put the Pharos into a powered down state.
Arm the Pharos and the Pharos enclosure.
Press one of the Pharos enclosure laser e-stops.
Verify that the Pharos power supply is cut off.
Administrative Override on the Pharos Enclosure
With the Pharos and Vault-1 armed, arm the LOCAL INTERLOCK CONTACT CONTROL modules on the Pharos LASER ENCLOSURE INTERLOCK protocase.
CONTROL #1
CONTROL #2
Open the Pharos enclosure rolling doors. In response:
Pharos LASER ENCLOSURE INTERLOCK protocase laser warning module will display LASER SAFE.
The LOCAL INTERLOCK CONTACT CONTROL modules will disarm and display LOCAL CONTACTS DISARMED.
Pharos LASER ENCLOSURE INTERLOCK protocase door monitor will display nothing.
Pharos UV and IR shutters will close.
The Pharos power supply is cut off.
Rearm the contact controls, and repeat step 2 for all enclosure doors.
East door
North door
South door
Turn the Pharos LASER ENCLOSURE INTERLOCK protocase INTERLOCK OVERRIDE key from INTERLOCK to OVERRIDE. The STATUS LED will change to red.
The VIEWMARQ in Vault-1 Control will display DANGER LASER HAZARD-PHAROS ARMED-PHAROS ADMIN OVERRIDE.
Beacon stacks show orange and blue LEDs on.
Vault-1 Control
Vault-1 east wall
Pharos LASER ENCLOSURE INTERLOCK protocase
Beacon stack on Dira LASER ENCLOSURE INTERLOCK protocase only shows blue LED on.
Arm the LOCAL INTERLOCK CONTACT CONTROL modules on the Pharos LASER ENCLOSURE INTERLOCK protocase.
CONTROL #1
CONTROL #2
With the Pharos, Vault-1, and LOCAL INTERLOCK CONTACT CONTROL modules armed and the Pharos enclosure set to override, open one of the Pharos enclosure rolling doors. In response:
Pharos LASER ENCLOSURE INTERLOCK protocase laser warning module will display LASER ON.
The LOCAL INTERLOCK CONTACT CONTROL modules will stay armed.
Pharos LASER ENCLOSURE INTERLOCK protocase door monitor will display CLOSED.
Pharos UV and IR shutters will not close.
The Pharos power supply stays on.
Turn the Pharos LASER ENCLOSURE INTERLOCK protocase INTERLOCK OVERRIDE key from OVERRIDE to INTERLOCK. The STATUS LED changed to green. The VIEWMARQ display and beacon stacks show a non-override status.
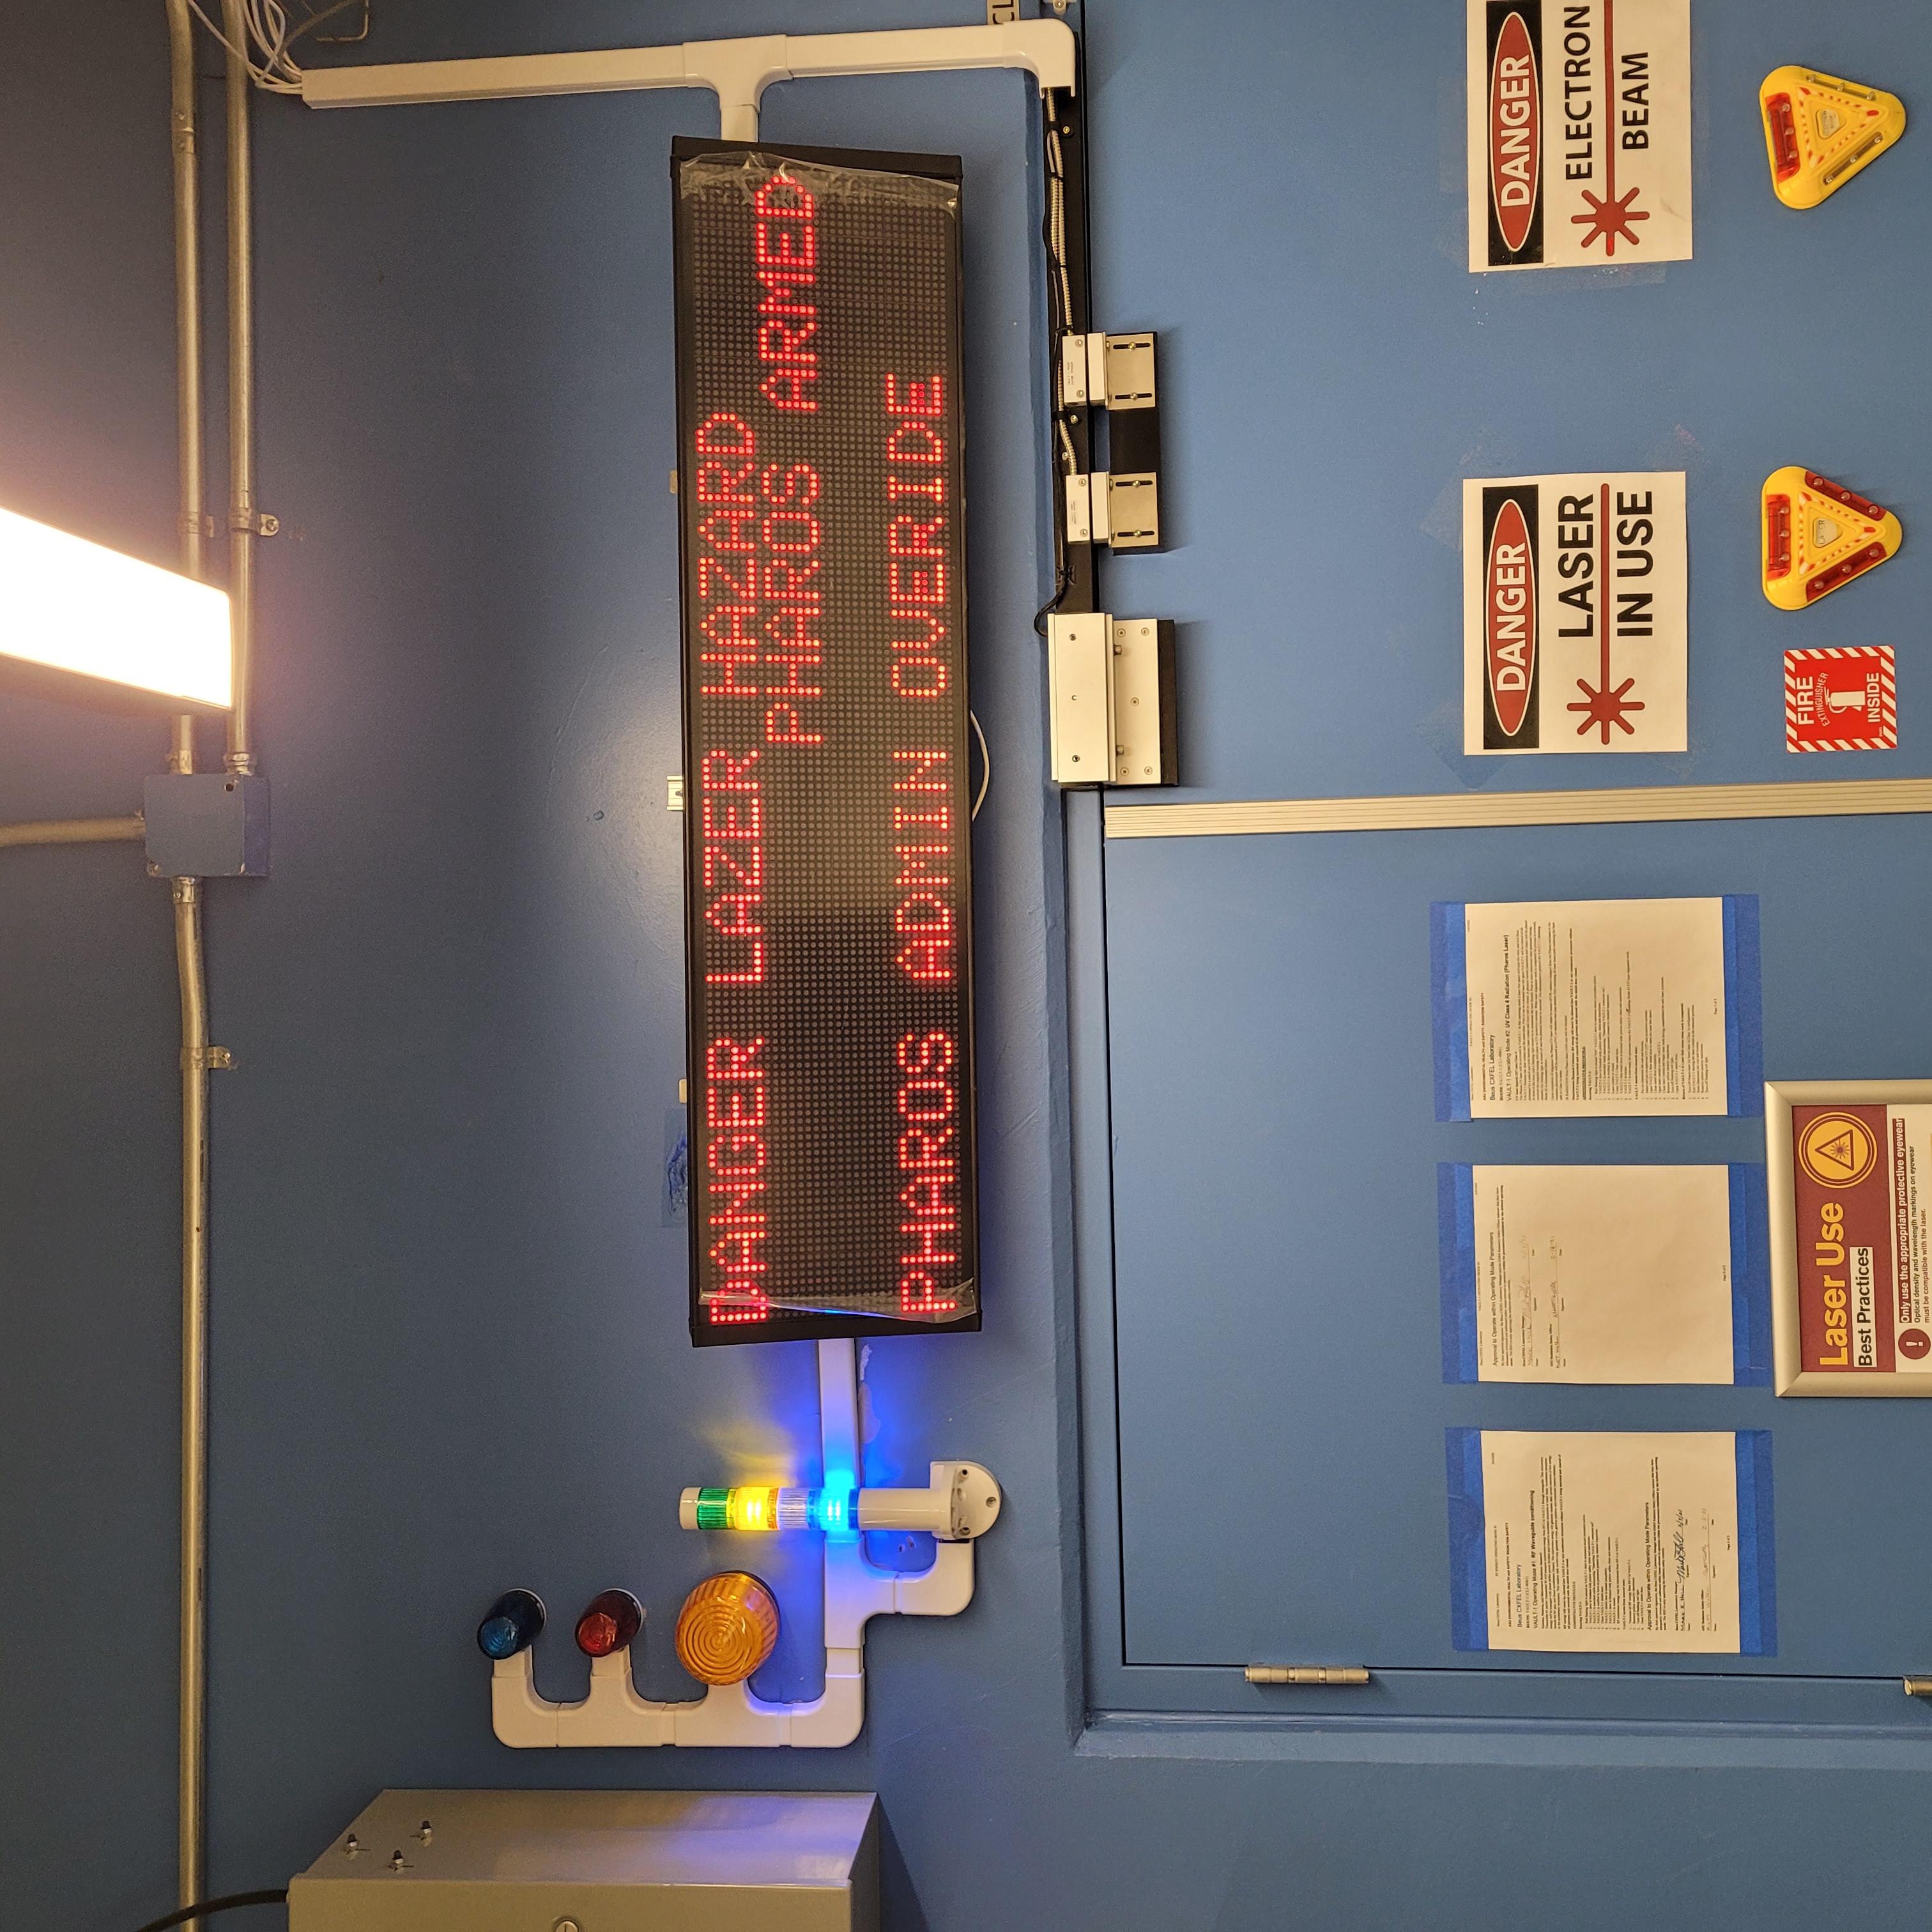
Figure 14: This is the Vault-1 Control VIEWMARQ display when the system is overridden.
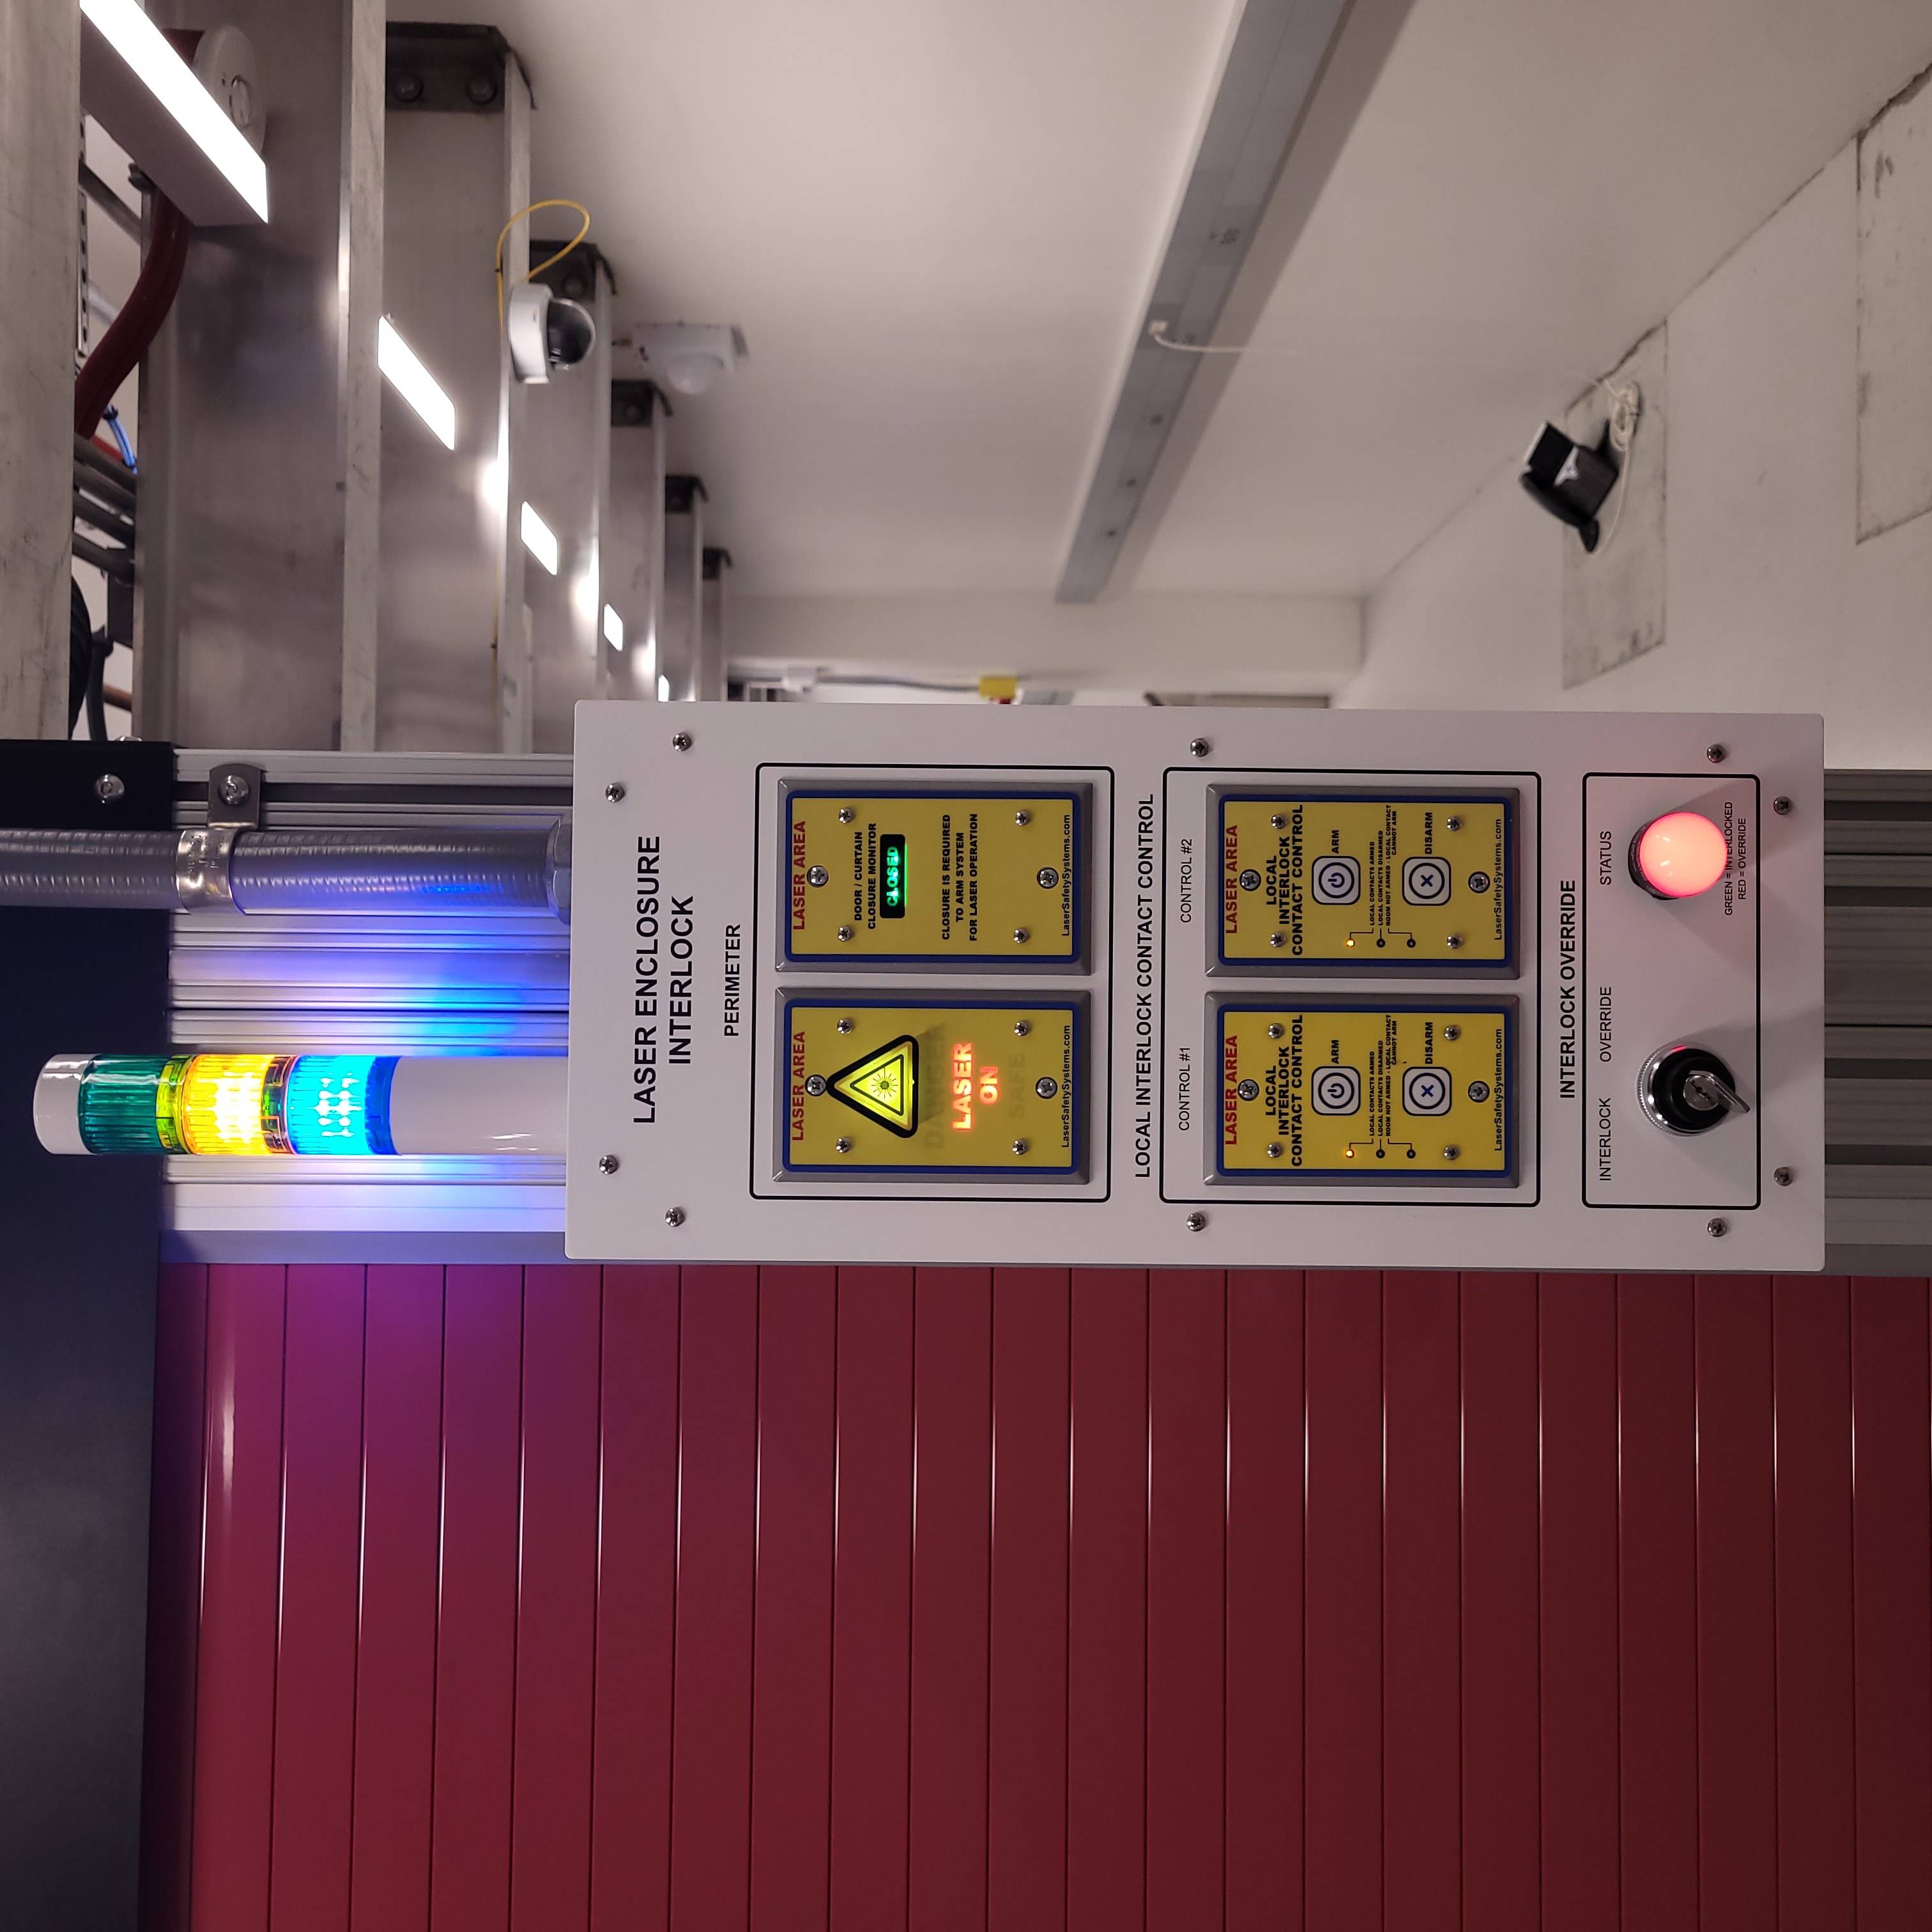
Figure 15: This is the Pharos LASER ENCLOSURE INTERLOCK protocase when the system is overridden.
Arming the Dira Enclosure and Laser
Disarm Vault-1 and the Pharos.
See Laser Lab testing procedure for arming the Dira. The laser warning module on Dira enclosure displays DANGER LASER ON.
Change the Dira LASER ENCLOSURE INTERLOCK protocase INTERLOCK OVERRIDE key from INTERLOCK to OVERRIDE. The STATUS LED remains green. Change back to INTERLOCK.
Administrative Override on the Dira Enclosure
Open the Dira enclosure rolling doors. In response:
Dira and Pharos LASER ENCLOSURE INTERLOCK protocase laser warning module will display LASER SAFE
The LOCAL INTERLOCK CONTACT CONTROL modules will disarm and display LOCAL CONTACTS DISARMED on the Dira and Pharos protocases.
Dira and Pharos LASER ENCLOSURE INTERLOCK protocase door monitor will display nothing.
Pharos UV and IR shutters will close.
Dira UV and IR shutters will close.
The Dira power supply is cut off.
The Pharos power supply is cut off.
Rearm the Dira.
With Vault-1, the Dira armed, and the Pharos armed turn the INTERLOCK OVERRIDE key on the Dira LASER ENCLOSURE INTERLOCK protocase from INTERLOCK to OVERRIDE. The STATUS LED will change to red.
The VIEWMARQ displays DANGER LASER HAZARD-PHAROS ARMED-DIRA ARMED-DIRA ADMIN OVERRIDE.
Beacon stacks show orange, white, and blue LEDs on.
Vault-1 Control
Vault-1 east wall
Dira LASER ENCLOSURE INTERLOCK protocase.
Beacon stack on the Pharos LASER ENCLOSURE INTERLOCK protocase will show blue LEDs on.
Turn the INTERLOCK OVERRIDE key on the Pharos LASER ENCLOSURE INTERLOCK protocol case from INTERLOCK to OVERRIDE. The STATUS LED will change to red.
The VIEWMARQ in Vault-1 Control will display DANGER LASER ON - PHAROS ARMED - DIRA ARMED - PHAROS ADMIN OVERRIDE - DIRA ADMIN OVERRIDE.
The beacon stack on the Pharos LASER ENCLOSURE INTERLOCK protocase will show orange and blue LEDs on.
With the Pharos, Dira, Vault-1, and LOCAL INTERLOCK CONTACT CONTROL armed and the Dira and Pharos enclosures set to override, open one of the Dira enclosure rolling doors. In response:
Pharos LASER ENCLOSURE INTERLOCK protocase laser warning module will display DANGER LASER ON
The LOCAL INTERLOCK CONTACT CONTROL modules will disarm on the Pharos.
Pharos UV and IR shutters will not close.
Dira UV and IR shutters will not close.
With the Pharos, Dira, and Vault-1 armed and the Dira and Pharos enclosures set to override, open one of the Dira enclosure rolling doors. In response:
Dira LASER ENCLOSURE INTERLOCK protocase warning module will display DANGER LASER ON.
Dira LASER ENCLOSURE INTERLOCK protocase door monitor will display CLOSED.
Pharos LASER ENCLOSURE INTERLOCK protocase door monitor will display nothing.
Pharos UV and IR shutters will close.
Dira UV and IR shutters will close.
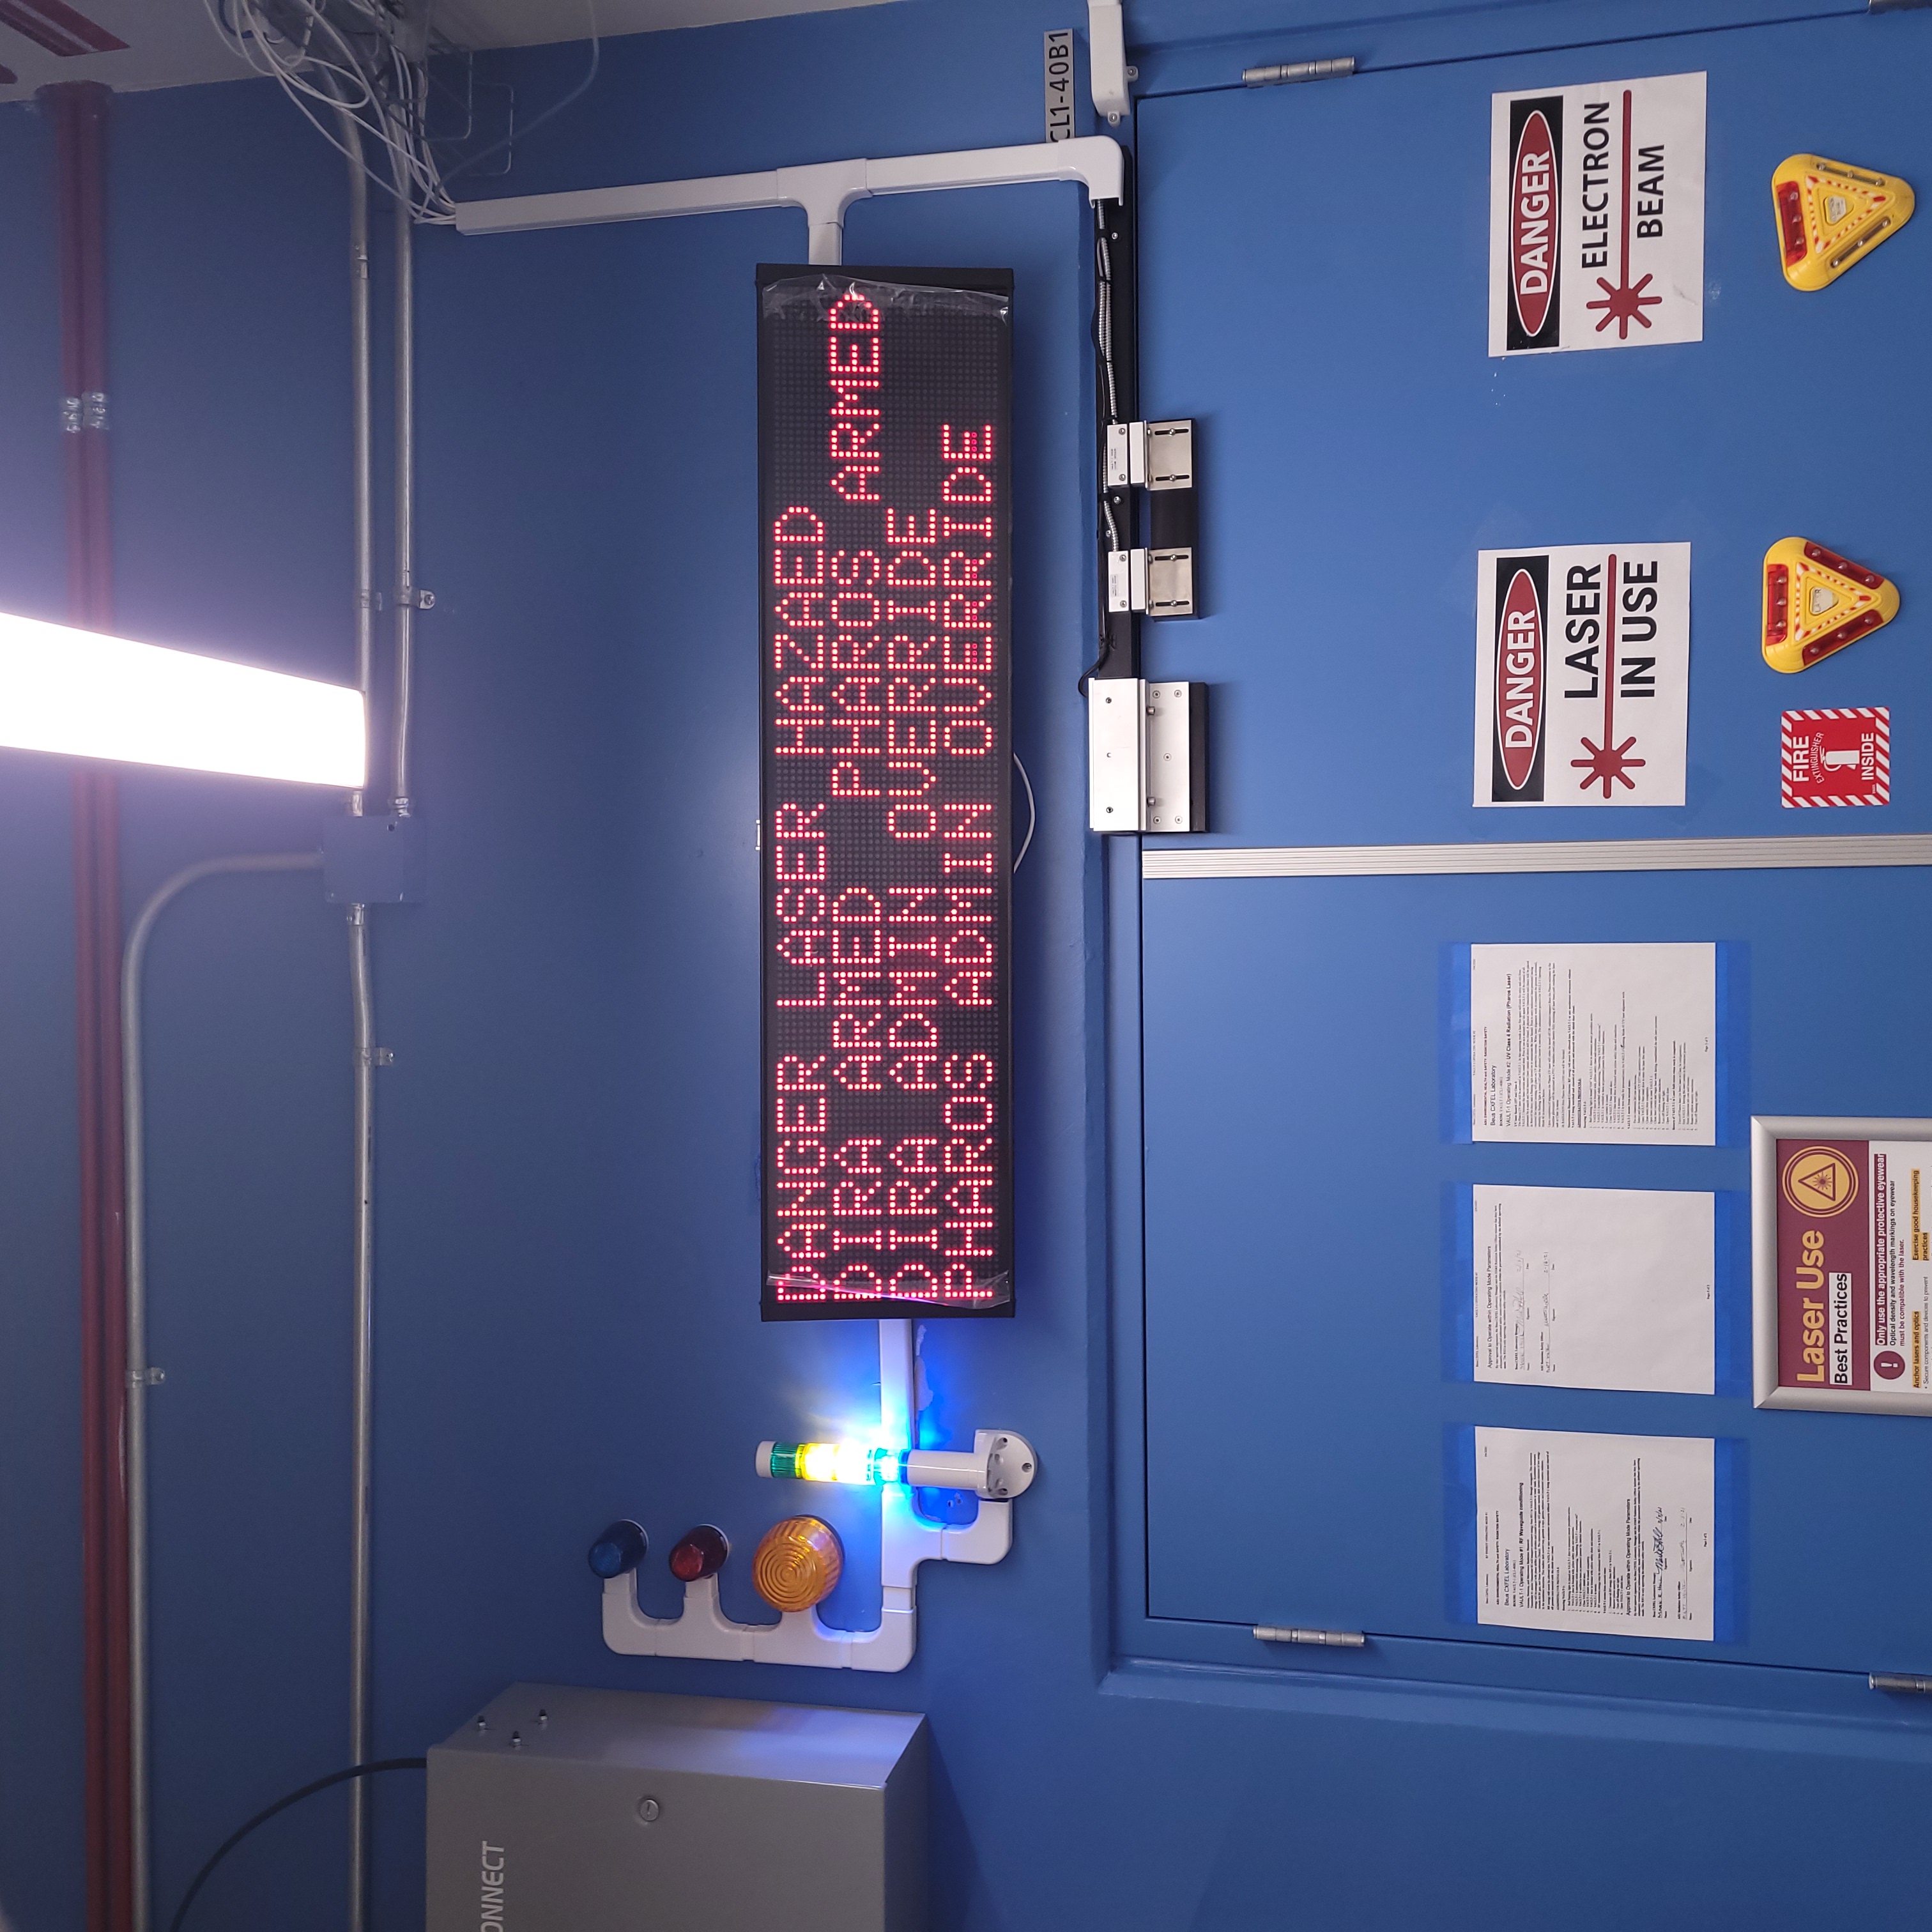
Figure 16: This is the Vault-1 Control VIEWMARQ display when the system is overridden.
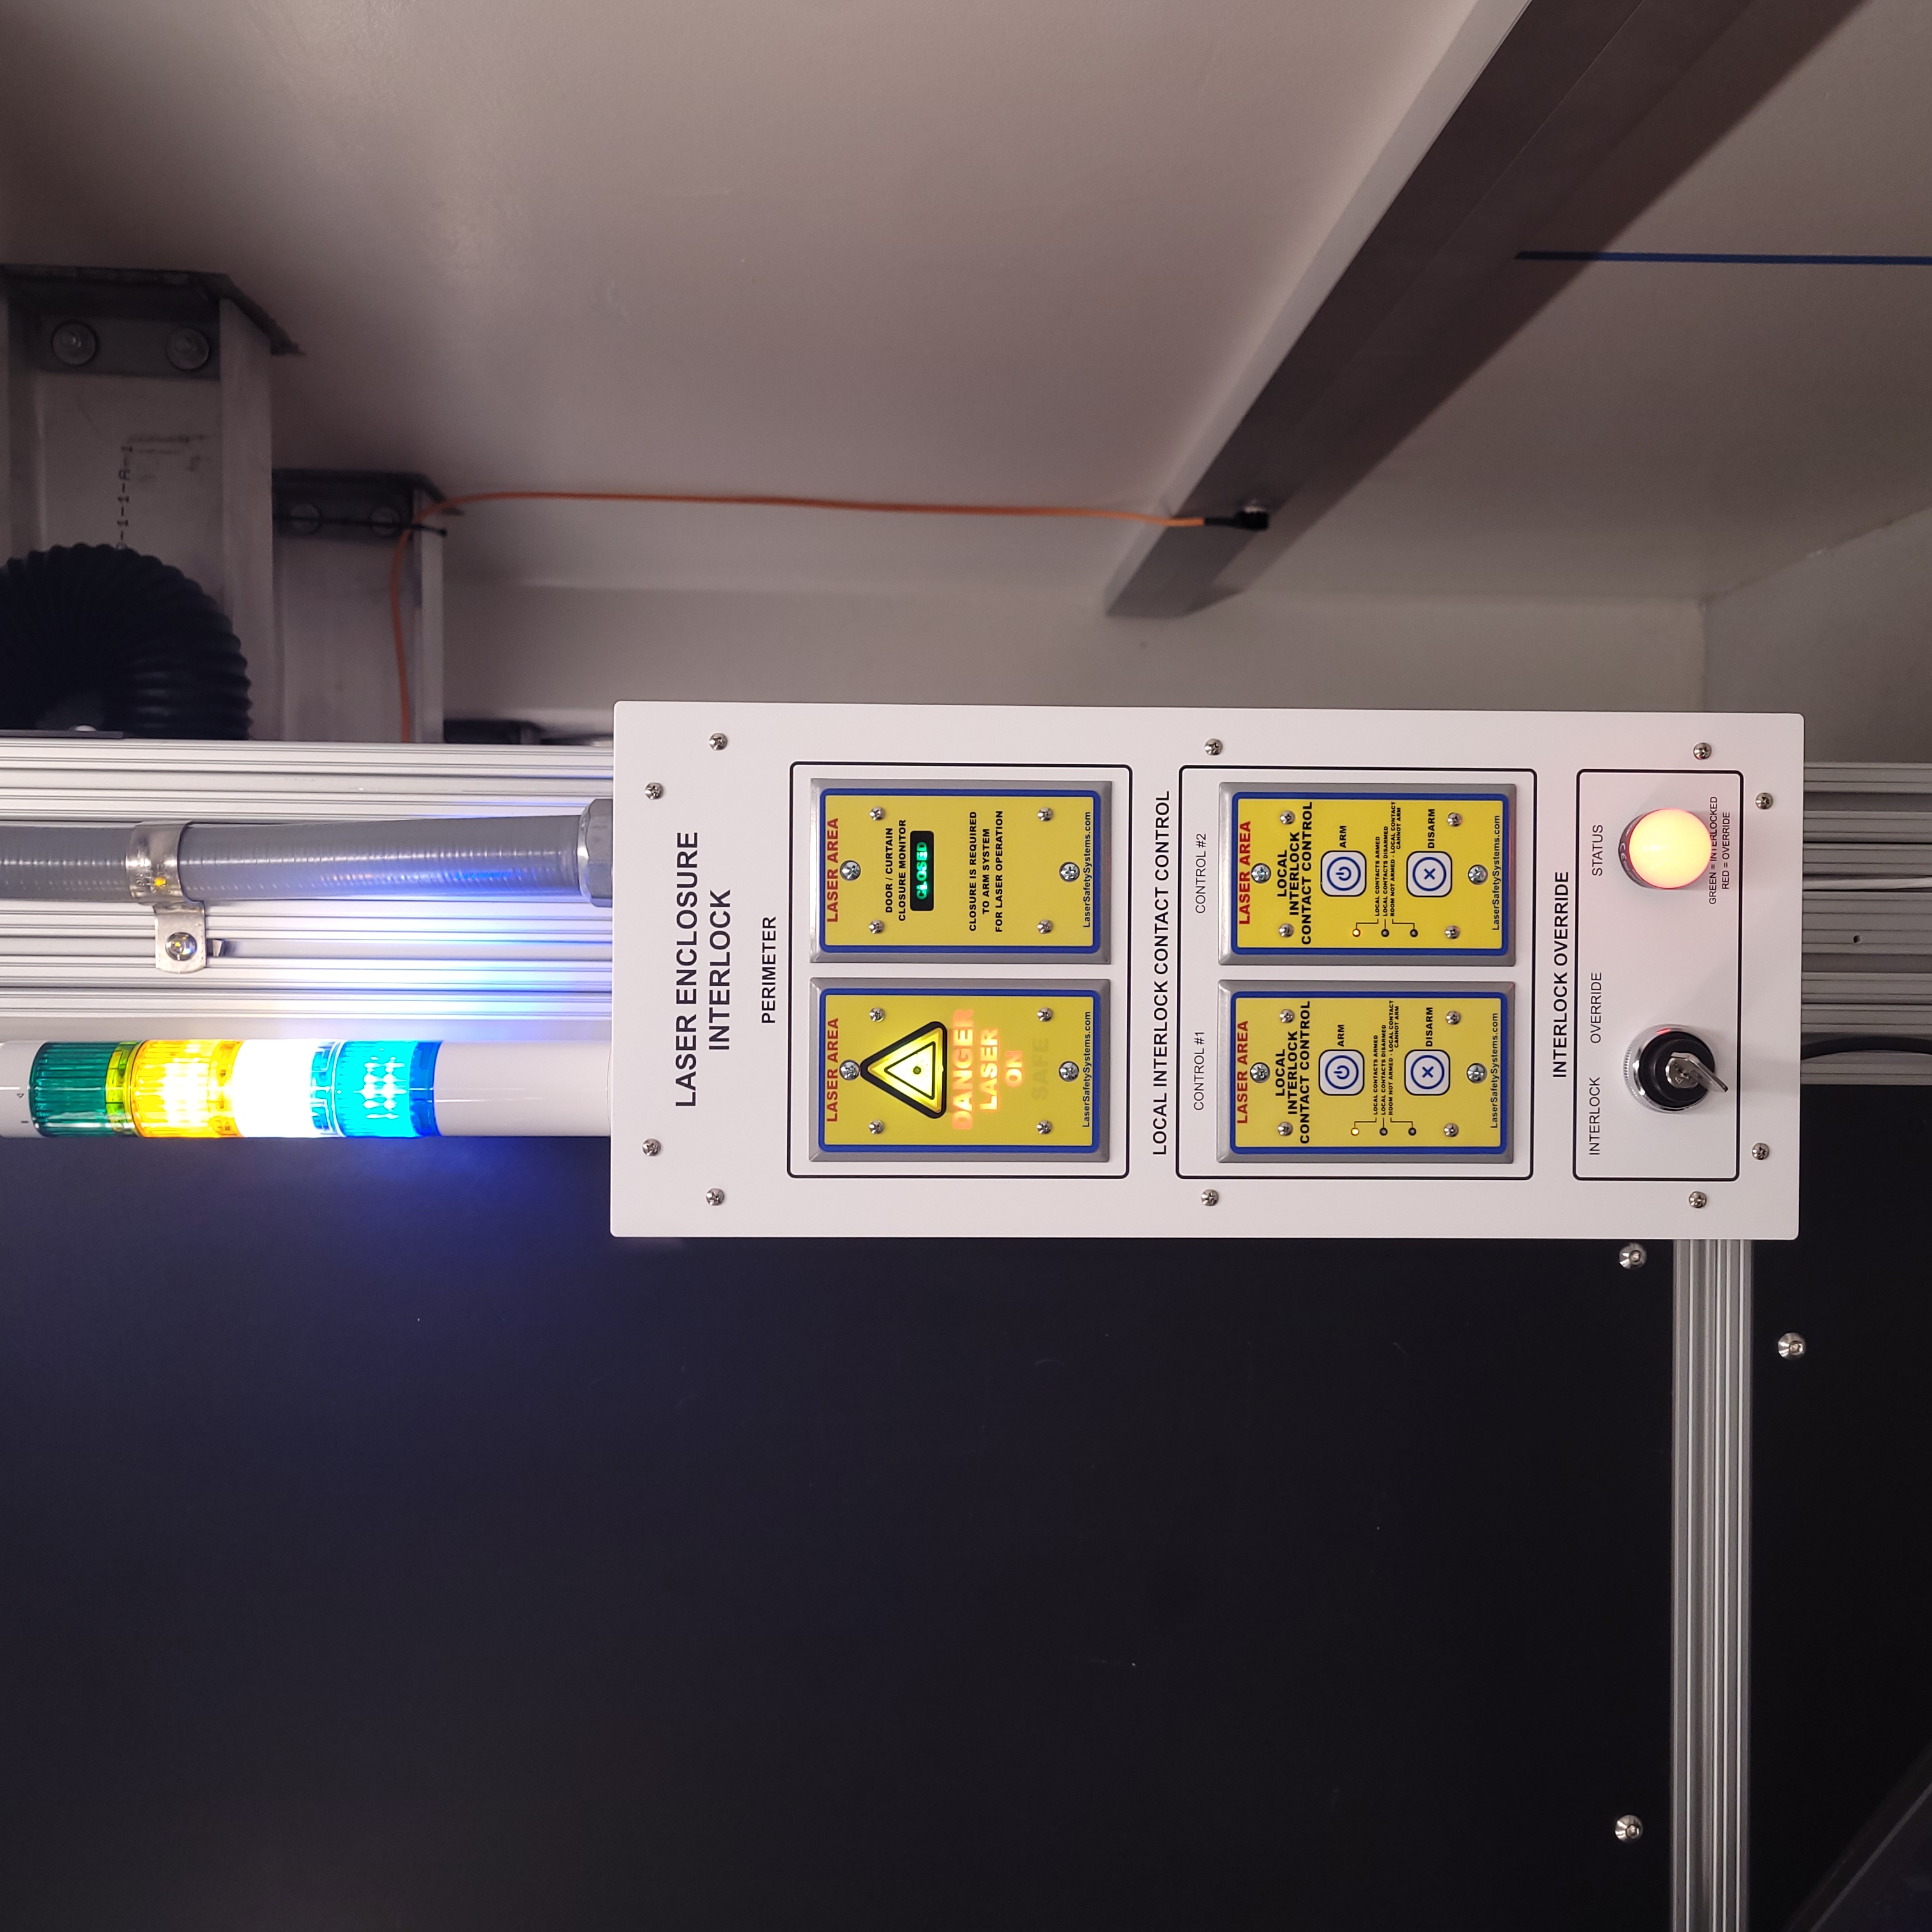
Figure 17: This is the Dira LASER ENCLOSURE INTERLOCK protocase when the system is overridden.
Crashing the Dira Laser
Once every 6 months, the Pharos laser emergency stop buttons are tested that they can successfully cut power to the Pharos from a functional state. Verify if the last testing date was 6 months ago.
If 6 months have passed, arm the Pharos laser, and use one of the laser e-stops to crash the laser and verify that power has been cut.
Return to Starting Conditions
Return the Vault-1 laser interlock system back to starting conditions.